Reasons
Setup Reasons to be selected when performing an action in RMS.
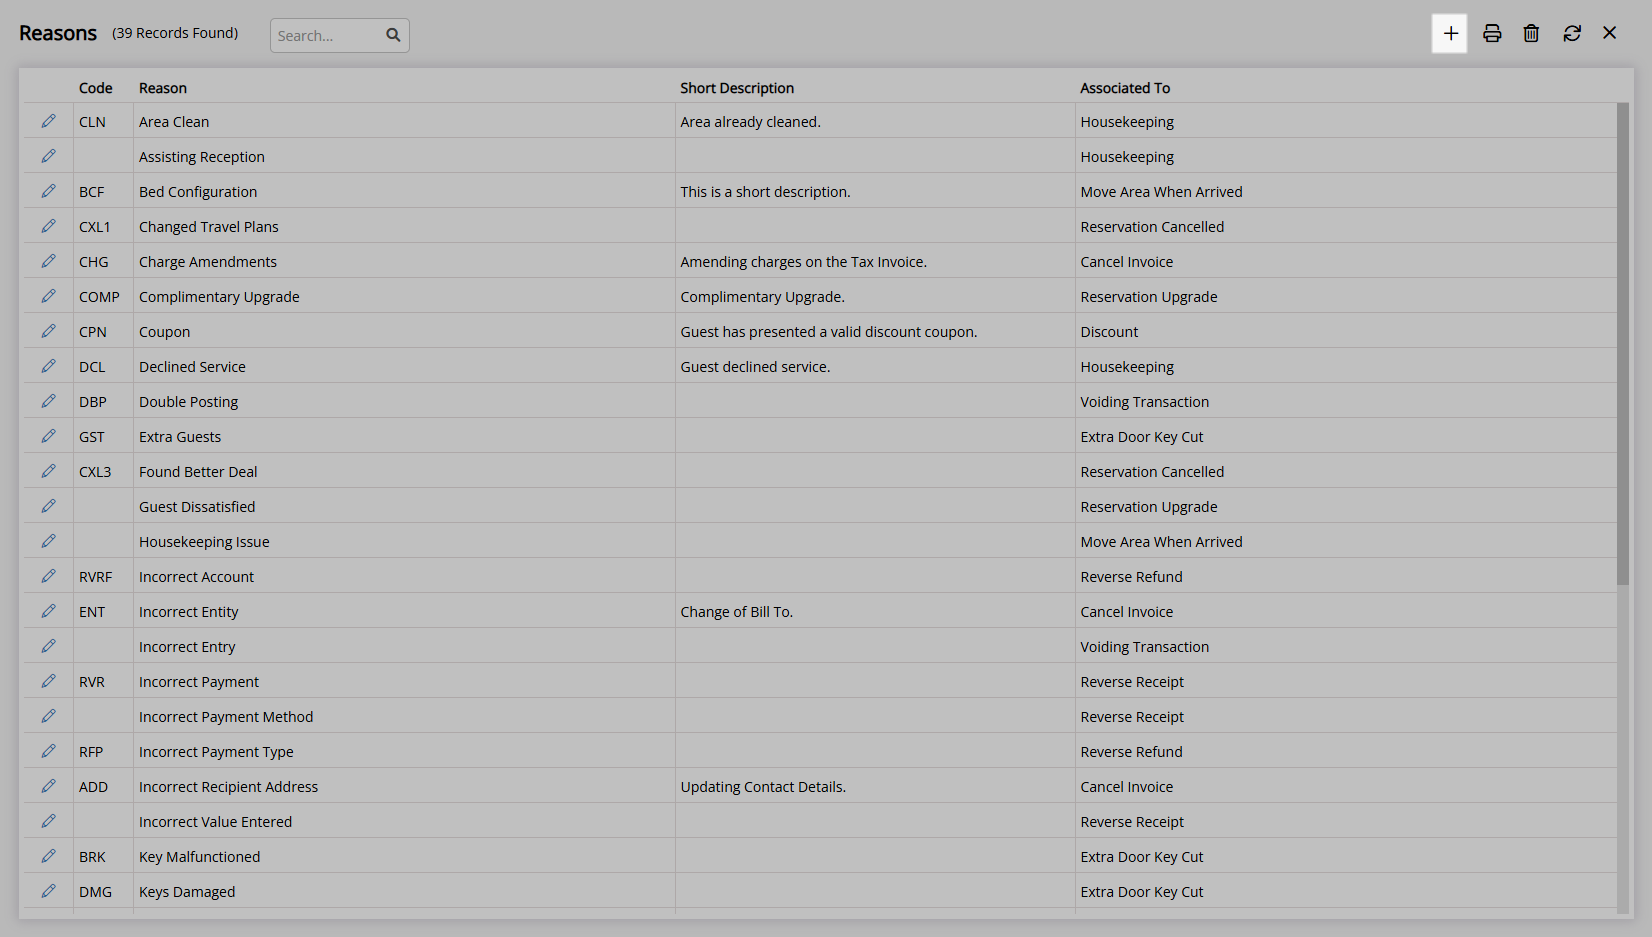
The Reasons Lookup Table provides predefined options to select when performing an action.
-
Information
-
Setup
- Add Button
Information
The Reasons Lookup Table provides predefined options to select when performing an action.
When no Reason is setup for a particular action the User will not be prompted or have the option to select a Reason when performing that action.
Reason selection can be made mandatory for certain actions including Reservation Discount, Tax Invoice Cancellation and Reservation Upgrade.
Reasons can be setup for the following actions.
| Action | Description |
|---|---|
| Asset Associated To Changed | Changing the 'Associated To' on an existing Asset. |
| Cancel Invoice | Cancelling a Tax Invoice on an Account. |
| Change of Rate Type | Changing the selected Rate Type on a Reservation. |
| Closed Opportunity Stage | Setting the Opportunity Stage to 'Closed'. |
| Discount | Selecting or changing the selected Discount on a Reservation. |
| Extra Door Key Cut | Creating an extra Key on a Reservation. |
| Fix Reservation | Changing the 'Fixed' field on a Reservation to make a Reservation a Fixed Reservation or remove a Reservation from being a Fixed Reservation. |
| Housekeeping | Setting a Housekeeping Task as 'Not Required' in the Staff Portal. |
| Inactive | Editing an existing setup item and selecting the 'Inactive' toggle. |
| Maintenance Reservation | Creating a new Maintenance Reservation. |
| Manual Override | Manually Overriding any part of the Total Rate on a Reservation. |
| Move Area When Arrived | Changing the Area on a Reservation in 'Arrived' status. |
| Pencil Reservation | Creating a Pencil Reservation. |
| Reinstate Reservation | Revert a Departed Reservation back to Unconfirmed or Confirmed status for accidental check-out. |
| Rejected Image Upload | Declining an image uploaded in the Guest Portal by the Guest. |
| Reservation Cancelled | Changing the Reservation Status to 'Cancelled'. |
| Reservation No Show | Changing the Reservation Status to 'No Show'. |
| Reservation Upgrade | Changing the Category on an existing Reservation. |
| Reverse Expense Payment | Selecting 'Void Expense' for an Expense Payment on an Account. |
| Reverse Receipt | Selecting 'Reverse Receipt' for a Receipt on an Account. |
| Reverse Refund | Selecting 'Reverse Refund' for a Refund on an Account. |
| Revert Reservation | Revert an Arrived Reservation back to Unconfirmed or Confirmed status to undo an accidental check-in. |
| Transfer to Account | Using Balance Transfer, Charge Transfer or Transfer to Guest to move part or all of a balance to an Account. |
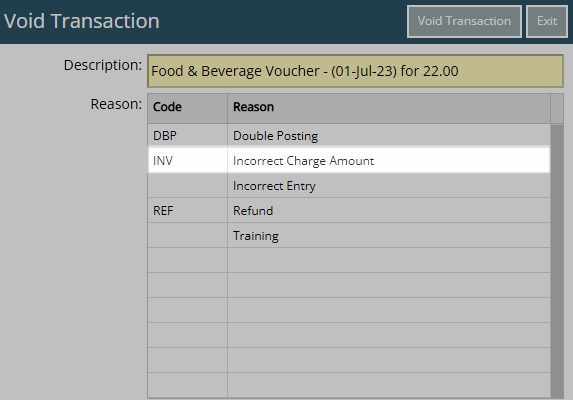
| Voiding Transaction | Selecting 'Void' for a transaction on an Account. |

Category, Area, Arrive, Depart, Reservation, Guest and Rate are default System Labels that can be customised.

System Administrators will require Security Profile access to setup this feature.
-
Setup
- Add Button
Setup
Have your System Administrator complete the following.
- Go to Setup > Lookup Tables > Reasons in the Side Menu of RMS.
- Select the
 'Add' icon.
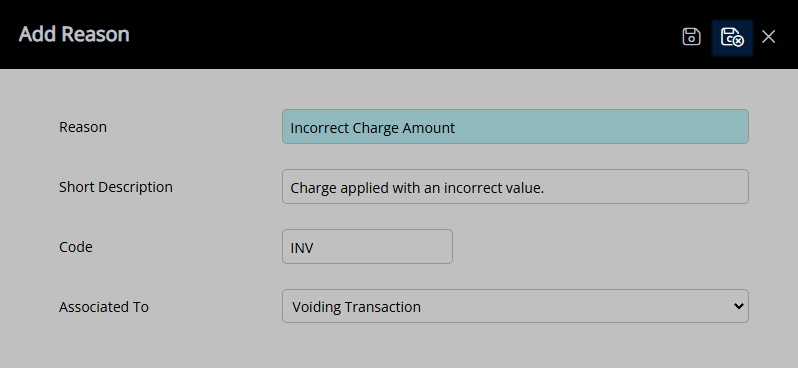
 - Enter a Reason.
- Optional: Enter a Short Description.
- Optional: Enter a Reason Code.
- Select an Action Associated To.
- Save/Exit.

When no Reason is setup for a particular action the User will not be prompted or have the option to select a Reason when performing that action.
-
Guide
- Add Button
Guide
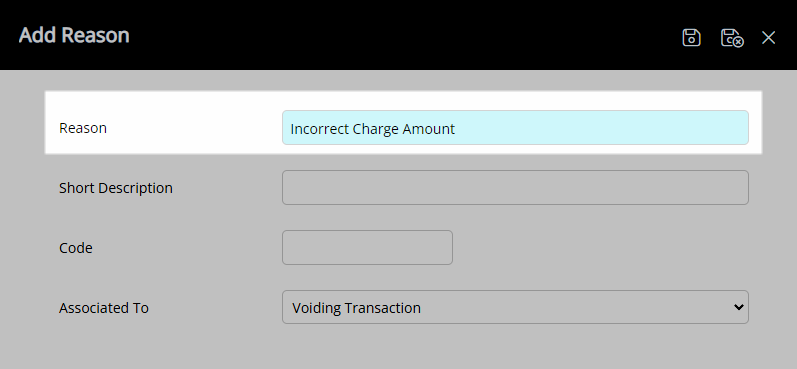
Go to Setup > Lookup Tables > Reasons in the Side Menu of RMS.

Select the ![]() 'Add' icon.
'Add' icon.
Enter a Reason.
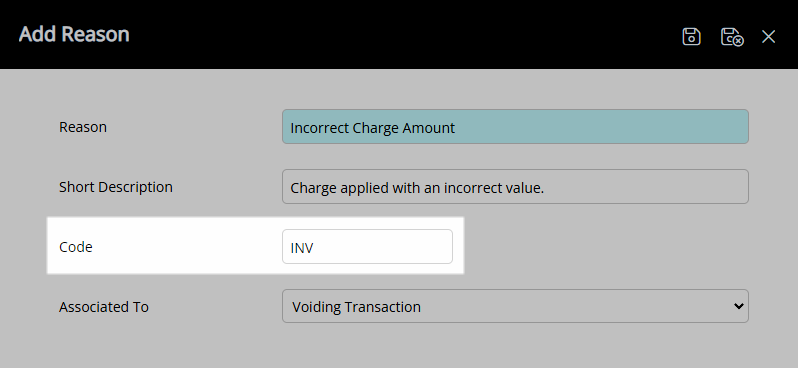
Optional: Enter a Short Description.

Optional: Enter a Reason Code.
Select an Action Associated To.
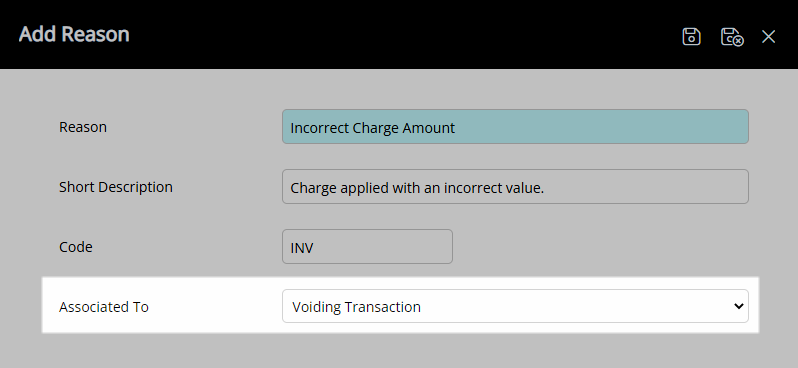
Select the  'Save/Exit' icon to store the changes made and leave the setup.
This Reason will be available for selection when performing the selected Associated To action.
Setup
Have your System Administrator complete the following.
- Go to Setup > Lookup Tables > Reasons in the Side Menu of RMS.
- Select the 'Add' icon.
- Enter a Reason.
- Optional: Enter a Short Description.
- Optional: Enter a Reason Code.
- Select an Action Associated To.
- Save/Exit.
When no Reason is setup for a particular action the User will not be prompted or have the option to select a Reason when performing that action.
-
Guide
- Add Button
Guide
Go to Setup > Lookup Tables > Reasons in the Side Menu of RMS.
Select the ![]() 'Add' icon.
'Add' icon.
Enter a Reason.
Optional: Enter a Short Description.
Optional: Enter a Reason Code.
Select an Action Associated To.
Select the 'Save/Exit' icon to store the changes made and leave the setup.
This Reason will be available for selection when performing the selected Associated To action.