Triggered Correspondence
Automate sending an SMS or email from RMS.
Triggered Correspondence enables automating communications based on predefined rules and conditions.
-
Information
-
Setup
-
Automation Examples
- Add Button
Information
Triggered Correspondence enables automating communications based on predefined rules and conditions.
SMS, emailed Form Letters and Interactive Form Letters to the Guest Portal can all be automated using Triggered Correspondence.
Automation can be set to send the select SMS or Form Letter at the time an action occurs, a set amount of time before or after an action occurs or a specific time of day.
Additional criteria can be set to only send the Triggered Correspondence based on the Reservation Status, Rate Type, Company, Travel Agent and/or date range of Reservation Made or Reservation Stay Dates as well as action specific criteria including 'Arriving Today', 'Currently In-House' or 'Departing Tomorrow'.
Triggered Correspondence set to send using either 'Specific Time of Day' or 'X Periods Before or After an Action' will only apply to Reservations created after the Triggered Correspondence is saved if 'No' is selected when prompted to apply to all current and future Reservations during setup.
The 'Apply to Existing Reservations' option can be used to later update all current and future Reservations to use the new Triggered Correspondence rule.
Triggered Correspondence set to send 'At the time of an action occurring' will apply to any new or existing Reservation if that action occurs.
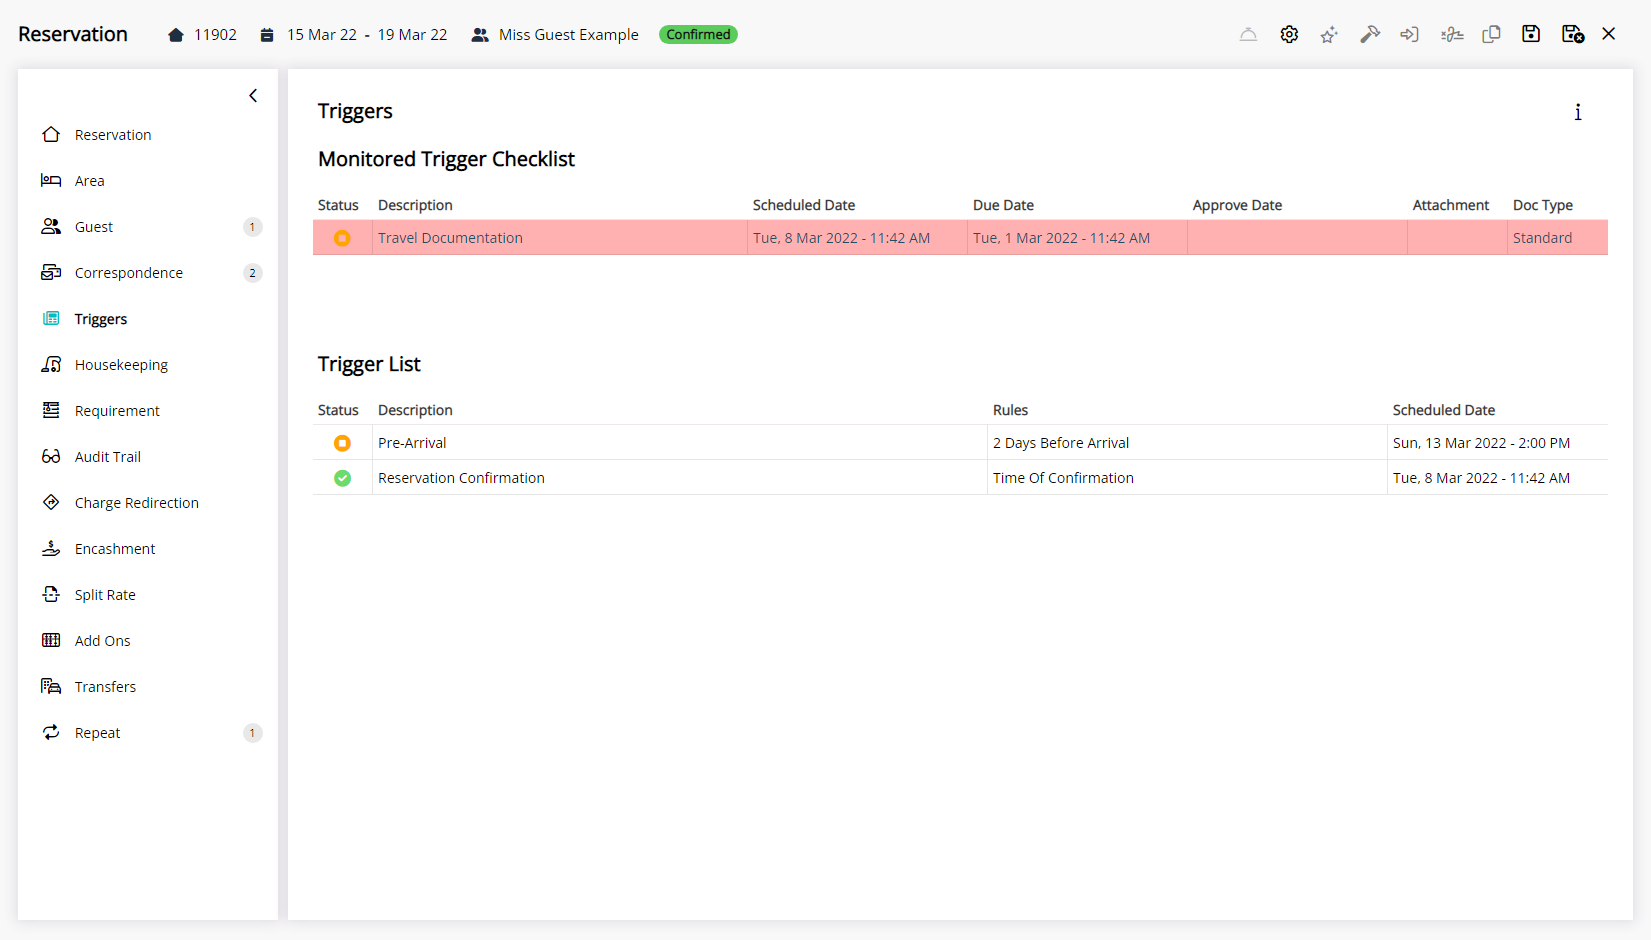
Triggered Correspondence set to send to the Guest Portal includes the option of being set as a Monitored Trigger.
Monitored Triggers include a due date with optional reminders that can be tracked on the  'Triggers' tab of the Reservation or on the Monitored Triggers dashboard.
Monitored Triggers are only available when the Trigger Type is set to 'X Periods Before or After an Action' and the Correspondence Type is 'Guest Portal'.
Interactive Form Letters can be used with Monitored Triggers and include the option to request a file upload in the Guest Portal to obtain a copy of photo identification or travel documentation.
Any file uploaded in the Guest Portal will be saved on the 'Photo' tab of the Guest Profile.
All correspondence sent using Triggered Correspondence will be recorded on the  'Correspondence' tab of the Guest Profile and Reservation.
The following options are available for Triggered Correspondence.
| Trigger Types | |
| At the Time of an Action Occurring | |
| Reservation | Cancelled |
| Check-in | |
| Check-out | |
| Confirmed | |
| Quote Status to Unconfirmed Status | |
| New Reservation Created | |
| Area Status Set to 'Clean' (Arriving Guest) | |
| Account | Balance Updated to greater than or equal to the entered value. |
| Area | Status Set to 'Dirty' (Associated Housekeeper) |
| Status Set to 'Inspect' (Associated Housekeeper) | |
| Guest | New Guest Profile Created |
| Job | Status Set to 'Awaiting Parts' |
| Status Set to 'Cancelled' | |
| Status Set to 'Completed' | |
| Status Set to 'Quoted' | |
| Status Set to 'Reported' | |
| Status Set to 'Started' | |
| X Periods Before or After an Action | |
| Before | Reservation Arrive Date |
| Reservation Depart Date | |
| Guest Credit Expires | |
| Housekeeping Inspection | |
| Pass Expiry | |
| RMS Pay By Link Expiry | |
| Pencil Reservation Expiry | |
| Reservation Second Deposit Due | |
| After | Rate Table Bond Paid in Full |
| Rate Table Bond Paid in Part | |
| Reservation Cancelled | |
| Reservation Check-in | |
| Reservation Check-out | |
| Reservation Confirmed | |
| Reservation Depart Date | |
| Reservation Deposit Due | |
| Guest Portal Documents Pending | |
| Guest Credit Expires | |
| Guest Loyalty Sign Up | |
| Account Tax Invoice Created | |
| Pencil Reservation Expiry | |
| Reservation Made | |
| Reservation Modified | |
| Reservation Second Deposit Due | |
| Specific Time of Day | |
| At the Set Time Daily or on a Day of the Week | Arriving Today |
| Departing Tomorrow | |
| Currently In-House | |
| Date Filters | |
| No Date Validation, Date Range or Today | Reservation Created |
| Reservation Stay Dates | |
| Reservation Arrive Date | |
| Reservation Arrive Day of the Week | |
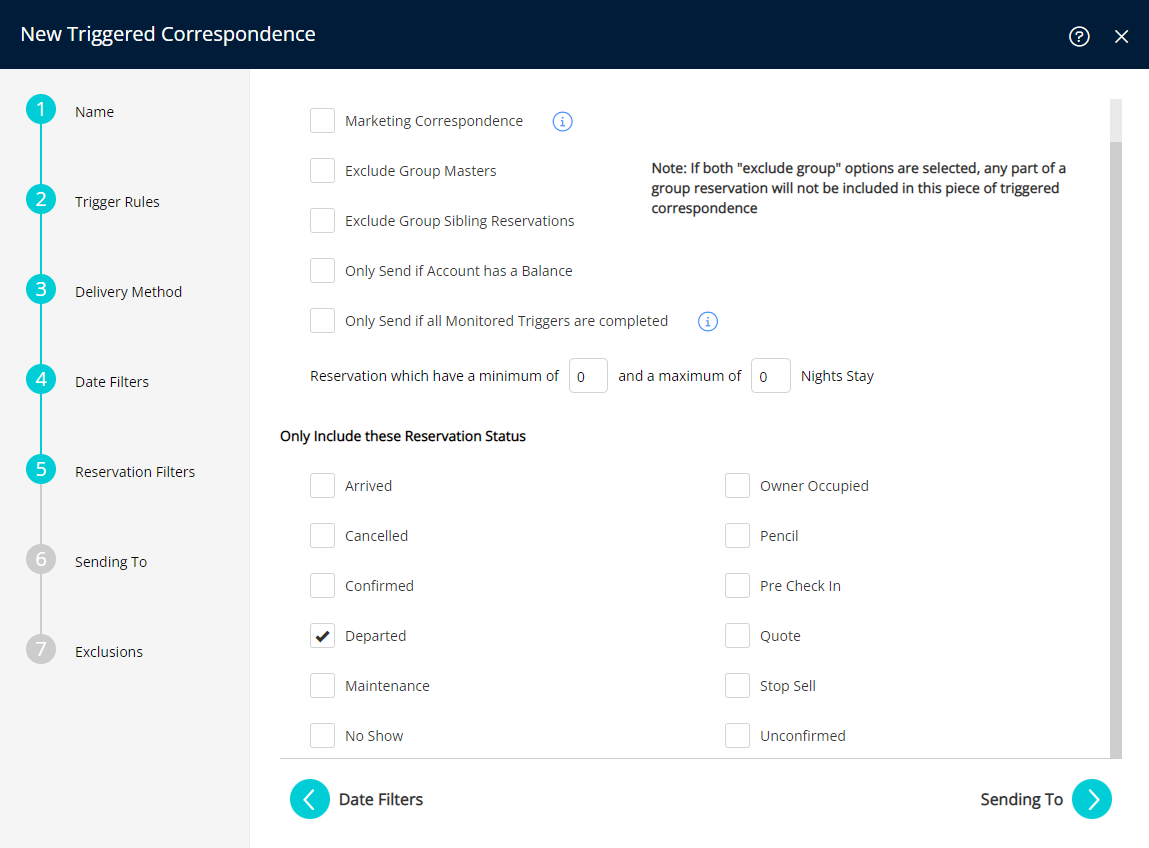
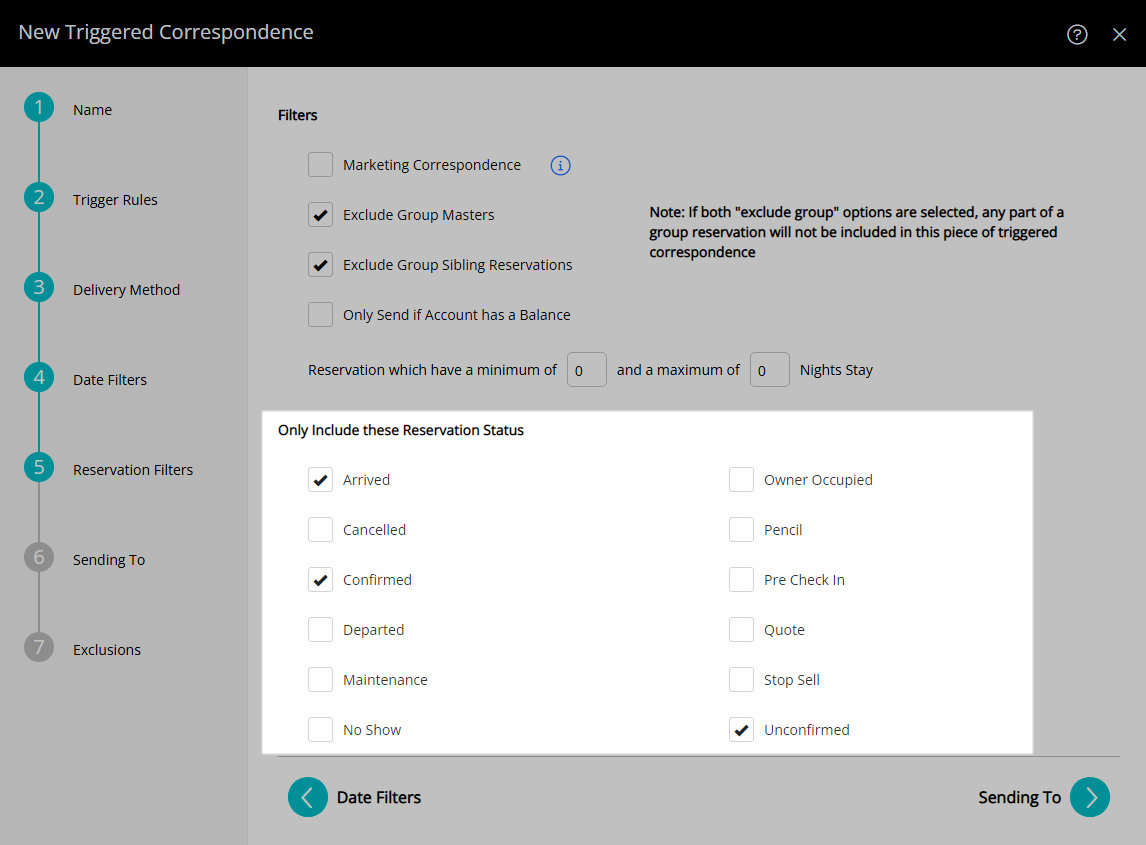
| Reservation Filters | |
| Marketing Correspondence | Will only send if the 'Marketing Opt Out' field is set to 'No'. |
| Exclude Group Masters | Will not send to the Guest Profile on the (Master) of a Master Reservation. |
| Exclude Group Sibling Reservations | Will not send to the Guest Profile on any Sibling Reservation in a Master Reservation. |
| Only Include Confirmed Status | The Reservation Status must be 'Confirmed' to send. |
| Only Send if Account has a Balance | Will only send if the Account Balance is not 0.00 |
| Only Send if Monitored Triggers are Completed | Will only send if the status of the Monitored Triggers is 'Completed'. |
| Length of Stay | Will only send if the Reservation's length of stay is for the minimum and/or maximum entered. |
| Only Include Selected Reservation Statuses | Will only send if the Reservation is in one of the selected statuses. |
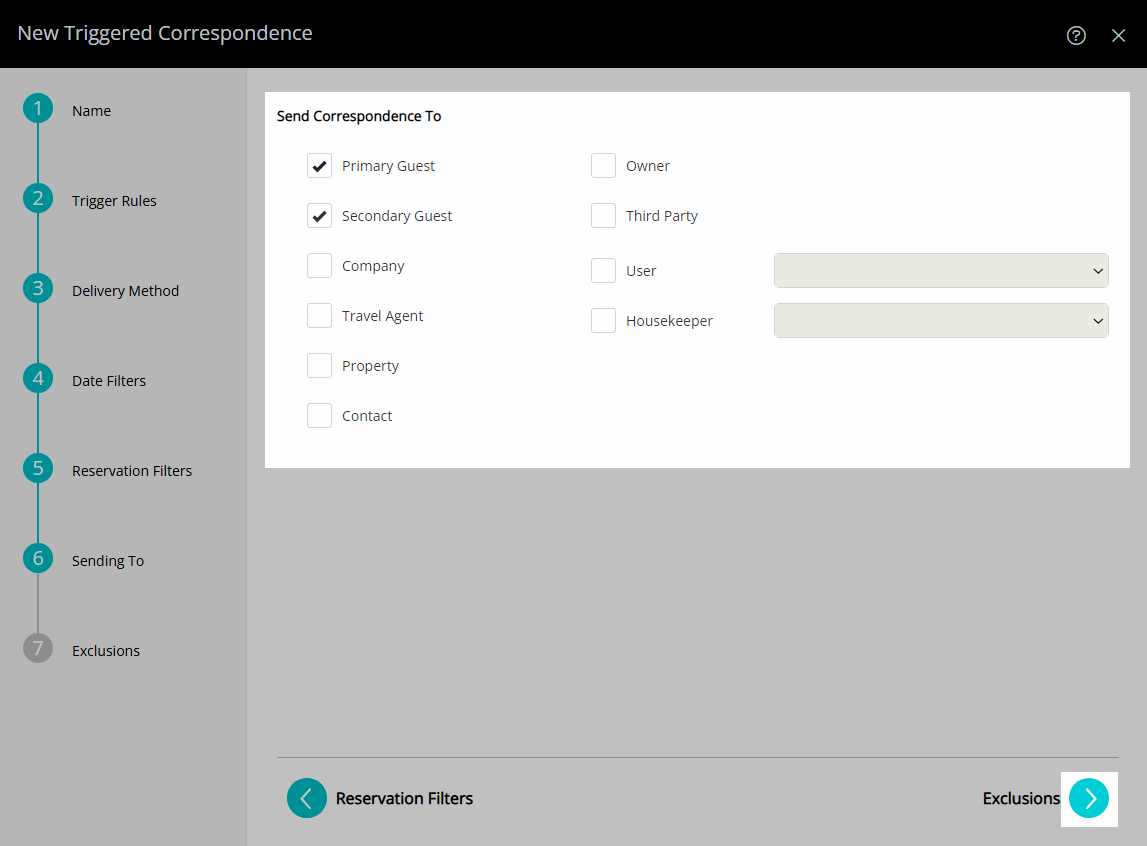
| Send To | |
| Primary Guest | Sends to the Primary Guest Profile on the Reservation. |
| Additional Guests | Sends to any additional Guest Profiles on the Reservation that are not the Primary Guest. |
| Company | Sends to the Company using the Company Details. |
| Travel Agent | Sends to the Travel Agent using the Travel Agent Details. |
| Property | Sends to the Property. |
| Contact | Sends to the selected Contact on the Reservation. |
| Owner | Sends to the Owner of the Area on the Reservation. |
| Third Party | Sends to the Third Party. |
| User | Sends to the selected User. |
| Housekeeper | Sends to the selected Housekeeper. |
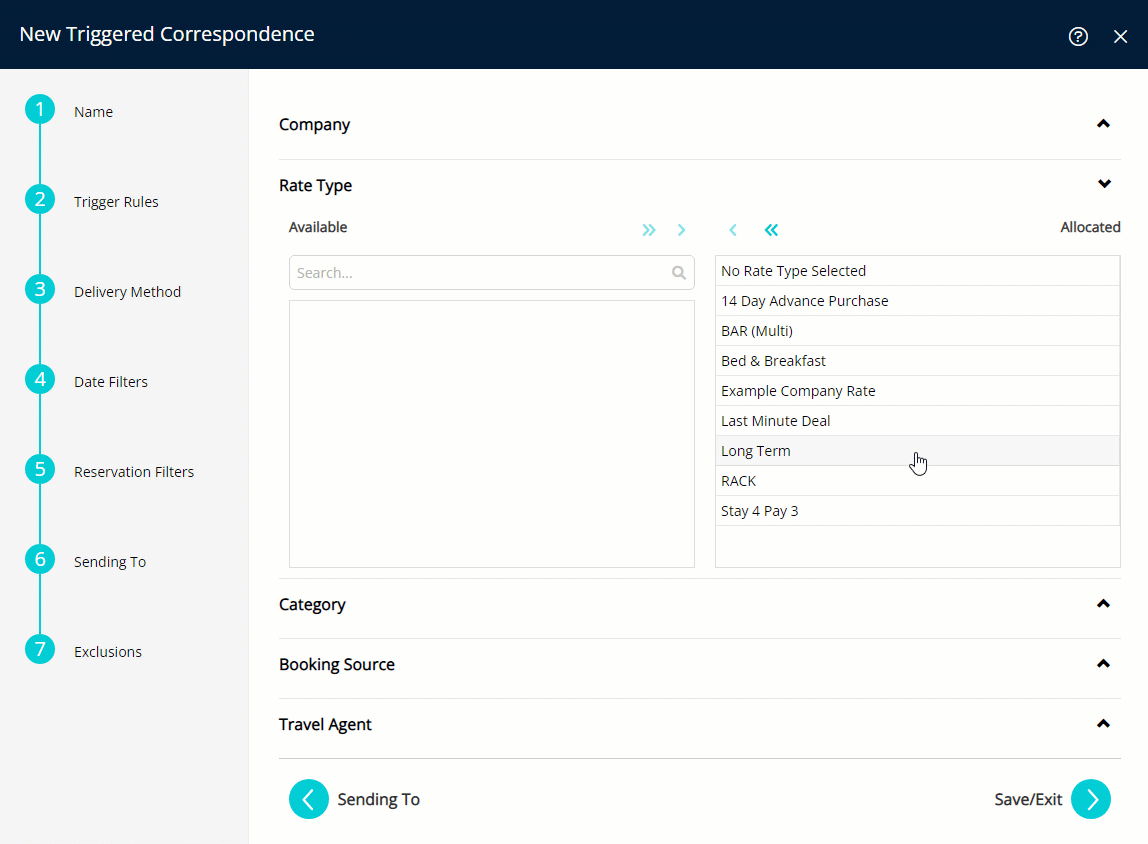
| Exclusions | |
| Exclude or only apply to the selected. | Company |
| Rate Type | |
| Category | |
| Booking Source | |
| Travel Agent | |

Arrive, Depart, Category, Area, Reservation, Guest, Booking Source, Company, Travel Agent and Rate are default System Labels that can be customised.
The 2-Way SMS module is required to send SMS in RMS.

System Administrators will require Security Profile access to setup this feature.
-
Setup
- Add Button
Setup
Have your System Administrator complete the following.
- Go to Setup > Correspondence > Triggered in RMS.
- Select the
 'Add' icon.
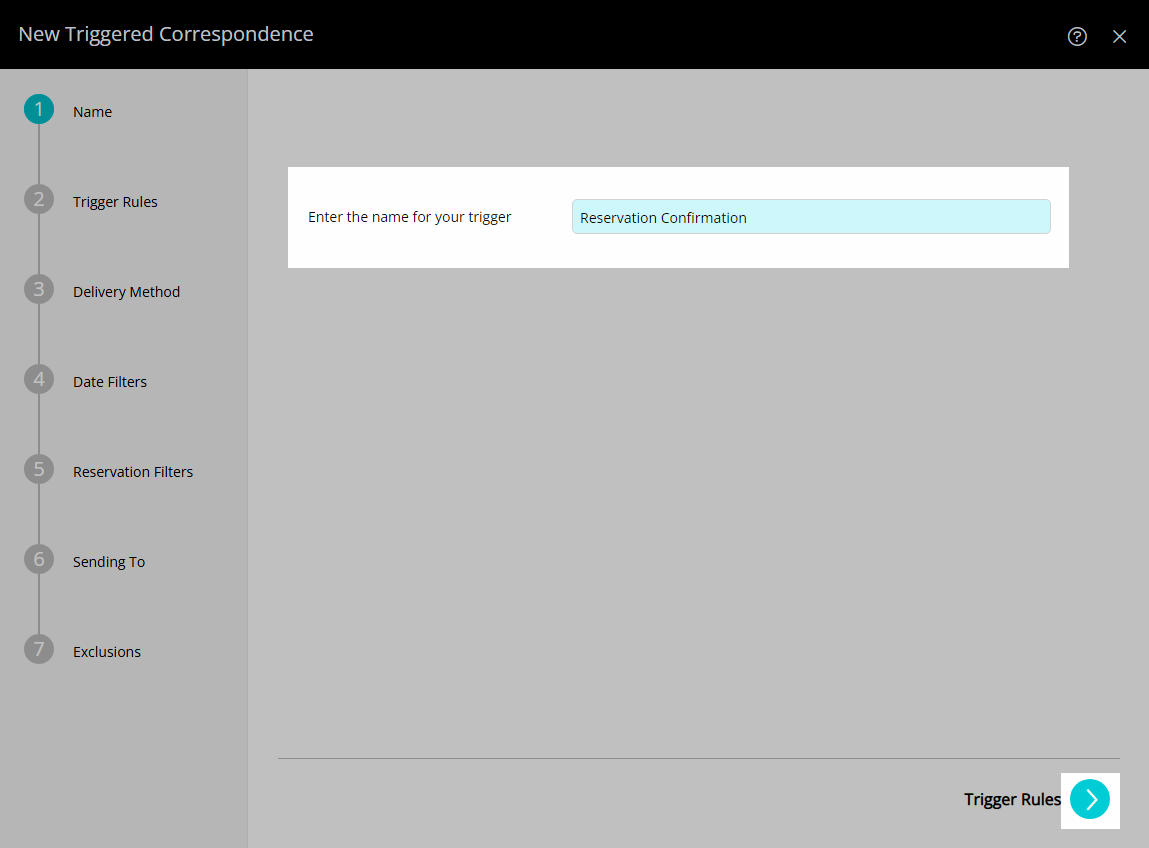
 - Enter a Name and select the
 'Next' icon.
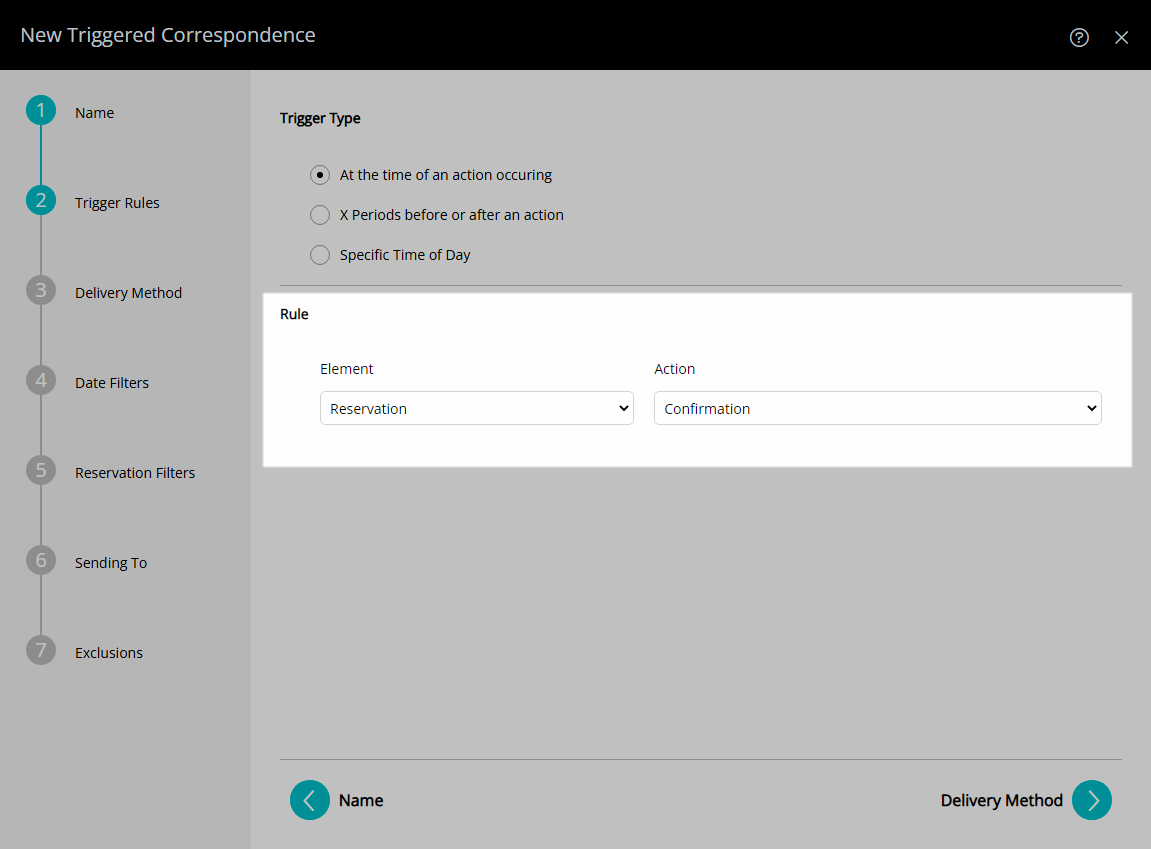
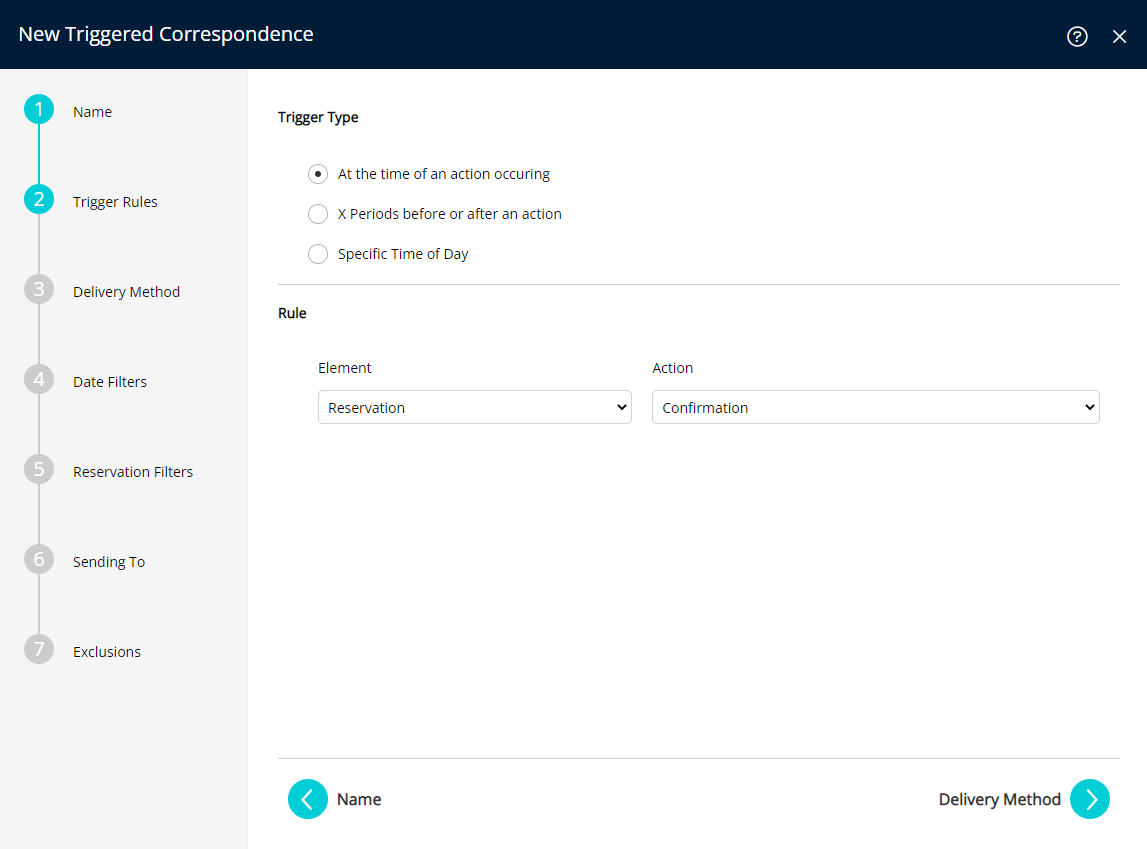
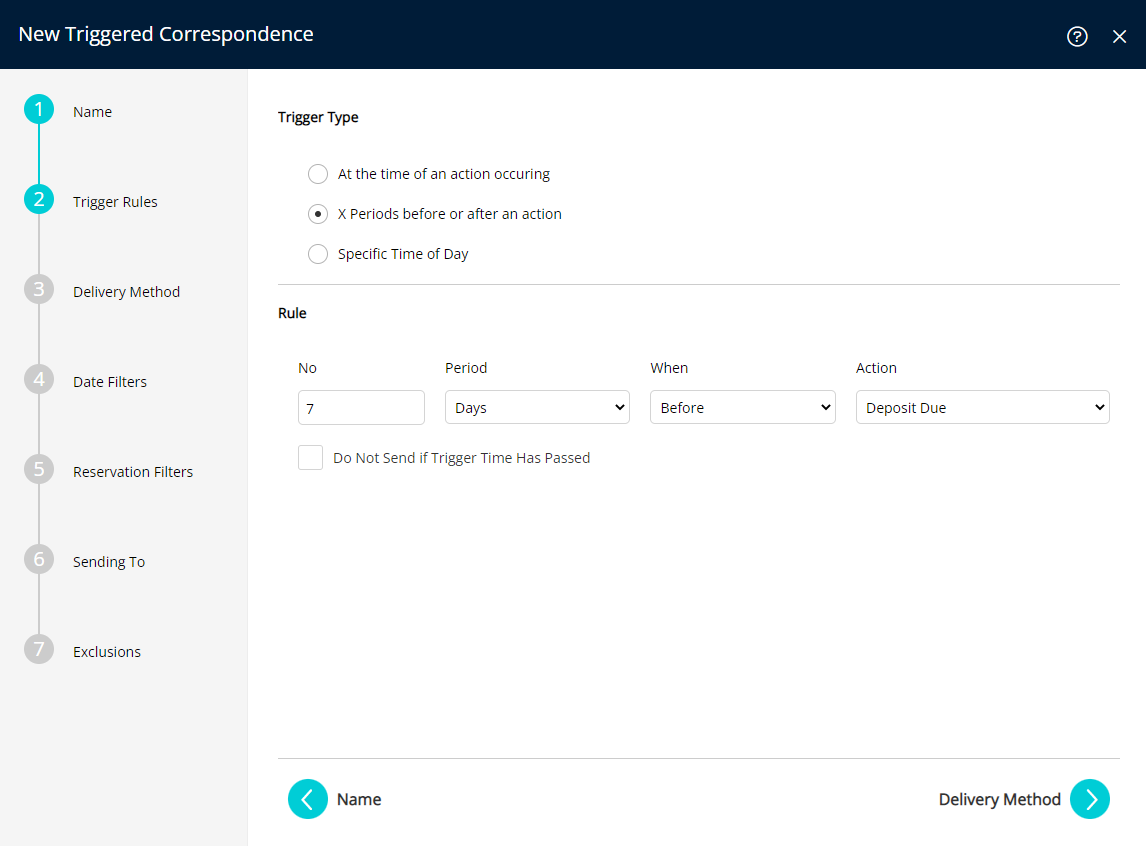
 - Select the Trigger Type.
- Select & Enter the Trigger Rules then choose the
 'Next' icon.
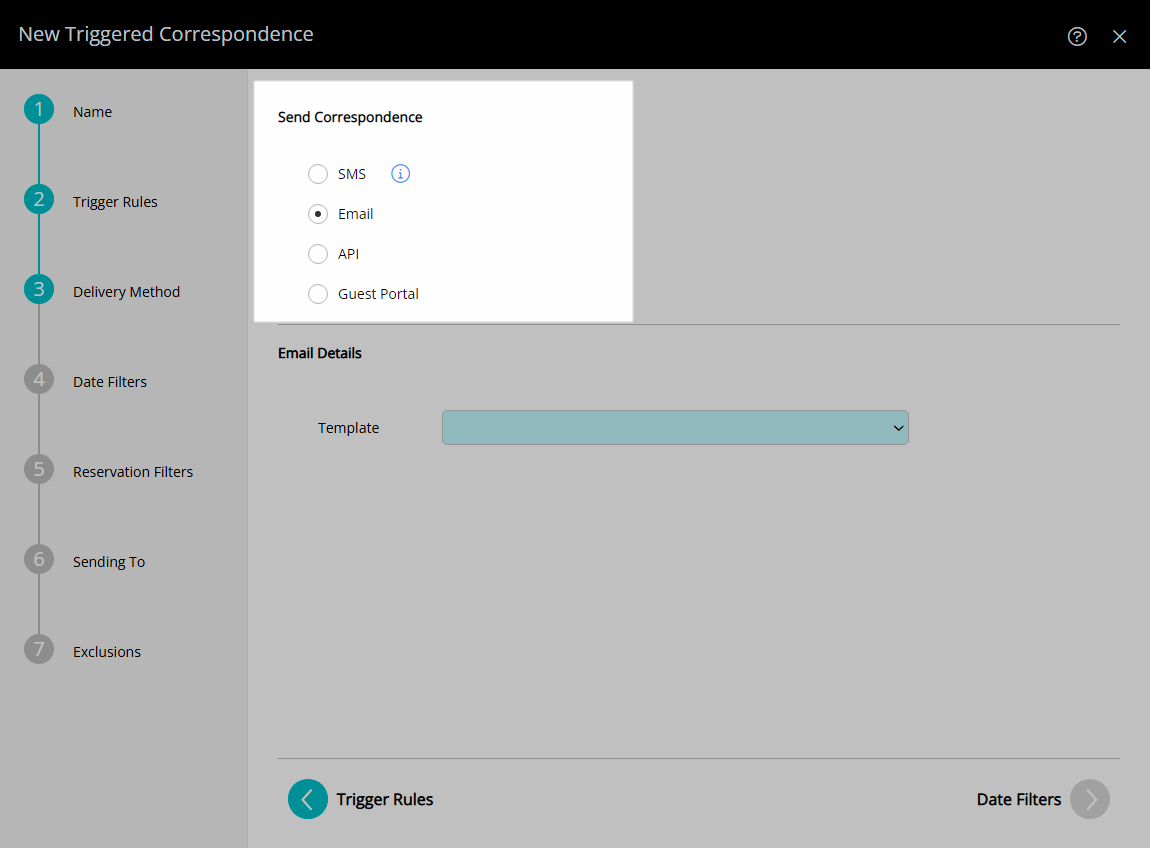
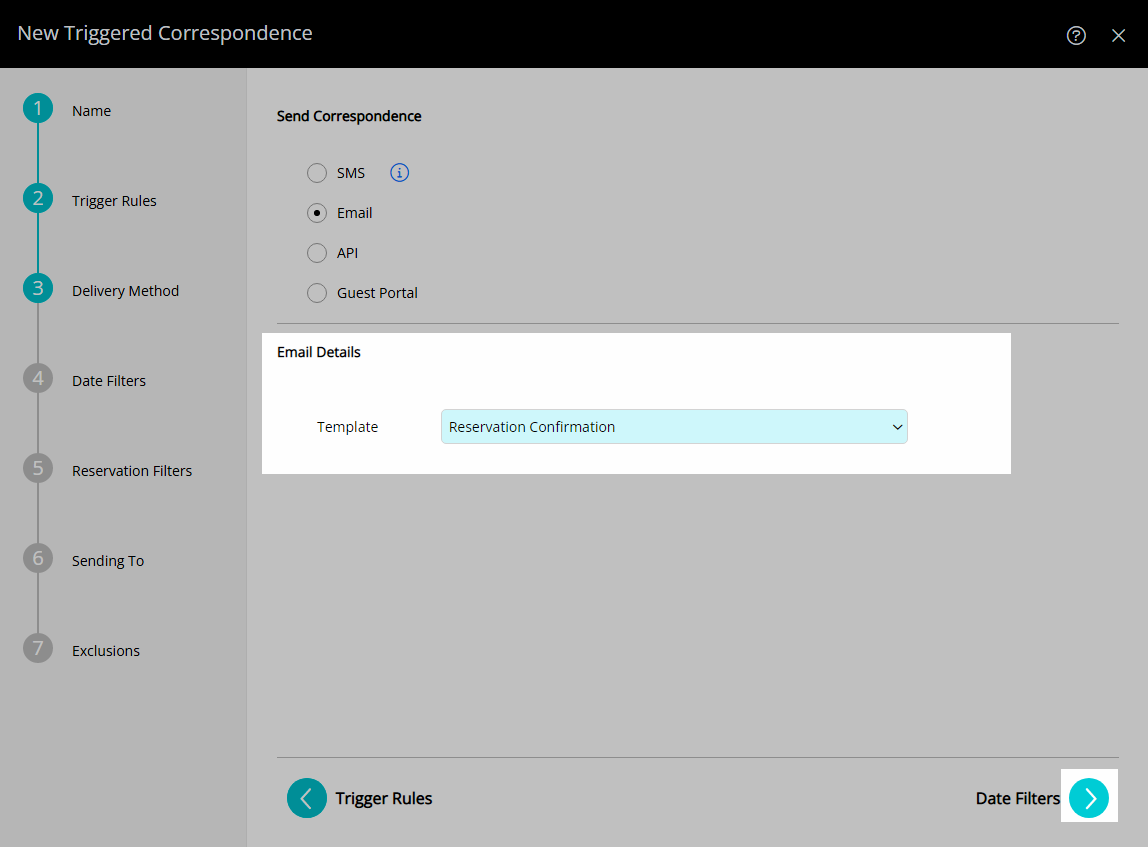
 - Select the Correspondence Type.
- Select the Correspondence Template and choose the
 'Next' icon.
 -
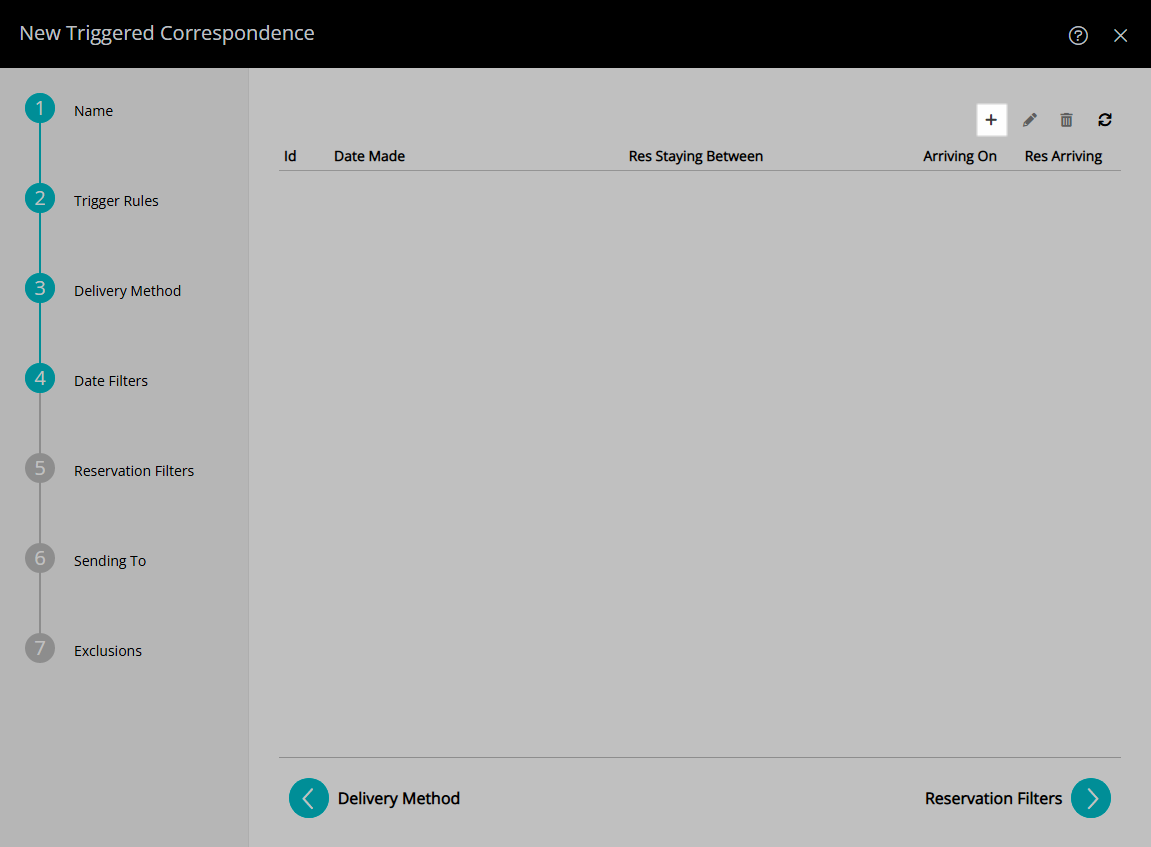
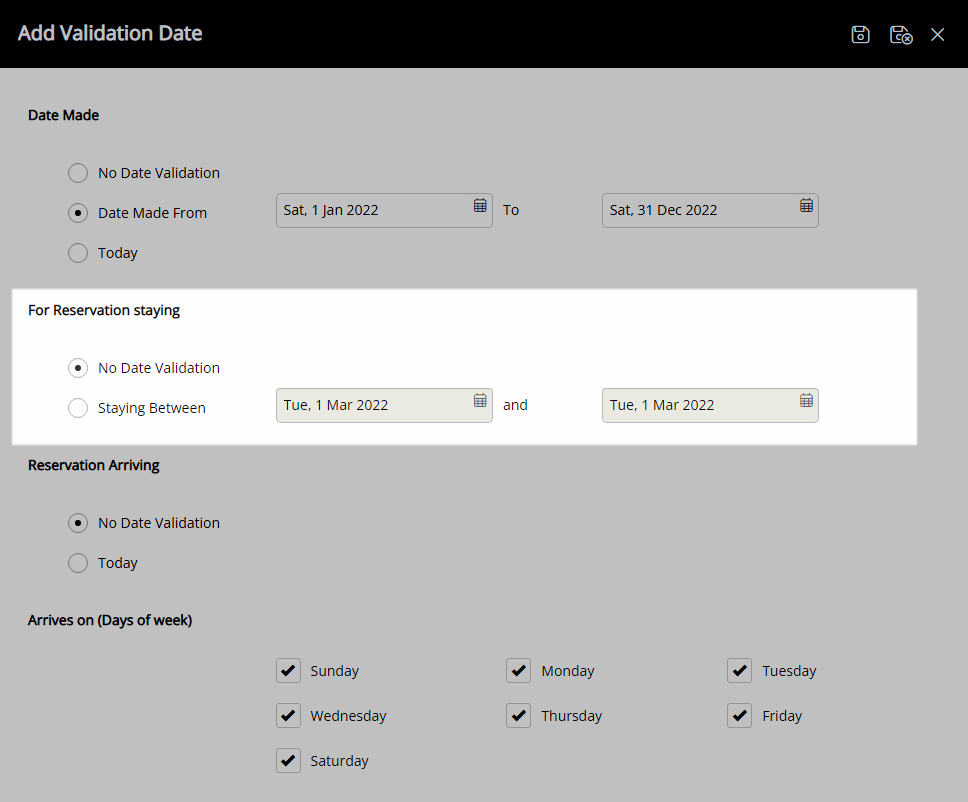
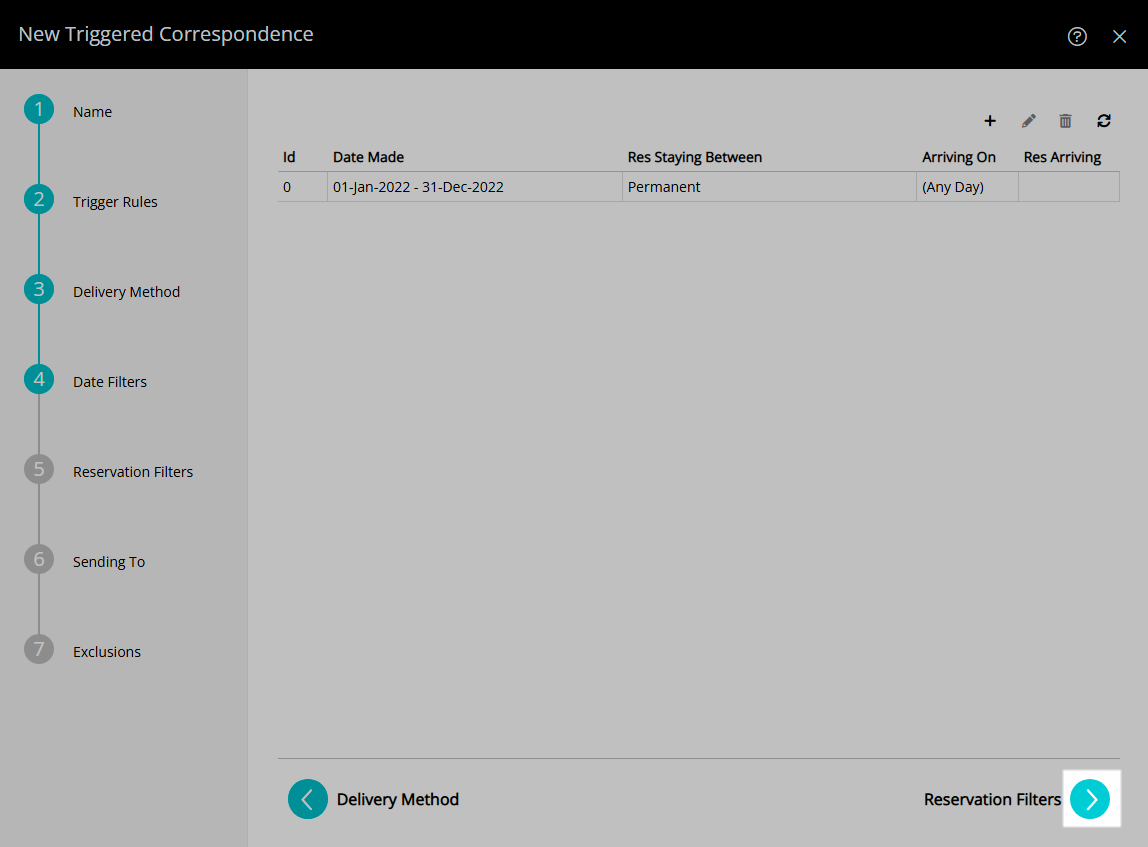
Optional: Add Date Filters.
- Select the
 'Add' icon.
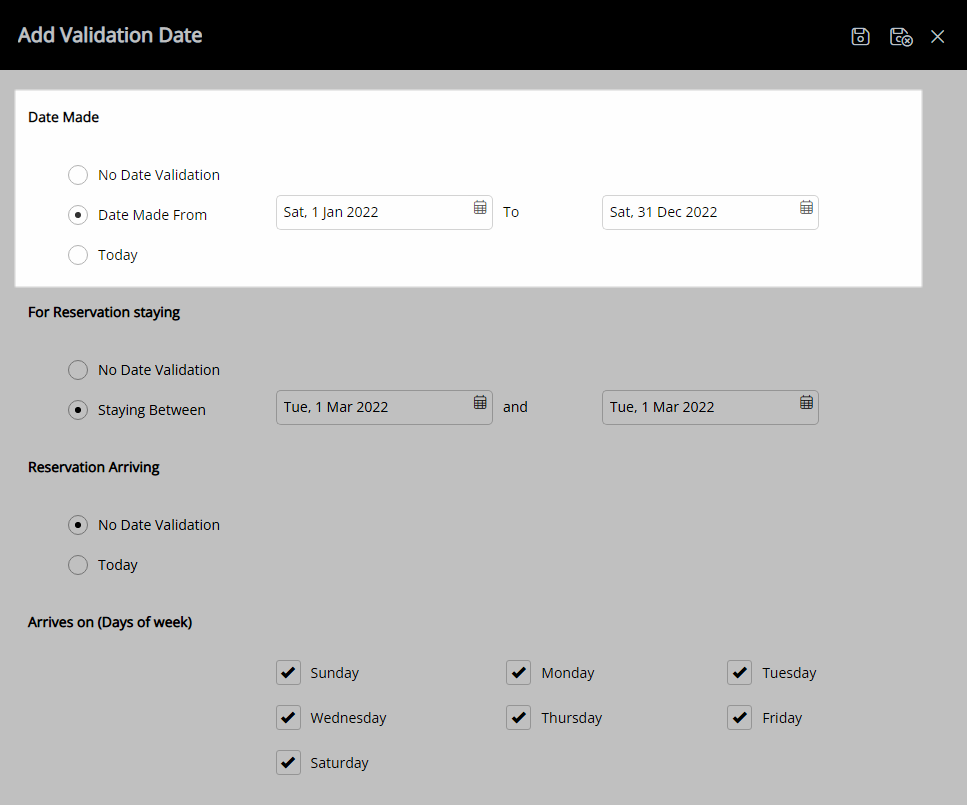
 - Select the Date Made option.
- Select the Date Range.
- Select the Reservation Stay Dates option.
- Select the Date Range.
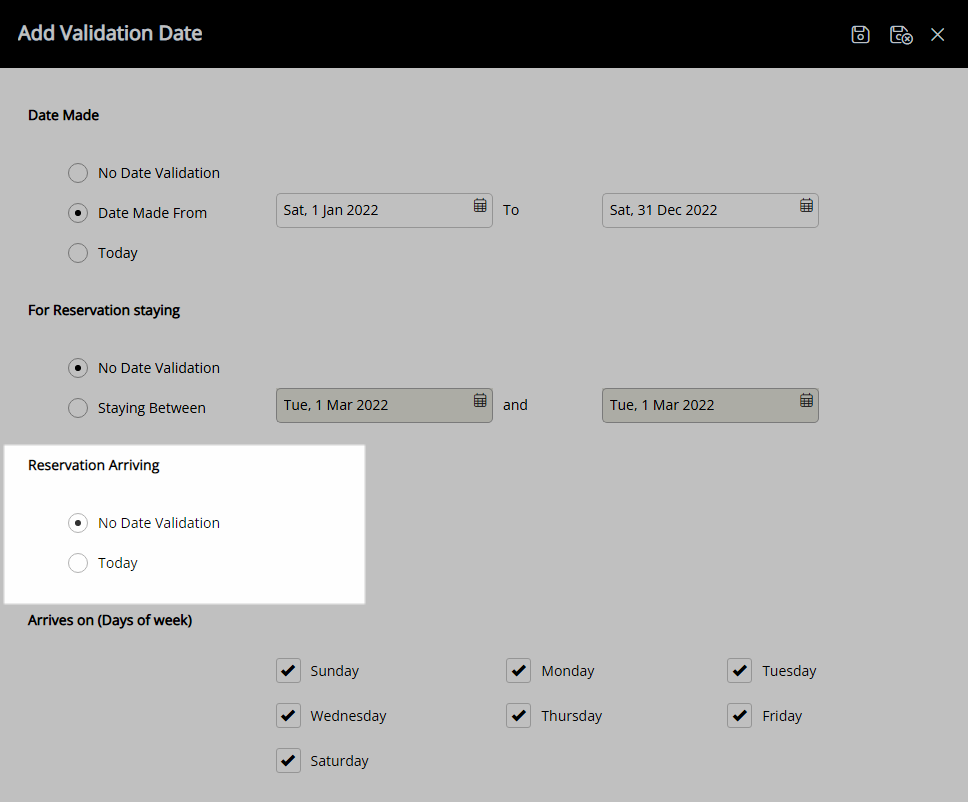
- Select the Reservation Arriving option.
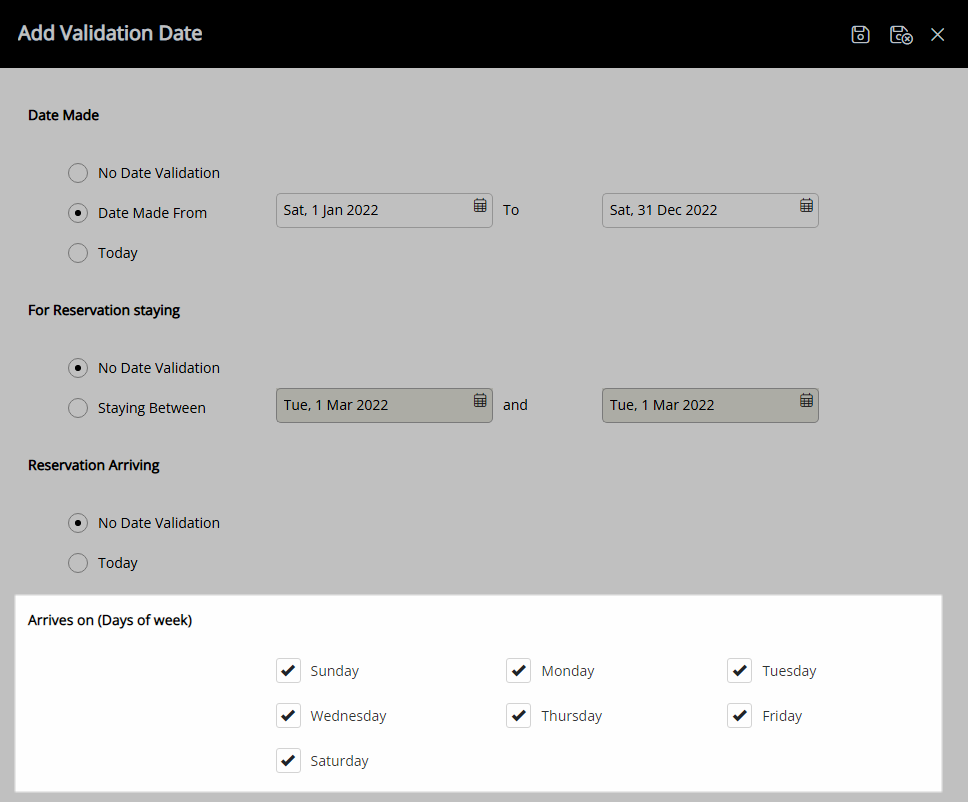
- Optional: Select the checkbox for Days of the Week.
- Select
 'Save/Exit'.
- Select the
- Select the
 'Next' icon.
 - Select the checkbox for the Reservation Filters.
- Select the checkbox for the Reservation Statuses to include.
- Select the
 'Next' icon.
 - Select the Recipients and choose the
 'Next' icon.
 -
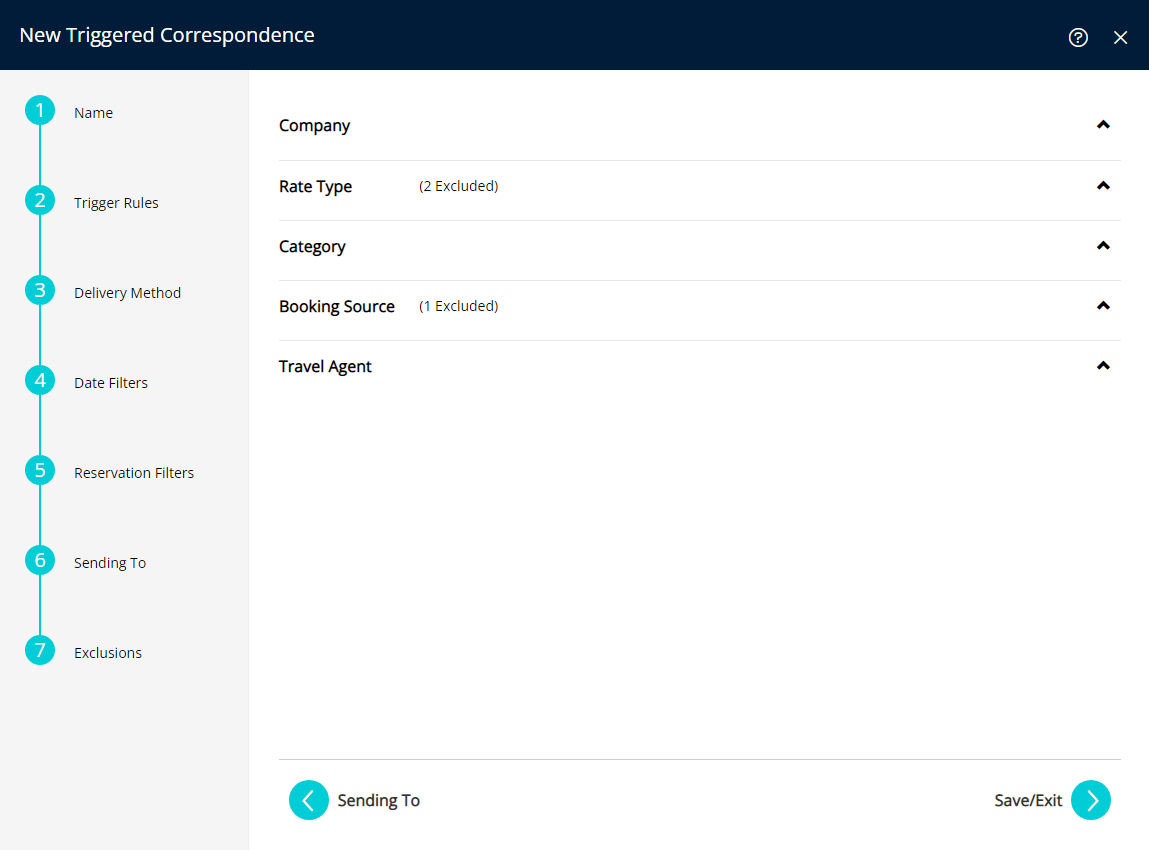
Optional: Select the Exclusions.
- Expand an Exclusion Type.
- Select the Exclusions and choose the
 button.
 - Repeat for all required Exclusions.
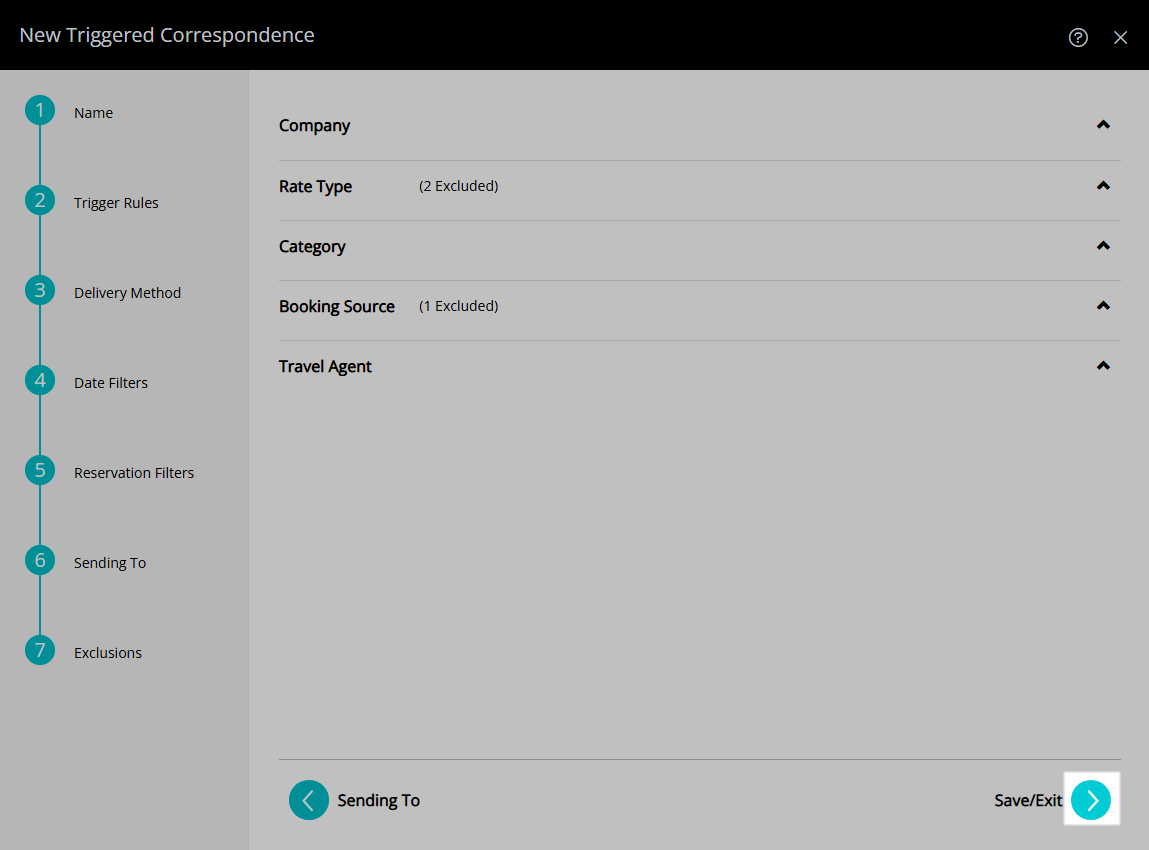
- Select the
 'Save/Exit' icon.
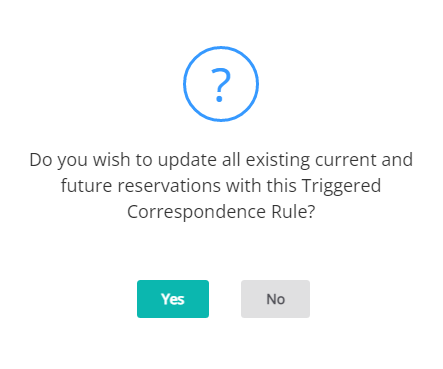
 - Select 'Yes' or 'No' if prompted with an option to update current and future reservations with the new Triggered Correspondence Rule.

Select the  'Back' button to make changes in a previous step.
Monitored Triggers are only available when the Trigger Type is set to 'X Periods before or after an action' and the Correspondence Type is 'Guest Portal'.
Step 16 will only occur if the Trigger Type is set to 'X Periods before or after an action' or 'Specific Time of Day' and will update all current and future reservations to receive the new Triggered Correspondence if 'Yes' is selected.
-
Guide
- Add Button
Guide
Go to Setup > Correspondence > Triggered in RMS.

Select the ![]() 'Add' icon.
'Add' icon.

Enter a Name and select the ![]() 'Next' icon.
'Next' icon.
Select the Trigger Type.
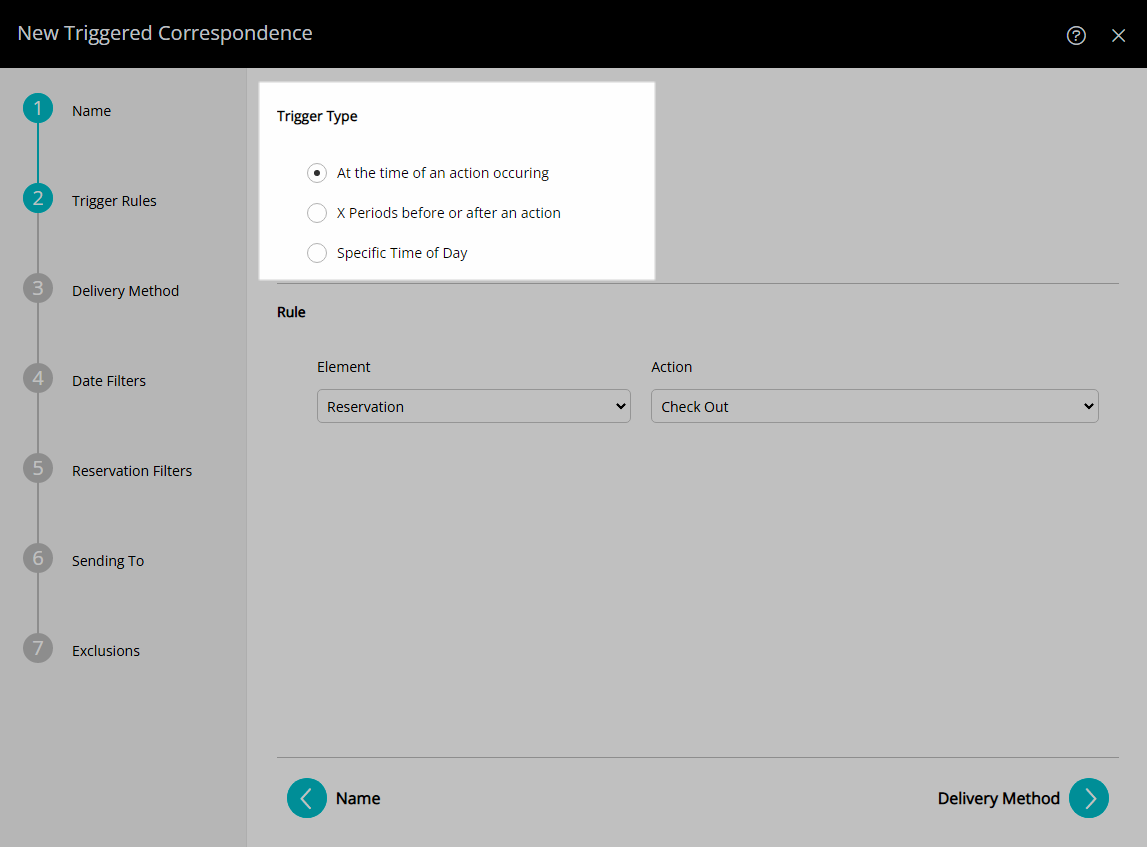
Select & Enter the Trigger Rules then choose the ![]() 'Next' icon.
'Next' icon.
Select the Correspondence Type.
Select the Correspondence Template and choose the ![]() 'Next' icon.
'Next' icon.
Optional: Add Date Filters.
Select the ![]() 'Add' icon.
'Add' icon.
Select the Date Made option and select the Date Range.
Select the Reservation Stay Dates option and select the Date Range.
Select the Reservation Arriving option.
Optional: Select the checkbox for Days of the Week.
Select ![]() 'Save/Exit'.
'Save/Exit'.
Select the ![]() 'Next' icon.
'Next' icon.
Select the checkbox for the Reservation Filters.
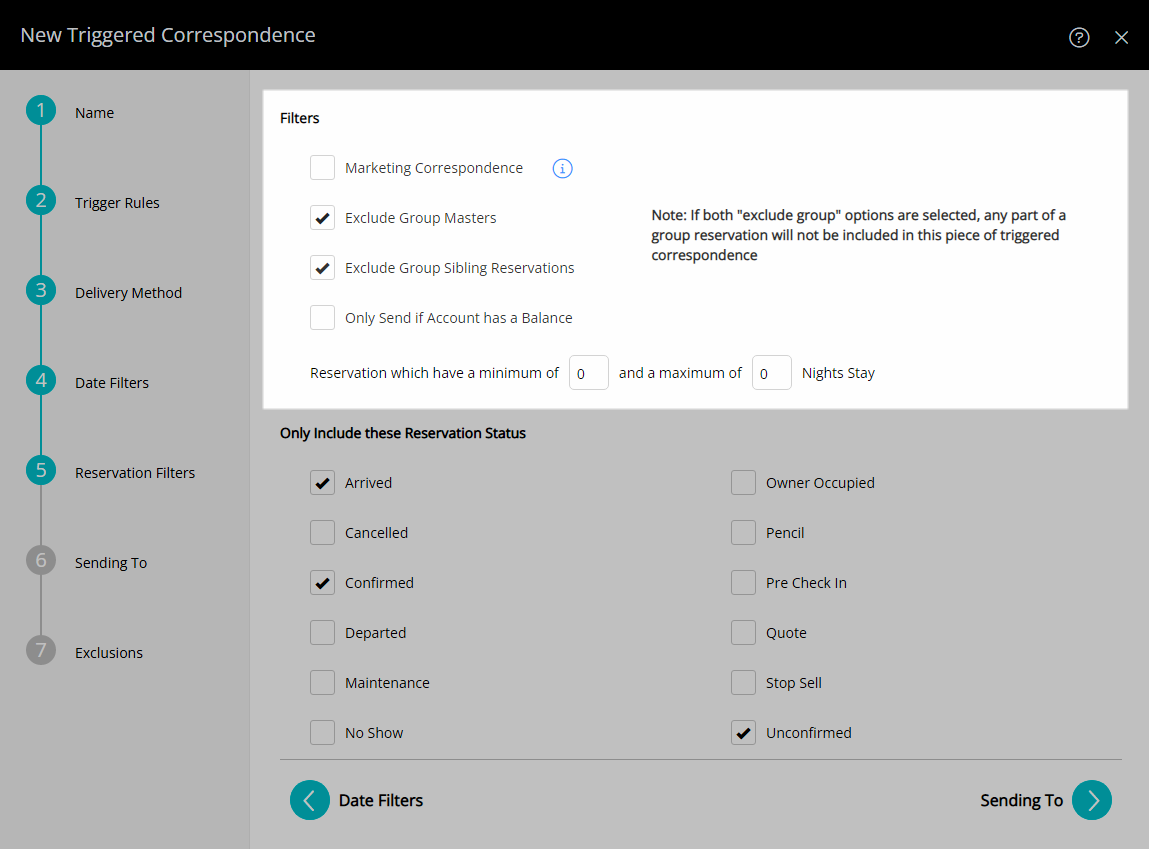
Select the checkbox for the Reservation Statuses to include.

Select the ![]() 'Next' icon.
'Next' icon.

Select the Recipients and choose the ![]() 'Next' icon.
'Next' icon.
Optional: Select the Exclusions.
Expand an Exclusion Type.
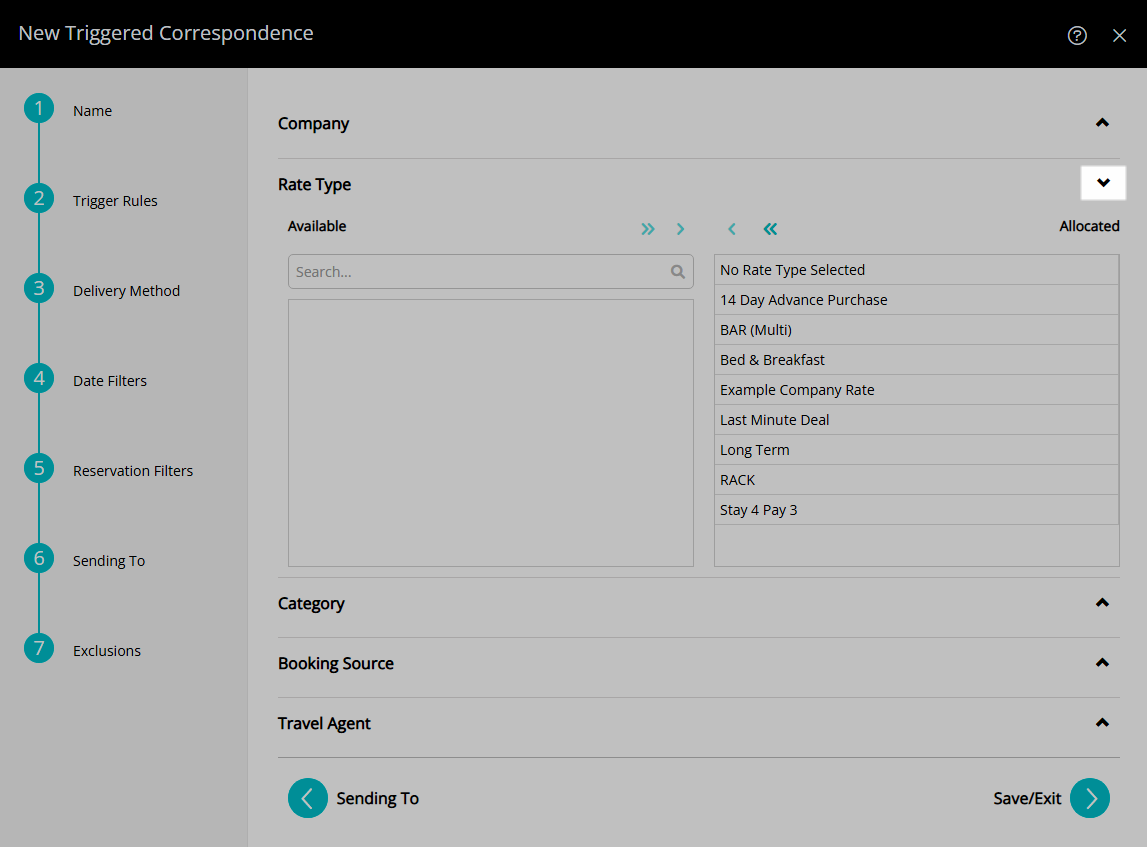
Select the Exclusions and choose the ![]() button.
button.
Repeat for all required Exclusions.
Select the ![]() 'Save/Exit' icon.
'Save/Exit' icon.
Select 'Yes' or 'No' if prompted with an option to update current and future reservations with the new Triggered Correspondence Rule.
The selected template will now send at the scheduled time and can be monitored on the 'Triggers' tab of a Reservation or the Monitored Triggers checklist.
Setup
Have your System Administrator complete the following.
- Go to Setup > Correspondence > Triggered in RMS.
- Select the
 'Add' icon.
 - Enter a Name and select the
 'Next' icon.
 - Select the Trigger Type.
- Select & Enter the Trigger Rules then choose the
 'Next' icon.
 - Select the Correspondence Type.
- Select the Correspondence Template and choose the
 'Next' icon.
 -
Optional: Add Date Filters.
- Select the
 'Add' icon.
 - Select the Date Made option.
- Select the Date Range.
- Select the Reservation Stay Dates option.
- Select the Date Range.
- Select the Reservation Arriving option.
- Optional: Select the checkbox for Days of the Week.
- Select 'Save/Exit'.
- Select the
- Select the
 'Next' icon.
 - Select the checkbox for the Reservation Filters.
- Select the checkbox for the Reservation Statuses to include.
- Select the
 'Next' icon.
 - Select the Recipients and choose the
 'Next' icon.
 -
Optional: Select the Exclusions.
- Expand an Exclusion Type.
- Select the Exclusions and choose the
 button.
 - Repeat for all required Exclusions.
- Select the
 'Save/Exit' icon.
 - Select 'Yes' or 'No' if prompted with an option to update current and future reservations with the new Triggered Correspondence Rule.

Select the 'Back' button to make changes in a previous step.
Monitored Triggers are only available when the Trigger Type is set to 'X Periods before or after an action' and the Correspondence Type is 'Guest Portal'.
Step 16 will only occur if the Trigger Type is set to 'X Periods before or after an action' or 'Specific Time of Day' and will update all current and future reservations to receive the new Triggered Correspondence if 'Yes' is selected.
-
Guide
- Add Button
Guide
Go to Setup > Correspondence > Triggered in RMS.
Select the ![]() 'Add' icon.
'Add' icon.
Enter a Name and select the ![]() 'Next' icon.
'Next' icon.
Select the Trigger Type.
Select & Enter the Trigger Rules then choose the ![]() 'Next' icon.
'Next' icon.
Select the Correspondence Type.
Select the Correspondence Template and choose the ![]() 'Next' icon.
'Next' icon.
Optional: Add Date Filters.
Select the ![]() 'Add' icon.
'Add' icon.
Select the Date Made option and select the Date Range.
Select the Reservation Stay Dates option and select the Date Range.
Select the Reservation Arriving option.
Optional: Select the checkbox for Days of the Week.
Select ![]() 'Save/Exit'.
'Save/Exit'.
Select the ![]() 'Next' icon.
'Next' icon.
Select the checkbox for the Reservation Filters.

Select the checkbox for the Reservation Statuses to include.
Select the ![]() 'Next' icon.
'Next' icon.

Select the Recipients and choose the ![]() 'Next' icon.
'Next' icon.
Optional: Select the Exclusions.
Expand an Exclusion Type.
Select the Exclusions and choose the ![]() button.
button.
Repeat for all required Exclusions.
Select the ![]() 'Save/Exit' icon.
'Save/Exit' icon.
Select 'Yes' or 'No' if prompted with an option to update current and future reservations with the new Triggered Correspondence Rule.
The selected template will now send at the scheduled time and can be monitored on the 'Triggers' tab of a Reservation or the Monitored Triggers checklist.
Automation Examples
The below examples are commonly created Triggered Correspondence rules to automate communications.
For a full list of the options available to create Triggered Correspondence see the 'Information' section of this article.
Reservation Confirmation
Use Triggered Correspondence to automatically notify a Guest when the Reservation Status is changed to 'Confirmed' by selecting the Trigger Type as 'At the time of an action occurring' and select the Rule Element as 'Reservation' and the Action as 'Confirmed'.
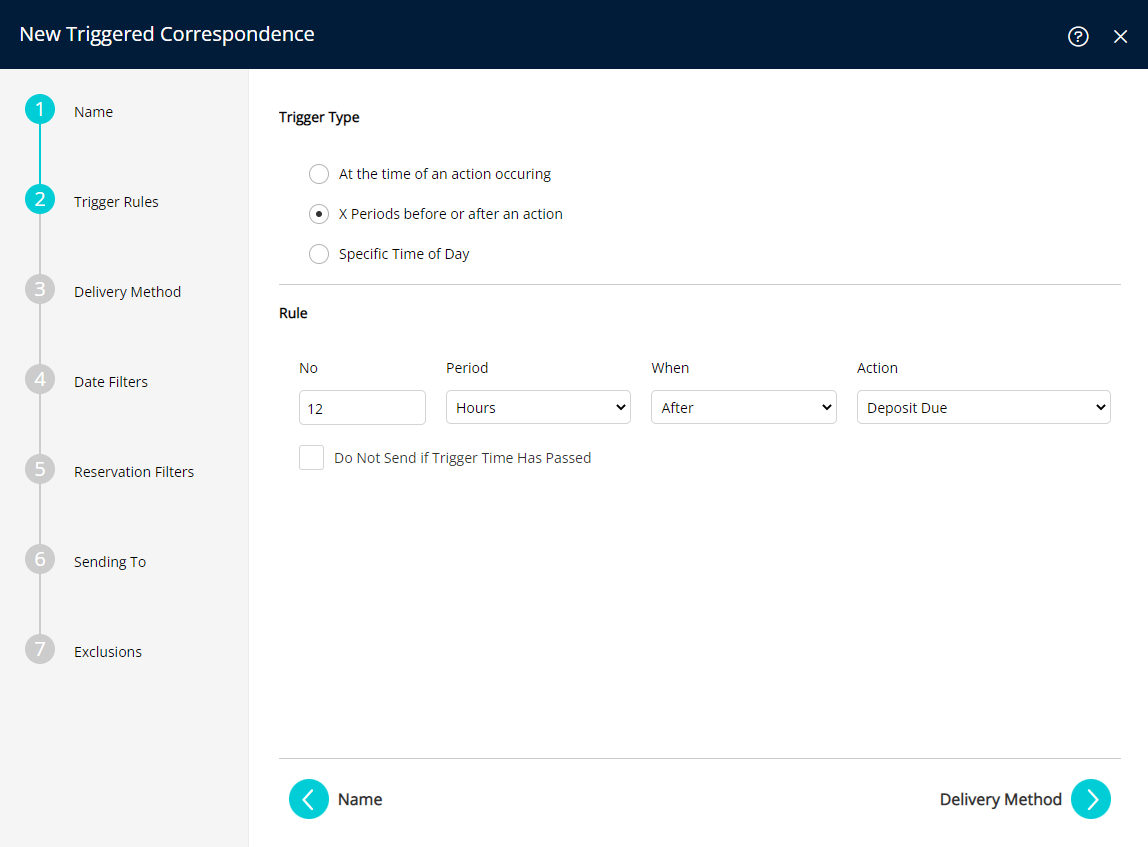
Deposit or Second Deposit Due
Use Triggered Correspondence to automatically notify a Guest when the Deposit Due or Second Deposit Due date is coming up or has passed on the Reservation by selecting the Trigger Type as 'X Periods before or after an action'.
Before
Select and enter the Number and Period then choose the When as 'Before' and the Action as 'Deposit Due' or 'Second Deposit Due'.
After
Select and enter the Number and Period then choose the When as 'After' and the Action as 'Deposit Due' or 'Second Deposit Due'.
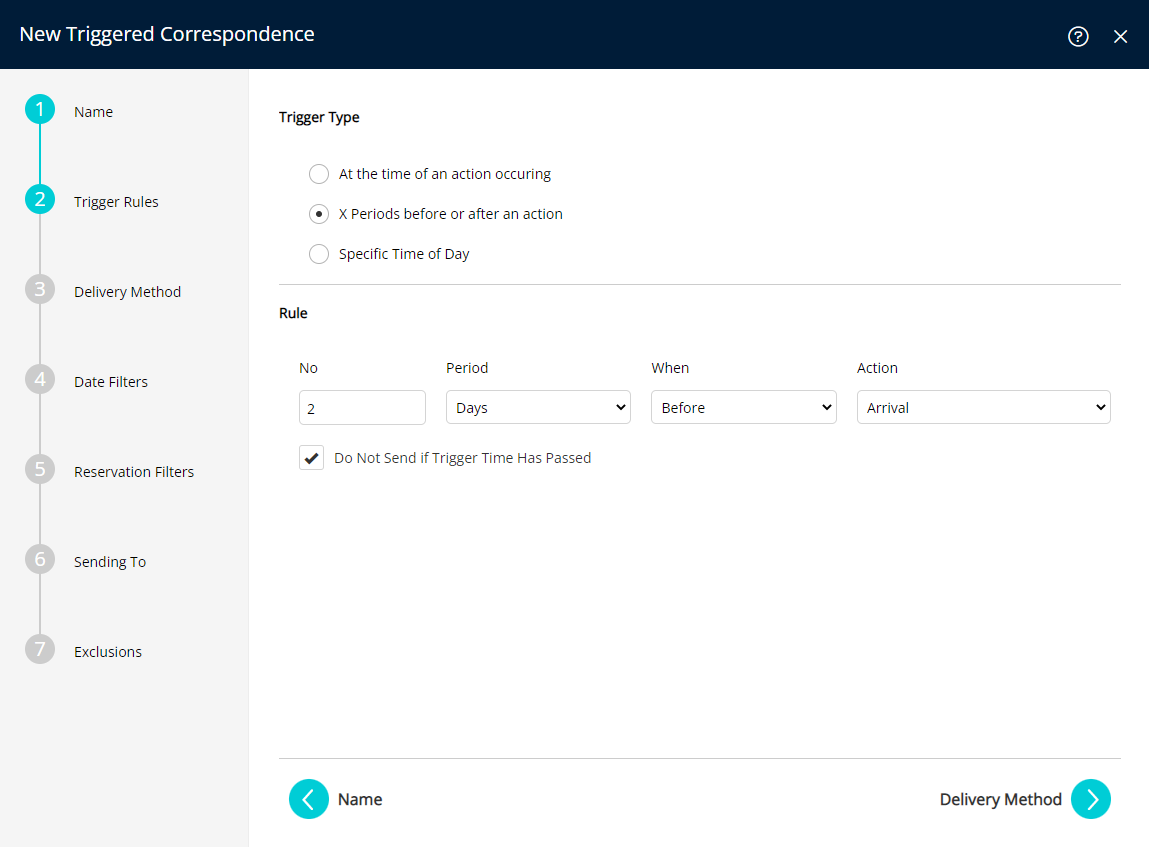
Pre-Arrival
Use Triggered Correspondence to automatically send information to a Guest ahead of their scheduled arrival by selecting the Trigger Type as 'X Periods Before or After an Action'.
Select and enter the Number and Period of time then choose the When as 'Before' and the Action as 'Arrival'.
Use the checkbox 'Do Not Send if Triggered Time Has Passed' to exclude any Same Day Arrivals or Walk-ins.
Pre Check-in
Use Triggered Correspondence to remind a Guest to complete Pre Check-in by selecting the Trigger Type as 'X Periods Before or After an Action' or 'Specific Time of Day'.
Use 'X Periods Before or After an Action' to prompt the Guest to complete Pre Check-in days, weeks, months, hours or minutes leading up to their arrival and use the checkbox 'Do Not Send if Trigger Time Has Passed' to prevent sending the Pre Check-in notice to Same Day Arrivals or Walk-ins.

Use 'Specific Time of Day' to send a reminder or notification to complete Pre Check-in on the Arrive Date.
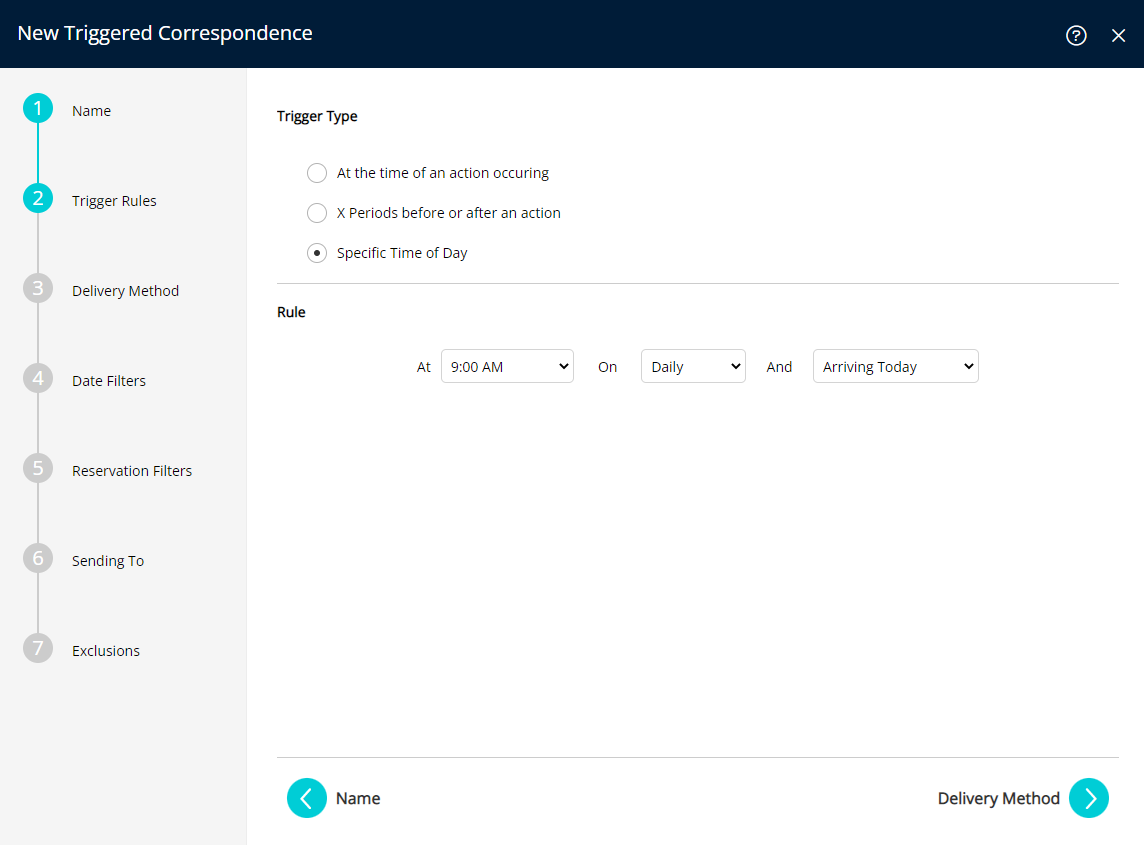
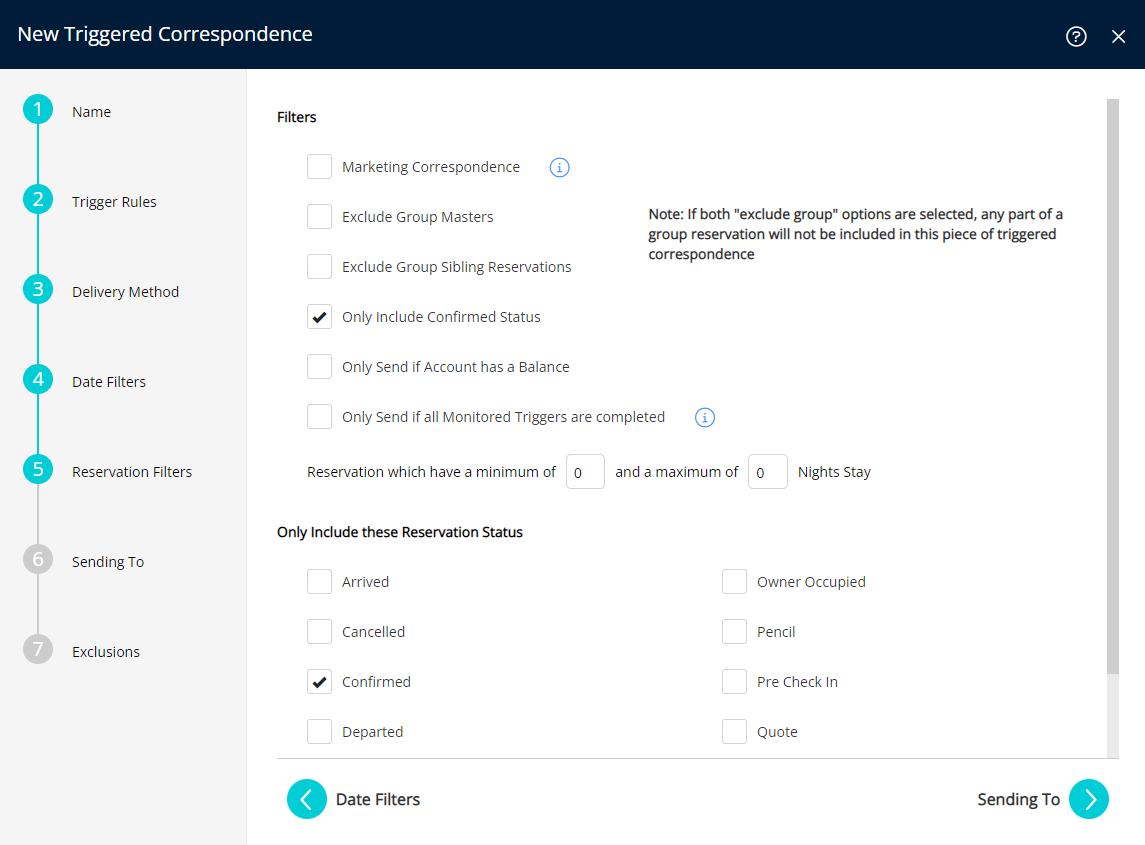
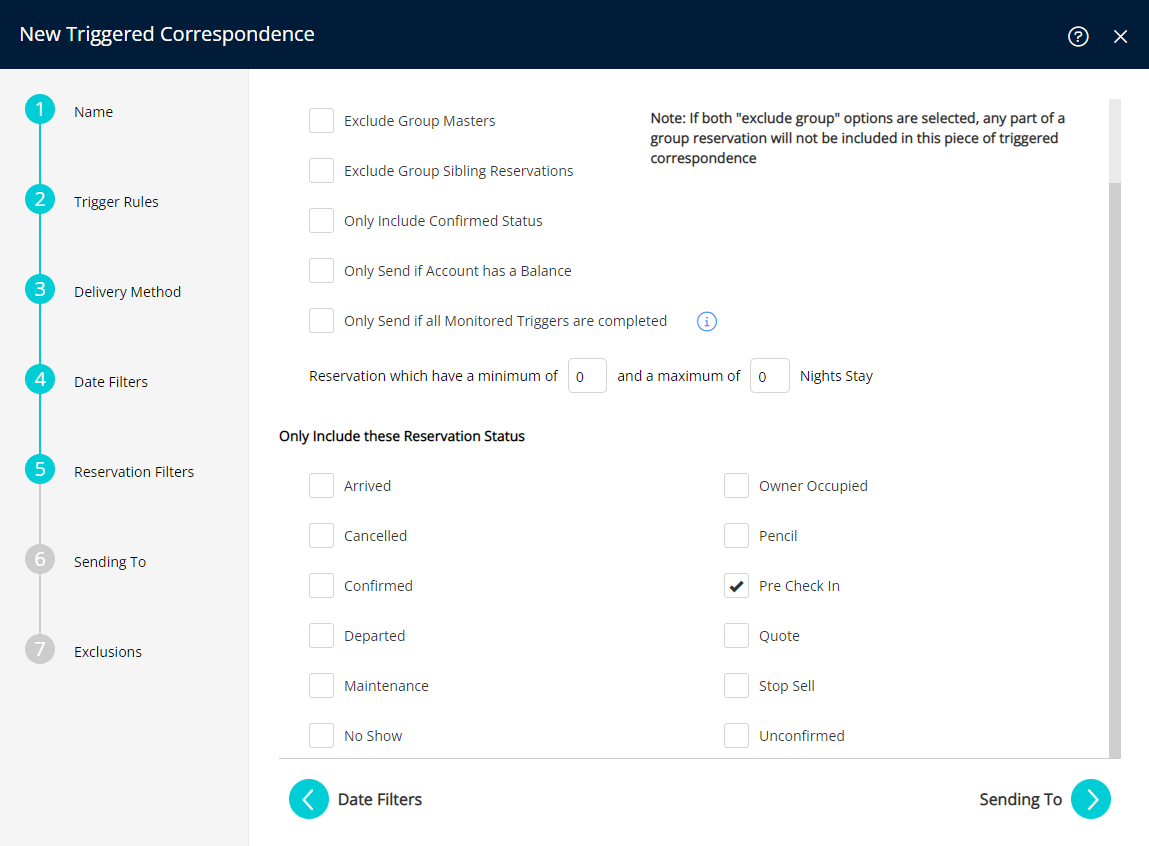
Use the Reservation Filter 'Only send to Confirmed Status' to limit the Triggered Correspondence to Confirmed Reservations.
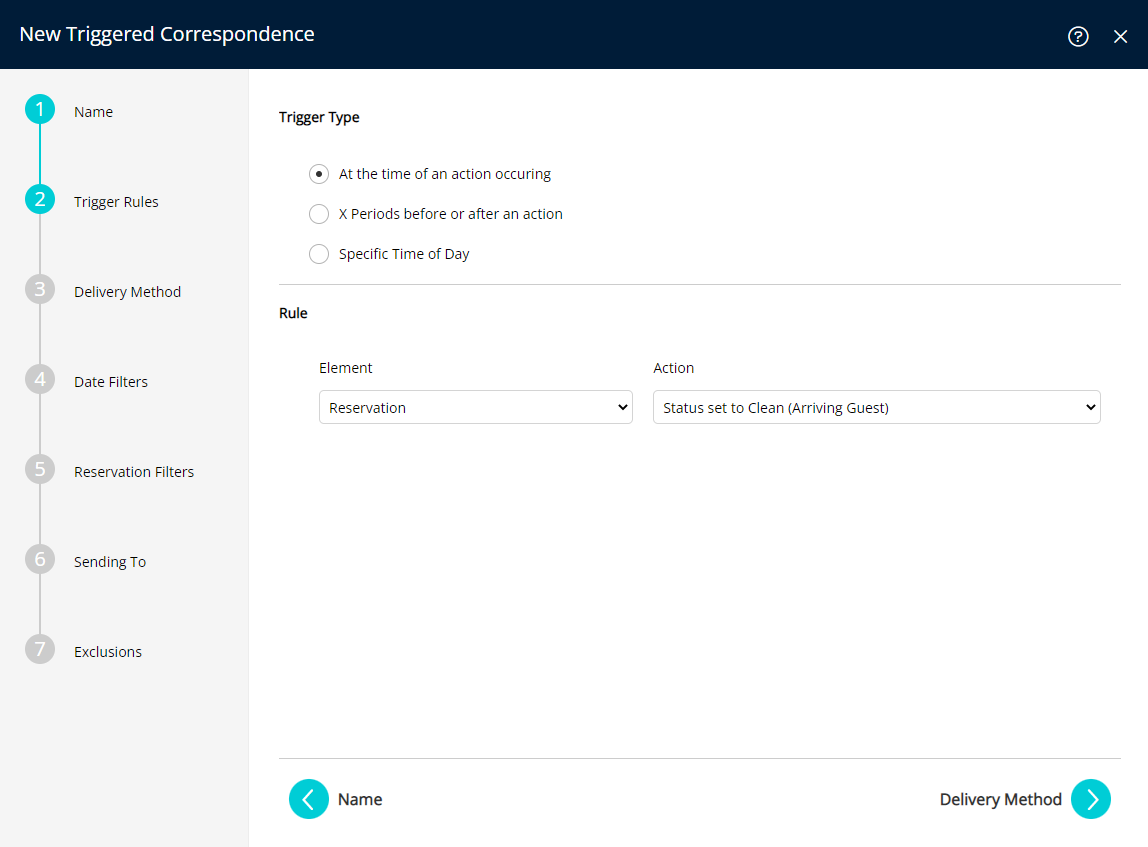
Area Ready
Use Triggered Correspondence to automatically alert a Guest their Area is ready for check-in by selecting the Trigger Type as 'At the time of an action occurring' and the Rule Element as 'Reservation' then select the Action as 'Status Set to Clean (Arriving Guest)'.
Use the Reservation Filter to only send to Guests who have completed Pre Check-in.
Post Departure
Send a 'Thank you for staying' or 'Guest Satisfaction Survey' automatically after Reservation Check-out by selecting the Trigger Type as 'X Periods Before or After an Action'.
Enter the Number and Period of time then select the When as 'After' and the Action as 'Depart'.

Use the Reservation Filter to only send the Triggered Correspondence when the Reservation Status is 'Departed'.