Triggered Correspondence Specific Time of Day
Automate sending correspondence at a specific time of day for arriving, departing or in-house guests in RMS.
Triggered Correspondence can be setup to send at a set time of day for reservations that are arriving today, departing tomorrow or currently in-house.
-
Information
-
Setup
- Add Button
Information
Triggered Correspondence can be setup to send at a set time of day for reservations that are arriving today, departing tomorrow or currently in-house.
Triggered Correspondence can automate sending of SMS, email, EDM campaigns, Guest Portal correspondence or Document Requests and the Trigger Type 'Specific Time of Day' can be scheduled to send at the selected time each day or a set day of the week.
This Trigger Type can be used to send weekly reminders to annuals or long term tenants, daily notices for property events including bar or restaurant specials, live entertainment and themed dinners, key property information or instructions for daily arrivals or departures and much more.

Category, Area, Reservation, Guest, and Rate are default System Labels that can be customised.

System Administrators will require Security Profile access to use this feature.
-
Setup
- Add Button
Setup
Have your System Administrator complete the following.
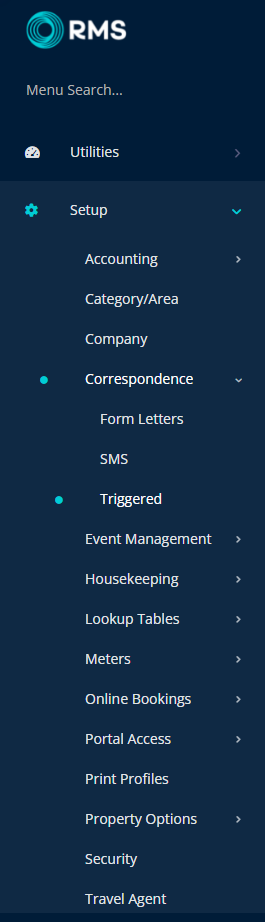
- Go to Setup > Correspondence > Triggered in RMS.
- Select the
 'Add' icon.
 - Enter a Name and select the
 'Next' icon.
 - Select the Trigger Type as 'Specific Time of Day'.
- Select & Enter the Trigger Rules then choose the
 'Next' icon.
 - Select the Correspondence Type.
- Select the Correspondence Template and choose the
 'Next' icon.
 -
Optional: Add Date Filters.
- Select the
 'Add' icon.
 - Select the Date Made option.
- Select the Date Range.
- Select the Reservation Stay Dates option.
- Select the Date Range.
- Select the Reservation Arriving option.
- Optional: Select the checkbox for Days of the Week.
- Select
 'Save/Exit'.
- Select the
- Select the
 'Next' icon.
 - Select the checkbox for the Reservation Filters.
- Select the
 'Next' icon.
 - Select the
 'Next' icon.
 -
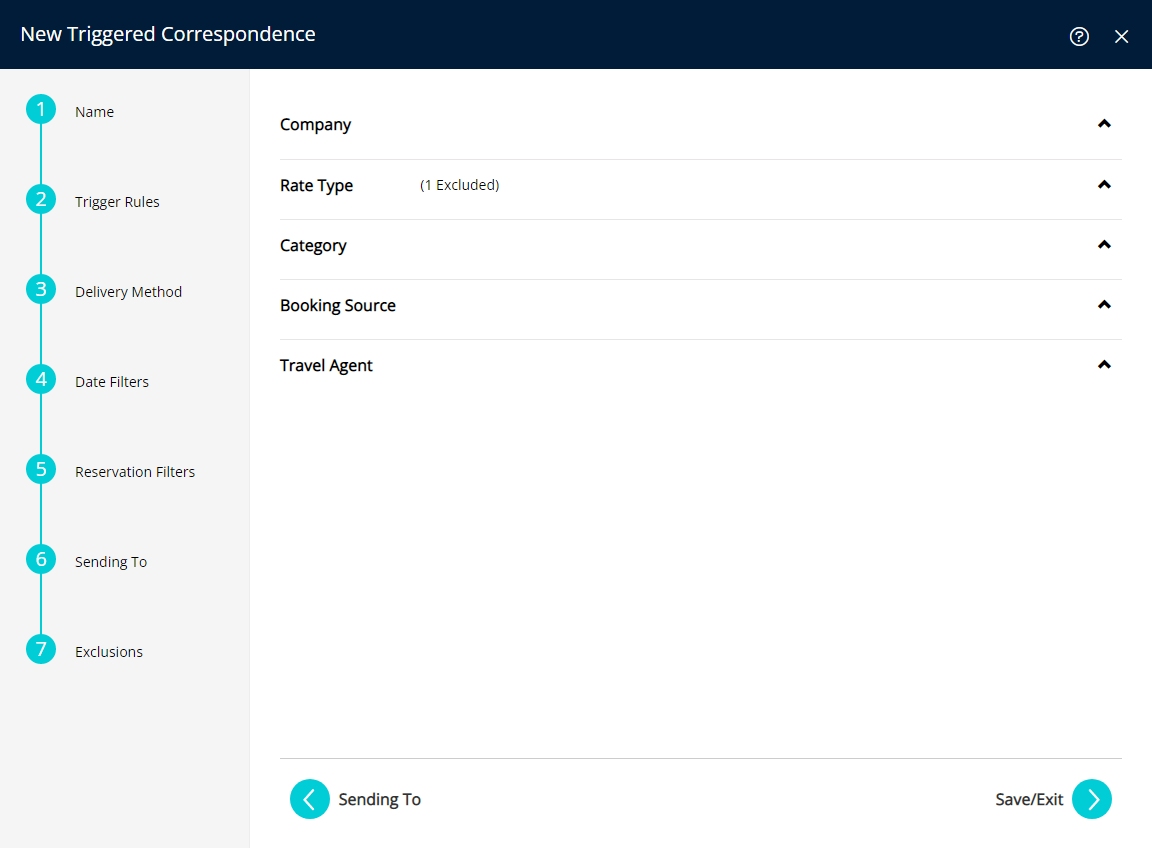
Optional: Select the Exclusions.
- Expand an Exclusion Type.
- Select the Exclusions and choose the
 button.
 - Repeat for all required Exclusions.
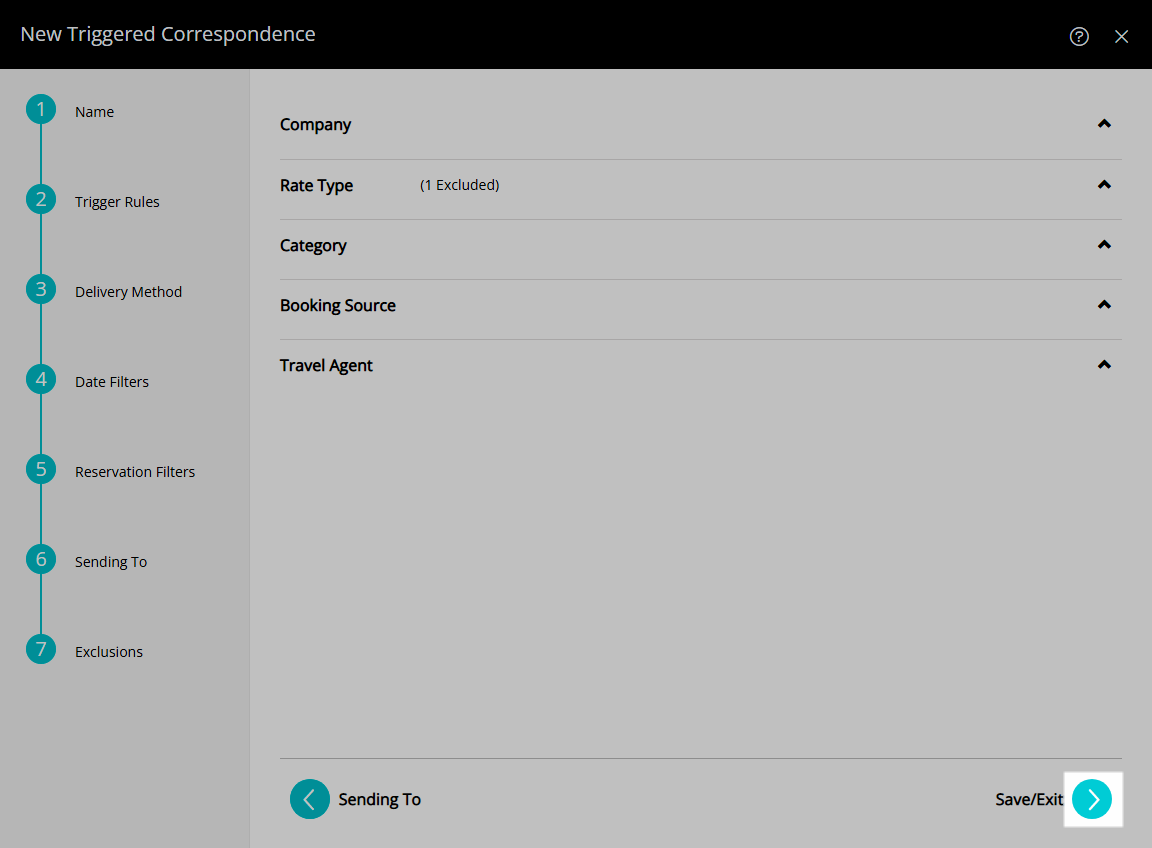
- Select the
 'Save/Exit' icon.
 - Select 'Yes' or 'No' when prompted with an option to update current and future reservations with the new Triggered Correspondence Rule.

Select the ![]() 'Back' button to make changes in a previous step.
'Back' button to make changes in a previous step.
Recipients and included Reservation Statuses are determined by the criteria selected in Step 5.
-
Guide
- Add Button
Guide
Go to Setup > Correspondence > Triggered in RMS.
Select the ![]() 'Add' icon.
'Add' icon.

Enter a Name and select the  'Next' icon.
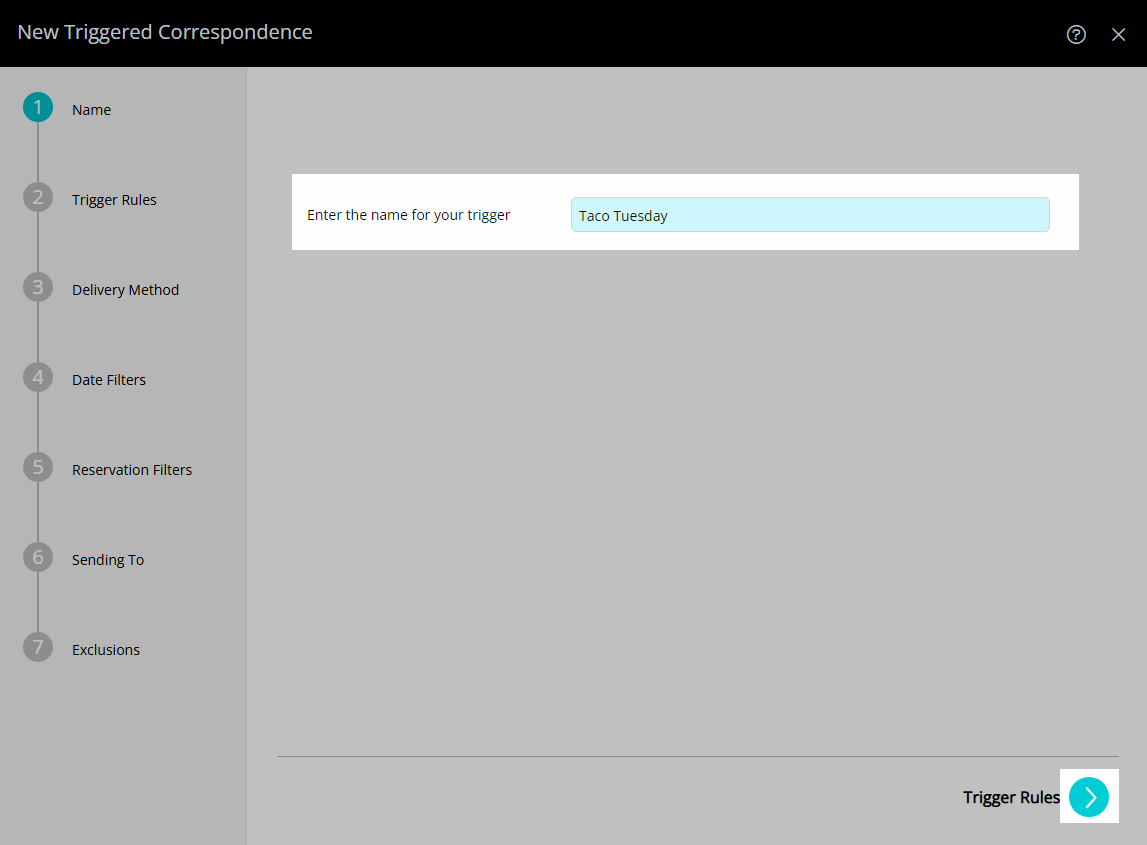
Select the Trigger Type as 'Specific Time of Day'.
Select & Enter the Trigger Rules then choose the  'Next' icon.

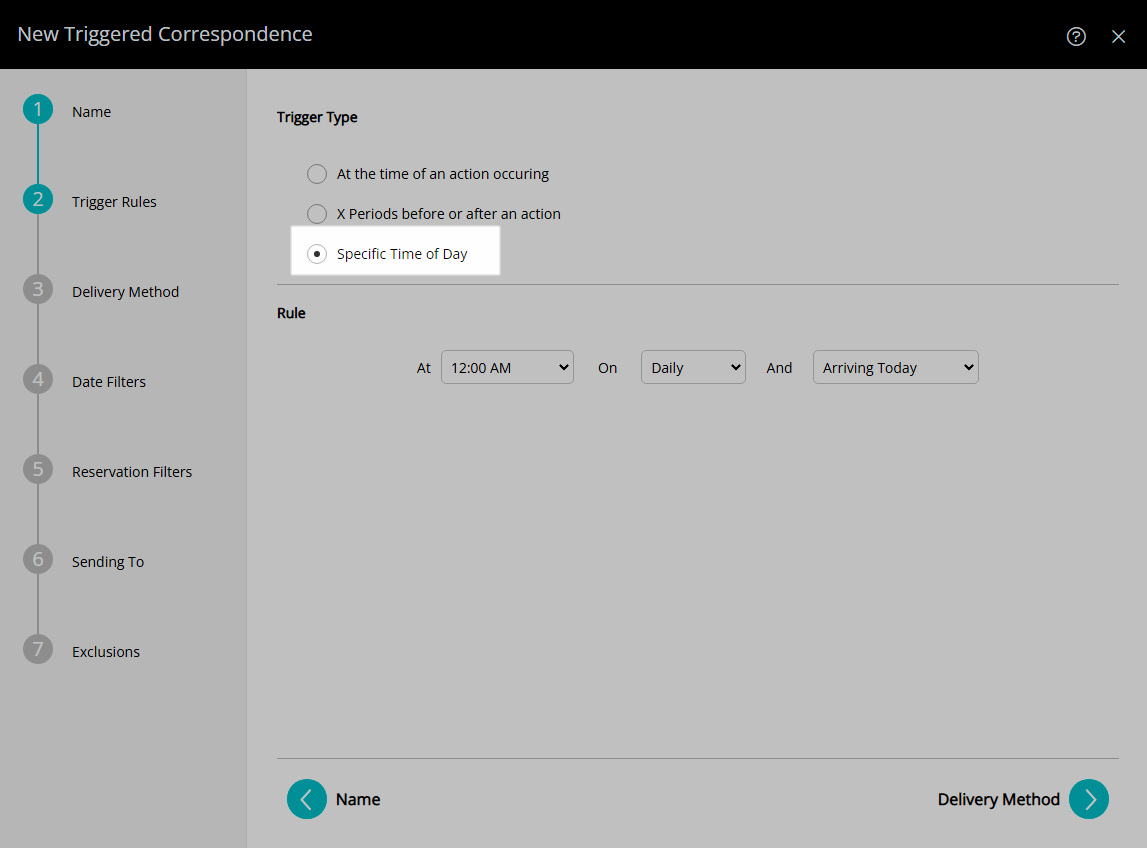
Select the Correspondence Type.
Select the Correspondence Template and choose the  'Next' icon.

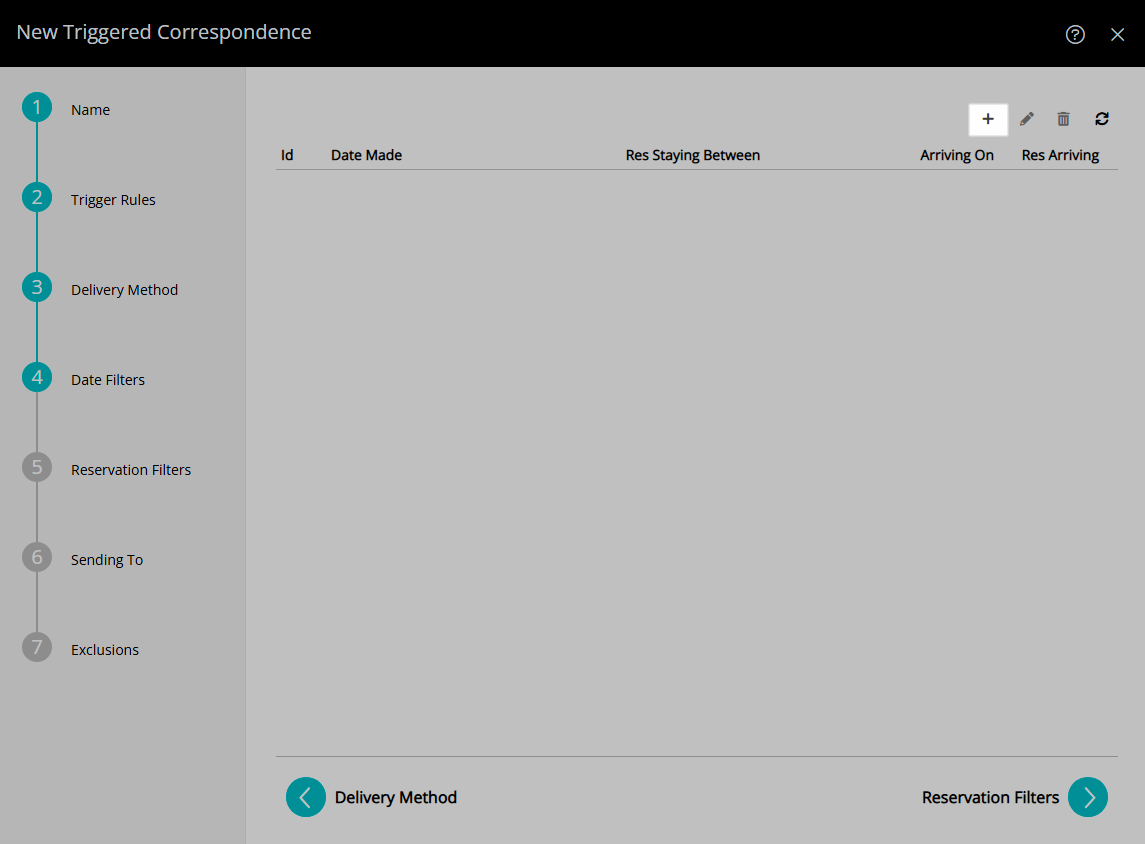
Optional: Add Date Filters.
Select the  'Add' icon.
Select the Date Made option and select a Date Range.
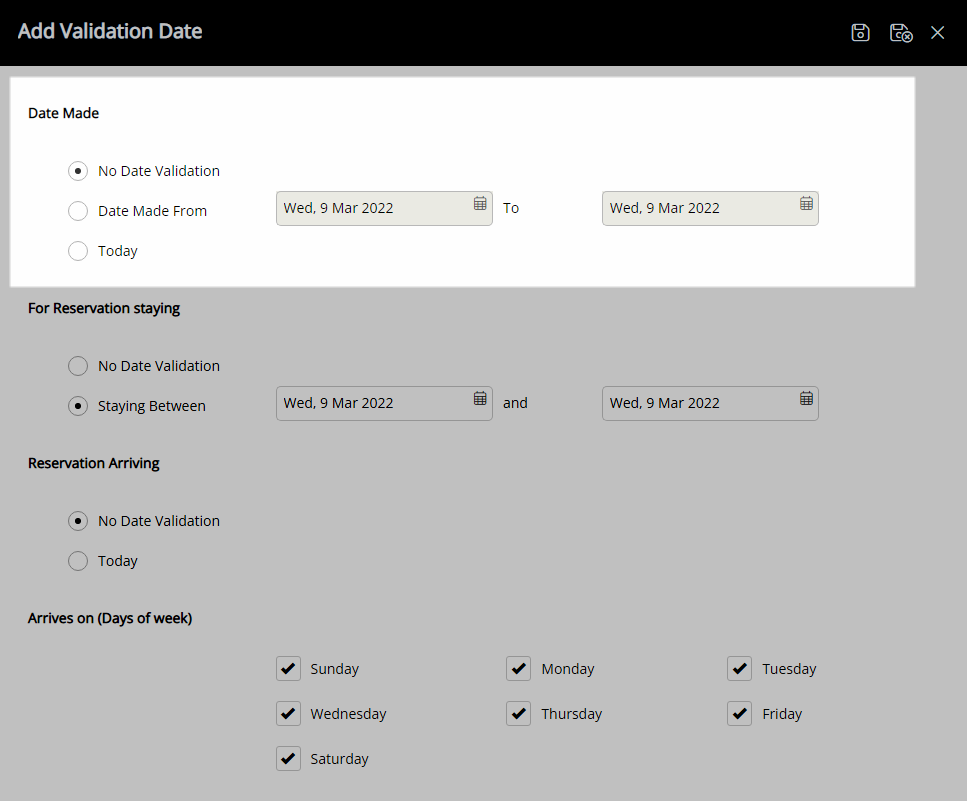
Select the Reservation Stay Dates option and select the Date Range.
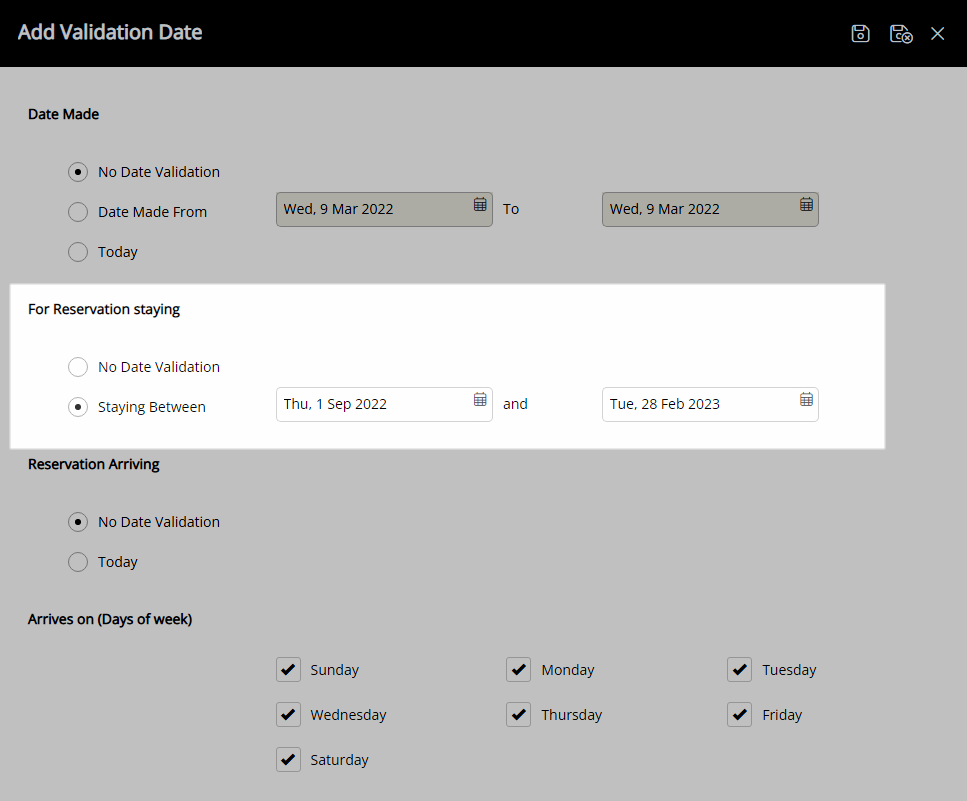
Select the Reservation Arriving option.
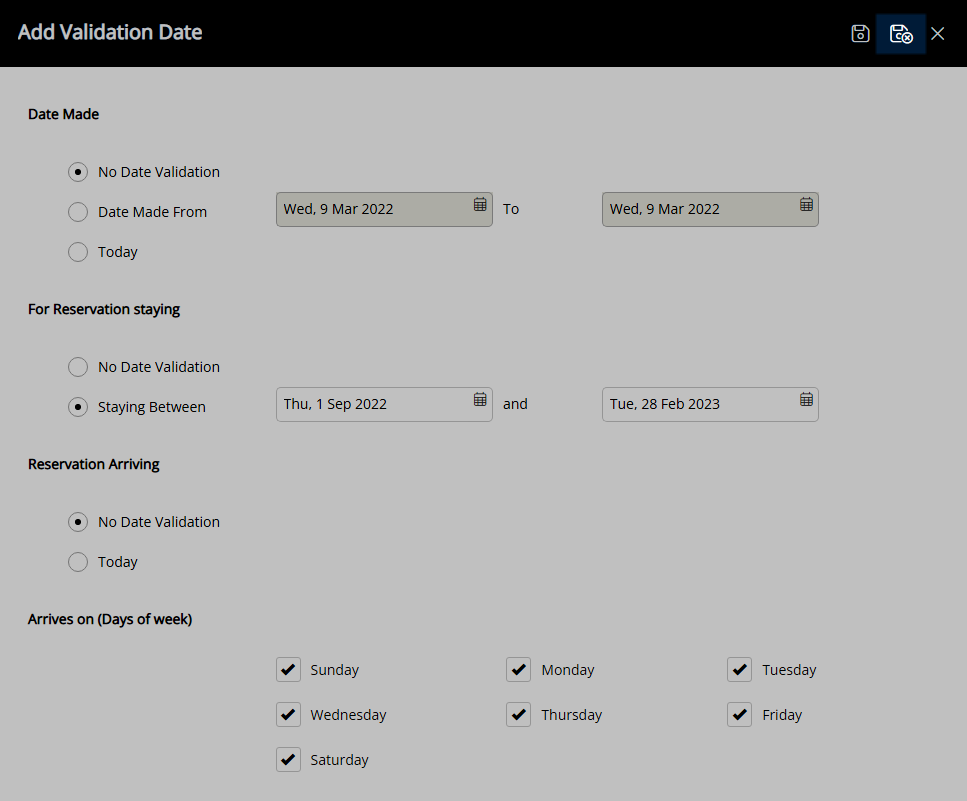
Optional: Select the checkbox for Days of the Week.
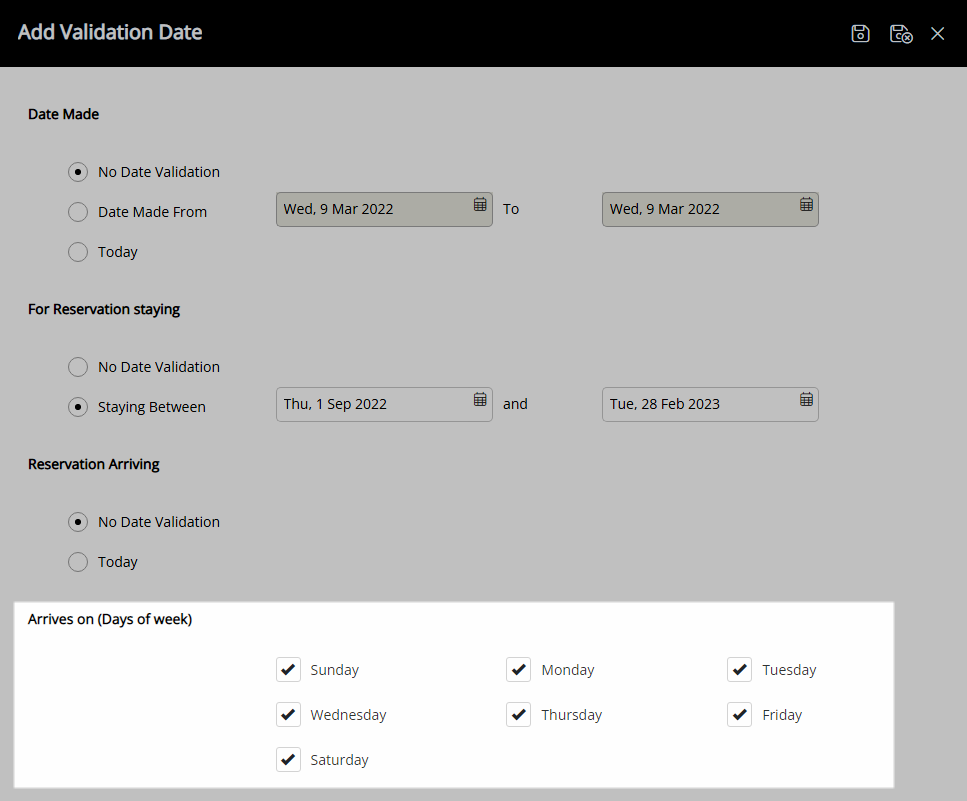
Select  'Save/Exit'.
Select the  'Next' icon.
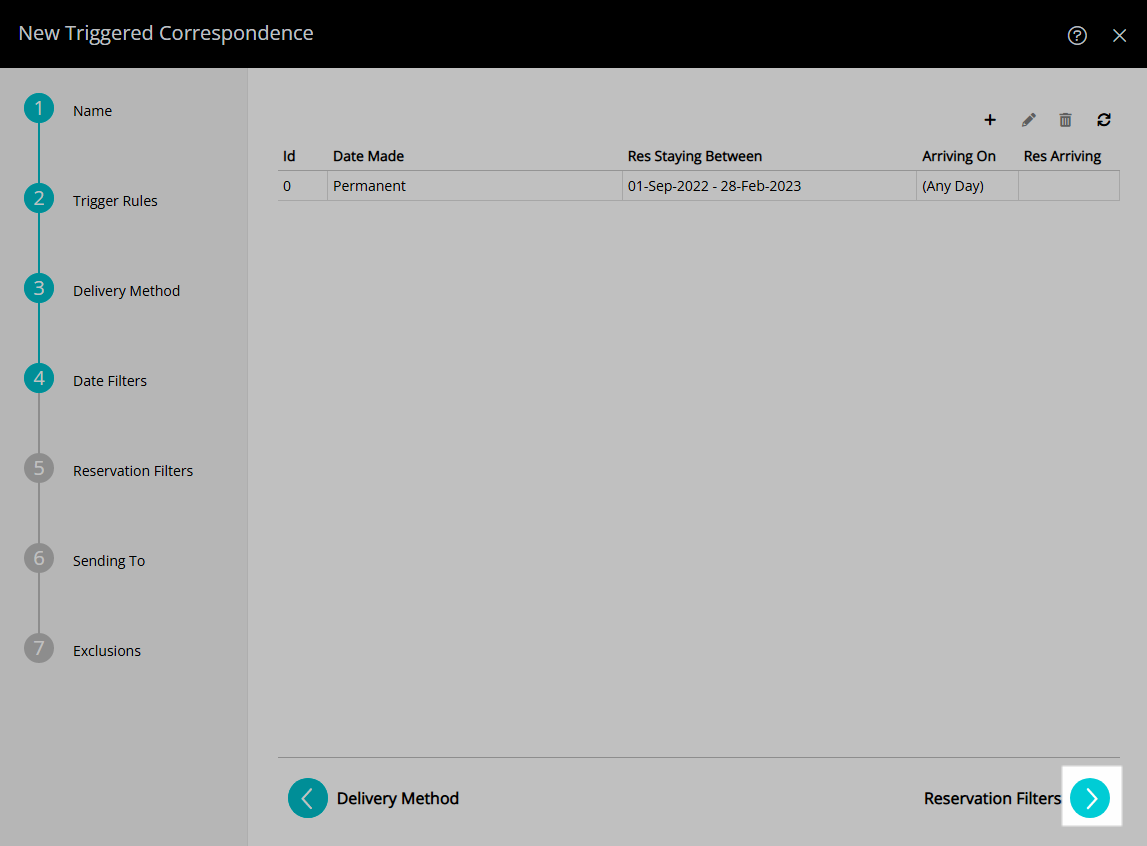
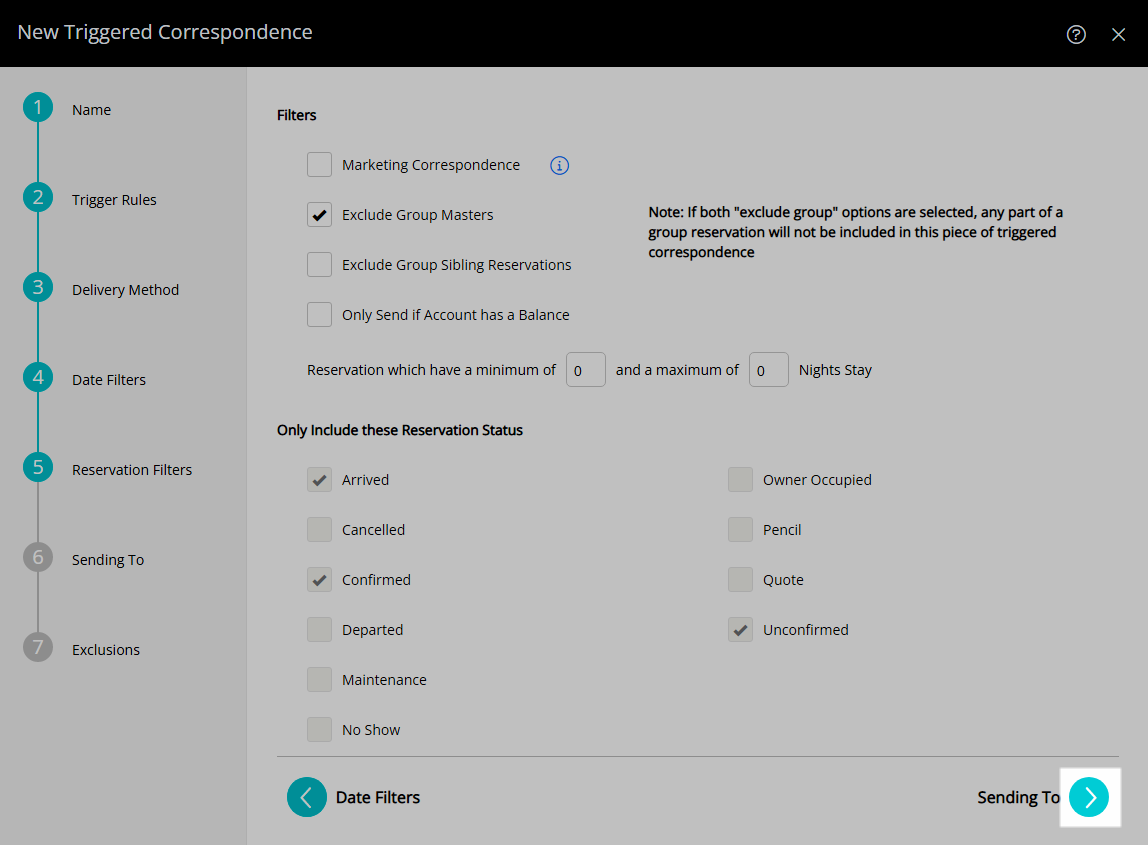
Select the checkbox for the Reservation Filters.
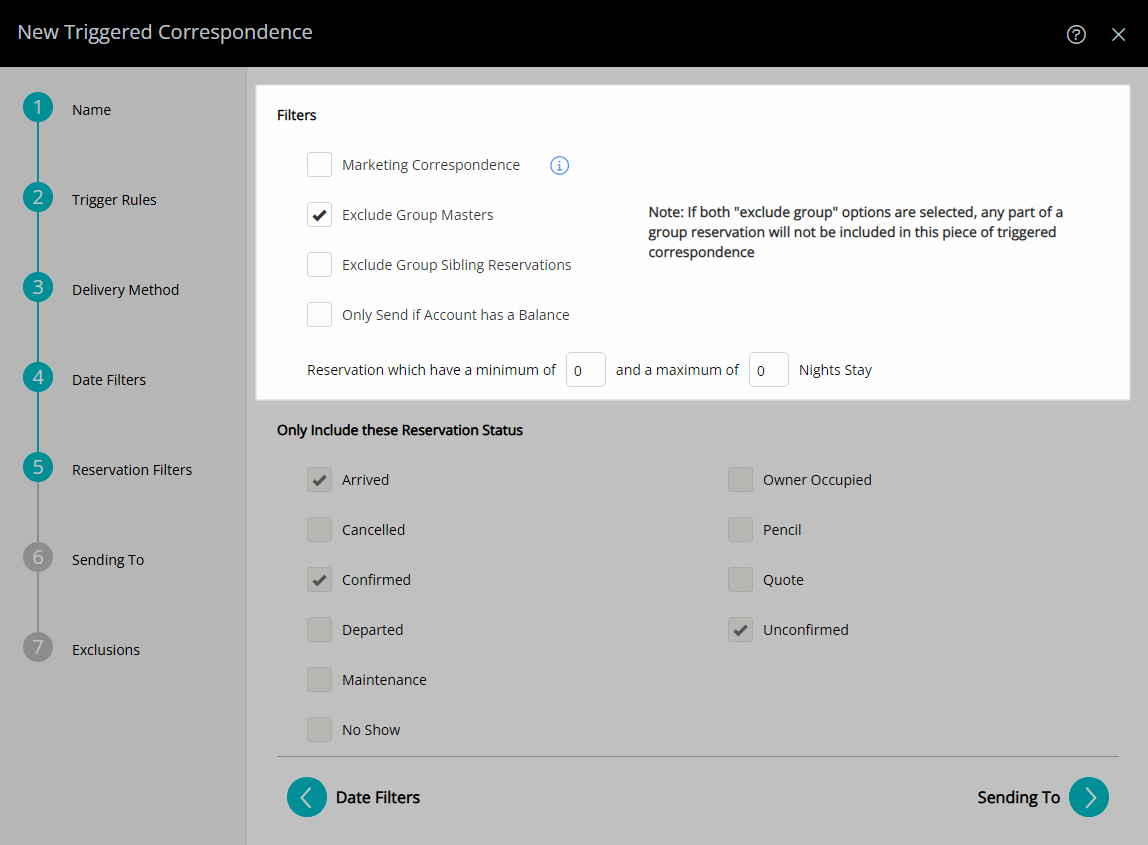
Select the  'Next' icon.
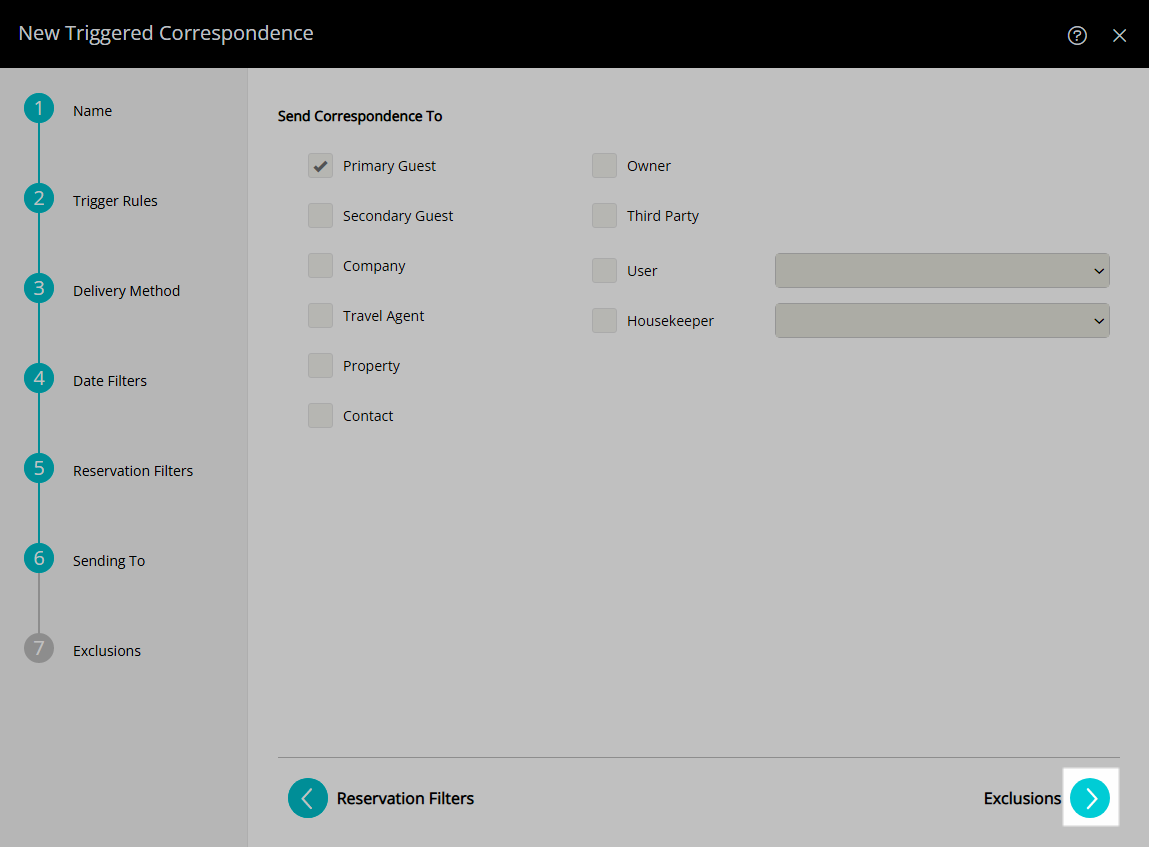
Select the  'Next' icon.
Optional: Select the Exclusions.
Expand an Exclusion Type.
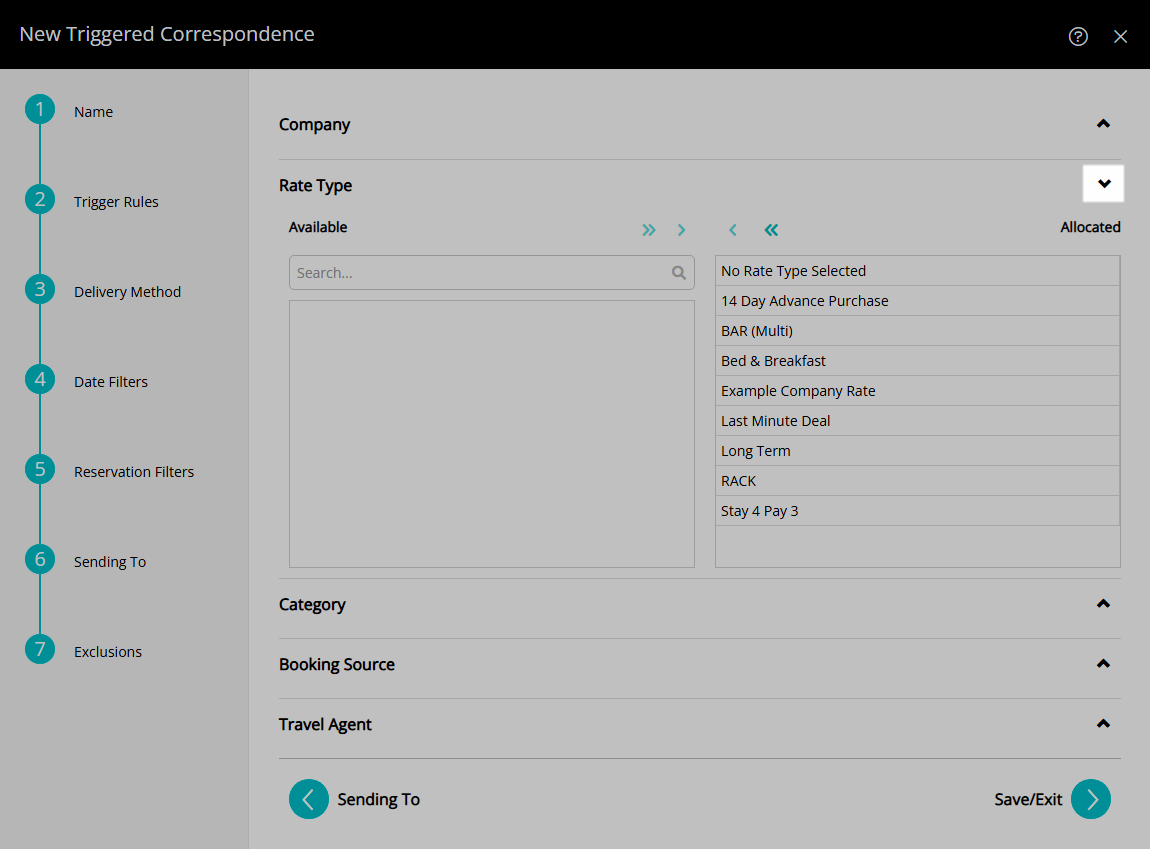
Select the Exclusions and choose the  button.
Repeat for all required Exclusions.
Select the  'Save/Exit' icon.
Select 'Yes' or 'No' when prompted with an option to update current and future reservations with the new Triggered Correspondence Rule.

The selected correspondence will be sent at the set time of day for reservations that meet the criteria.
Setup
Have your System Administrator complete the following.
- Go to Setup > Correspondence > Triggered in RMS.
- Select the
 'Add' icon.
 - Enter a Name and select the
 'Next' icon.
 - Select the Trigger Type as 'Specific Time of Day'.
- Select & Enter the Trigger Rules then choose the
 'Next' icon.
 - Select the Correspondence Type.
- Select the Correspondence Template and choose the
 'Next' icon.
 -
Optional: Add Date Filters.
- Select the
 'Add' icon.
 - Select the Date Made option.
- Select the Date Range.
- Select the Reservation Stay Dates option.
- Select the Date Range.
- Select the Reservation Arriving option.
- Optional: Select the checkbox for Days of the Week.
- Select
 'Save/Exit'.
- Select the
- Select the
 'Next' icon.
 - Select the checkbox for the Reservation Filters.
- Select the
 'Next' icon.
 - Select the
 'Next' icon.
 -
Optional: Select the Exclusions.
- Expand an Exclusion Type.
- Select the Exclusions and choose the
 button.
 - Repeat for all required Exclusions.
- Select the
 'Save/Exit' icon.
 - Select 'Yes' or 'No' when prompted with an option to update current and future reservations with the new Triggered Correspondence Rule.

Select the ![]() 'Back' button to make changes in a previous step.
'Back' button to make changes in a previous step.
Recipients and included Reservation Statuses are determined by the criteria selected in Step 5.
-
Guide
- Add Button
Guide
Go to Setup > Correspondence > Triggered in RMS.
Select the ![]() 'Add' icon.
'Add' icon.
Enter a Name and select the 'Next' icon.
Select the Trigger Type as 'Specific Time of Day'.
Select & Enter the Trigger Rules then choose the 'Next' icon.
Select the Correspondence Type.
Select the Correspondence Template and choose the 'Next' icon.
Optional: Add Date Filters.
Select the 'Add' icon.
Select the Date Made option and select a Date Range.
Select the Reservation Stay Dates option and select the Date Range.
Select the Reservation Arriving option.
Optional: Select the checkbox for Days of the Week.
Select 'Save/Exit'.
Select the 'Next' icon.
Select the checkbox for the Reservation Filters.
Select the 'Next' icon.
Select the 'Next' icon.
Optional: Select the Exclusions.
Expand an Exclusion Type.
Select the Exclusions and choose the button.
Repeat for all required Exclusions.
Select the 'Save/Exit' icon.
Select 'Yes' or 'No' when prompted with an option to update current and future reservations with the new Triggered Correspondence Rule.
The selected correspondence will be sent at the set time of day for reservations that meet the criteria.