Book by Category
Information on the alternate category setup enabling reservations to be saved without an area in RMS.
Table of Contents
Key FeaturesArea AllocationReservation Area AllocationBooking Chart Area AllocationIn/Out Movements Area AllocationAuto Area Allocation UtilityCategory OverbookingBook by Category is an option on the category setup to enable creating reservations without immediately allocating an area in RMS.
By default a category will be setup to require an area to be selected on the reservation at the time of booking unless 'Book by Category' is enabled.
When using Book by Category the overall category availability will be used to determine if the reservation can be saved instead of the physical availability of a single area within that category.
Book by Category enables allocating an area to a reservation any time between initial reservation creation and reservation arrival.
Areas can be allocated directly on the reservation, on the Booking Chart, on In/Out Movements, or in bulk using the Auto Area Allocation Utility.
Book by Category allows reservations to be made without selecting an area and includes the ability to allow Category Overbooking.
Category Overbooking is a feature that is only available when a category is setup as Book by Category and enables creating more reservations in a category than can be physically accommodated, up to the limit set.
Property Overbooking is a feature only available when one or more categories are setup as Book by Category and enables creating more reservations than can be physically accommodated at the property.
Maximum Property Oversell and Do Not Overbook Property can be used to manage overbooking when enabled on a category to either limit the number of reservations above the total property capacity or prevent reservations from ever exceeding the physical capacity at a property regardless of the individual category overbooking limits set.
Area Allocation
Area allocation assigns the physical space a guest will occupy for their reservation.
When using Book by Category area allocation can be completed any time between initial reservation creation and reservation arrival.
Area allocation can be set directly on the reservation, on the Booking Chart, on In/Out Movements, or in bulk using the Auto Area Allocation Utility.
Reservation Area Allocation
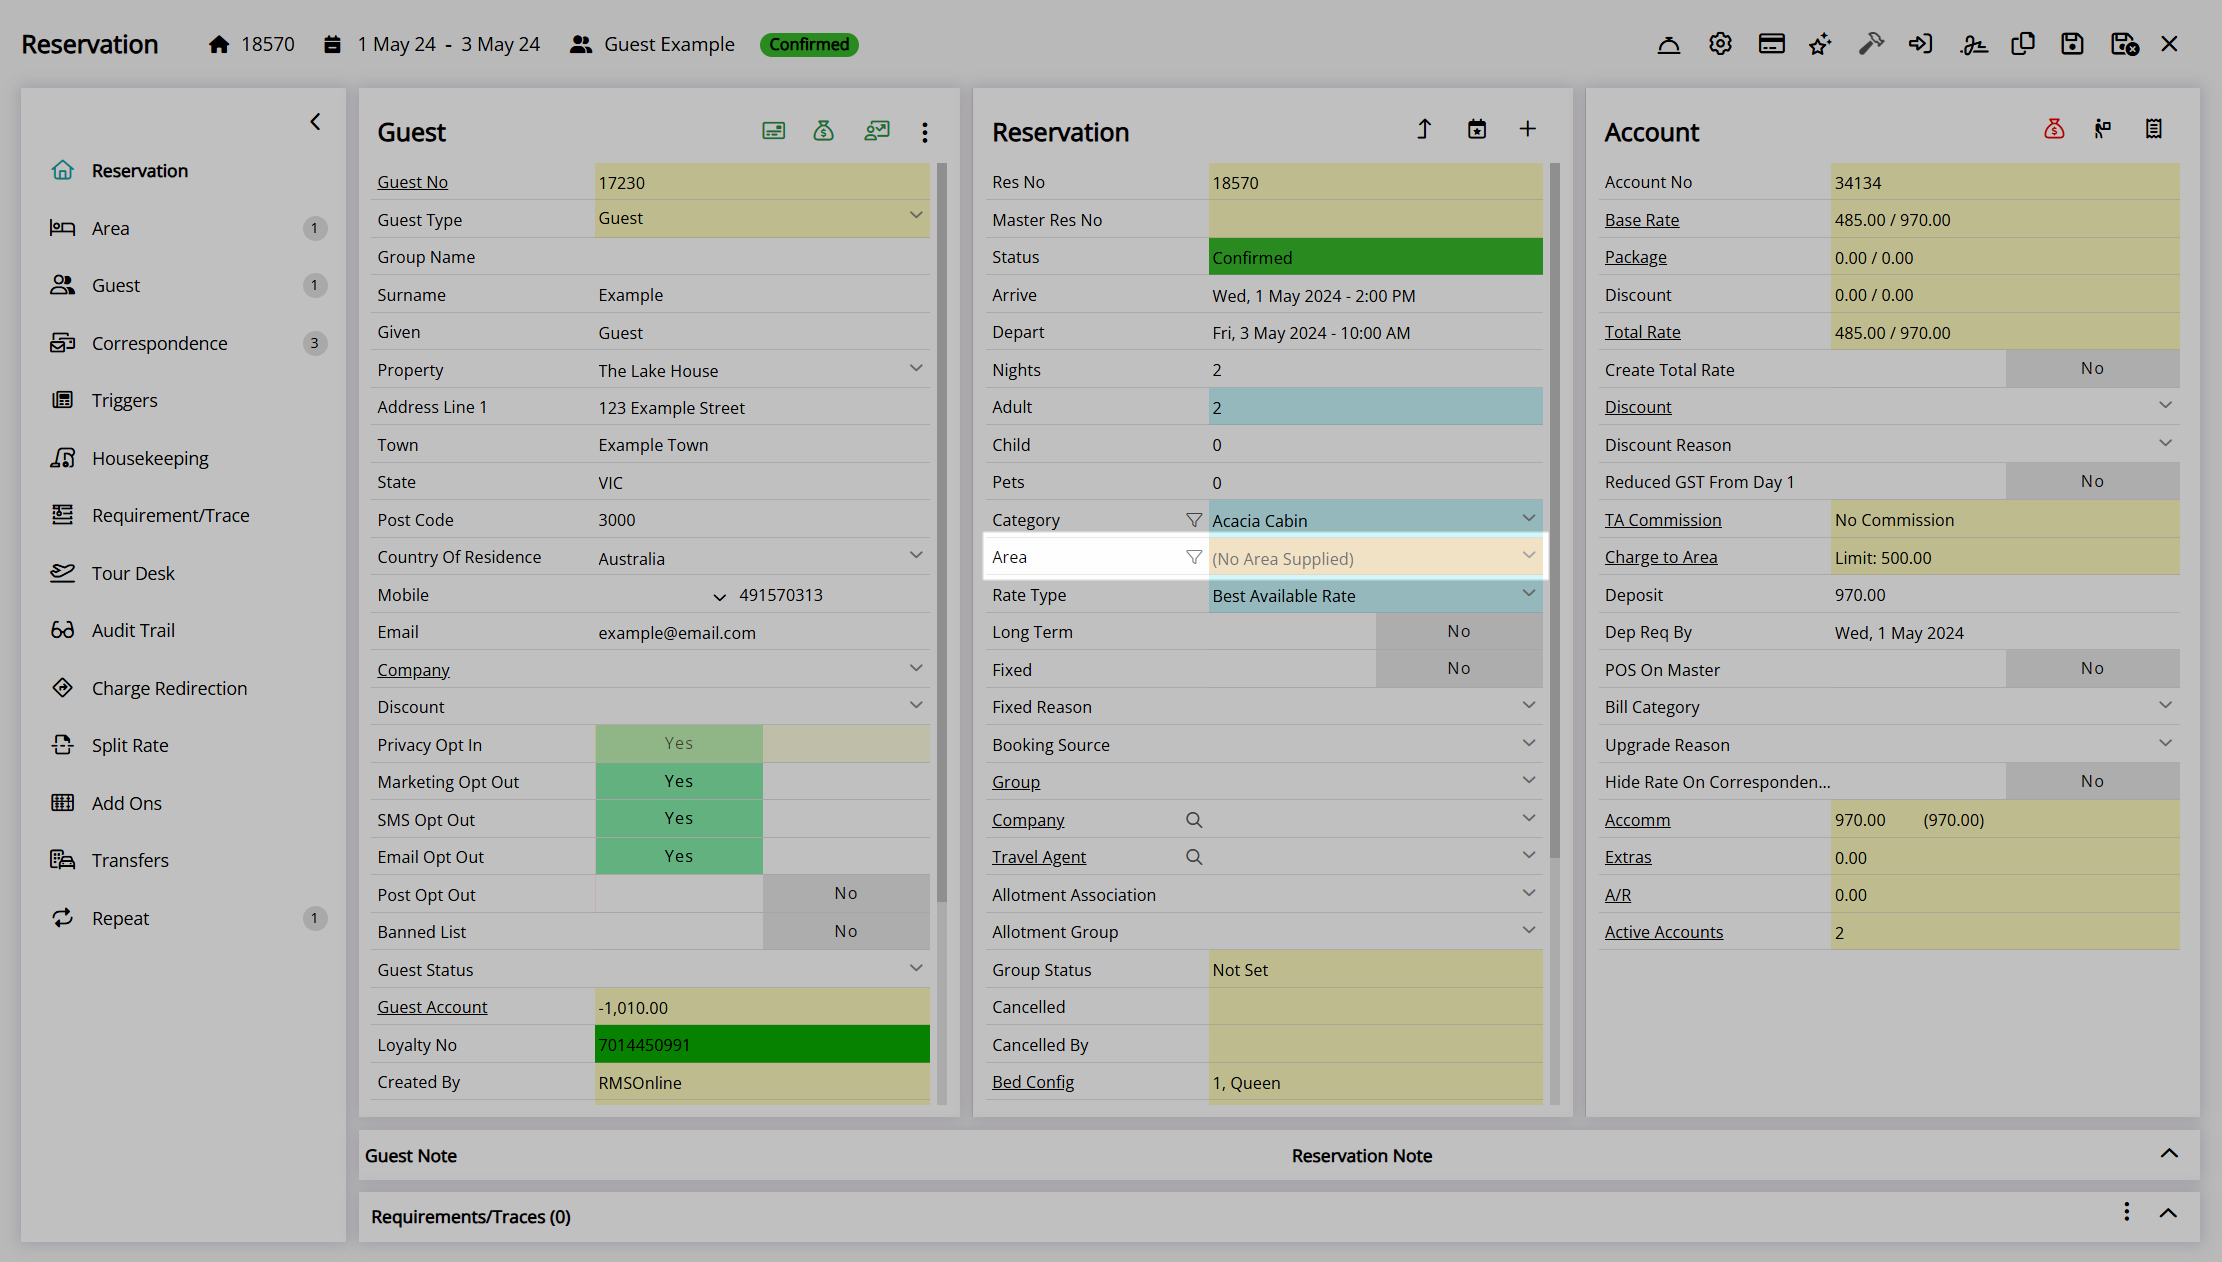
The 'Area' field on the reservation will only show areas in the selected category that are available for the reservation stay dates.
Areas that are already allocated to a reservation for any of the dates within the reservation's length of stay will not appear for selection in the list of available areas.
Allocate Area
- Go to the Toolbar Menu Reservation Search in RMS.
- Enter the Guest Name or Reservation Number and press 'Enter'.
- Select the 'Area' field.
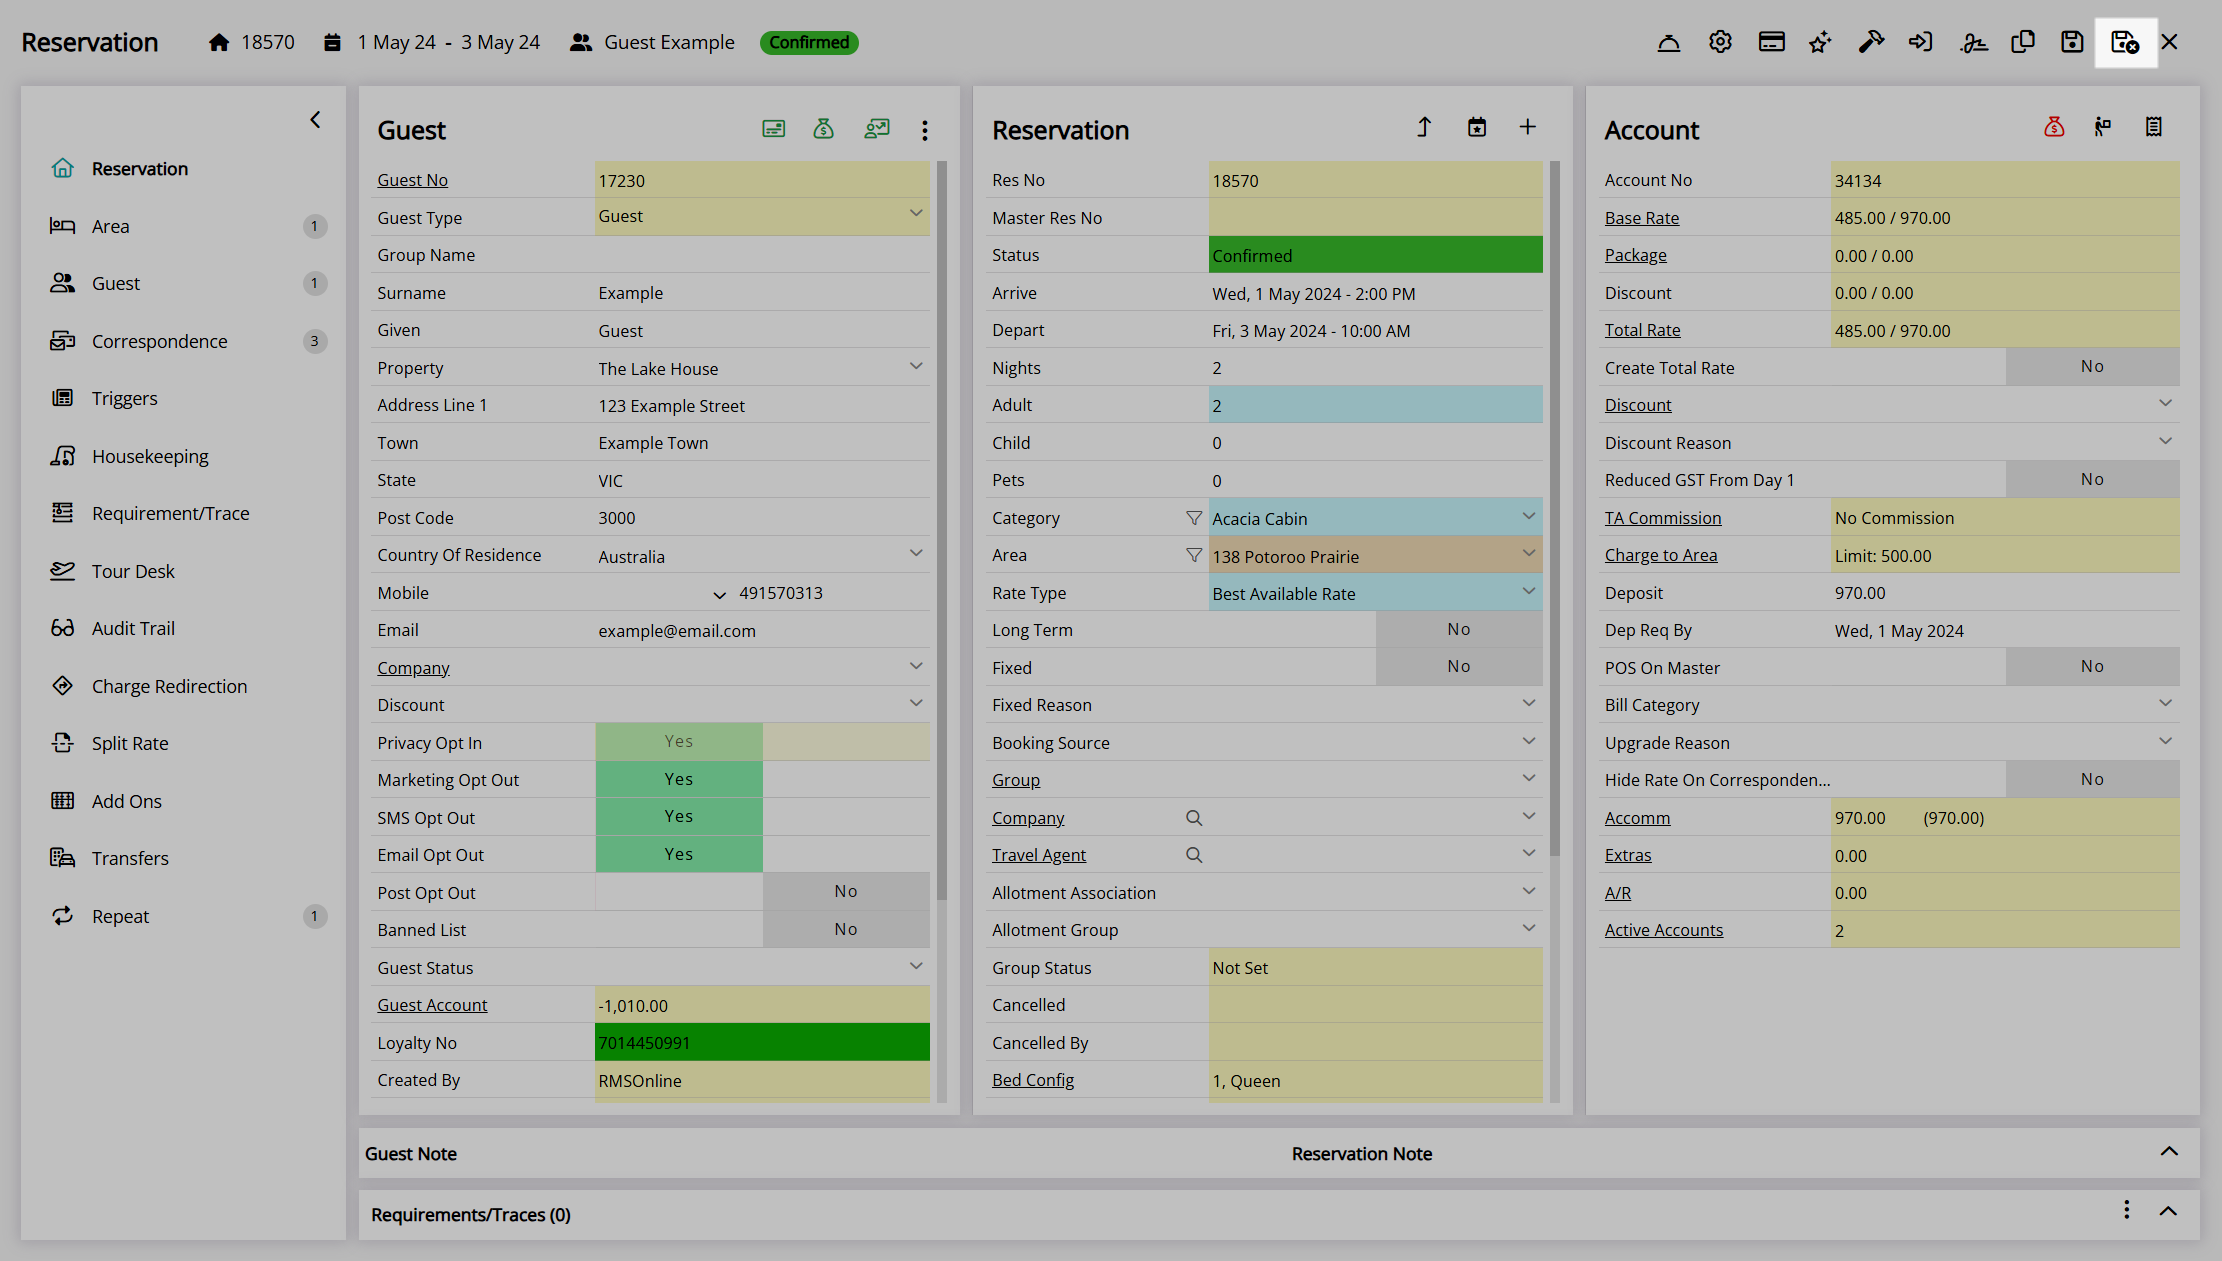
- Select an Area.
- Save/Exit.
Go to the Toolbar Menu Reservation Search in RMS.
Enter a Guest Name or Reservation Number and press 'Enter'.

Select the 'Area' field.
Select an Area.

Select the  'Save/Exit' icon to store the changes made and leave the reservation.
Booking Chart Area Allocation
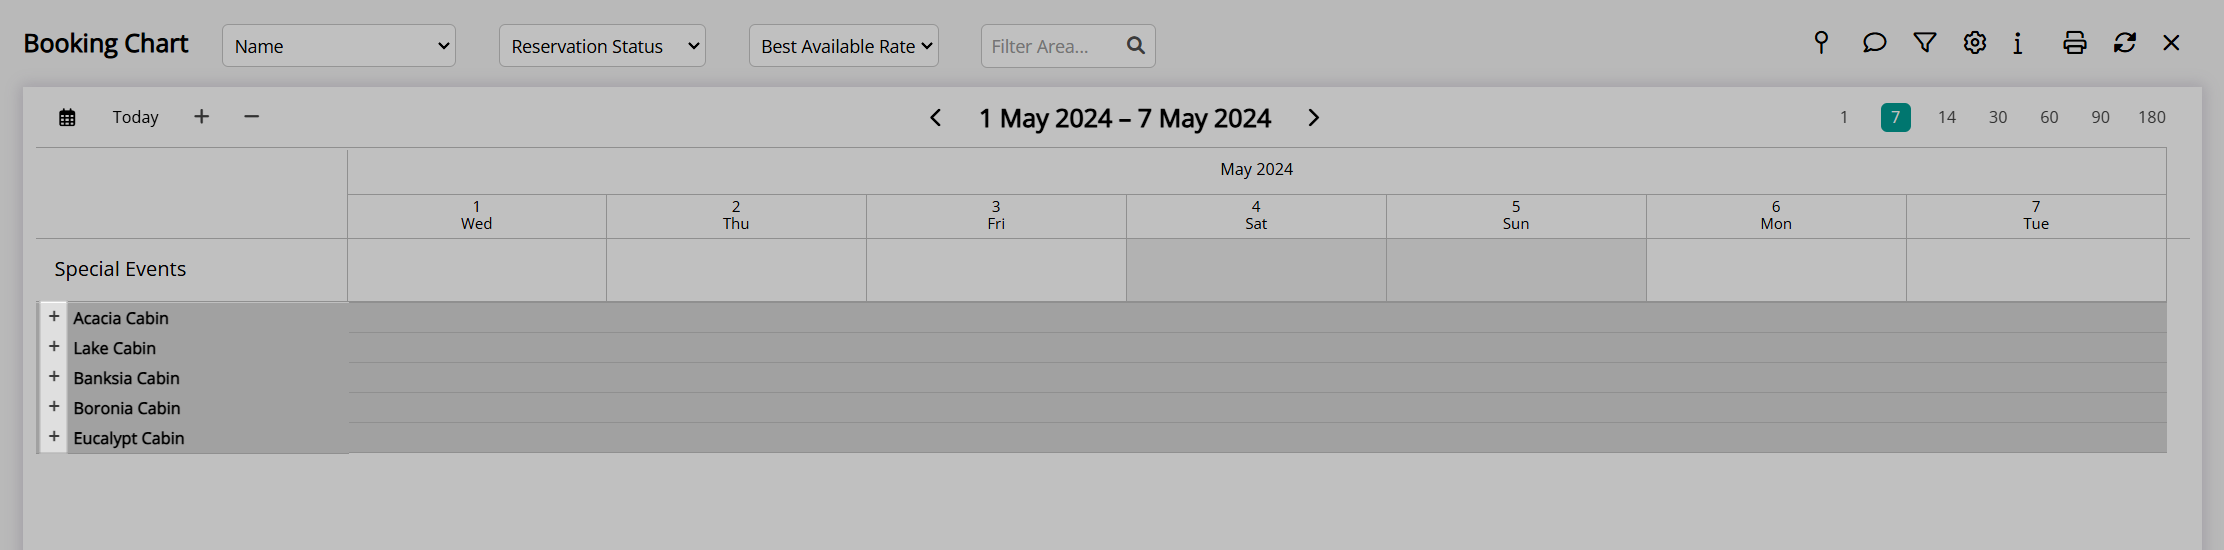
The Booking Chart is a visual representation of all reservations at the property displayed by area allocation.
Use the Booking Chart to see reservations in their areas and maximise occupancy opportunities by changing the allocated area on a reservation.
By default the Booking Chart will only show reservations already allocated to an area. The Booking Chart Option 'Show Unallocated Reservations' will add a new row on the Booking Chart to display all reservations not yet assigned to an area and can be used to allocate the reservations to available areas.
The display of the 'Unallocated Reservations' row will be determined by the other 'View By' options selected in Booking Chart Options. The 'Area by Category Display Order' options group areas by their category and will show an unallocated reservation row at the end of each category section whilst the 'Area Display Order' options display a single list of all areas using the selected display order and will only show one unallocated row.
Allocate Area
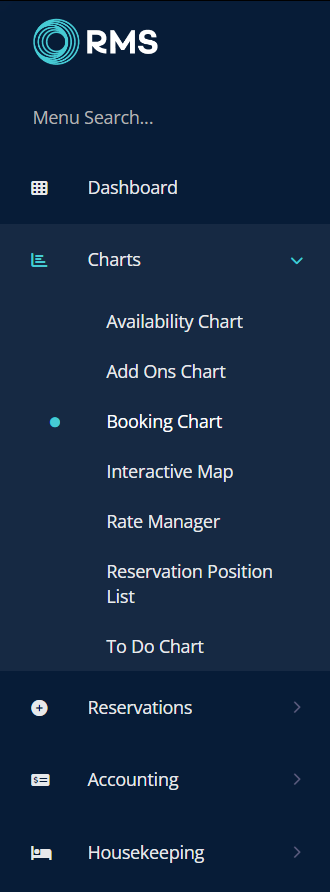
- Go to Charts > Booking Chart in the side menu of RMS.
- Select a Date.
- Expand a Category or scroll to the Unallocated Reservation Row.
- Click and drag a Reservation into an Area.
- Release the mouse button.
Go to Charts > Booking Chart in the side menu of RMS.
Select a Date.
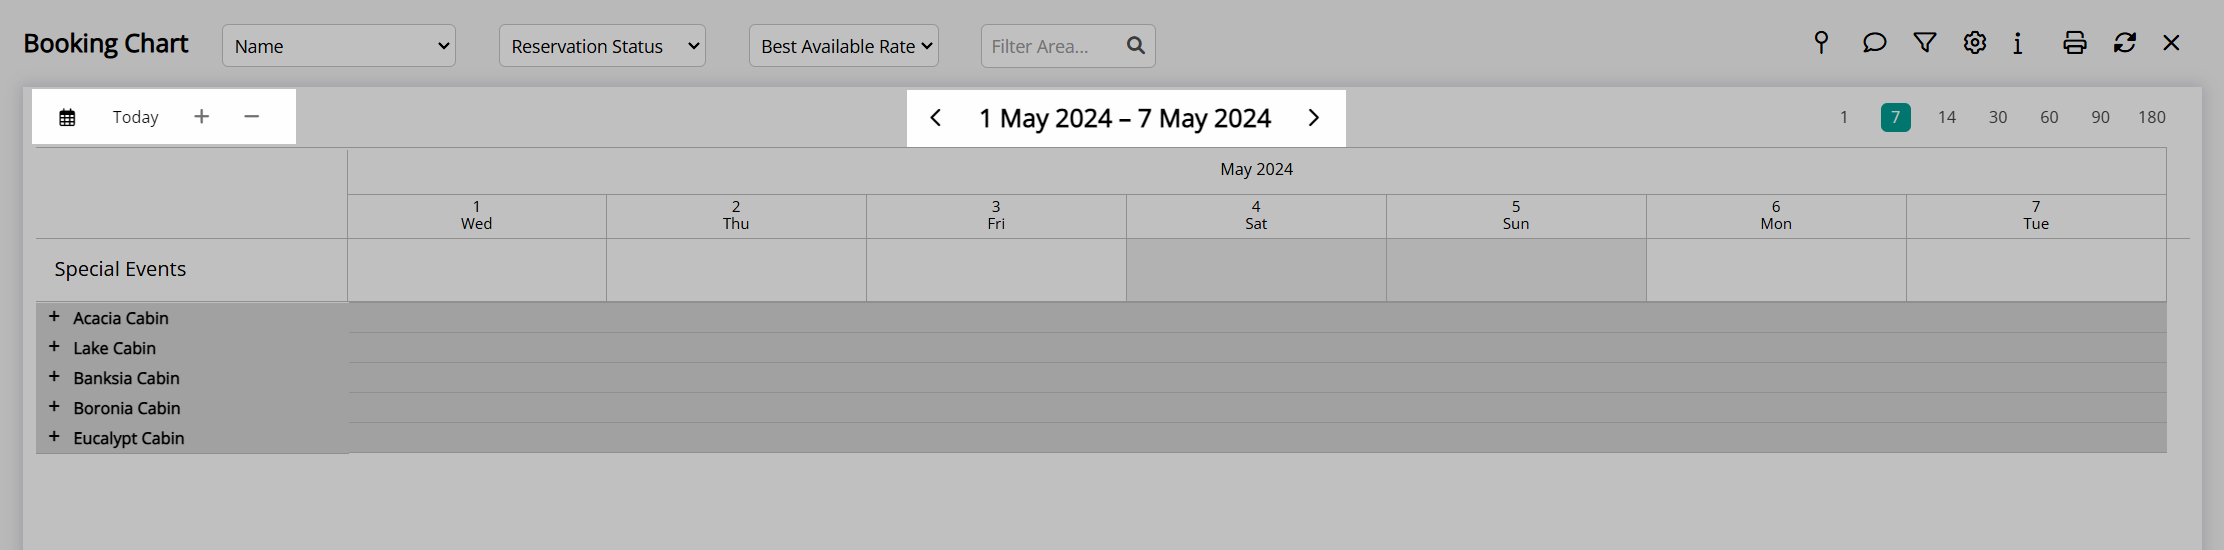
Expand a Category or scroll to the Unallocated Reservation Row.
Click and drag a reservation into an Area.

Release the mouse button to drop the reservation into the Area.

In/Out Movements Area Allocation
In/Out Movements provides a single point of management for reservations arriving, departing, or currently in-house at a property in RMS.
Contextual actions including check-in and check-out are determined by the selected view on In/Out Movements.
When using Book by Category an area can be allocated to a reservation on In/Out Movements using the 'Area' column.
Allocate Area
- Go to Reservations > In/Out Movements in the side menu of RMS.
- Select a Date Range.
- Select a View.
- Select 'No Area' in the Area Column for a Reservation.
- Select an Available Area.
- Save/Exit.
Go to Reservations > In/Out Movements in the side menu of RMS.

Select a Date Range.

Select a View.
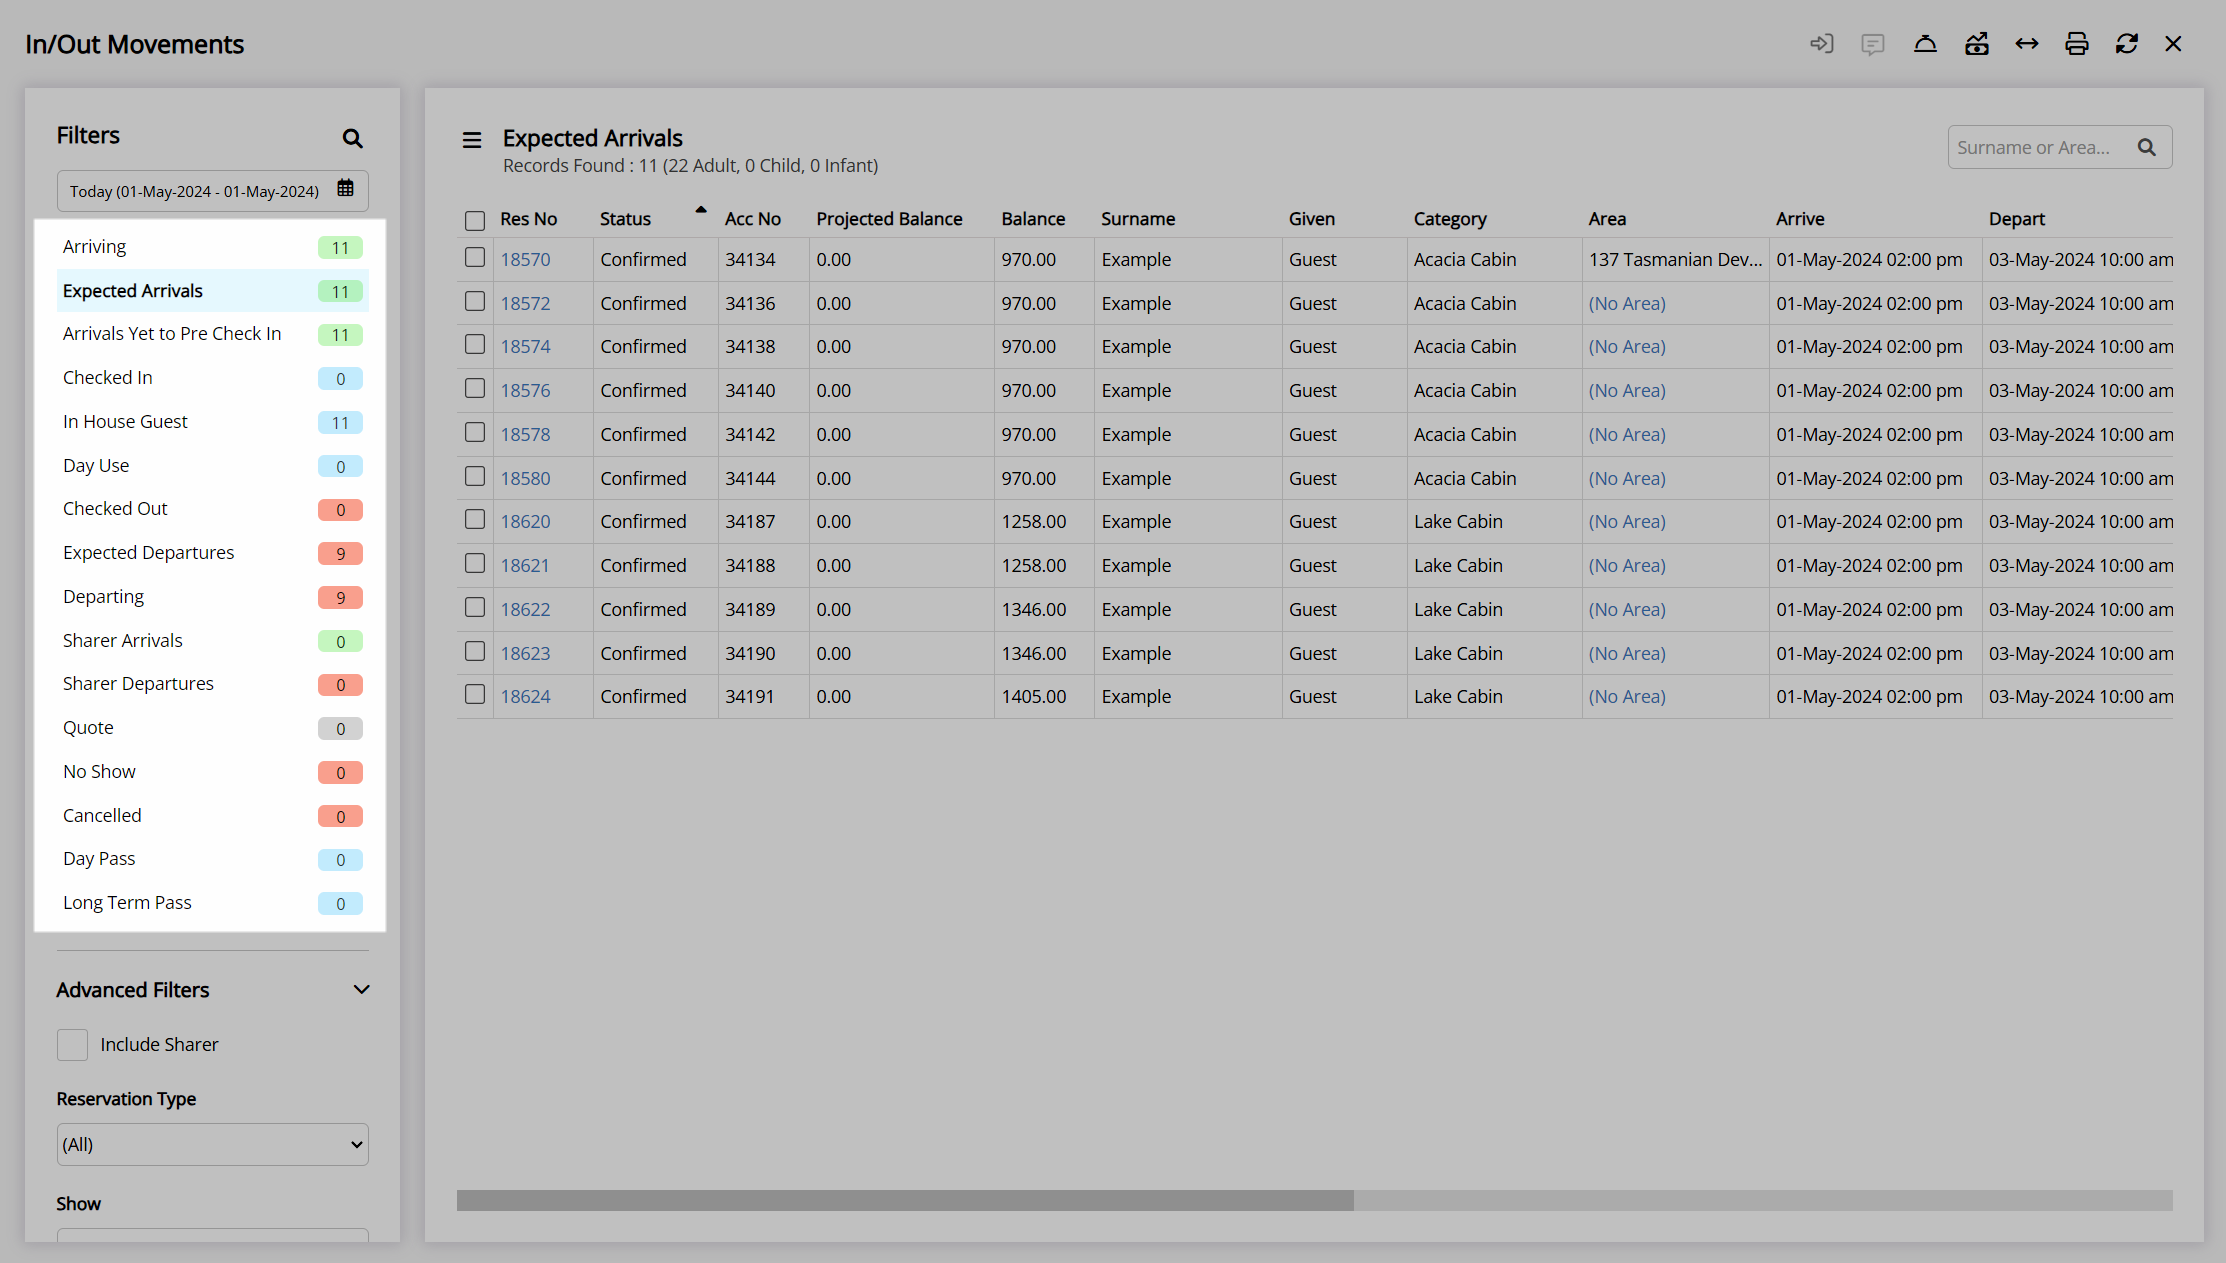
Select 'No Area' in the Area Column for a Reservation.

Select an Available Area.

Select the  'Save/Exit' icon to store the changes made and return to In/Out Movements.
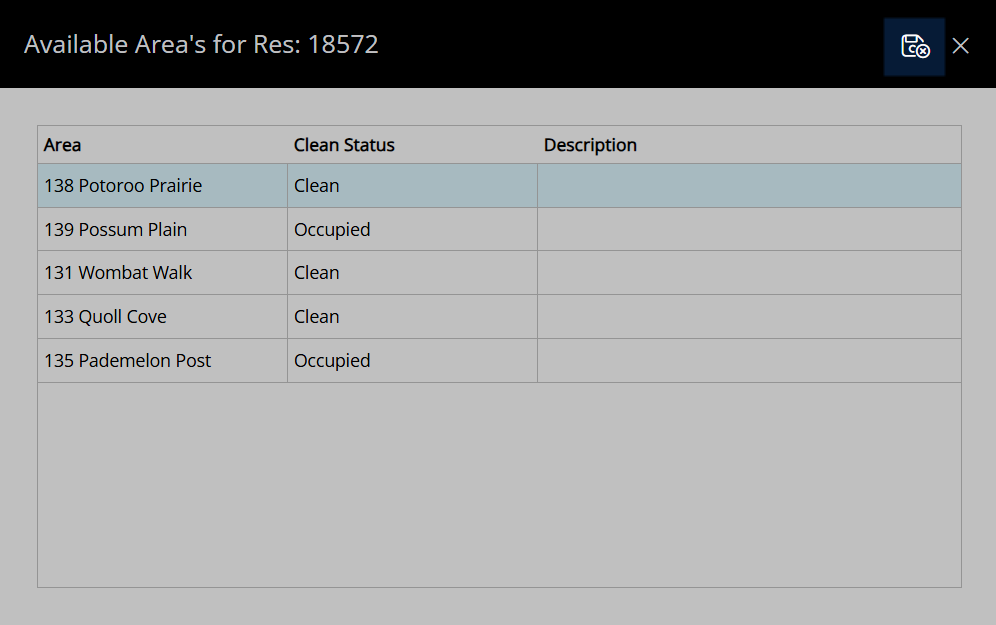
The selected area will be allocated to the reservation.

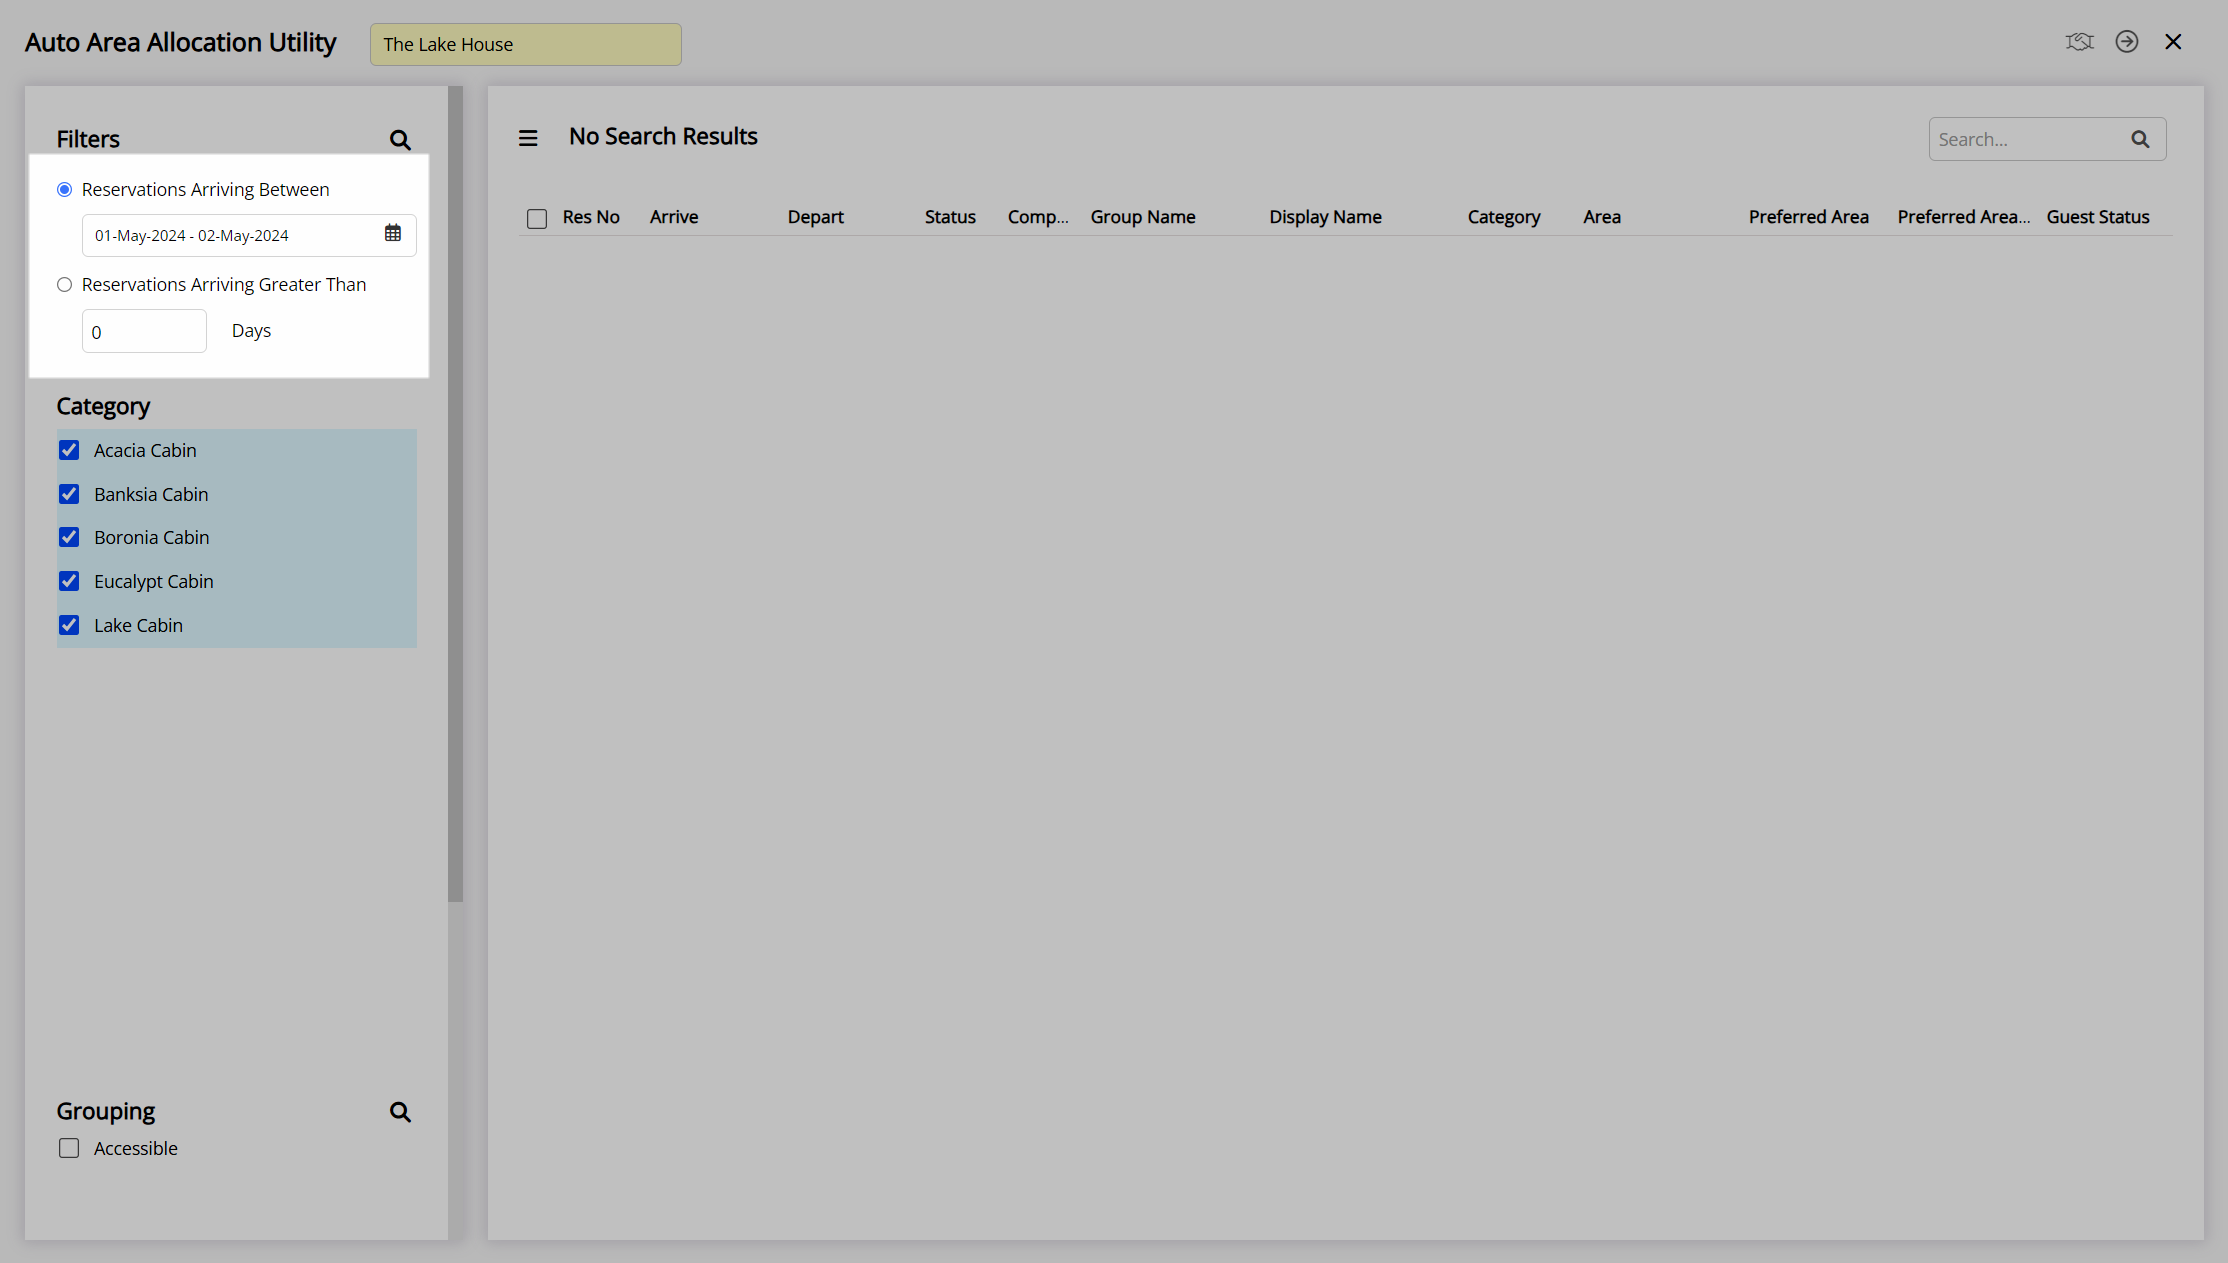
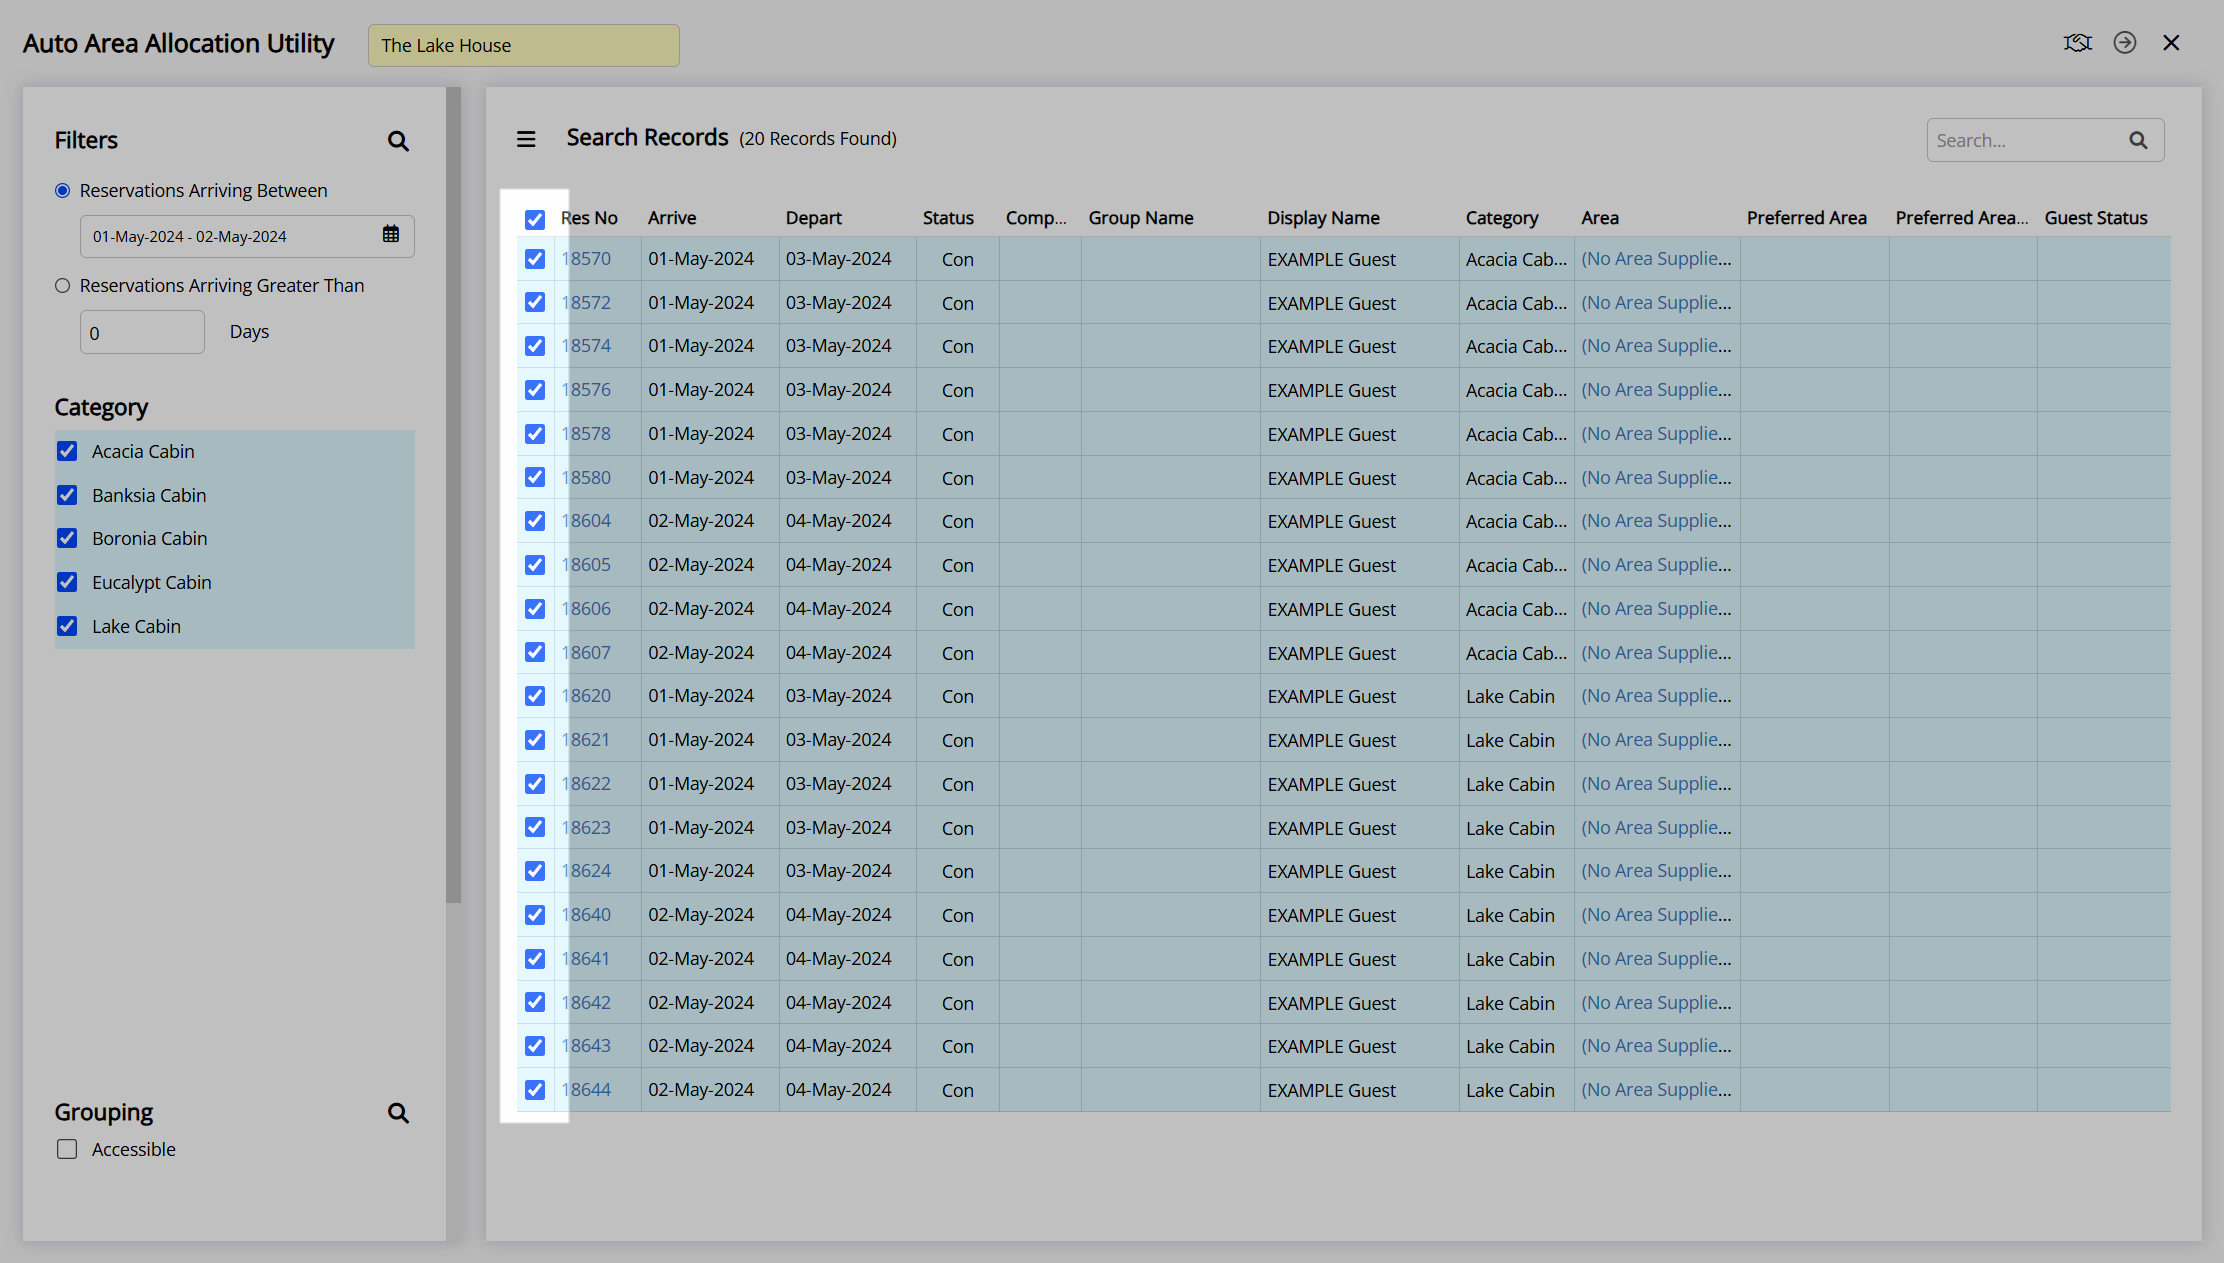
Auto Area Allocation Utility
The Auto Area Allocation utility enables assigning areas to all reservations arriving in the selected period when using Book by Category in RMS.
When using Book by Category an area can be assigned to a reservation any time from initial creation up to reservation arrival. An area must be assigned to the reservation before it can be changed to 'Arrived' status on guest check-in.
Guests with a preferred category or area can have this information saved on their Guest Profile with the option to ignore preferences when assigning areas using the Auto Area Allocation utility.
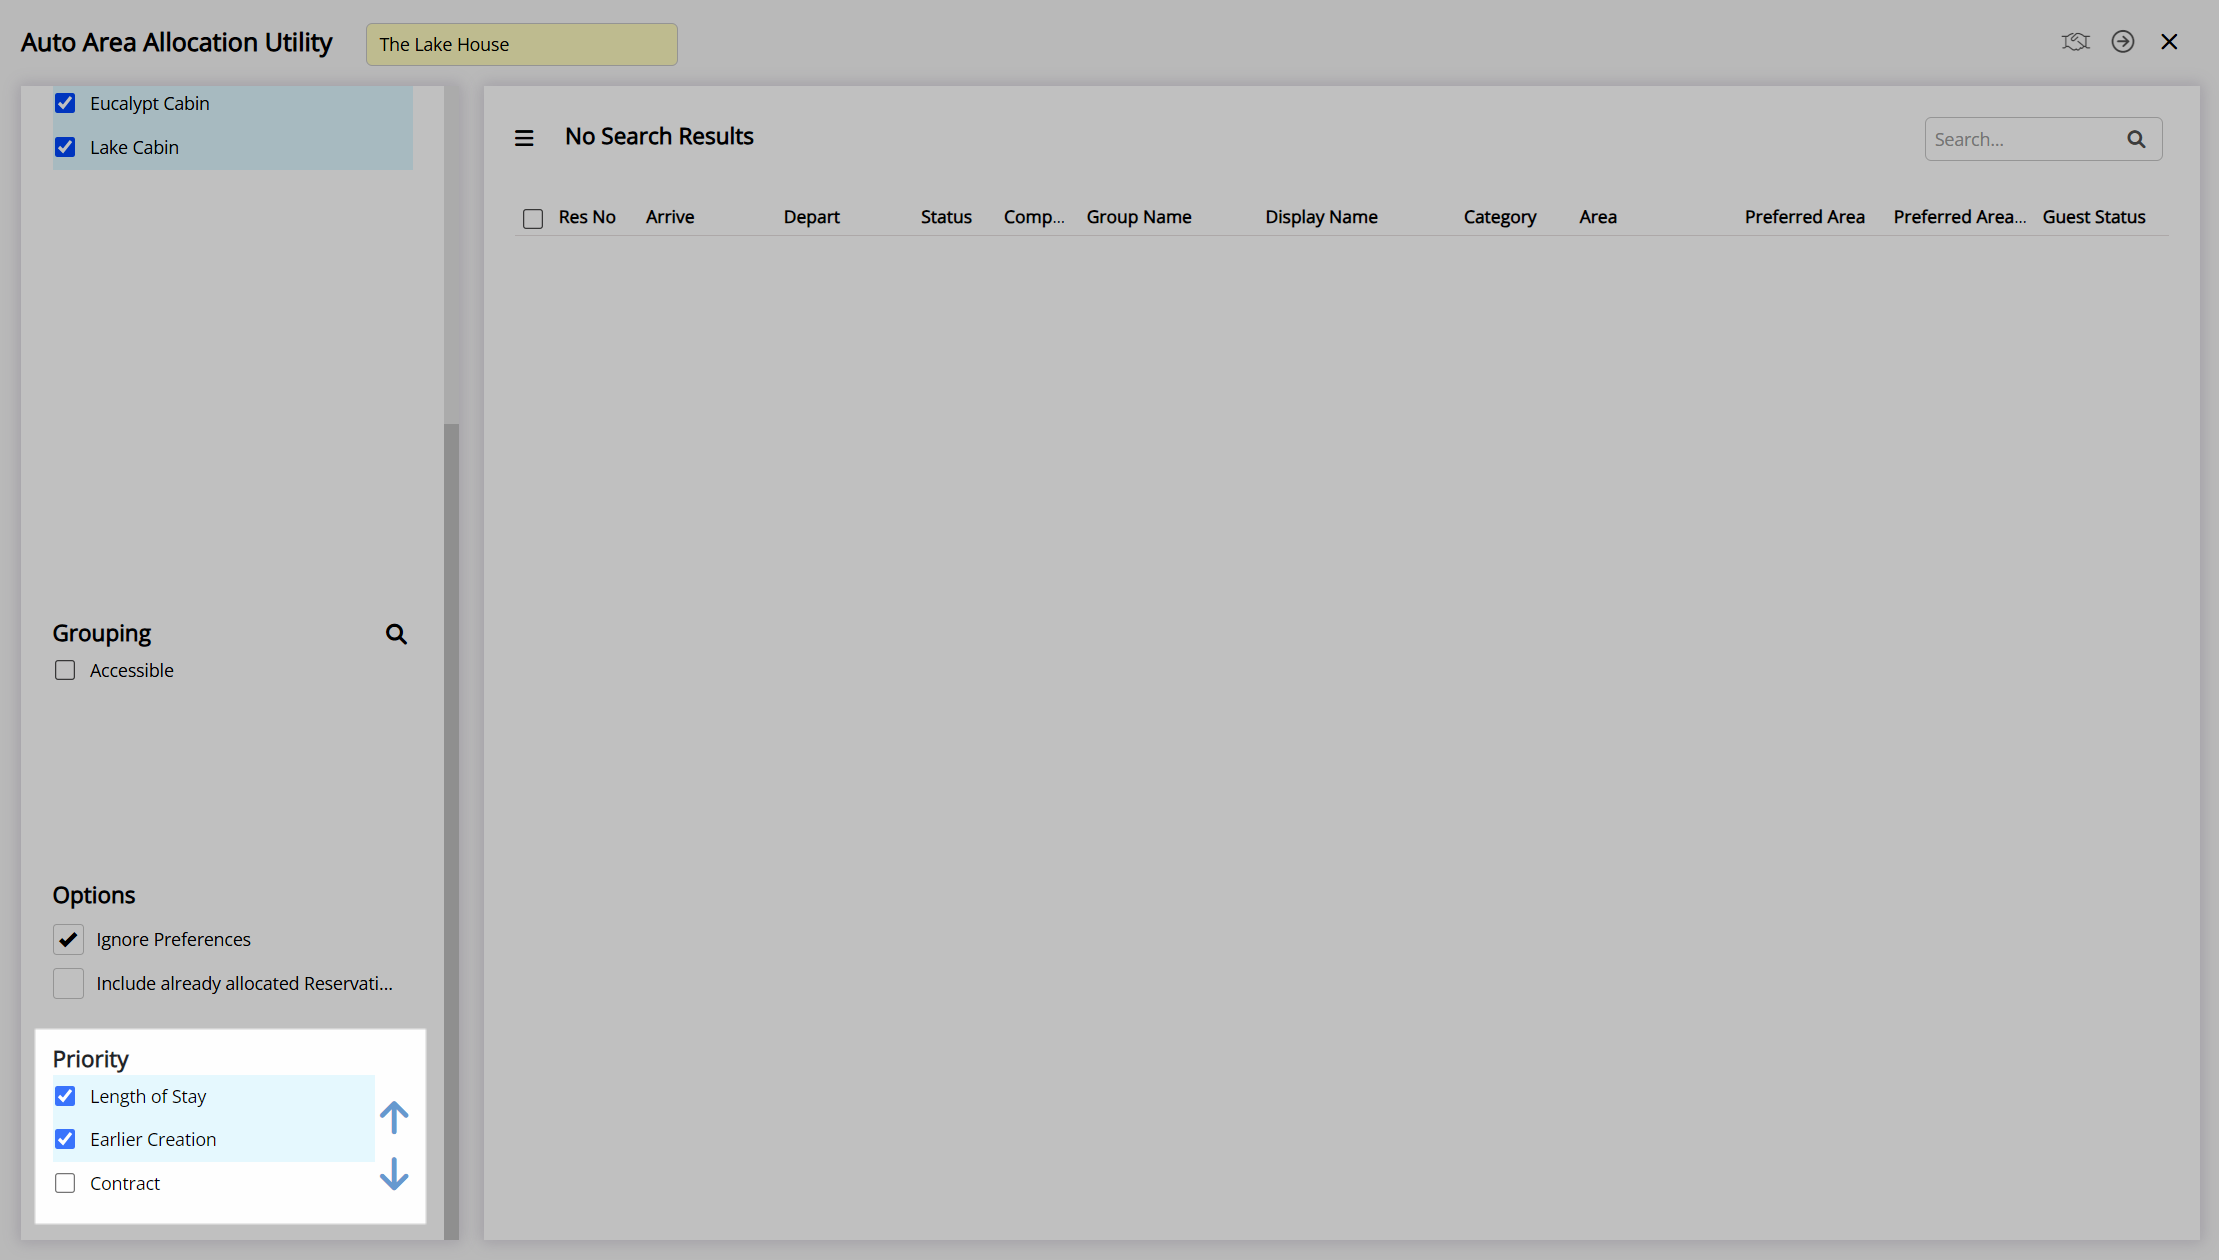
Area allocation in the utility can be set to prioritise reservations based on the reservation creation date, reservation length of stay, or owner contracts on the area. Prioritising by reservation creation date will assign areas to reservations in the order they were made in RMS, reservation length of stay will assign areas to reservations with longer stays first, and owner contracts will prioritise assigning areas with owner contracts to assist with distribution of owner income.
Multiple allocation priorities can be selected and the order set to determine which rule takes precedence when determining the priority order of reservations being assigned an area.
A category or area can be setup to be excluded from auto allocation to prevent that category or area from ever being assigned to a reservation when using the Auto Area Allocation utility. An area or category excluded from auto allocation will always require manual selection on a reservation.
An area can be manually assigned directly on an individual reservation, on the Booking Chart, or on In/Out Movements.
Allocate Areas
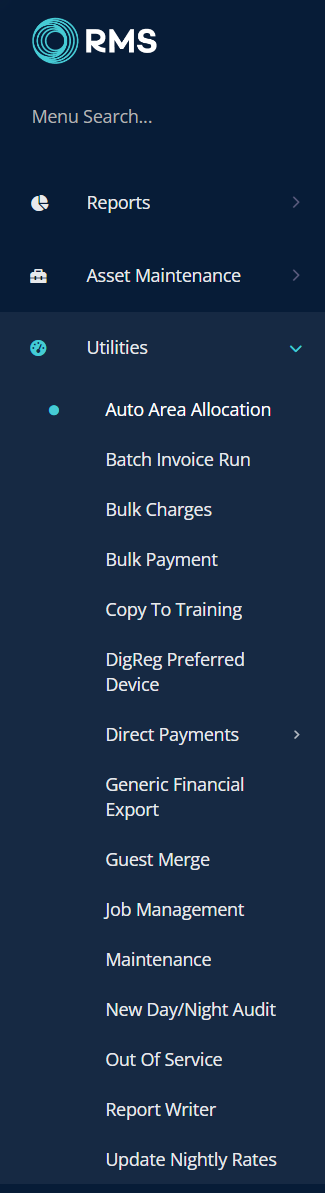
- Go to Utilities > Auto Area Allocation in the side menu of RMS.
- Select 'Reservations Arriving Between' or 'Reservations Arriving Greater Than'.
- Select the Date Range or enter the Number of Days.
- Optional: Select the checkbox for a Category.
- Optional: Select the checkbox for an Area Grouping.
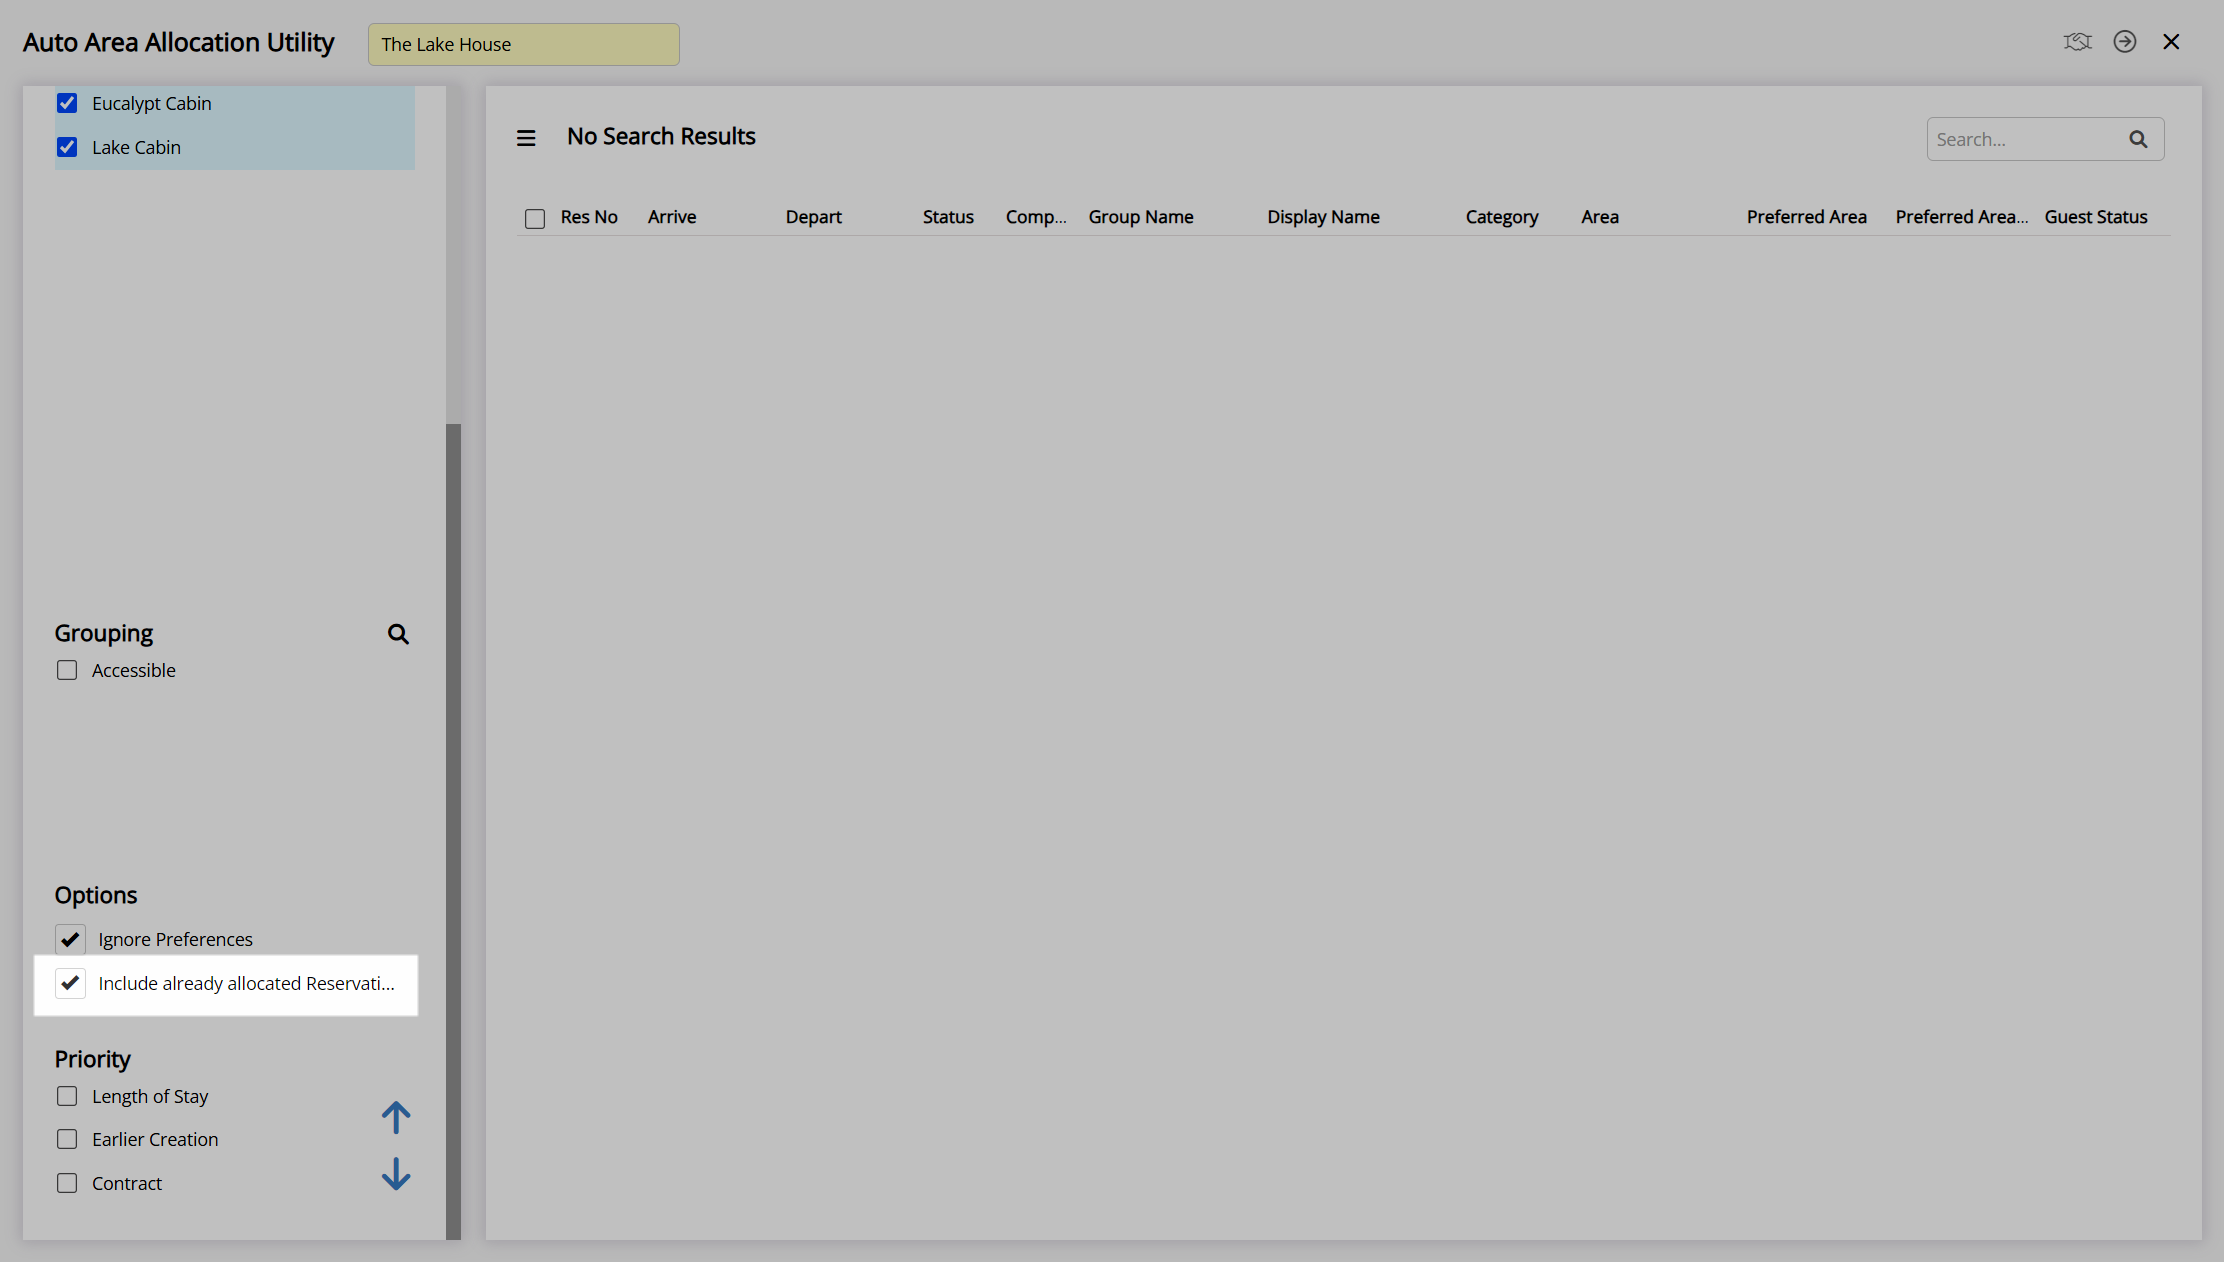
- Optional: Select the checkbox 'Ignore Preferences'.
- Optional: Select the checkbox 'Include Already Allocated Reservations'.
-
Optional: Set the Allocation Priority.
- Select the checkbox for a Priority.
- Select the
 or
or  to set the Priority Order.
- Select the
 'Search' icon.
 - Select the checkbox for a Reservation.
- Select the
 'Allocate Areas' icon.
 - Select the
 'Process' icon.
Go to Utilities > Auto Area Allocation in the side menu of RMS.
Select 'Reservations Arriving Between' or 'Reservations Arriving Greater Than'.

Select the Date Range or enter the Number of Days.
Optional: Select the checkbox for a Category.
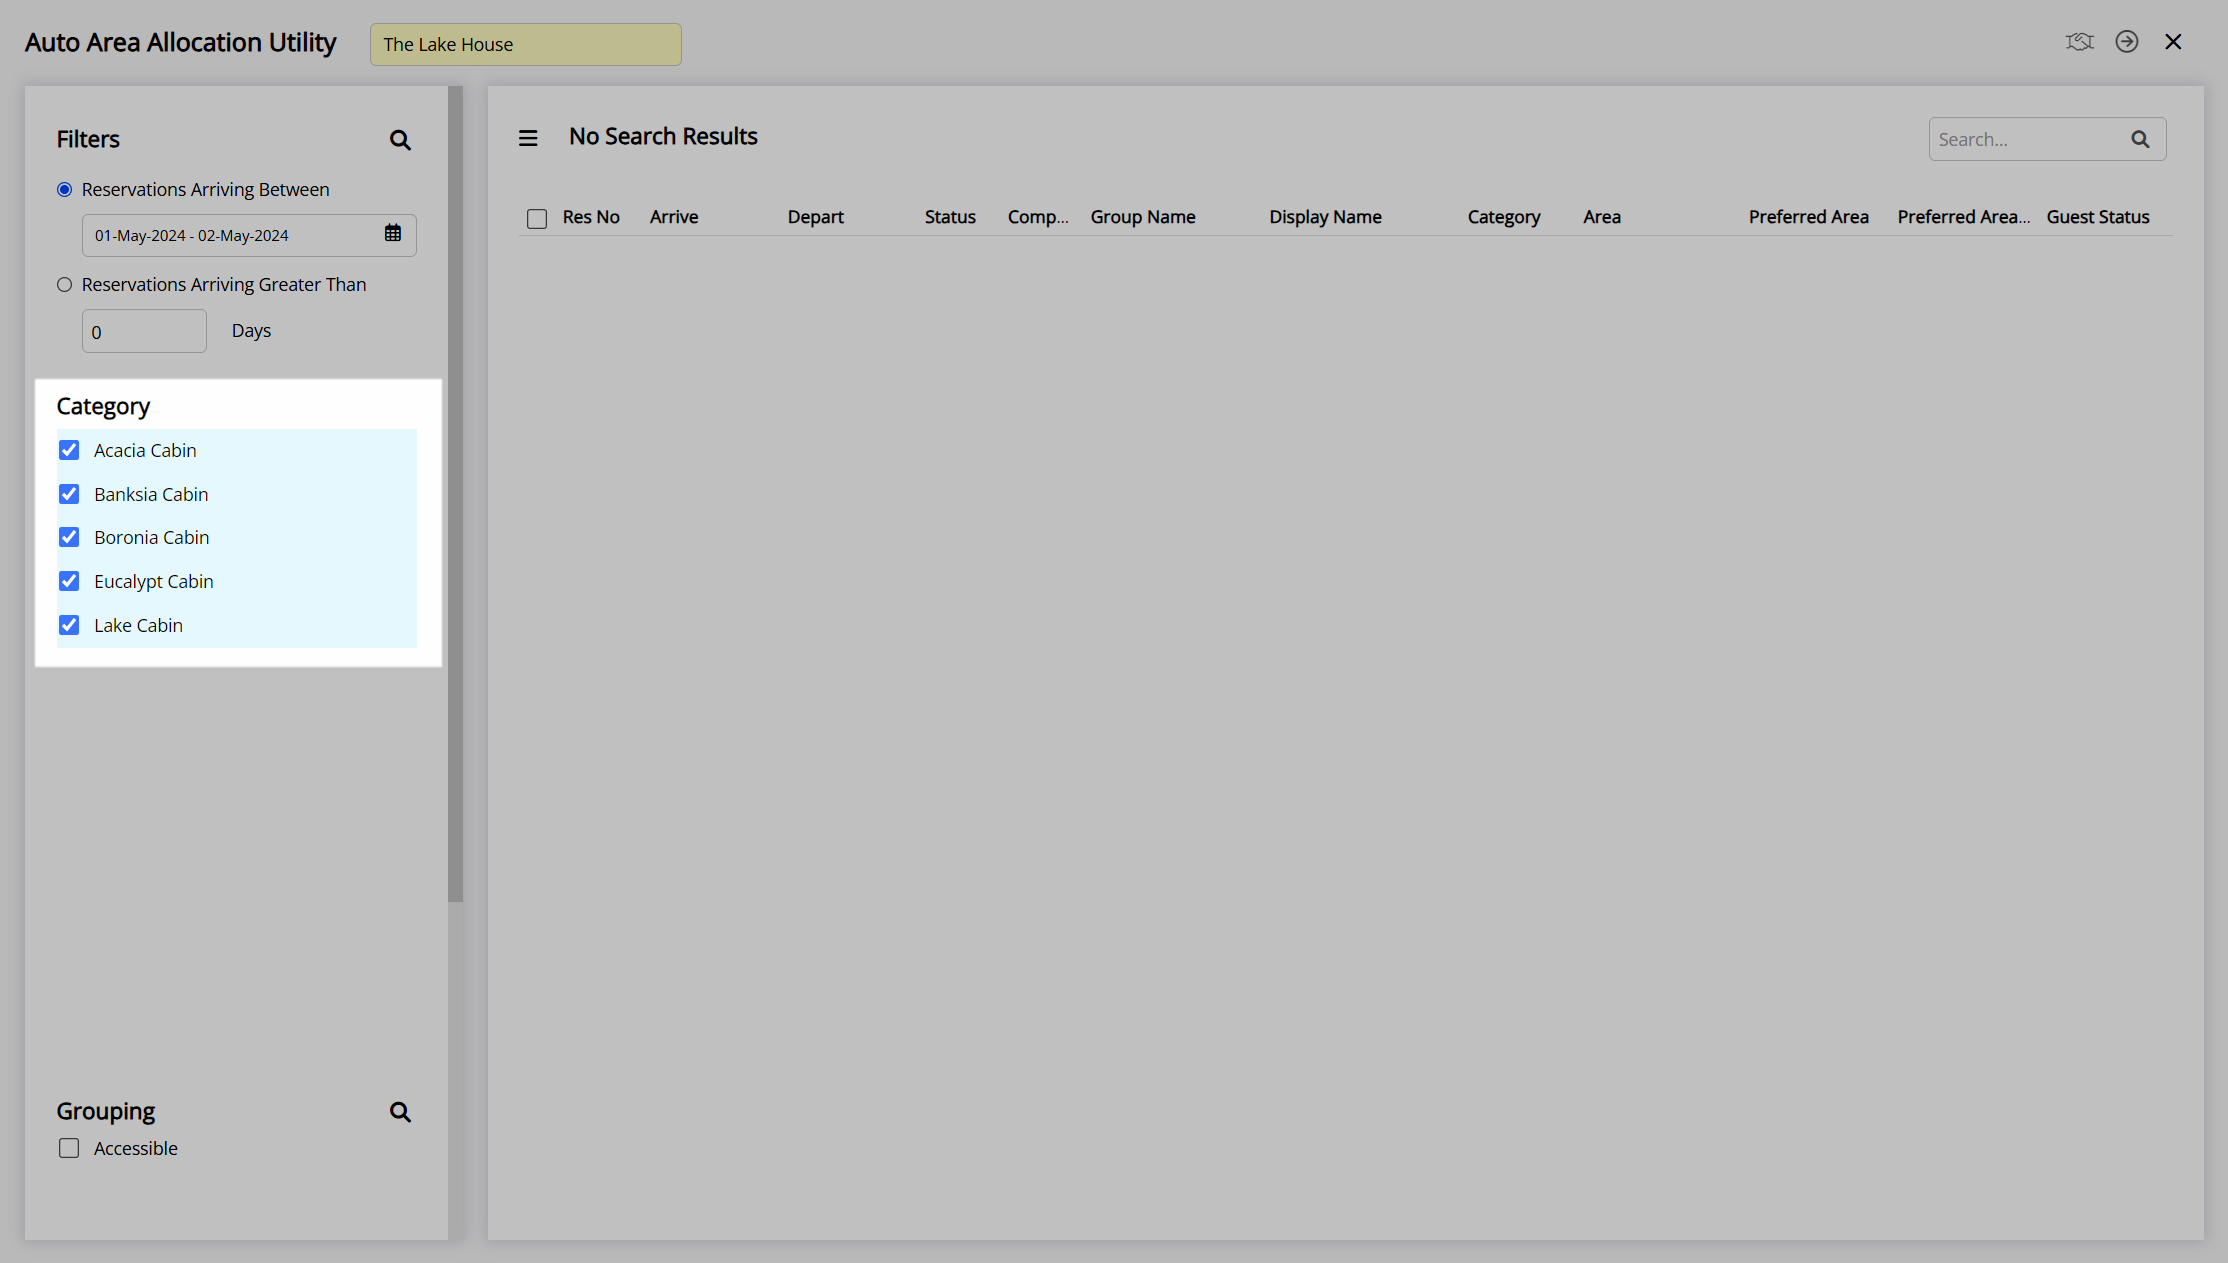
Optional: Select the checkbox for an Area Grouping.

Optional: Select the checkbox 'Ignore Preferences'.

Optional: Select the checkbox 'Include Already Allocated Reservations'.
Optional: Set the Allocation Priority.
Select the checkbox for a Priority.
Select the  or
or  to set the Priority Order.
Select the  'Search' icon.

Select the checkbox for a Reservation.
Select the  'Allocate Areas' icon.

Select the  'Process' icon to confirm allocation of areas to the selected reservations.
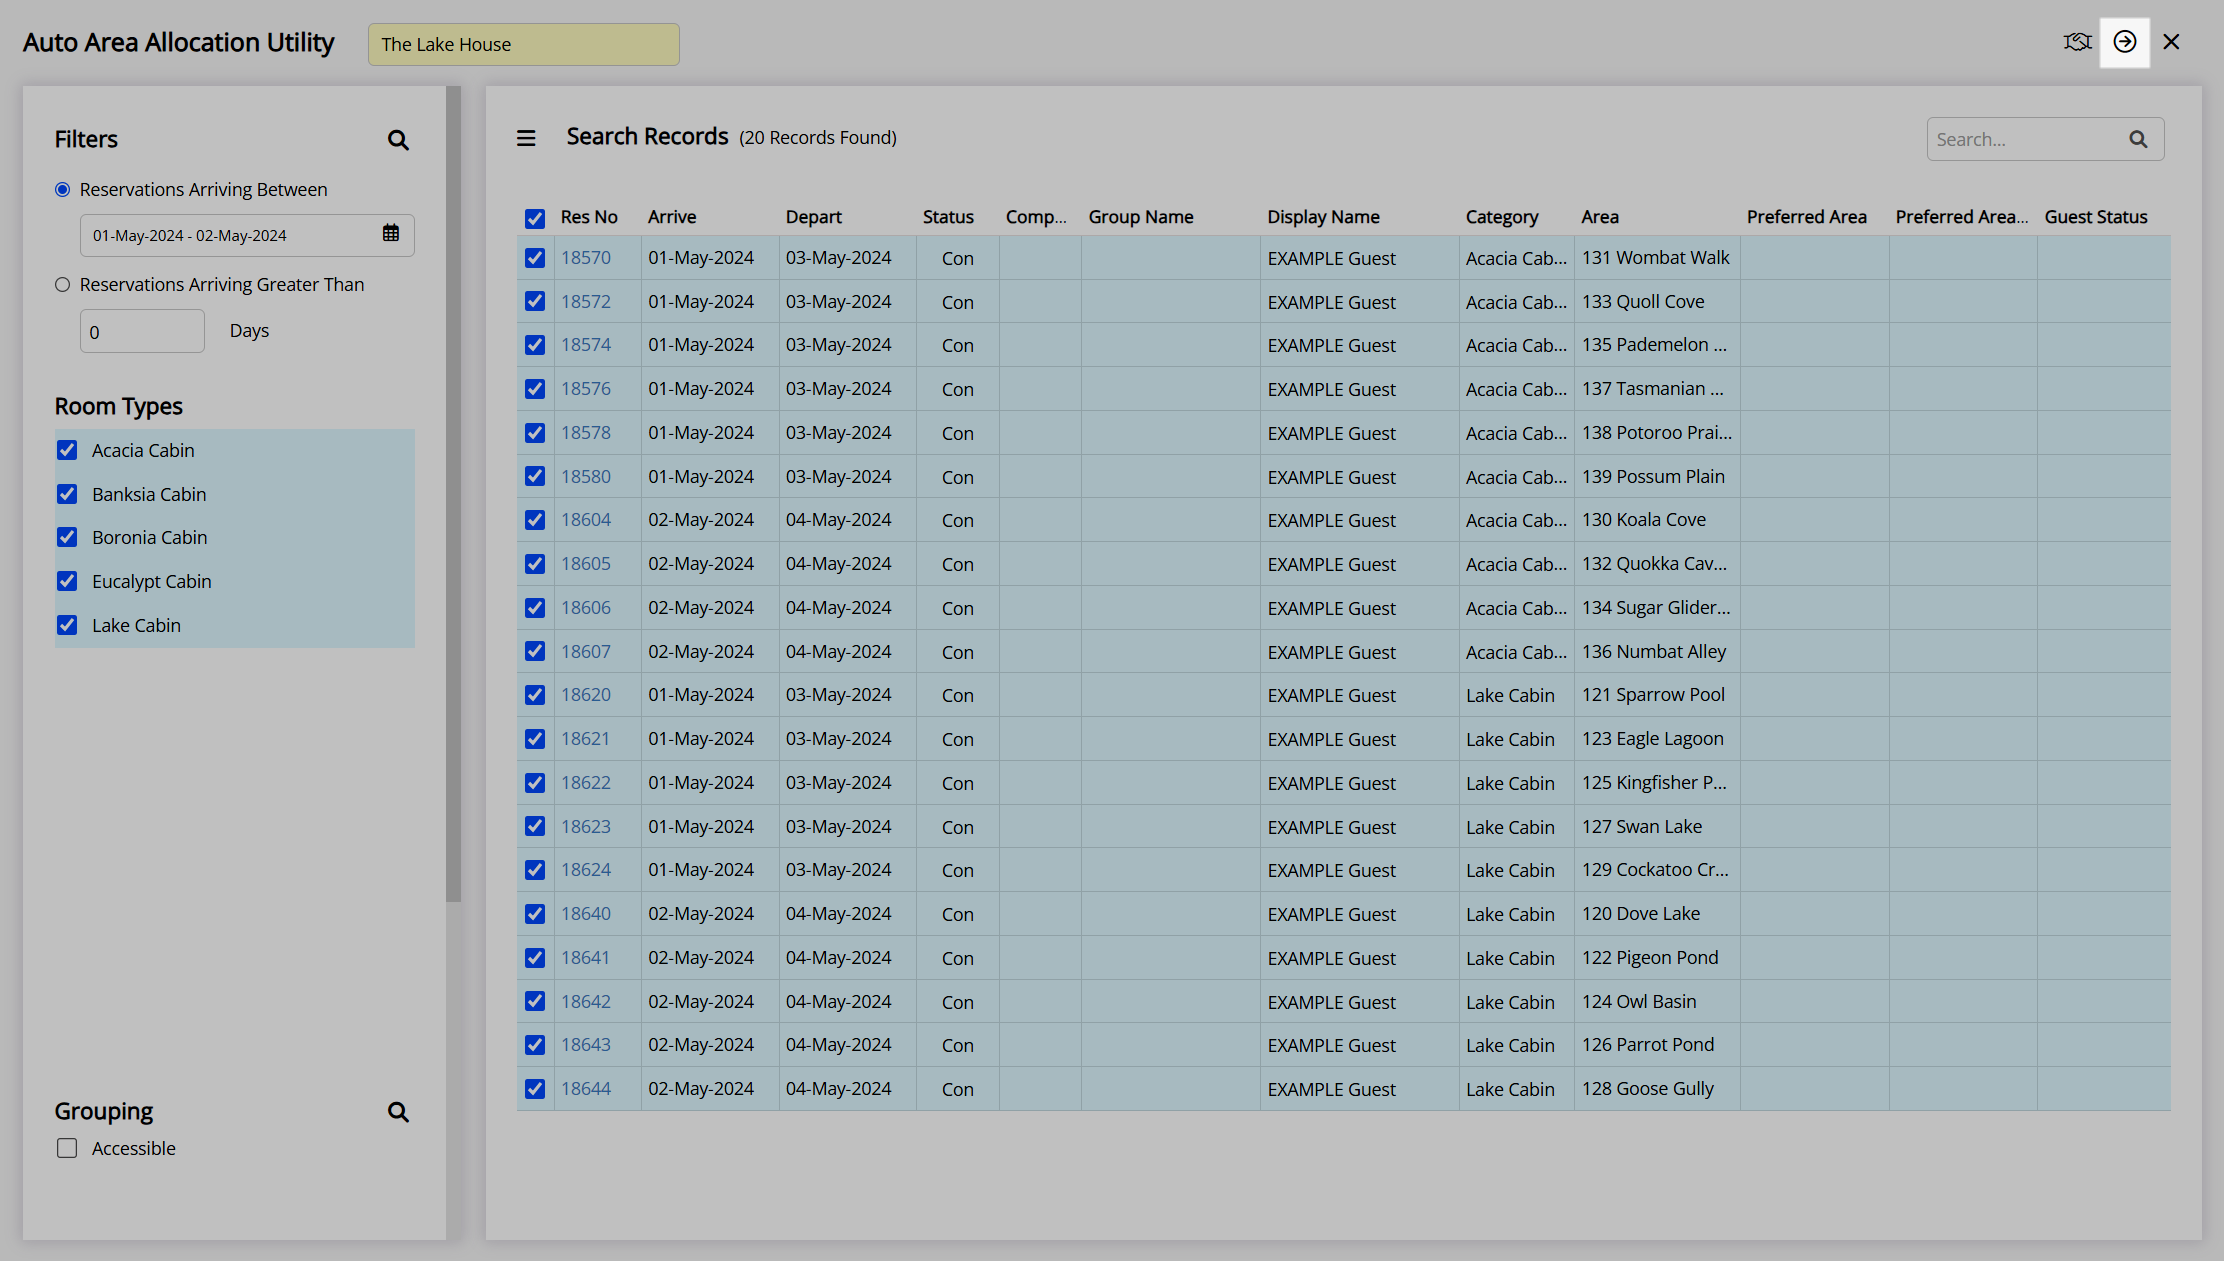
Areas will be automatically allocated to all selected reservations using the options and priorities set.

Category Overbooking
Category Overbooking is a feature that is only available when the category is setup as 'Book by Category' to enable creating more reservations in a specific category than can be physically accommodated.
Overbooking limits can be set on the category to manage the maximum number of excess reservations that can be saved in a category above the physical area count with the added option to protect against Property Overbooking.
Allowing one or more categories to be overbooked and using Property Overbooking Protection will limit the total number of reservations at the property to never exceed the total physical capacity at the property.
Only Overbooking Base Rooms
Only allowing overbooking on the entry level or standard category with the most availability and the lowest rate can improve overall property occupancy without negatively impacting the guest's experience by walking them on arrival.
Limiting overbooking to a specific category this way and not overbooking the total physical capacity of the property allows excess bookings in the standard category to be upgraded up to other room types.
By leveraging a category that may not get booked out as frequently to accommodate the excess reservations in the lower category, overall property occupancy can be improved, and revenue can be obtained for the higher room type that would have otherwise remained empty.
This method can be used if the target is to maximise occupancy without overbooking the property and works best when the change of accommodation offered to the guest is of a higher value than the originally booked category.
Use 'Allow Overbooking' on the standard category with the desired limit set and use 'Do Not Overbook Property' to limit all reservations to never exceed the total physical capacity at the property.
Offsetting Last Minute Cancellations & No Shows
The Cancellation List and Reservation Lead Time reports can be used to review trends on reservation creation, cancellation, and no shows when developing an overbooking strategy with a target of maximising occupancy or minimising revenue lost.
Based on the strategy developed each category can have an overbooking limit set with the property overbooking cap used as a safety net to prevent the total number of reservations never exceeding the physical capacity of the property.
Use 'Allow Overbooking' on each category to be included with the desired limit set. To limit the total of reservations to never exceed the physical capacity of the property use 'Do Not Overbook Property'.
Oversell Allotments can used in conjunction with the category overbooking limits to change the number of excess reservations permitted during specific periods of time.
This method can be used if the target is to minimise lost revenue at the property with or without limiting overbookings based on the physical capacity of the property.
'Do Not Overbook Property' provides an automated safety net that prevents the total number of reservations ever exceeding what can be physically accommodated at the property. When not using this option the level of overbookings and allocation of areas must be monitored and managed prior to the guest's arrival to avoid walking guests.