Control Panel
View and manage restrictions and overrides in RMS.
The Control Panel on the Rate Manager Chart enables viewing and managing restrictions and overrides for Rates and Availability.
-
Information
-
Use
- Add Button
Information
The Control Panel on the Rate Manager Chart enables viewing and managing restrictions and overrides for Rates and Availability.
The 'Add Restriction' wizard guides through each step of creating a new restriction in the Control Panel.
Existing restrictions can be edited, copied or deleted by selecting the checkbox for a Restriction or Override and selecting the ![]() 'Edit',
'Edit',  'Copy' or
  'Delete' icon.
RMS will use the newest record when more than one exists for the same date and Restriction Type.
Restriction Types
The following restrictions and overrides are available in the Control Panel.| Restriction | Description |
|---|---|
| Allotments | Allocate inventory available to a connected channel for selected Rate Types. |
| Any Day Within Stay (Soft Close) |
A Length of Stay Restriction that determines the minimum reservation period using all reservation stay dates.
Reservations with a stay date that falls within a Soft Close period will have the longest length of stay restriction applied.
|
| Booking Window | Booking Window is a Window of Time (Booking Period) that a Rate will be available for sale. |
| Close Rate | Close Rate prevents use of the selected Rate Type without closing availability of the Category for House Use reservations. |
| Closed to Arrival | Closed to Arrival allows reservations to stay in house or depart on the selected dates without allowing arrivals on that date. |
| Closed to Departure | Closed to Departure allows reservations to arrive or stay in house on the selected dates without allowing departure on that date. |
| Deposit Policy | Set an alternate deposit policy to any Online Deposit or Rate Deposit. |
| Last Area Value | Set the minimum value (hurdle rate) that the Rate Amount can be set to for the last available Area in the Category. The value entered will be used as a benchmark value preventing the Rate Type from being available if the Rate Amount would be lower than the value entered. |
| Last Area Value Yield Adjustment | The Yield Adjustment Value will be used in conjunction with the Last Area Value set to calculate the Rate Amount for Rate Types that include Commissions or Packages. The adjustment amount can be used to balance any package or commission component that would otherwise cause the Rate Amount to fall below the benchmark set as the Last Area Value. |
| Max Property Oversell | Set the maximum amount of inventory above physical inventory at the property that can be sold. This limit will restrict the total number of reservations above physical inventory and overrides any Oversell Allotment set on a Category. |
| On Arrival Day Only (MLOS) | Set a Length of Stay Restriction determined by the reservation's arrival date. |
| Oversell Allotment | Set a value of inventory above the physical inventory in a Category that can be sold. |
| Rate Adjustment | Set a percentage or flat amount value to be added or subtracted from the calculated Base Rate Amount. |
| Rate Override | Set a new Base Rate Amount for the selected Rate Type. |
| Sale | Set a spotlight on the selected dates for the RMS Internet Booking Engine Rate Grid to highlight a special rate or deal. |
| Set Daily BAR | Set the Best Available Rate Type to be used for a date range when using Multiple Best Available Rates. |
| Stop Sell | Close availability for the selected Category and Rate Type. |
Clear Restrictions
The following options can be used to cancel multiple restrictions or overrides.
| Option | Description |
|---|---|
| Clear Close Rate | Cancels the Close Rate set for the same date range without removing the record from the Control Panel. |
| Clear Closed to Arrival | Cancels the Closed to Arrival set for the same date range without removing the record from the Control Panel. |
| Clear Closed to Departure | Cancels the Closed to Departure set for the same date range without removing the record from the Control Panel. |
| Clear MLOS | Cancels the Minimum Nights set for the same date range without removing the record from the Control Panel. |
| Clear Soft Close | Cancels the Soft Close set for the same date range without removing the record from the Control Panel. |
| Clear Stop Sell | Cancels the Stop Sell set for the same date range without removing the record from the Control Panel. |
-
Use
- Add Button
Use
The Control Panel can be used to Add, Edit, Copy or Delete a restriction or override.
To create a new restriction or override, select the 'Add Restriction' below.
To view existing restrictions or overrides and Edit, Copy or Delete, select 'Search' below.
-
Add Restriction
-
Search
- Add Button
Add Restriction
- Go to Charts > Rate Manager in the Side Menu of RMS.
- Select the
 'Control Panel' icon.
 - Select the
 'Add' icon.
 - Select a Restriction Type and choose the
 'Next' icon.
 - Select the Date Range or select the checkbox 'Set Permanently'.
- Select the checkbox for the Days of the Week.
- Select and enter the Restriction Type Options then choose the
 'Next' icon.
 - Select a Category Grouping or select the checkbox for a Property and/or Category then choose the
 'Next' icon.
 - Select the checkbox for a Rate Type and choose the
 'Save/Exit' icon.
-
Guide
- Add Button
Guide
Go to Charts > Rate Manager in the Side Menu of RMS.
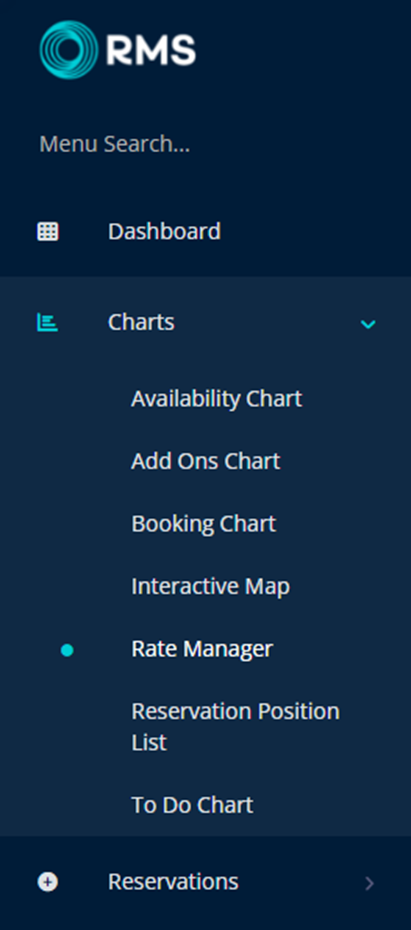
Select the ![]() 'Control Panel' icon.
'Control Panel' icon.
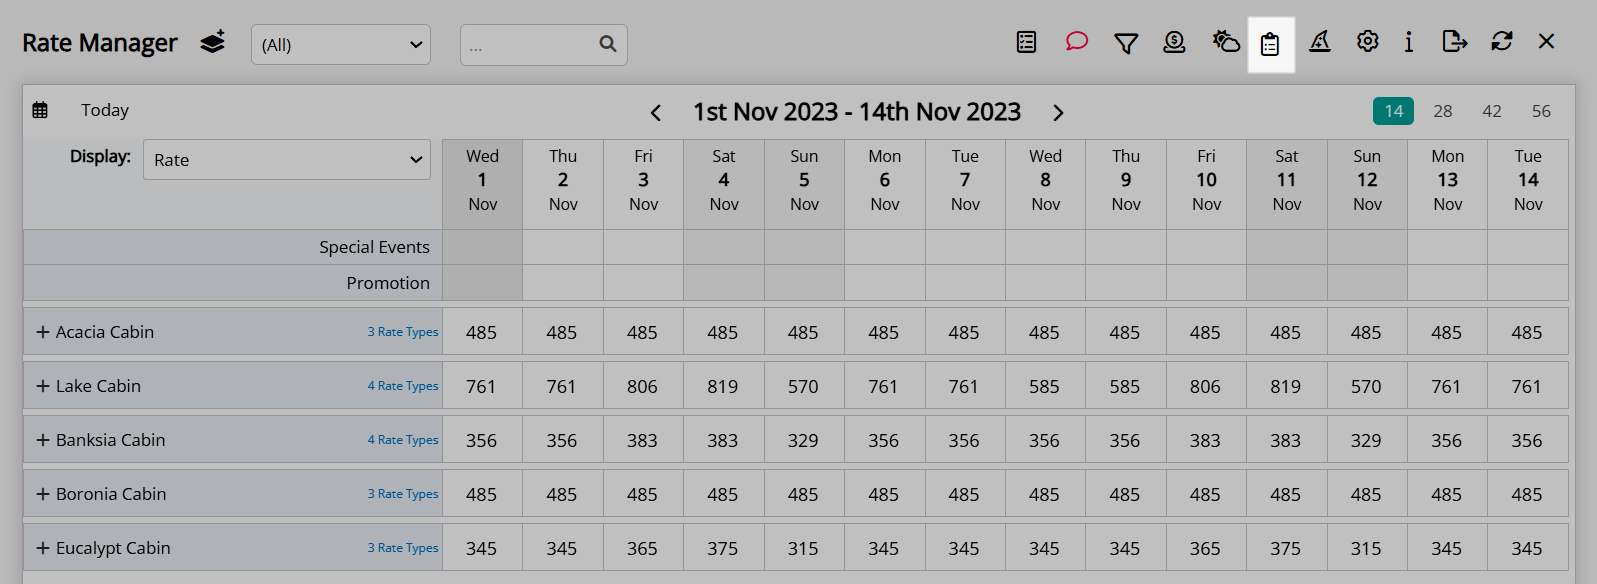
Select the  'Add' icon.
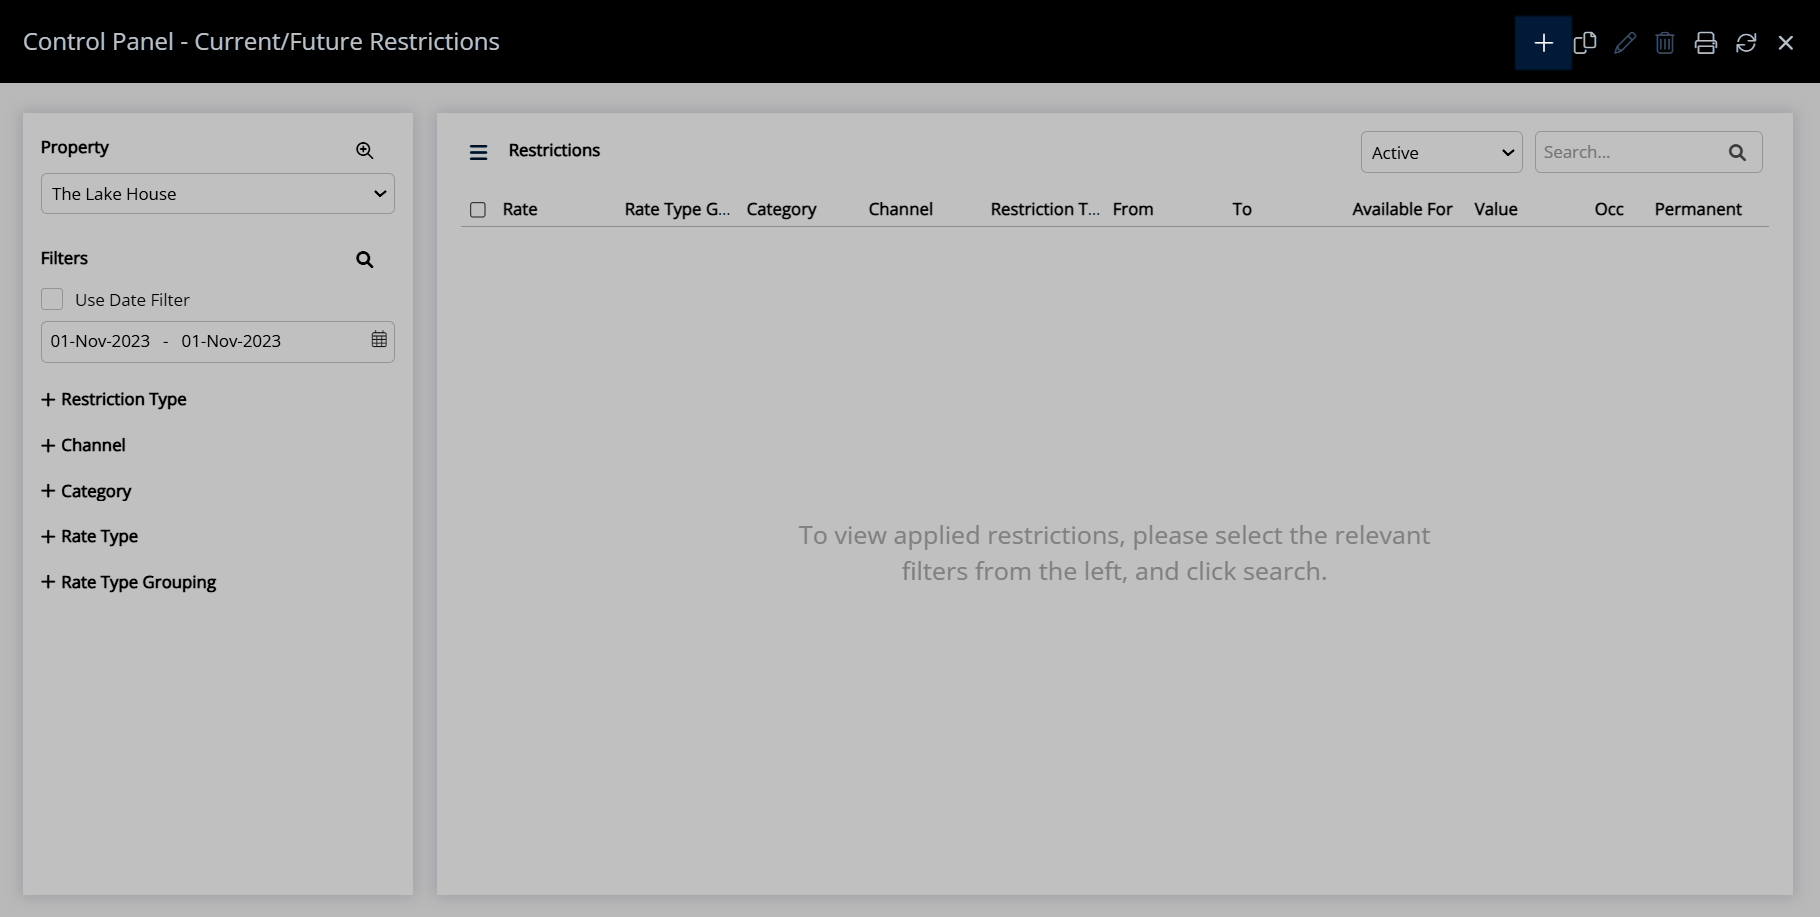
Select a Restriction Type and choose the  'Next' icon.
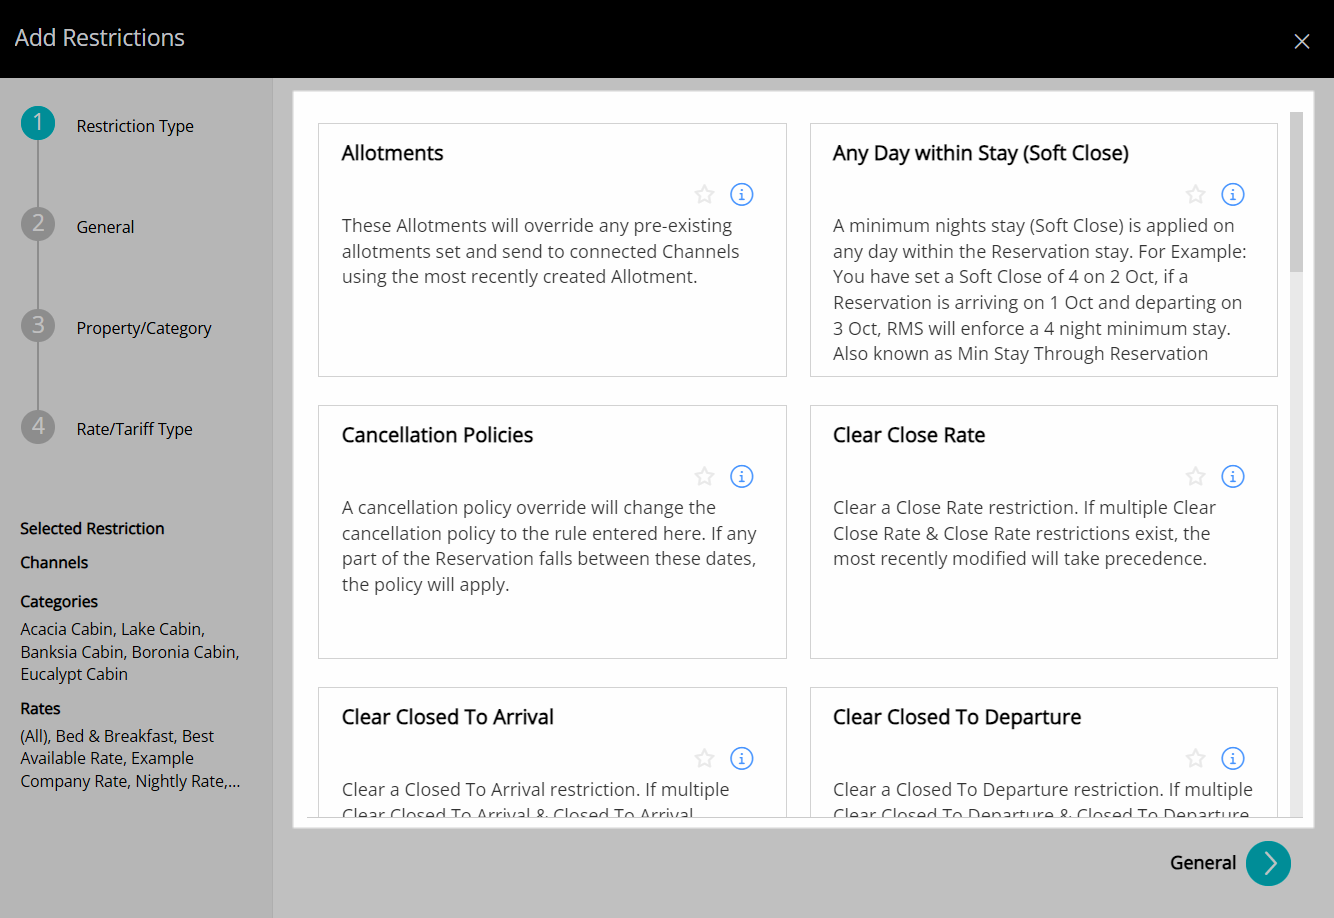
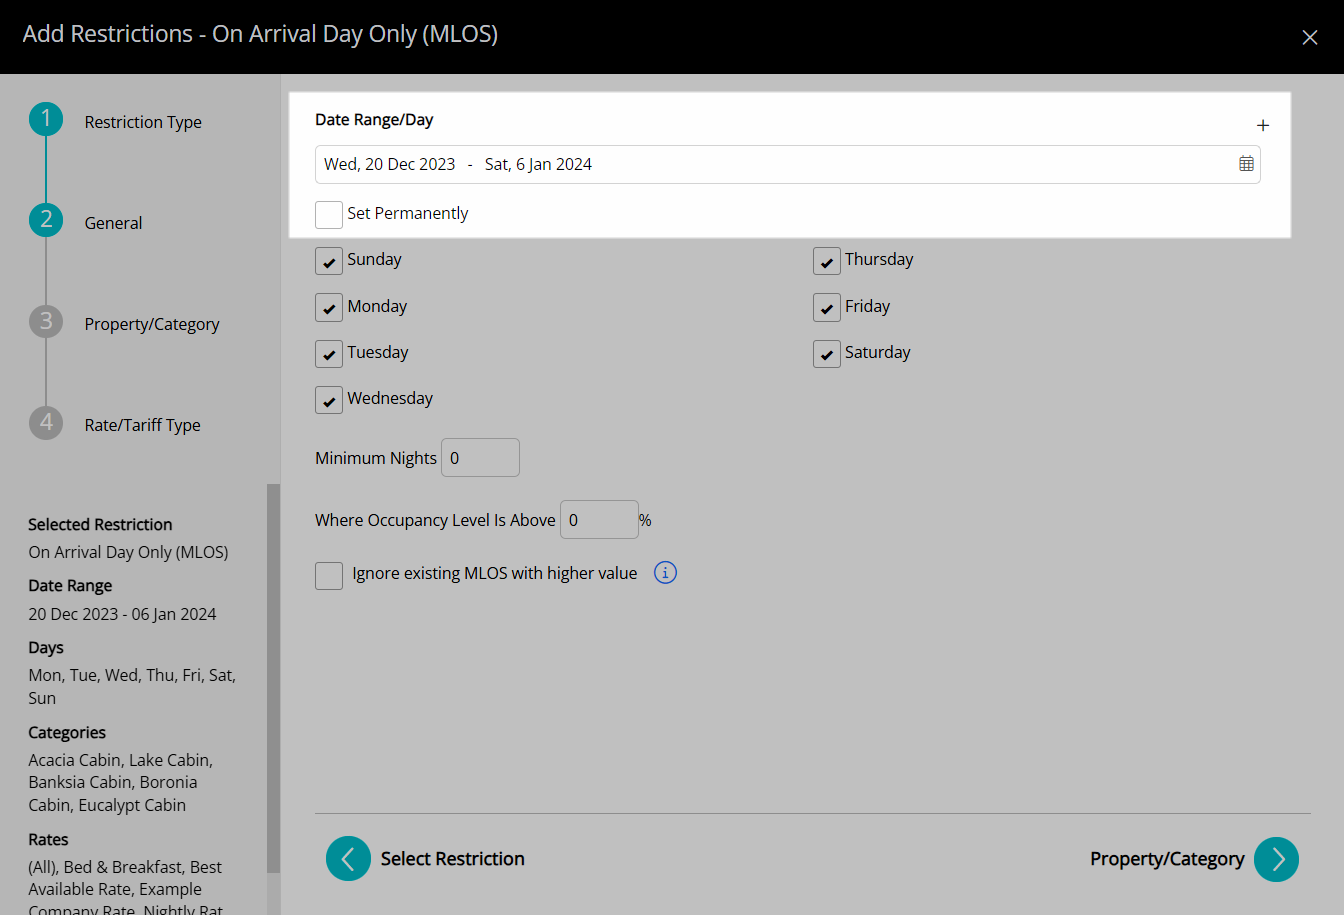
Select the Date Range or select the checkbox 'Set Permanently'.
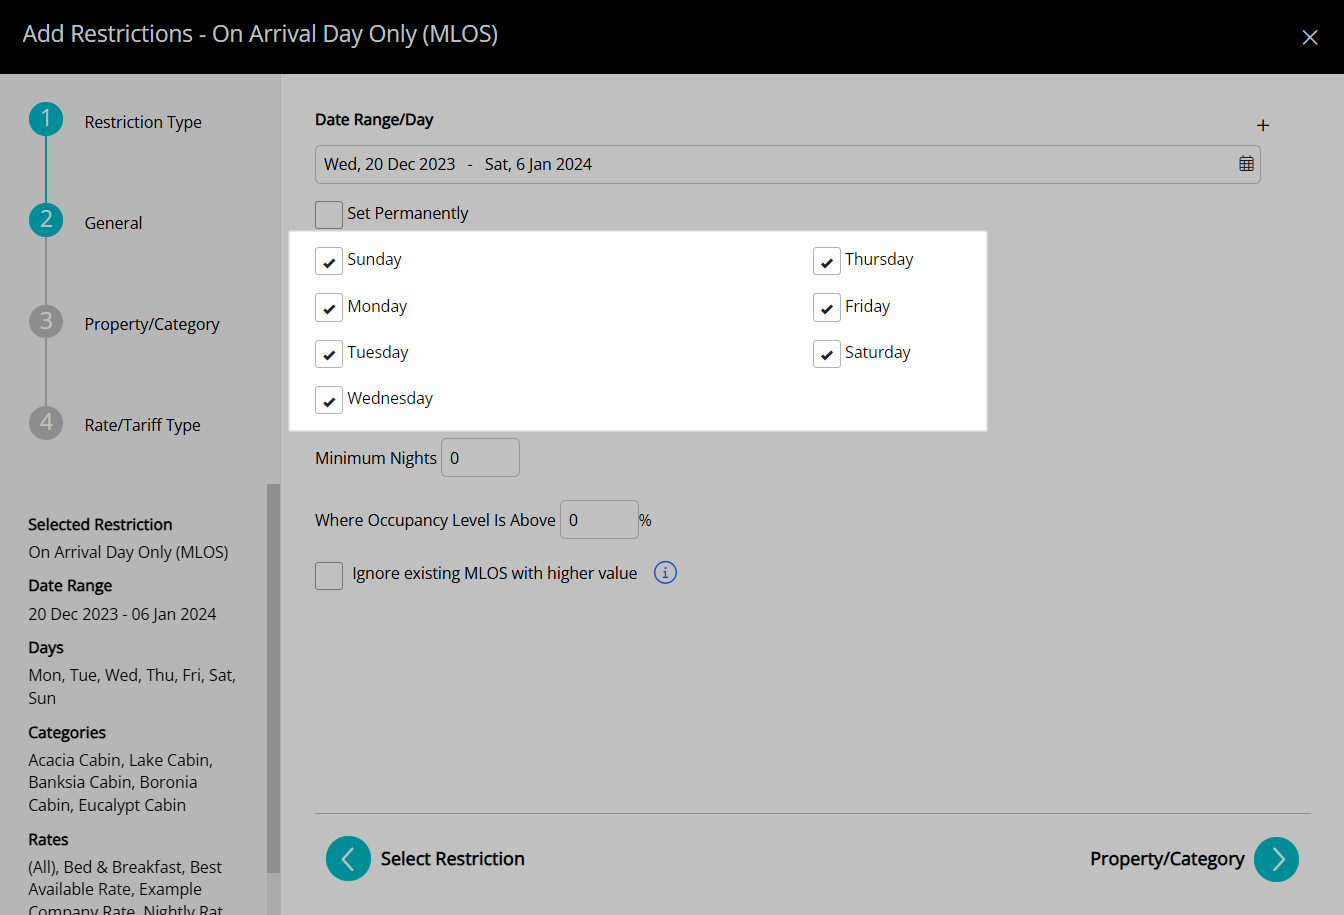
Select the checkbox for the Days of the Week.
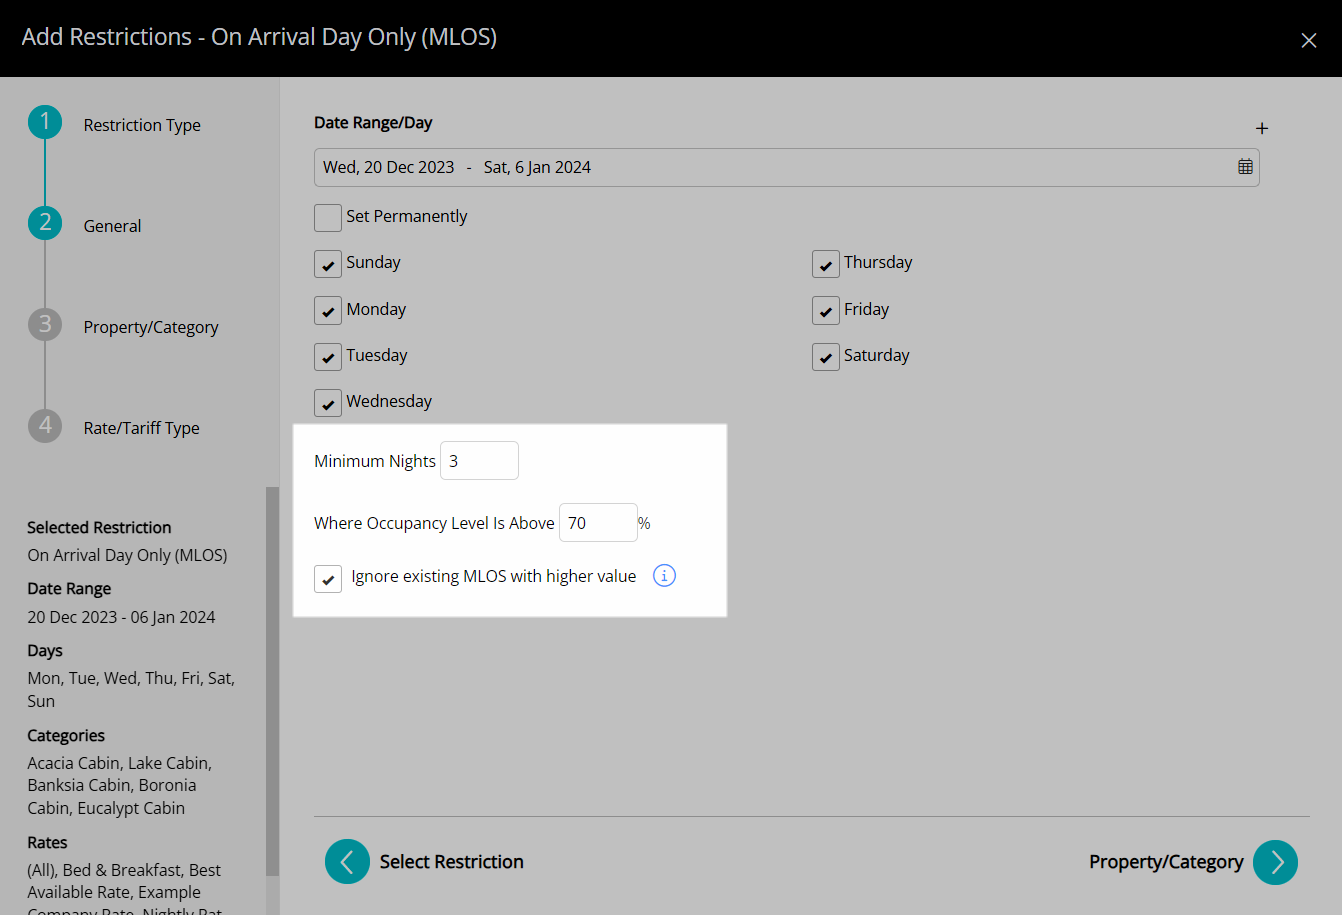
Select and enter the Restriction Type Options then choose the  'Next' icon.
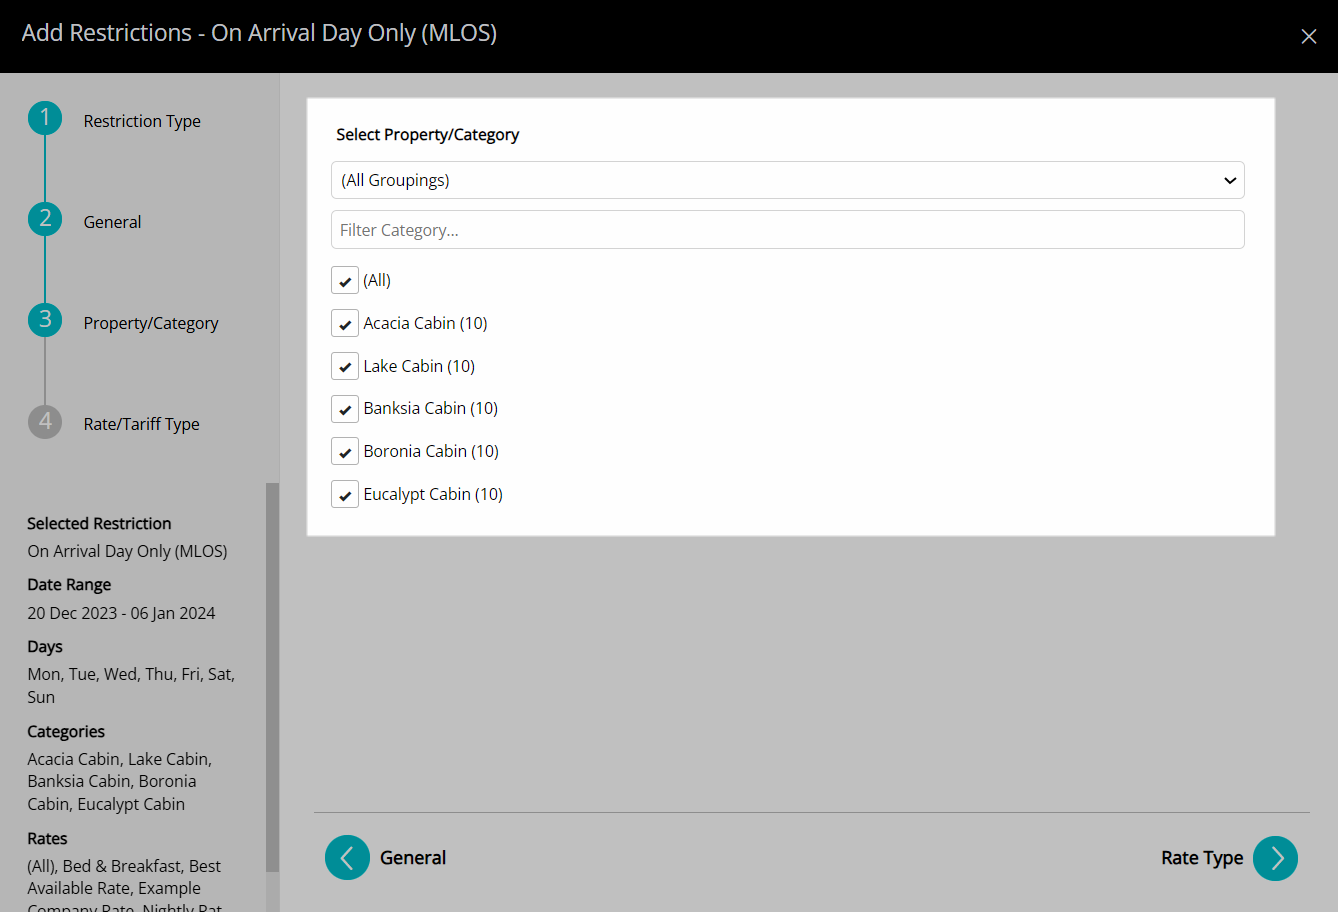
Select a Category Grouping or select the checkbox for a Property and/or Category then choose the  'Next' icon.
Select the checkbox for a Rate Type and choose the  'Save/Exit' icon.
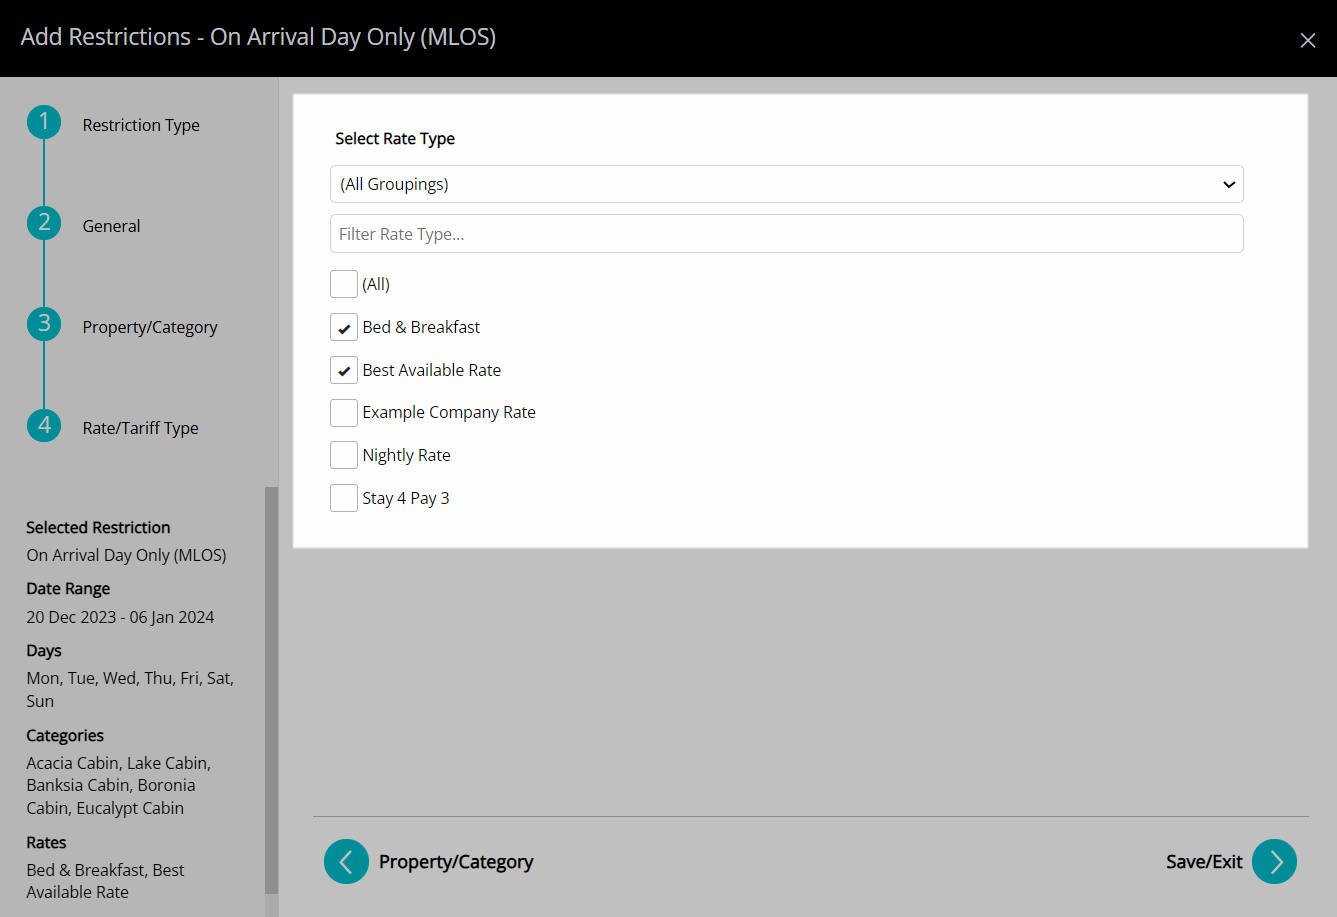
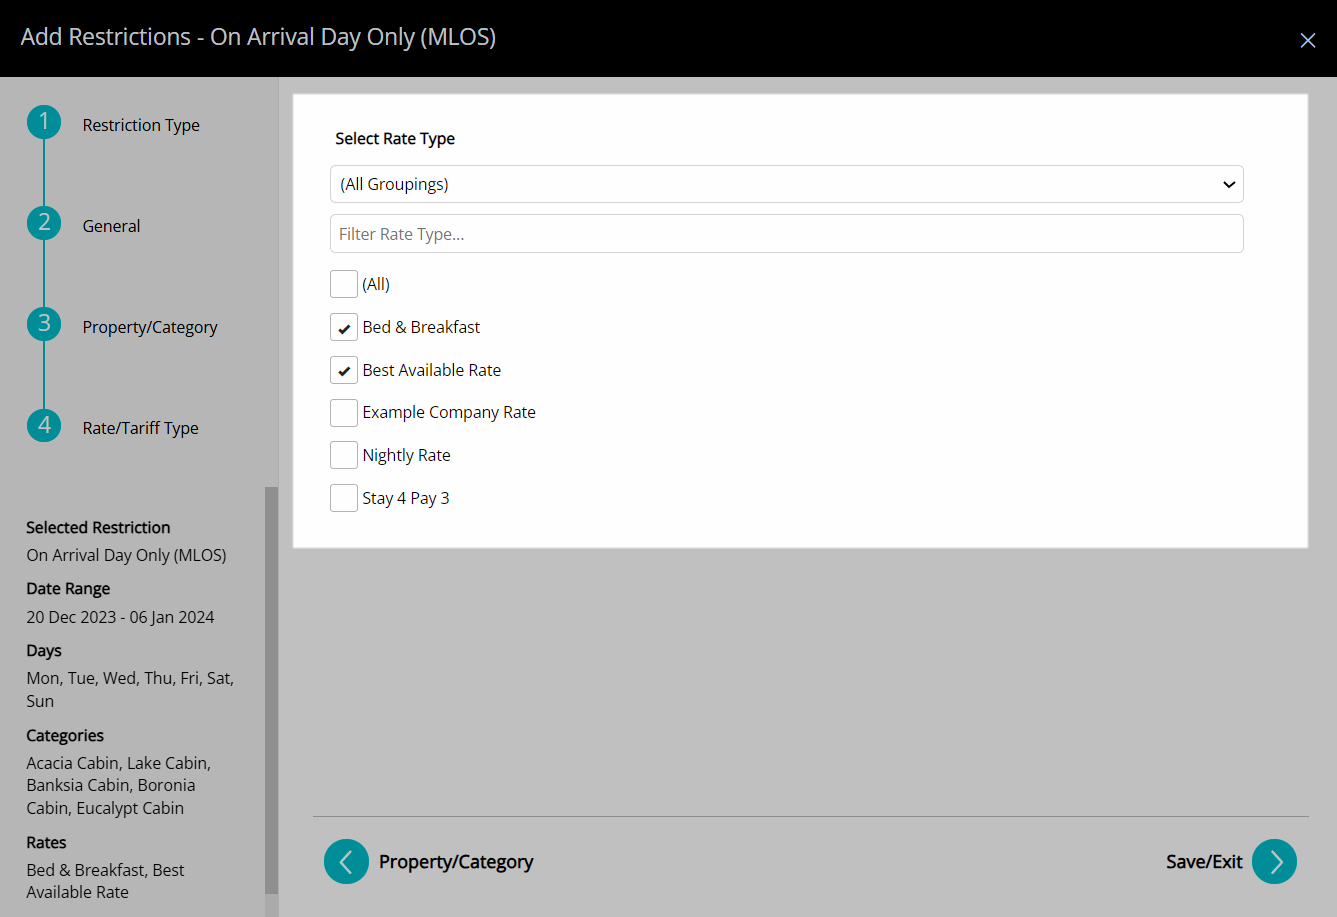
The new restriction or override will be created and visible on the Rate Manager Chart.
Any connected channels with the selected Rate Type will have the restriction or override applied.
Search
- Go to Charts > Rate Manager in the Side Menu of RMS.
- Select the
 'Control Panel' icon.
 - Select a Property.
- Select a Date Range.
- Select the Search Criteria.
- Select the
 icon to expand a Search Category.
 - Select the checkbox for the Search Criteria.
- Select the
- Select the
 'Search' icon.
 - Select the
 'Edit' icon to modify the selected Restriction, the
  'Delete' icon to erase the selected Restriction or the
  'Copy' icon to duplicate the selected Restriction.
 - Exit.
-
Guide
- Add Button
Guide
Go to Charts > Rate Manager in RMS.
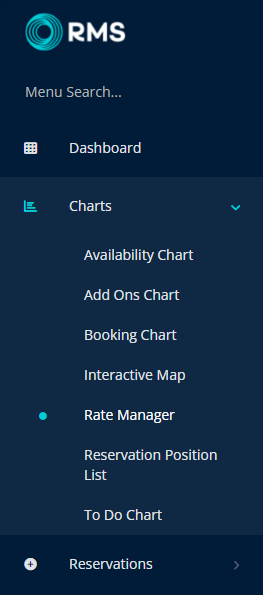
Select the ![]() 'Control Panel' icon.
'Control Panel' icon.

Select a Property.
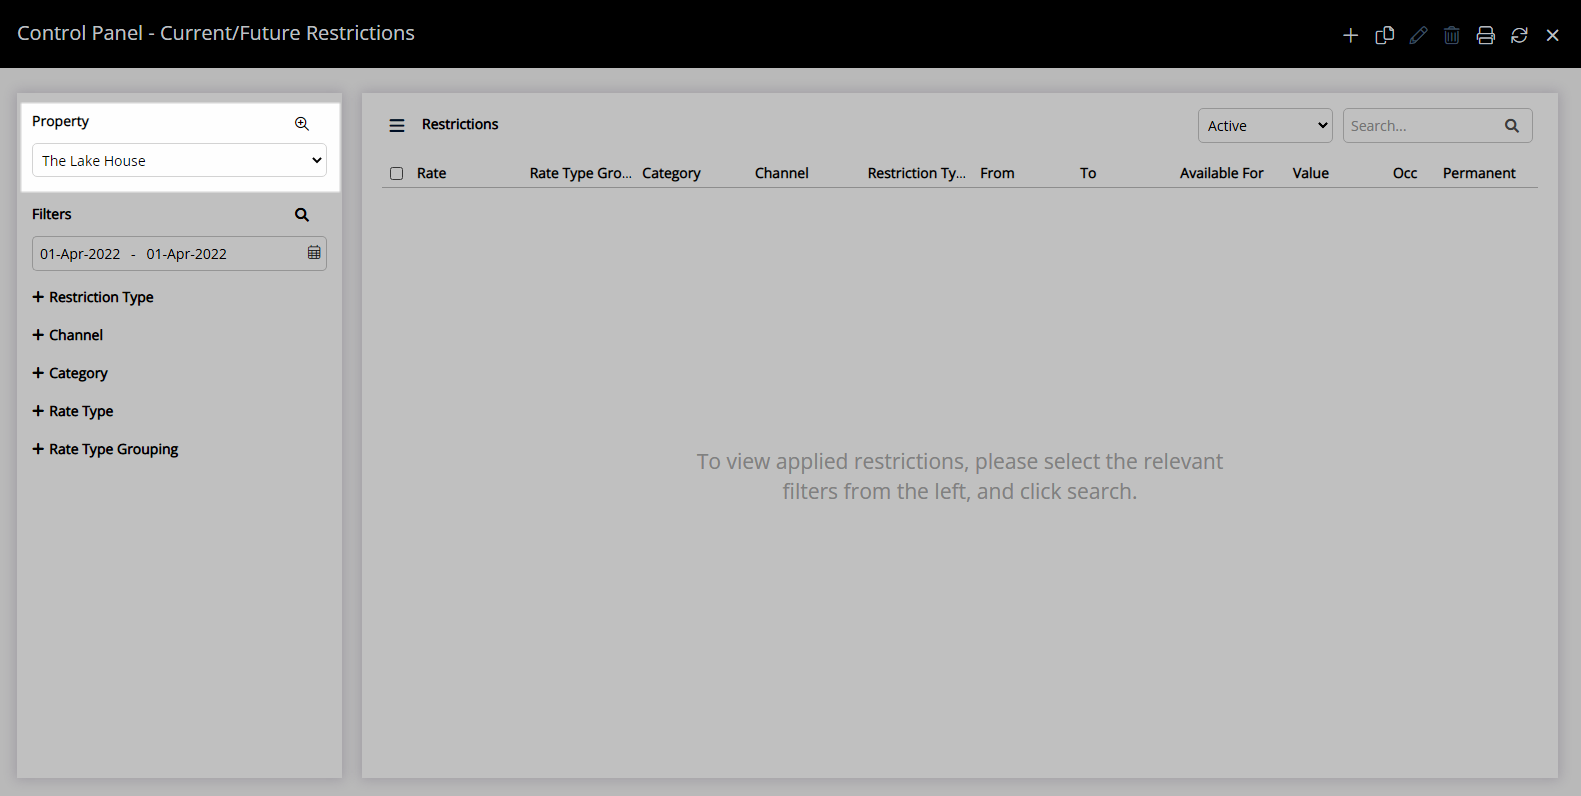
Select a Date Range.
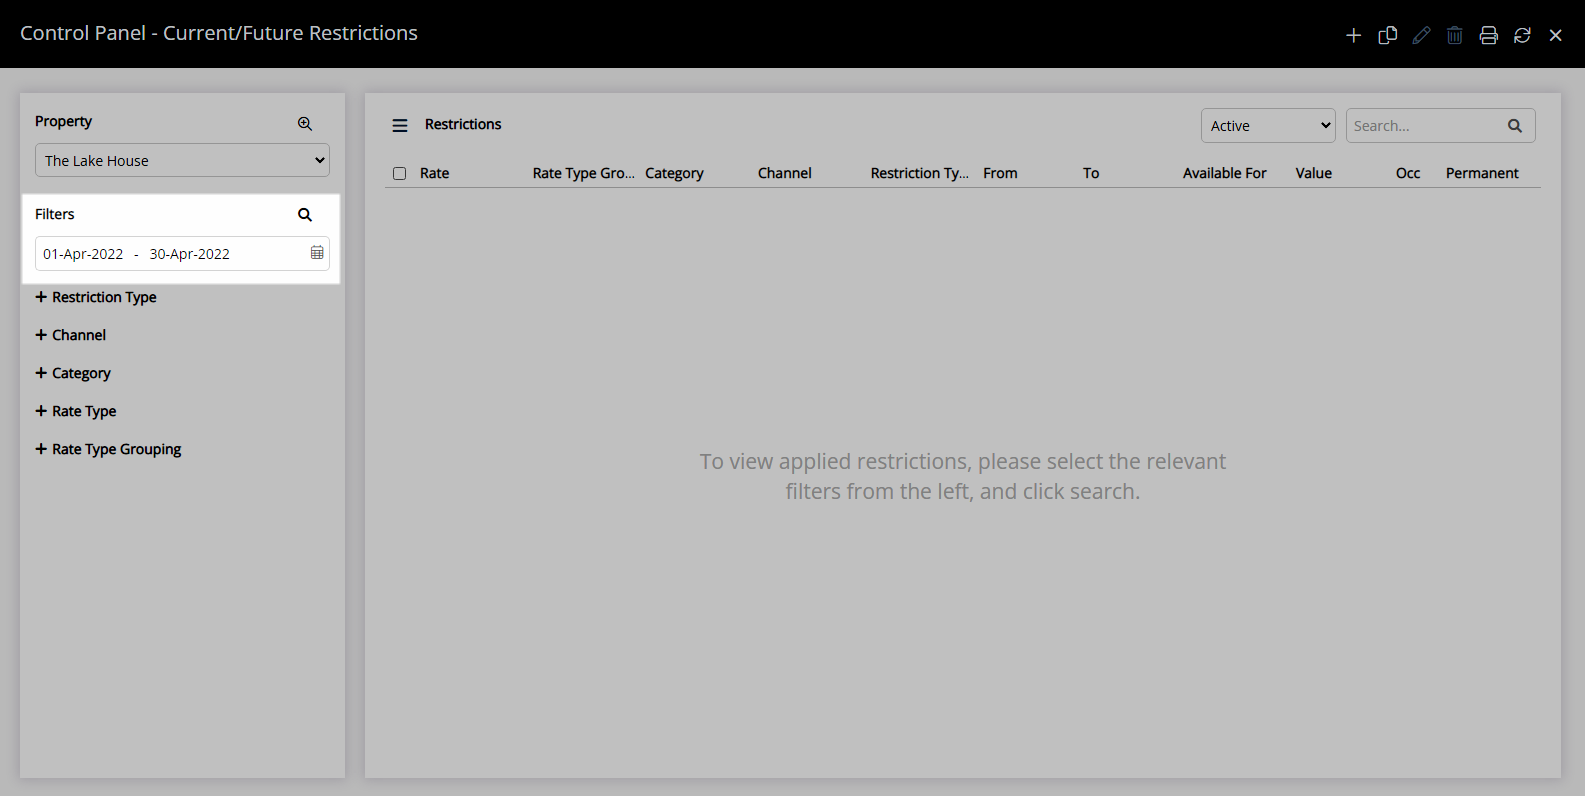
Select the Search Criteria.
Select the ![]() icon to expand a Search Category.
icon to expand a Search Category.
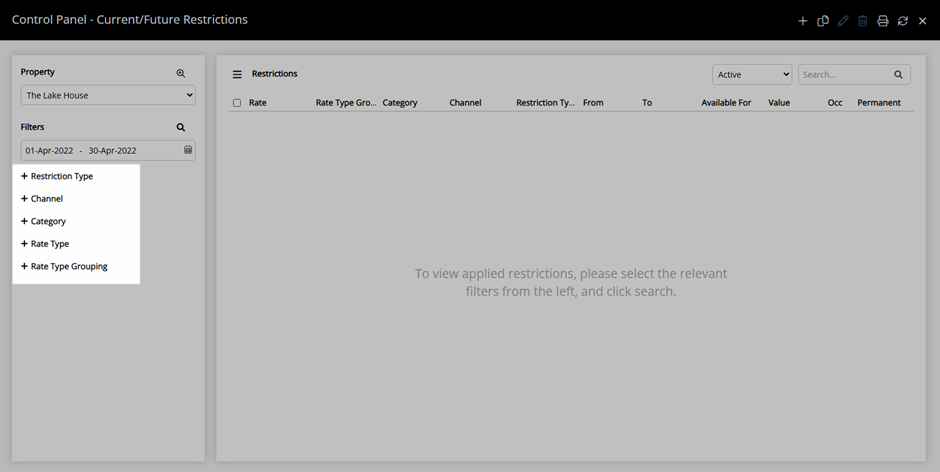
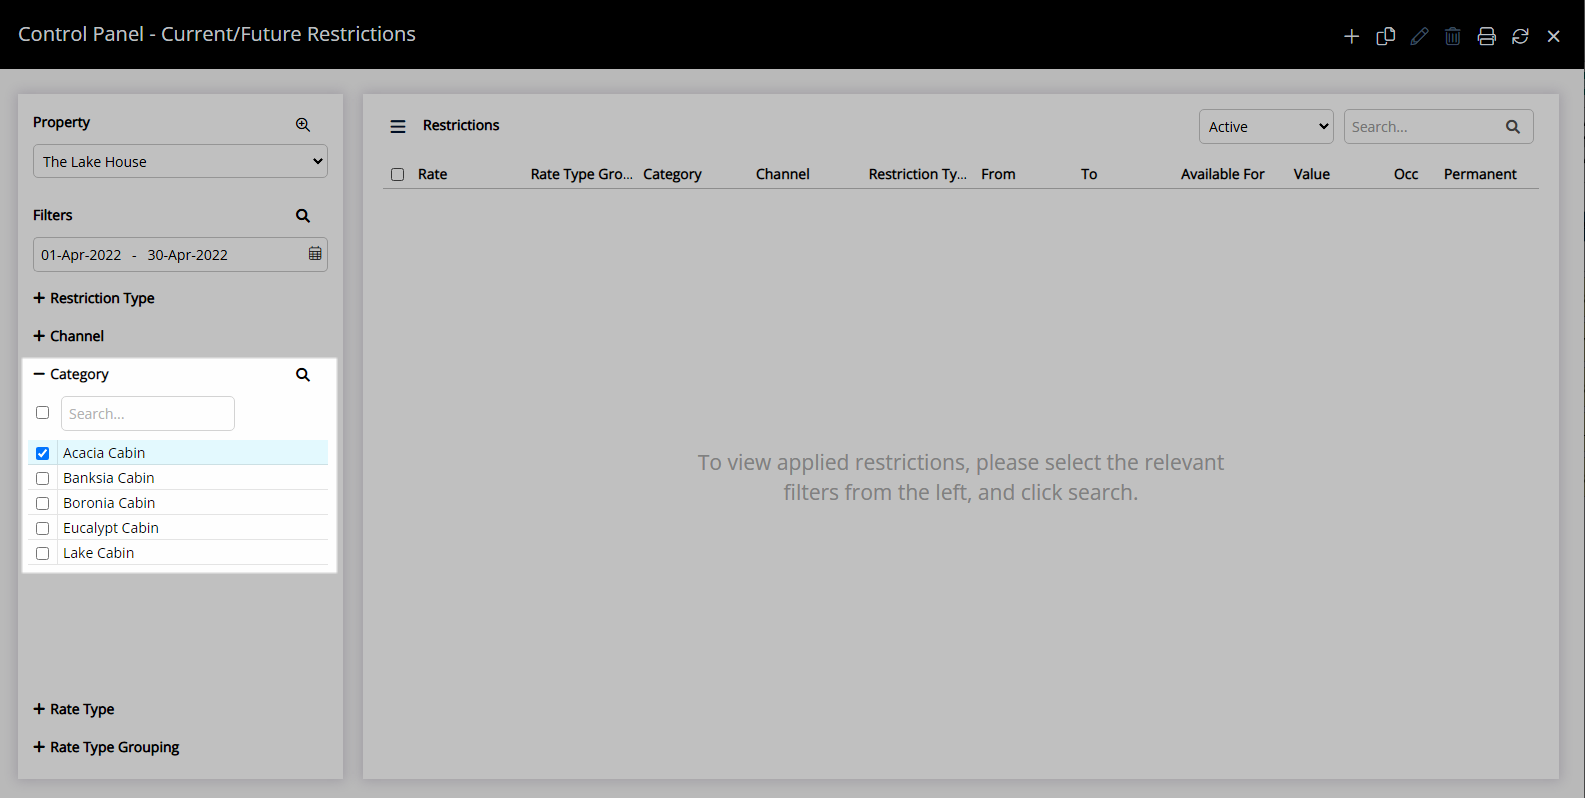
Select the checkbox for the Search Criteria.
Select the  'Search' icon.
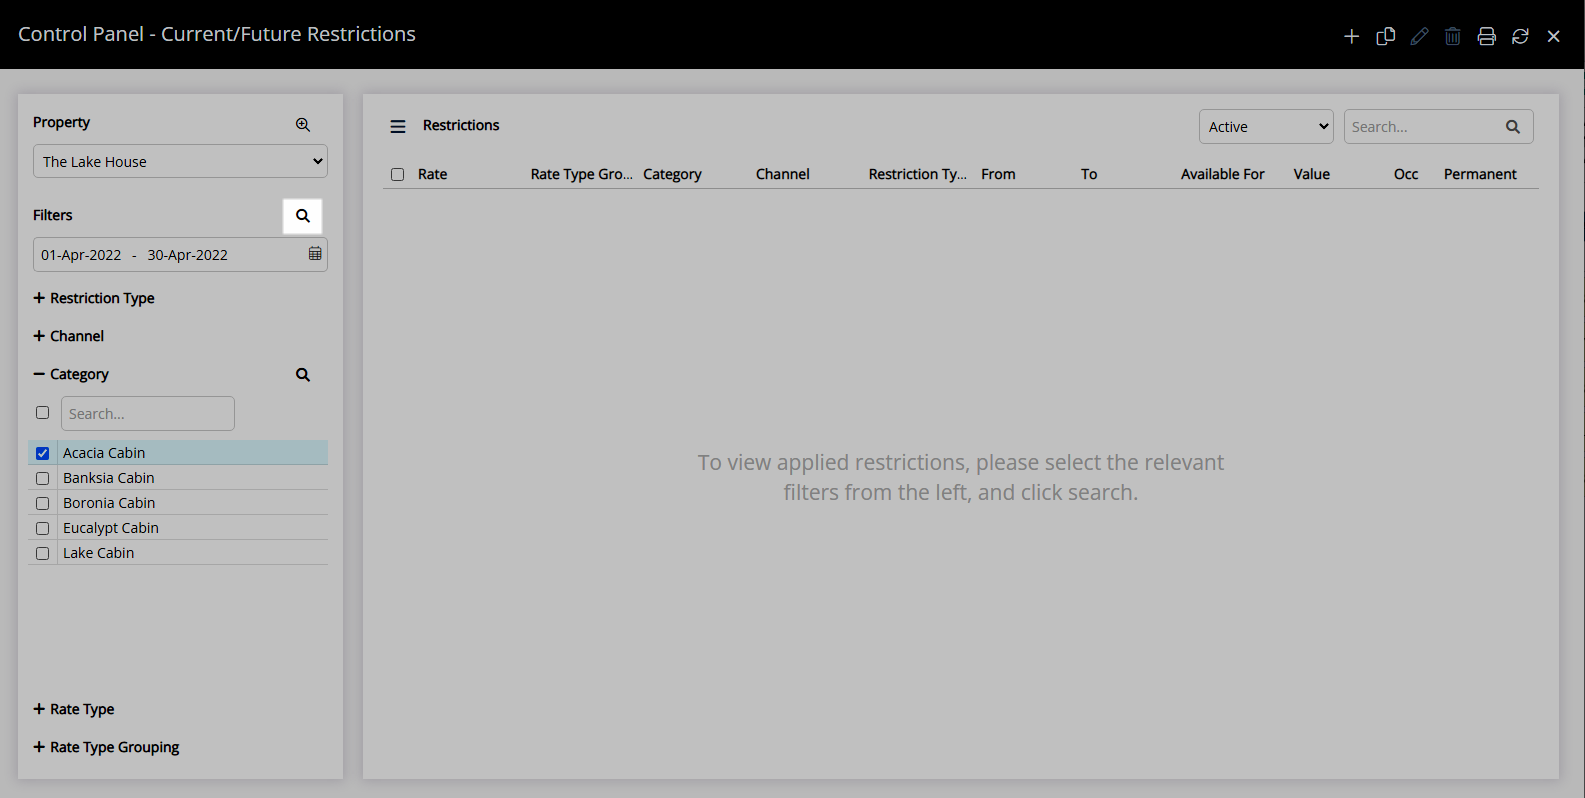
Restrictions and Overrides matching the selected search criteria will be displayed in the list.
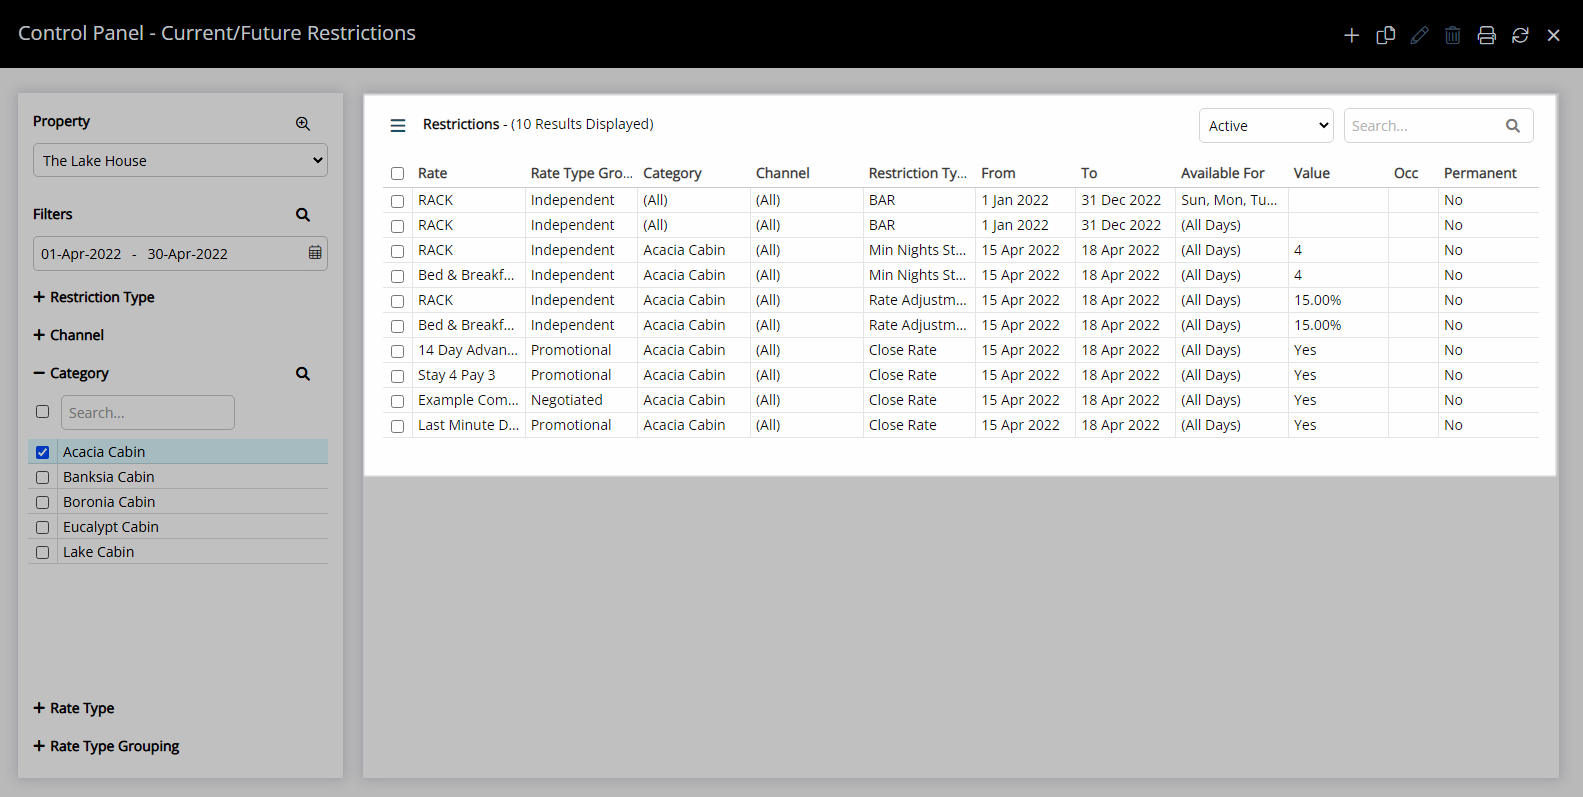
Select the  'Edit' icon to modify the selected Restriction, the
  'Delete' icon to erase the selected Restriction or the
  'Copy' icon to duplicate the selected Restriction.
Use
- Go to Charts > Rate Manager in RMS.
- Select the 'Control Panel' icon.
- Select a Property.
- Select a Date Range.
- Select the Search Criteria.
- Select the
 icon to expand a Search Category.
 - Select the checkbox for the Search Criteria.
- Select the
- Select the 'Search' icon.

The Control Panel will display matching Restrictions or Overrides after a search has been performed.
The option to 'Include Inactive' will display previously deleted Restrictions or Overrides that match the selected search criteria.
Existing restrictions can be edited, copied or deleted by selecting the checkbox for a Restriction or Override and selecting the  'Edit',
  'Copy' or
 ![]() 'Delete' icon.
'Delete' icon.
-
Guide
- Add Button
Guide
Go to Charts > Rate Manager in RMS.
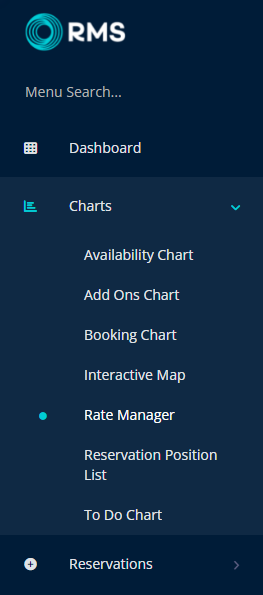
Select the  'Control Panel' icon.

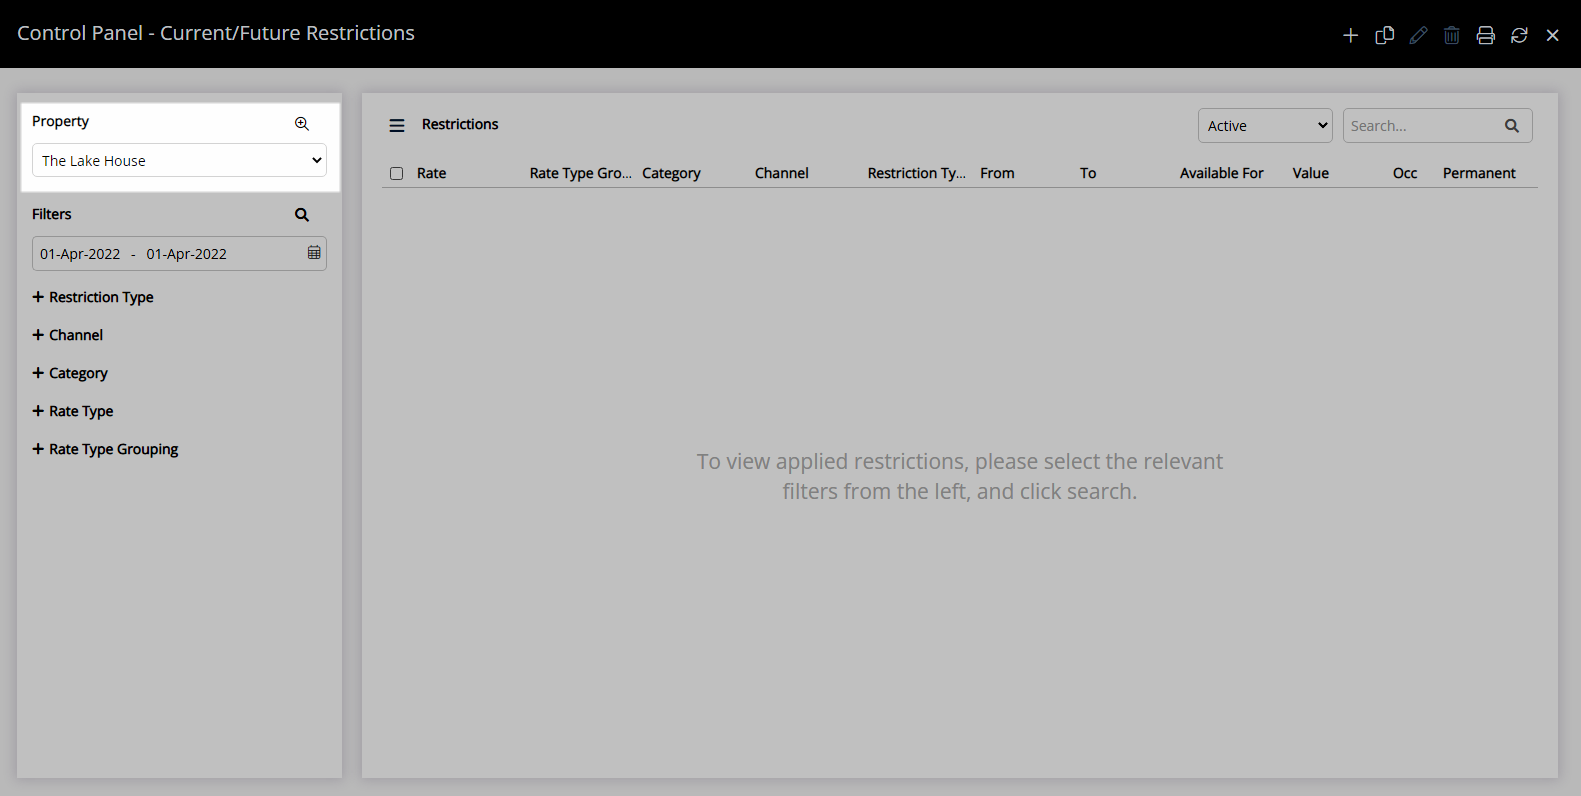
Select a Property.
Select a Date Range.
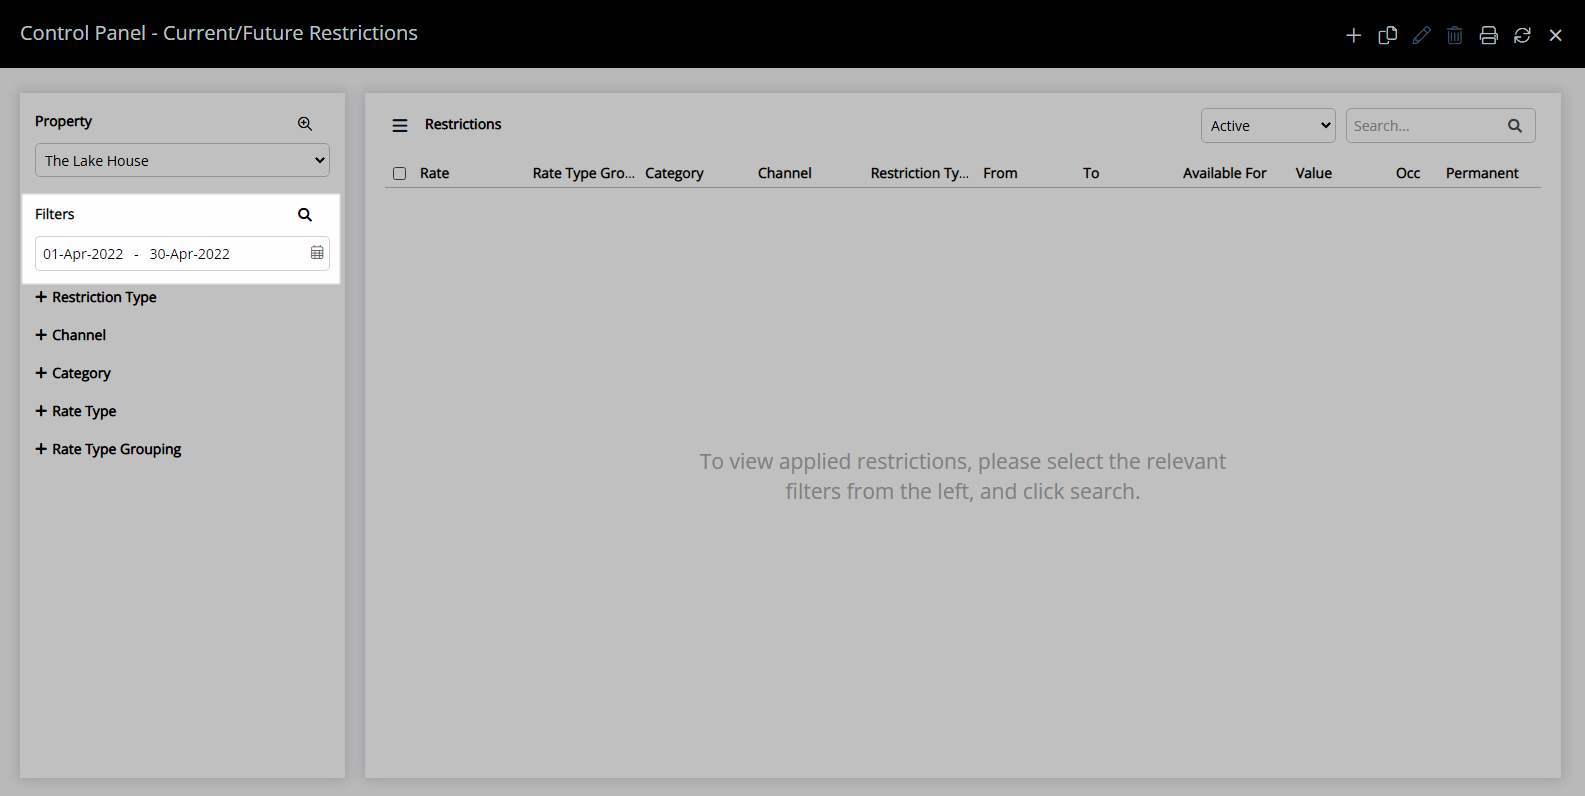
Select the Search Criteria.
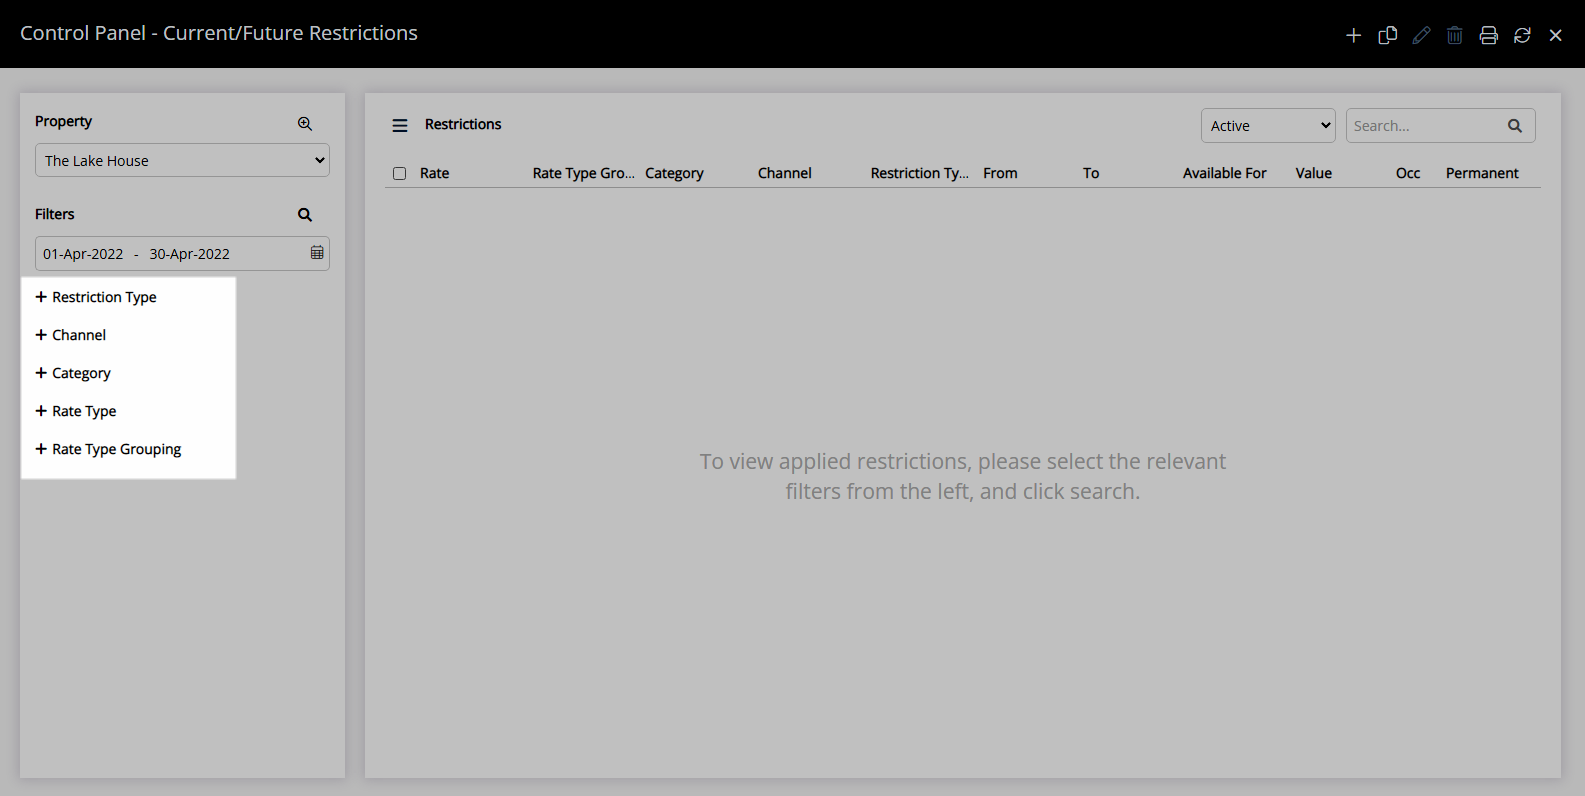
Select the ![]() icon to expand a Search Category.
icon to expand a Search Category.
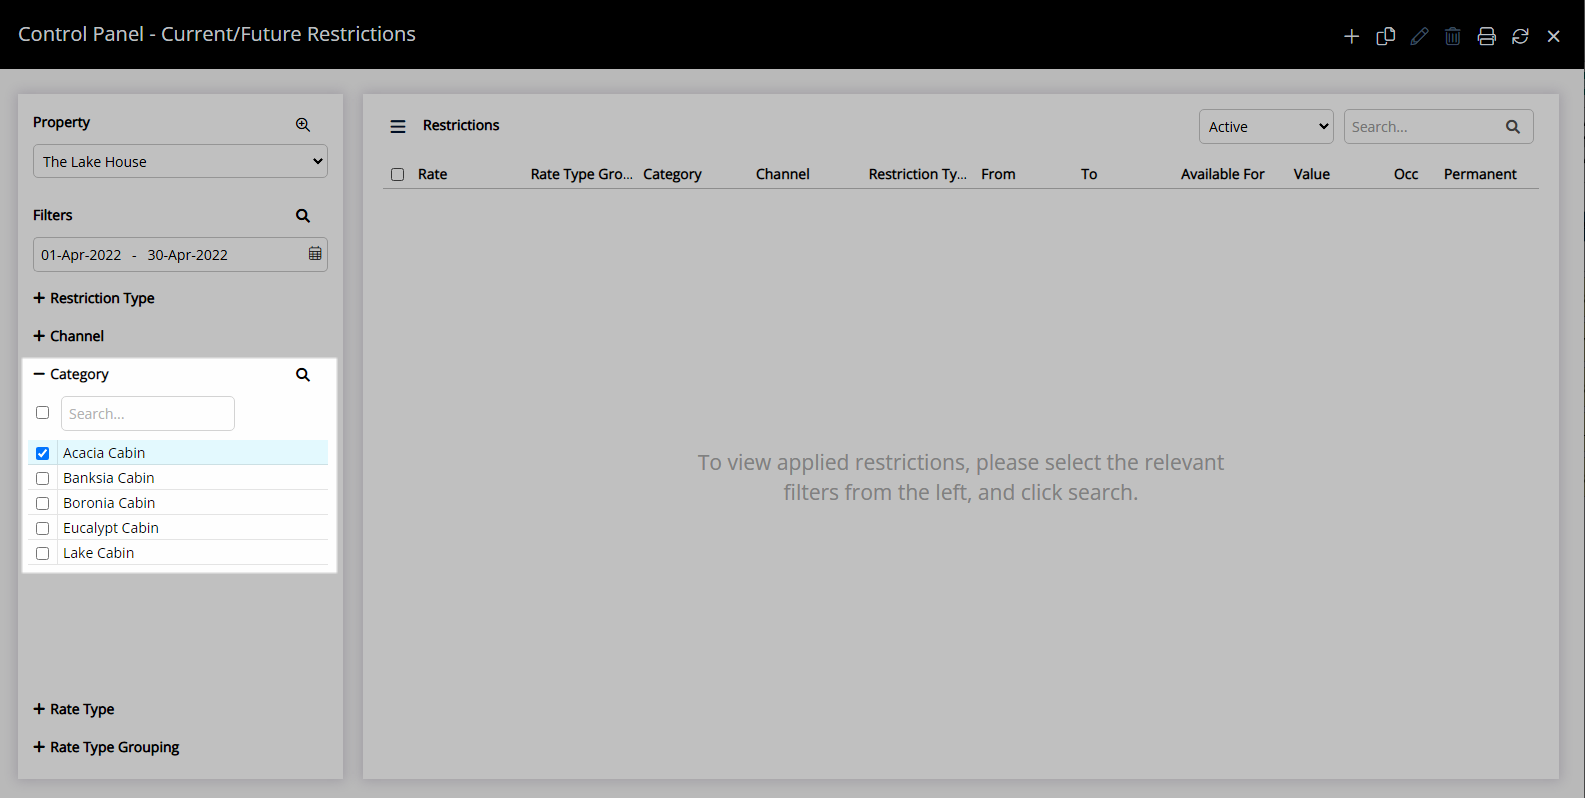
Select the checkbox for the Search Criteria.
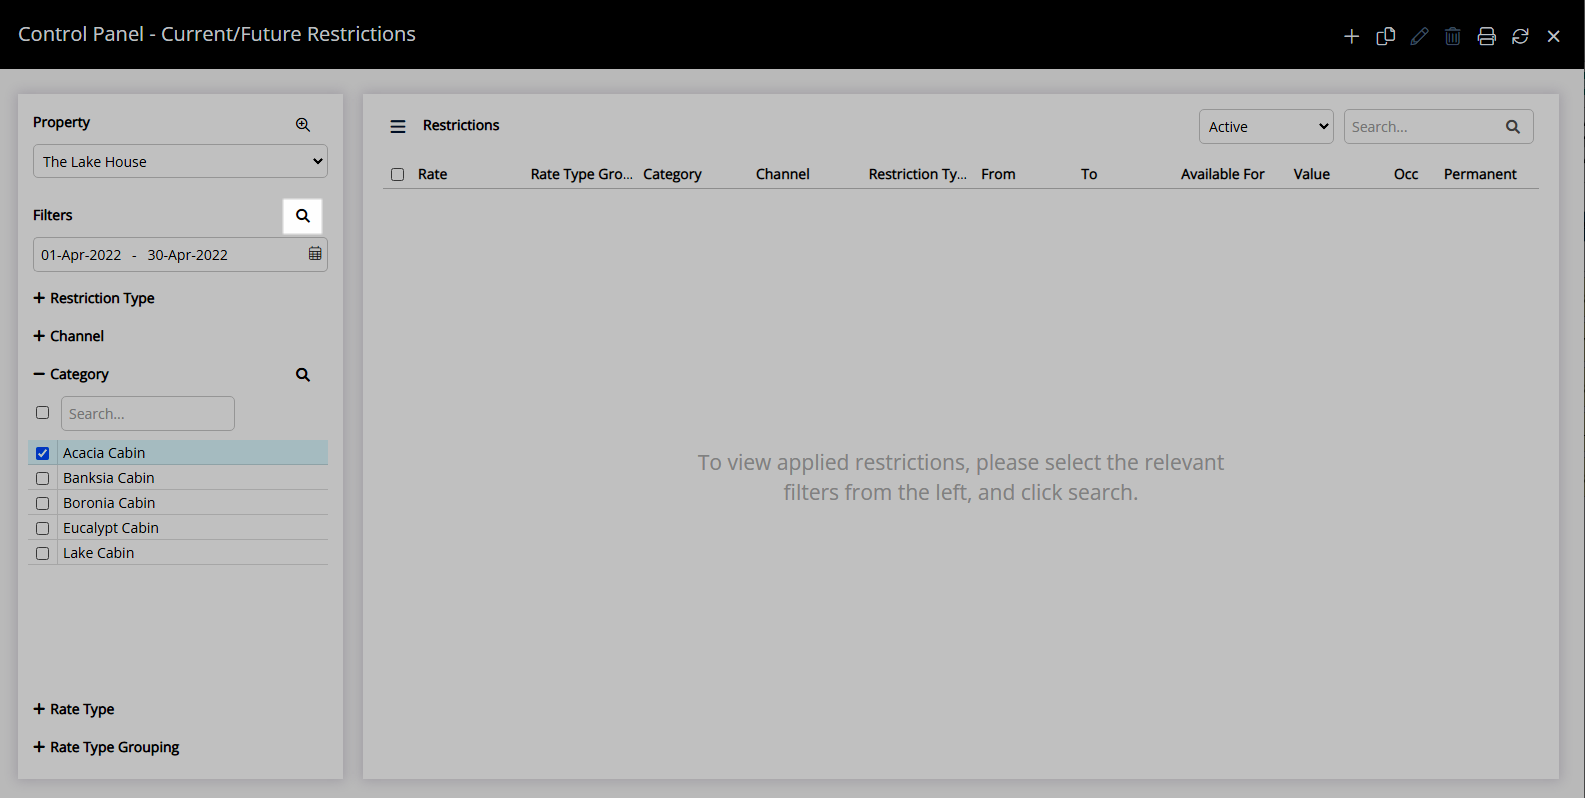
Select the  'Search' icon.
Restrictions and Overrides matching the selected search criteria will be displayed in the list.
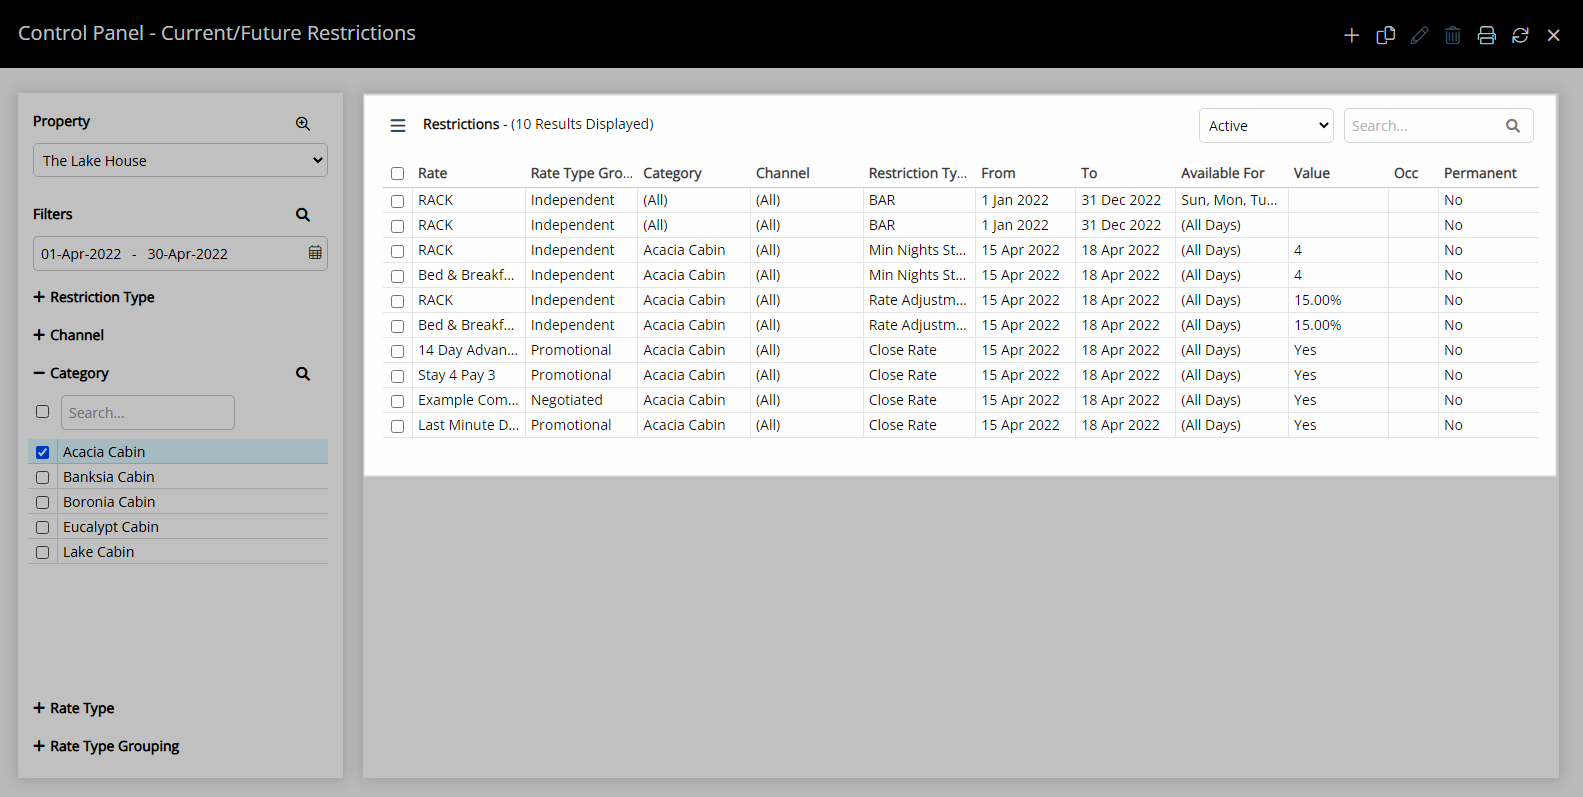
Existing restrictions can be edited, copied or deleted by selecting the checkbox for a Restriction or Override and selecting the  'Edit',
  'Copy' or
  'Delete' icon.
Use
The Control Panel can be used to Add, Edit, Copy or Delete a restriction or override.
To create a new restriction or override, select the 'Add Restriction' below.
To view existing restrictions or overrides and Edit, Copy or Delete, select 'Search' below.
-
Add Restriction
-
Search
- Add Button
Add Restriction
- Go to Charts > Rate Manager in the Side Menu of RMS.
- Select the
 'Control Panel' icon.
 - Select the
 'Add' icon.
 - Select a Restriction Type and choose the
 'Next' icon.
 - Select the Date Range or select the checkbox 'Set Permanently'.
- Select the checkbox for the Days of the Week.
- Select and enter the Restriction Type Options then choose the
 'Next' icon.
 - Select a Category Grouping or select the checkbox for a Property and/or Category then choose the
 'Next' icon.
 - Select the checkbox for a Rate Type and choose the
 'Save/Exit' icon.
-
Guide
- Add Button
Guide
Go to Charts > Rate Manager in the Side Menu of RMS.

Select the ![]() 'Control Panel' icon.
'Control Panel' icon.

Select the  'Add' icon.

Select a Restriction Type and choose the  'Next' icon.

Select the Date Range or select the checkbox 'Set Permanently'.

Select the checkbox for the Days of the Week.

Select and enter the Restriction Type Options then choose the  'Next' icon.

Select a Category Grouping or select the checkbox for a Property and/or Category then choose the  'Next' icon.

Select the checkbox for a Rate Type and choose the  'Save/Exit' icon.


The new restriction or override will be created and visible on the Rate Manager Chart.
Any connected channels with the selected Rate Type will have the restriction or override applied.
Search
- Go to Charts > Rate Manager in the Side Menu of RMS.
- Select the 'Control Panel' icon.
- Select a Property.
- Select a Date Range.
- Select the Search Criteria.
- Select the
 icon to expand a Search Category.
 - Select the checkbox for the Search Criteria.
- Select the
- Select the
 'Search' icon.
 - Select the
 'Edit' icon to modify the selected Restriction, the
  'Delete' icon to erase the selected Restriction or the
  'Copy' icon to duplicate the selected Restriction.
 - Exit.
-
Guide
- Add Button
Guide
Go to Charts > Rate Manager in RMS.
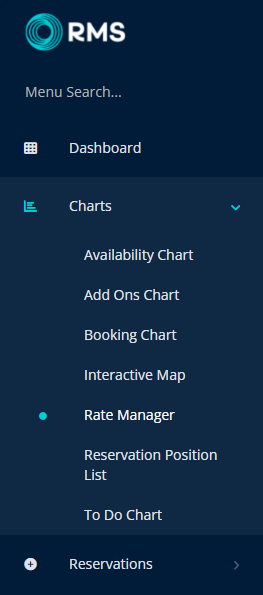
Select the ![]() 'Control Panel' icon.
'Control Panel' icon.

Select a Property.
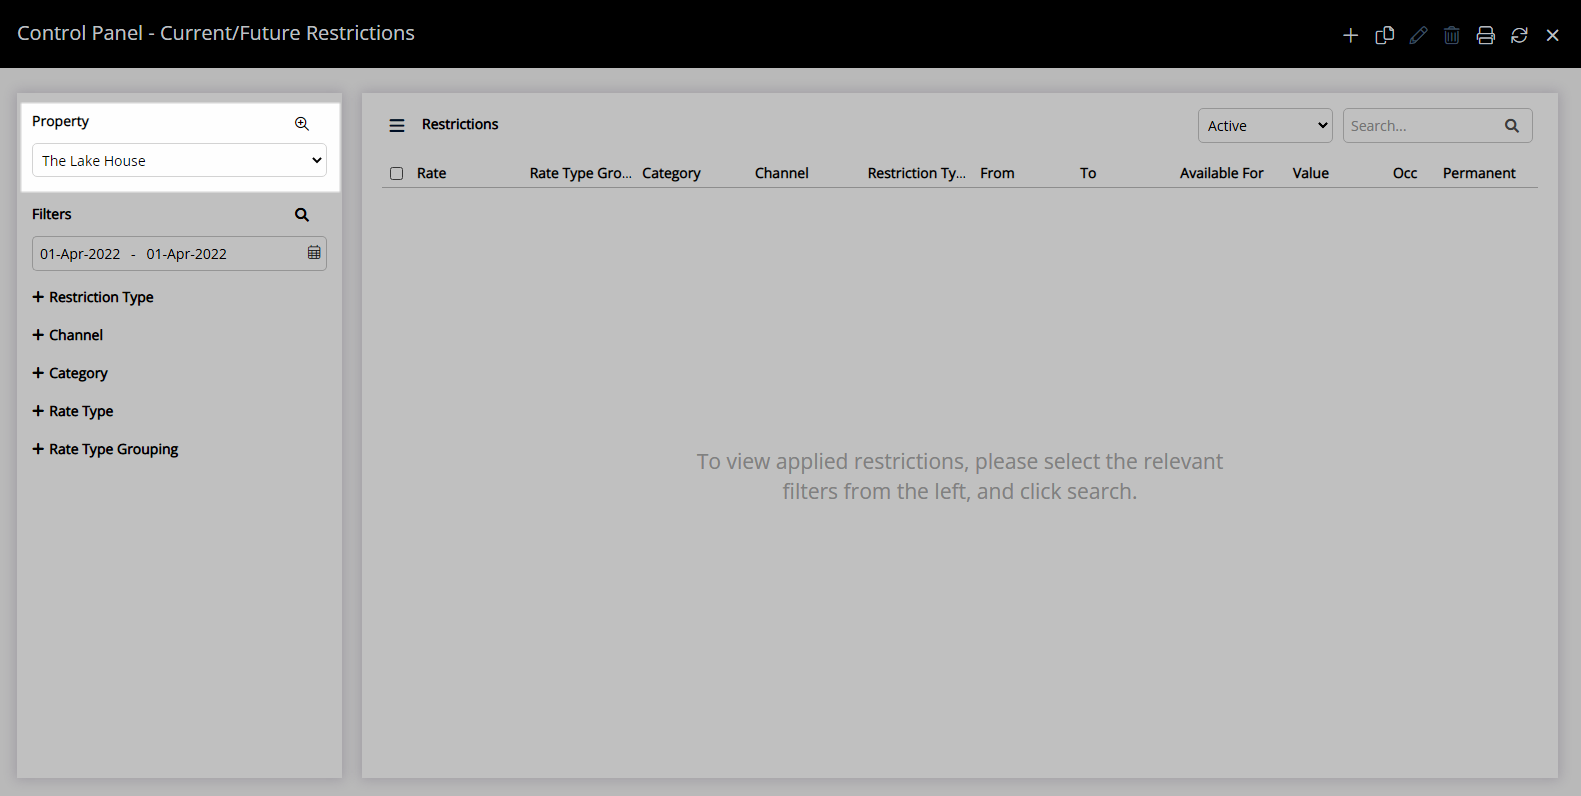
Select a Date Range.
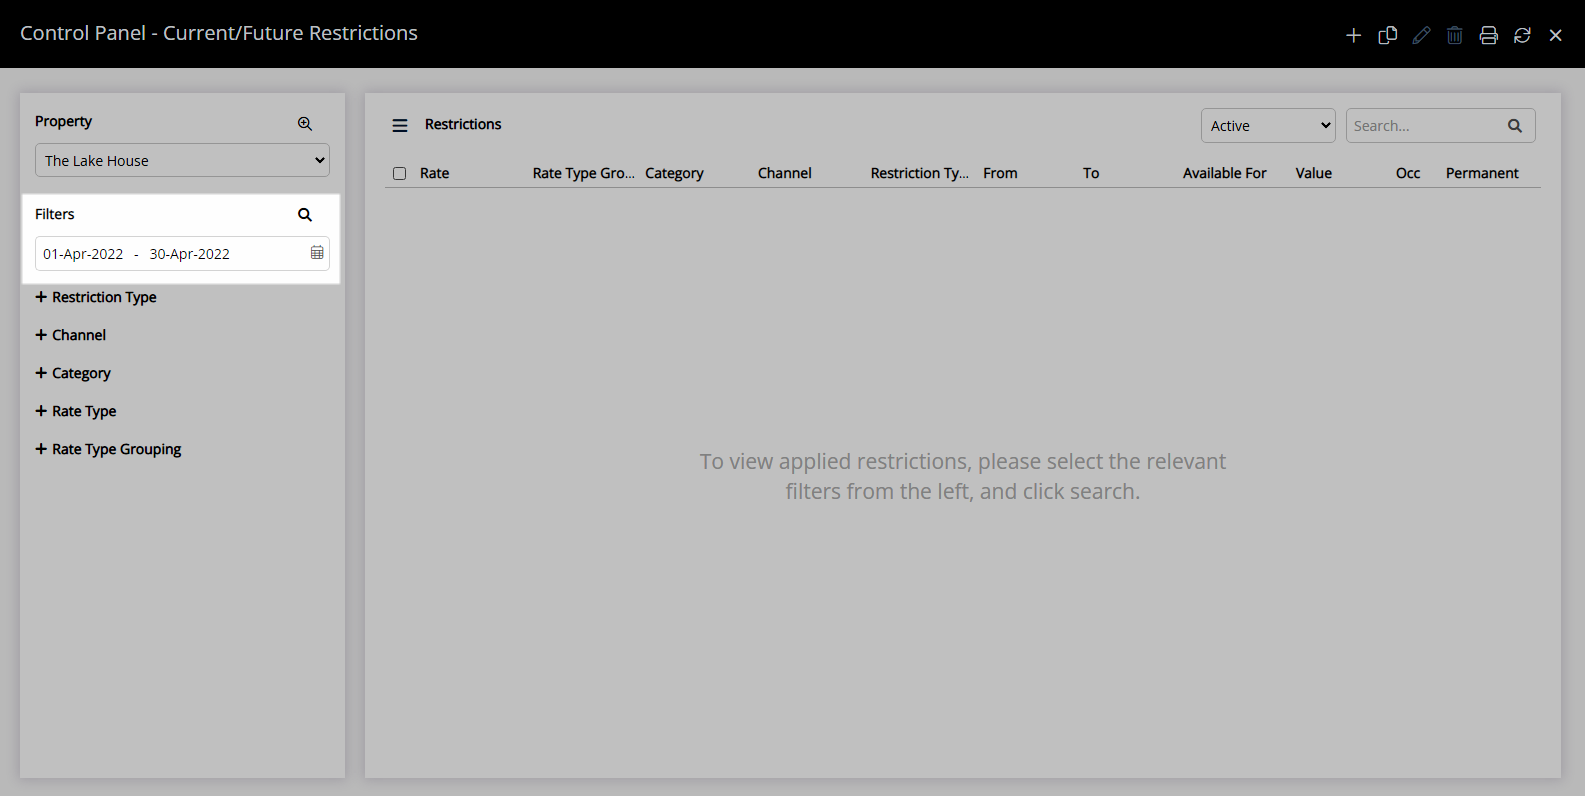
Select the Search Criteria.
Select the ![]() icon to expand a Search Category.
icon to expand a Search Category.
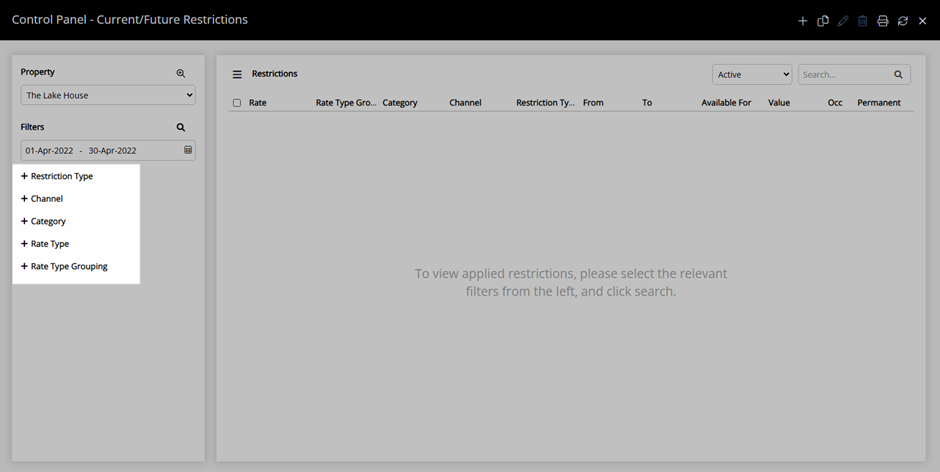
Select the checkbox for the Search Criteria.
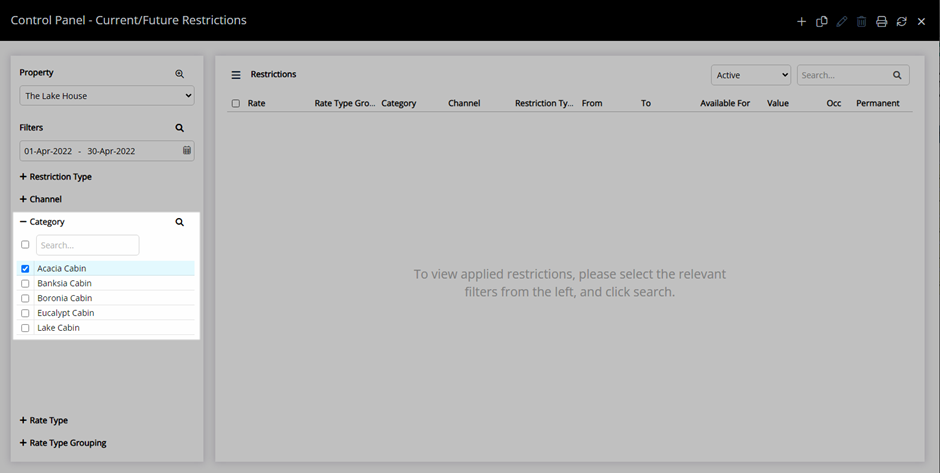
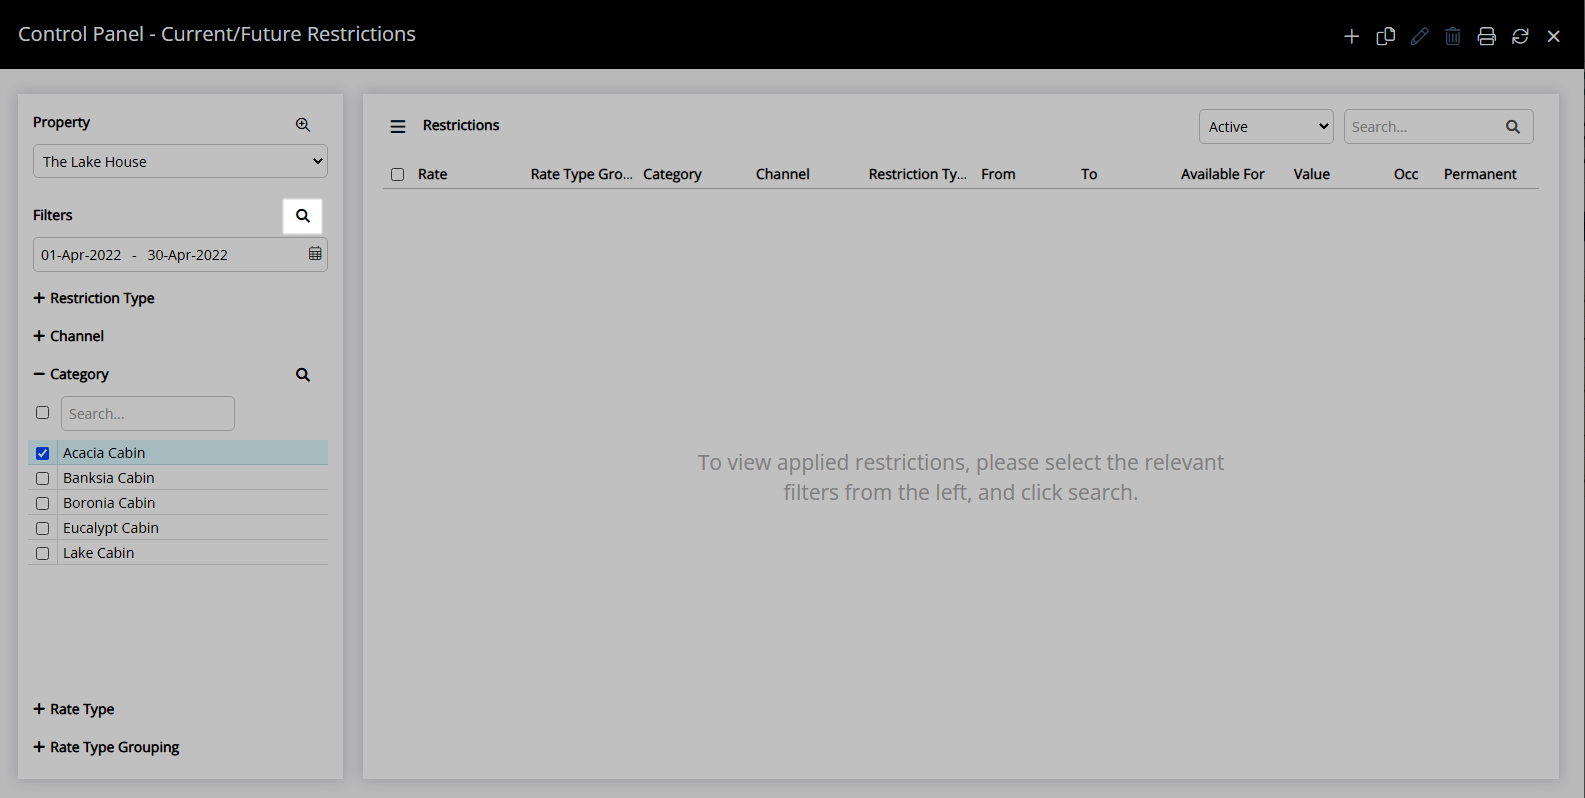
Select the  'Search' icon.
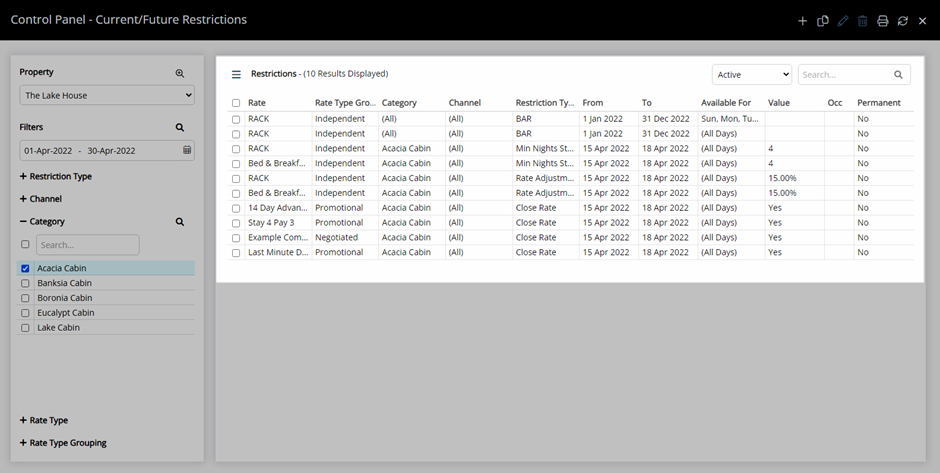
Restrictions and Overrides matching the selected search criteria will be displayed in the list.
Select the ![]() 'Edit' icon to modify the selected Restriction, the
'Edit' icon to modify the selected Restriction, the ![]() 'Delete' icon to erase the selected Restriction or the
'Delete' icon to erase the selected Restriction or the ![]() 'Copy' icon to duplicate the selected Restriction.
'Copy' icon to duplicate the selected Restriction.
 'Favourite' icon to set a Restriction Type as a favourite to always display at the top of the list.
 'Add' icon on the Date Range/Day section to create multiple date sets.
 'Add' icon to create multiple date sets.