Guest Portal
Portal for Guests to manage their reservation in RMS.
The Guest Portal is an optional feature to provide an area for Guests to login and manage their Reservations.
-
Information
-
Setup
- Add Button
Information
The Guest Portal is an optional feature to provide an area for Guests to login and manage their Reservations.
The Guest Portal URL can be linked to from the property's website and RMS Internet Booking Engine with the ability to use Guest Portal merge fields in SMS and Email sent in RMS.
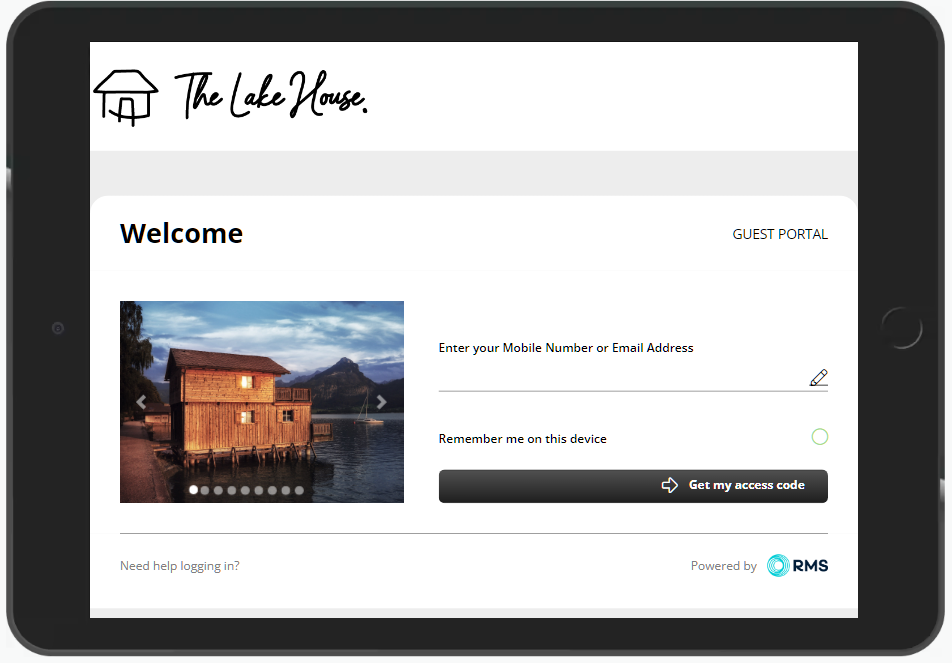
Guests can login securely to the Guest Portal using their mobile number or email address to receive a single use access code.
The mobile number or email address used for login must match the contact information saved on the Guest Profile.
Using Auto Guest Merge will ensure Guest Profiles are maintained with the most recent contact information.

Configuration options include the ability to allow Guests to view, cancel or manage their Reservation including make a payment, purchase extras using Requirements, Check-in, Check-out and/or Pre-Check-in, sign-up for Guest Rewards and view or modify their Guest Profile.
Photos can be added for a Property, Category, Area or Requirement and will be displayed on the login screen, Reservation and Requirements screen inside the Guest Portal.
Pre-Check-in provides an opportunity to collect payment, photo identification and optional Guest Declaration a pre-determined period of time ahead of their arrival at the property.
Payments through the Guest Portal require a Payment Gateway and can be configured to allow for charges to be selected or default to the to projected Reservation Account Balance as well as set criteria for payment on Pre-Check-in, Check-in and Check-out.
The 'Make a Payment' option will not be displayed for Reservations that are in 'Quote' status.
Requirements can be made available for sale as extras in the Guest Portal and will be added to the Reservation in RMS.
Preferences can be used to provide tailored information to Guests for their stay or make arrangements to personalise their accommodation based on their requests.
Message Centre Notifications can be customised to tailor which actions in the Guest Portal prompt a notification to the property in the Message Centre.
Enabling Guests to upload photo identification can be set to mandatory and will store the uploaded file to the 'Photo' tab on their Guest Profile in RMS.
Allowing Guests to view and modify their Guest Profile also provides the ability to enter information for additional Guests on the Reservation.

Category, Area, Reservation, Guest and Account Types are default System Labels that can be customised.
The Guest Portal can be accessed using the below URL and replacing 'xxxx' with the Property's RMS Client ID.
Enterprise customers can use the Enterprise RMS Client ID or an individual Property's RMS Client ID.
https://guestportal.rmscloud.com/Login/Index?clientId=xxxxxx
The ability to send SMS from RMS using the 1-Way SMS or 2-Way SMS module is required for Guests to receive a login passcode for the Guest Portal to their mobile.

System Administrators will require Security Profile access to setup this feature.
-
Setup
- Add Button
Setup
Have your System Administrator complete the following.
Guest Portal Activation
- Go to Setup > Portal Access > Guest Portal in the Side Menu of RMS.
- Navigate to the 'General Options' tab.
-
General Options.
- Select the checkbox 'Enable Guest Portal'.
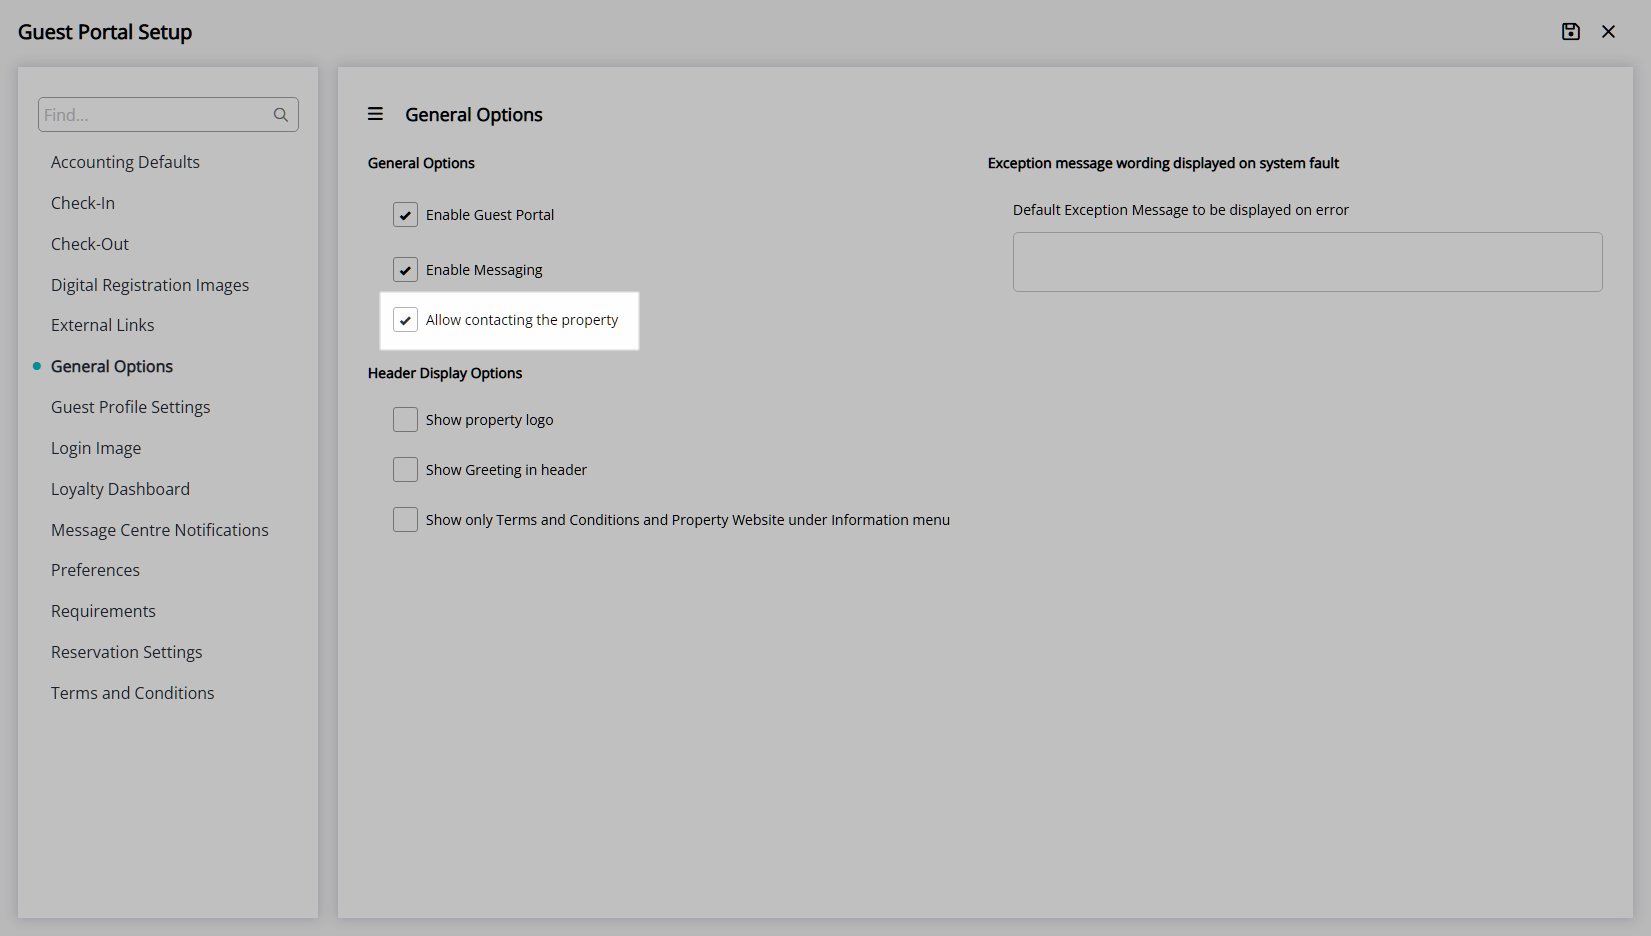
- Optional: Select the checkbox 'Enable Messaging'.
- Optional: Select the checkbox 'Allow contacting the Property'.
-
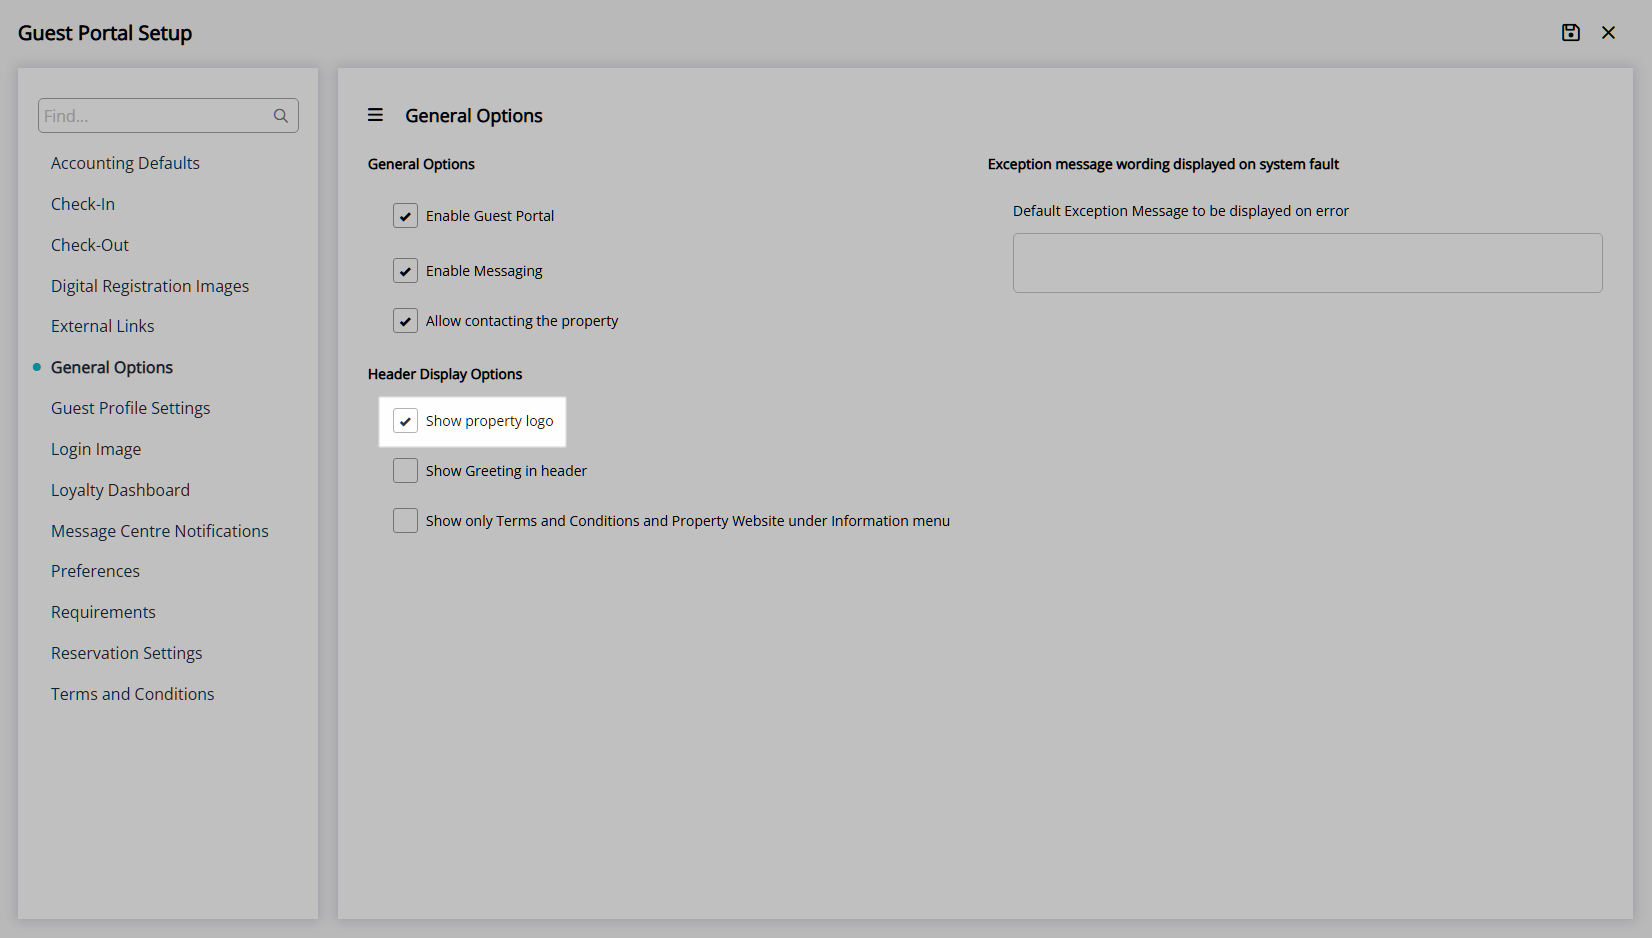
Header Display Options.
- Optional: Select the checkbox 'Show Property Logo'.
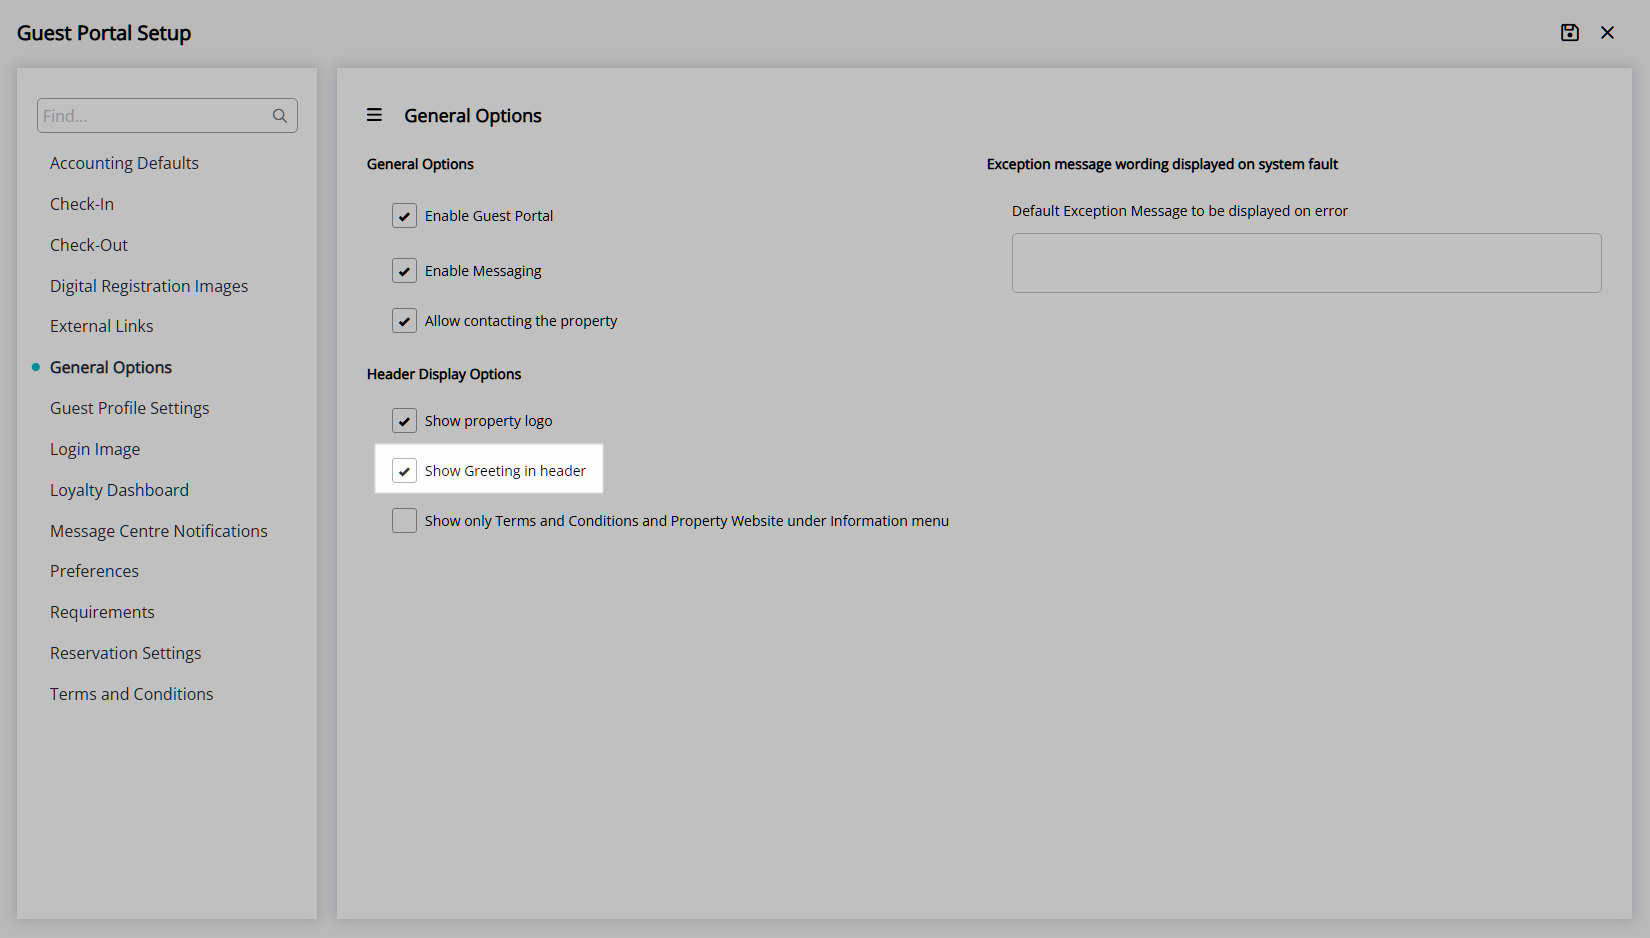
- Optional: Select the checkbox 'Show Greeting in header'.
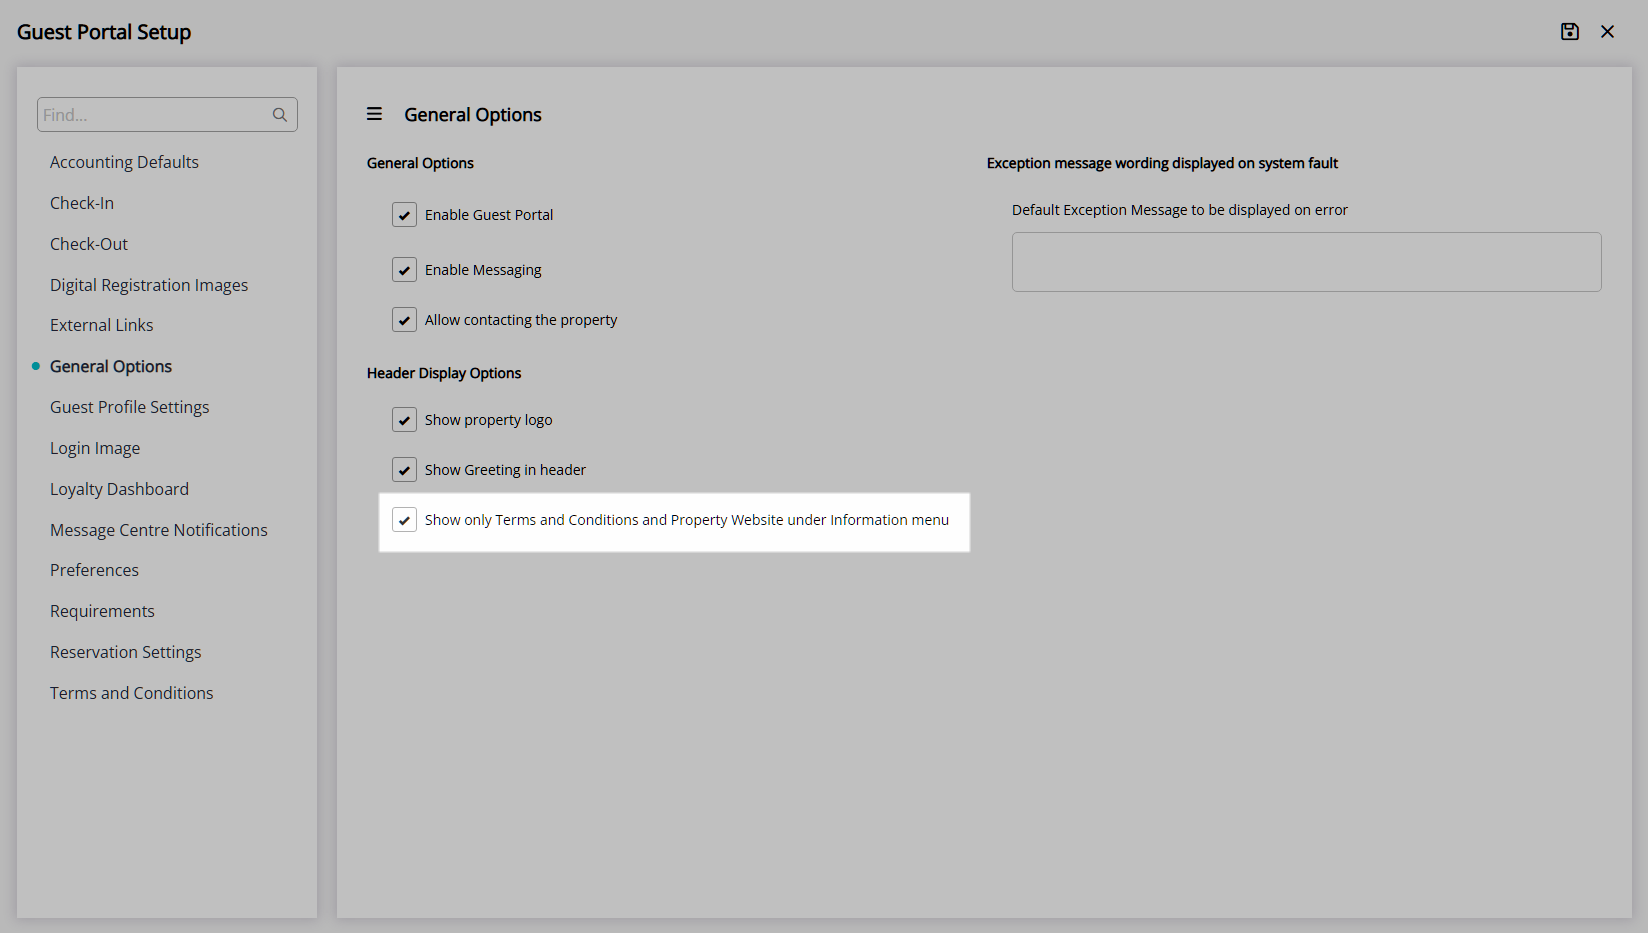
- Optional: Show only Terms & Conditions and Property Website under the 'Information' menu.
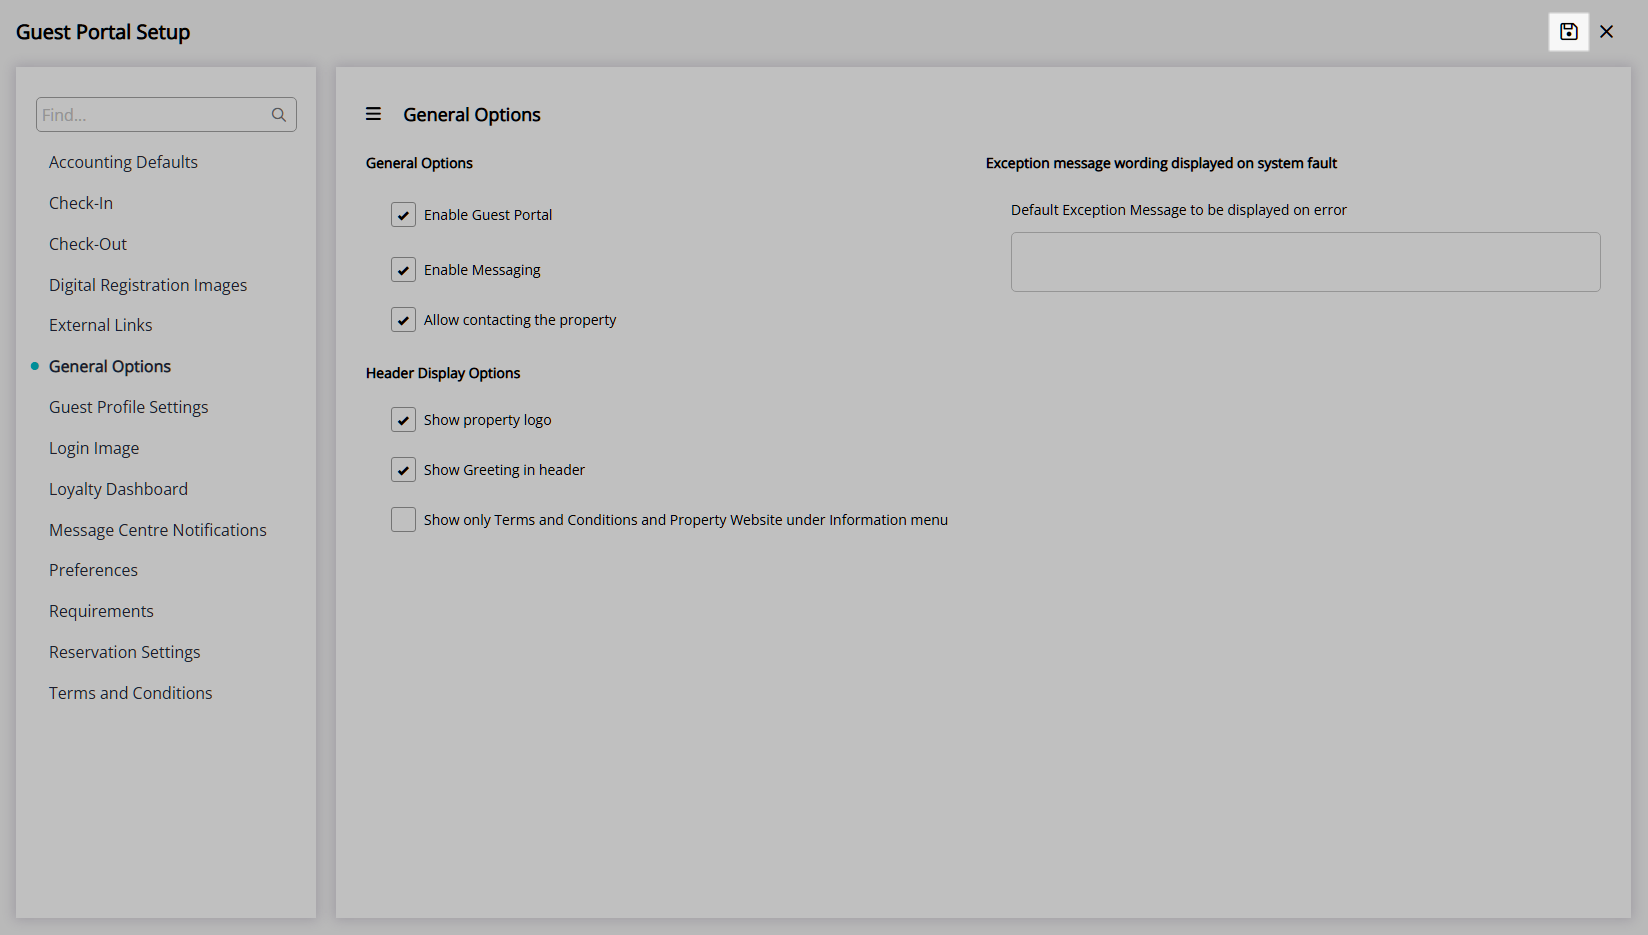
- Save.
-
General Options.
Guest Profile Options
- Navigate to the 'Guest Profile Settings' tab.
-
Profile Options.
-
Optional: Select the checkbox 'Allow access to profile information'.
- Optional: Select the checkbox 'Allow updates to profile information'.
-
Optional: Select the checkbox 'Allow Additional Guests to be added to the Reservation'.
- Optional: Select the checkbox 'Ignore Mandatory field requirements for additional Guests'.
-
Optional: Select the checkbox 'Allow Guest to upload Photo ID/Passport'.
- Optional: Select the checkbox 'Photo ID/Passport Mandatory'.
-
Optional: Select the checkbox 'Allow access to profile information'.
- Save.
-
Profile Options.
Reservation Options
- Navigate to the 'Reservation Settings' tab.
-
Display Options.
- Select the checkbox 'Show Reservation Stay Dates'.
- Optional: Select the checkbox 'Show Check-in Time'.
- Optional: Select the checkbox 'Show Check-out Time'.
- Select the checkbox 'Show Reservation Reference Number'.
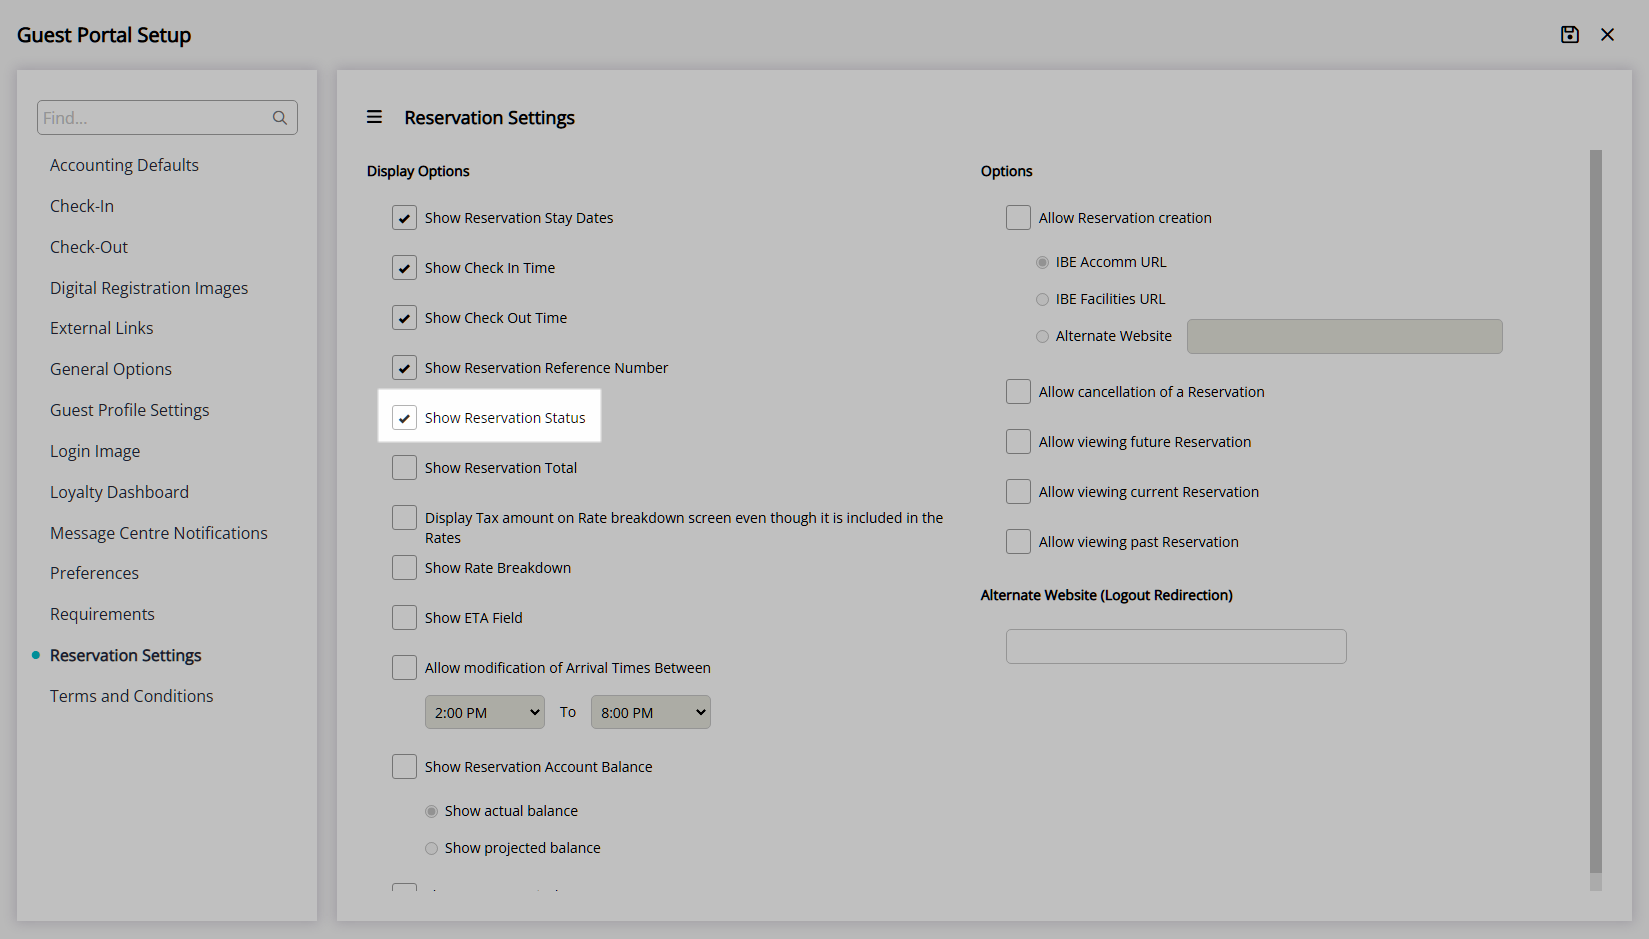
- Select the checkbox 'Show Reservation Status'.
- Optional: Select the checkbox 'Show Reservation Total'.
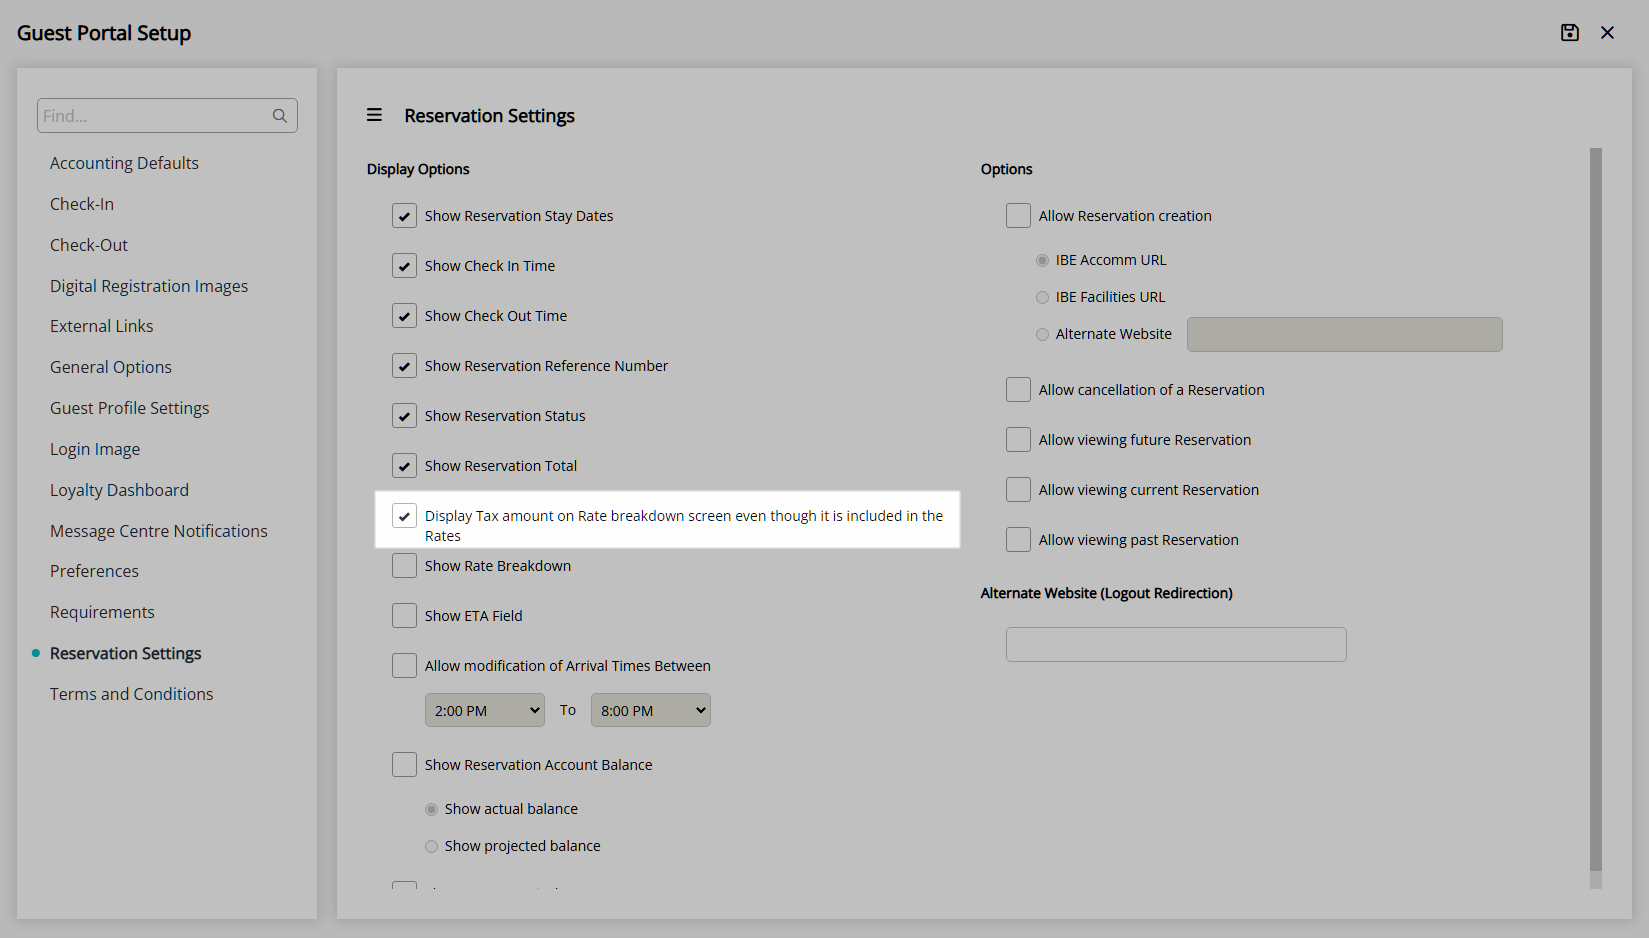
- Optional: Select the checkbox 'Display Tax Amount on the Rate Breakdown when Tax Inclusive'.
- Optional: Select the checkbox 'Show Rate Breakdown'.
-
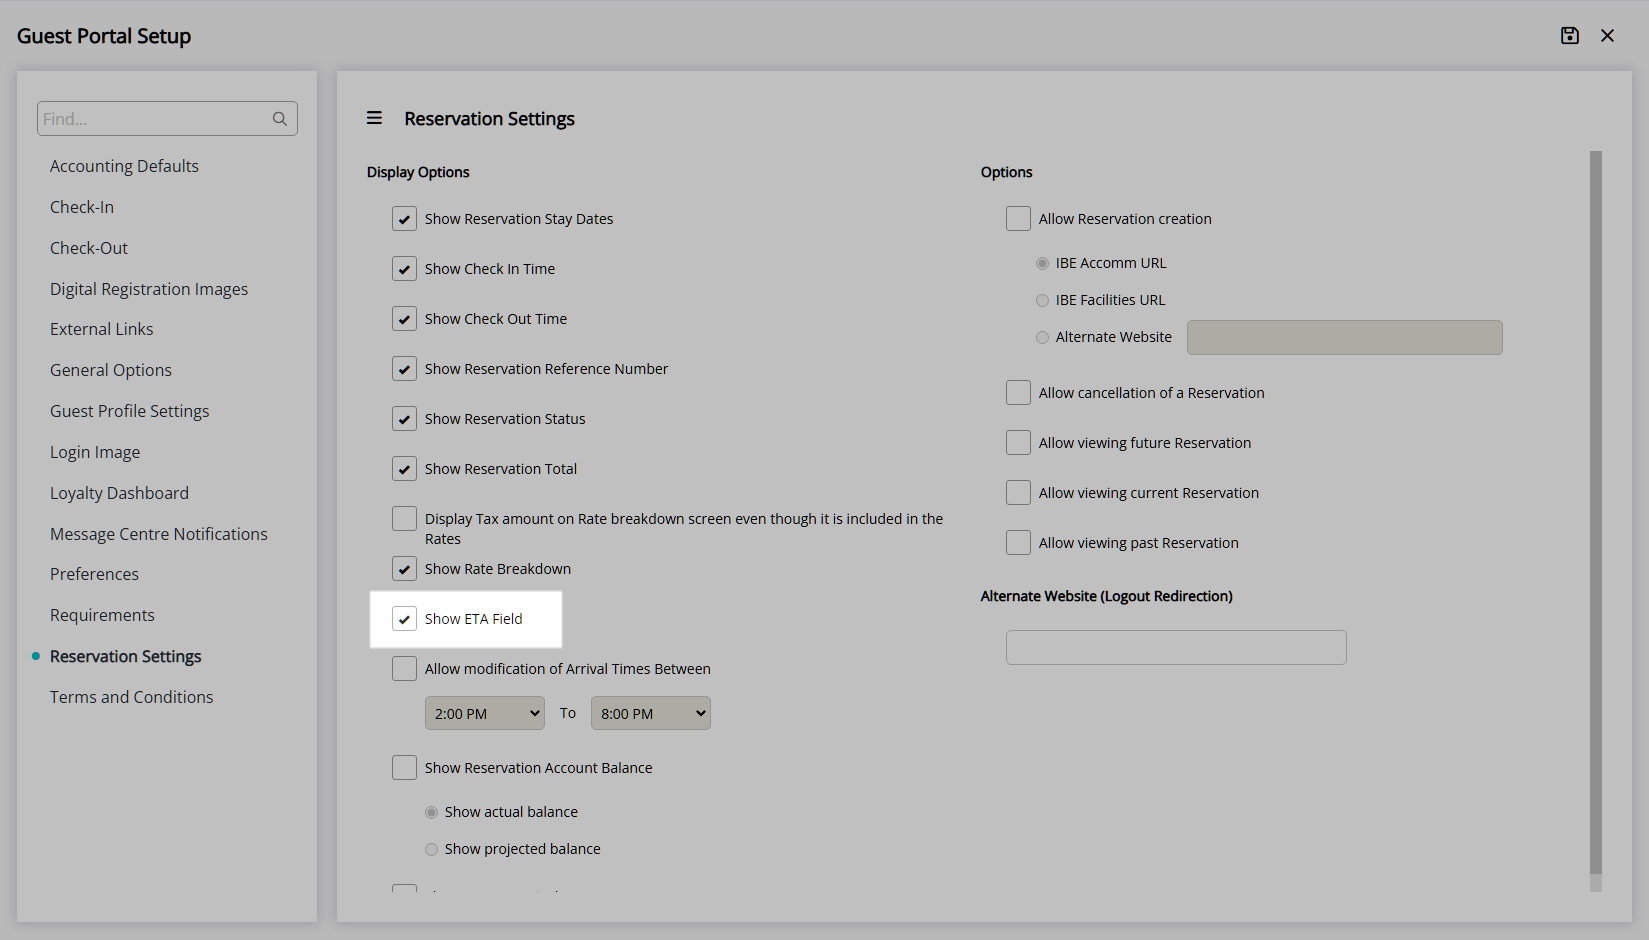
Optional: Select the checkbox 'Show ETA field'.
-
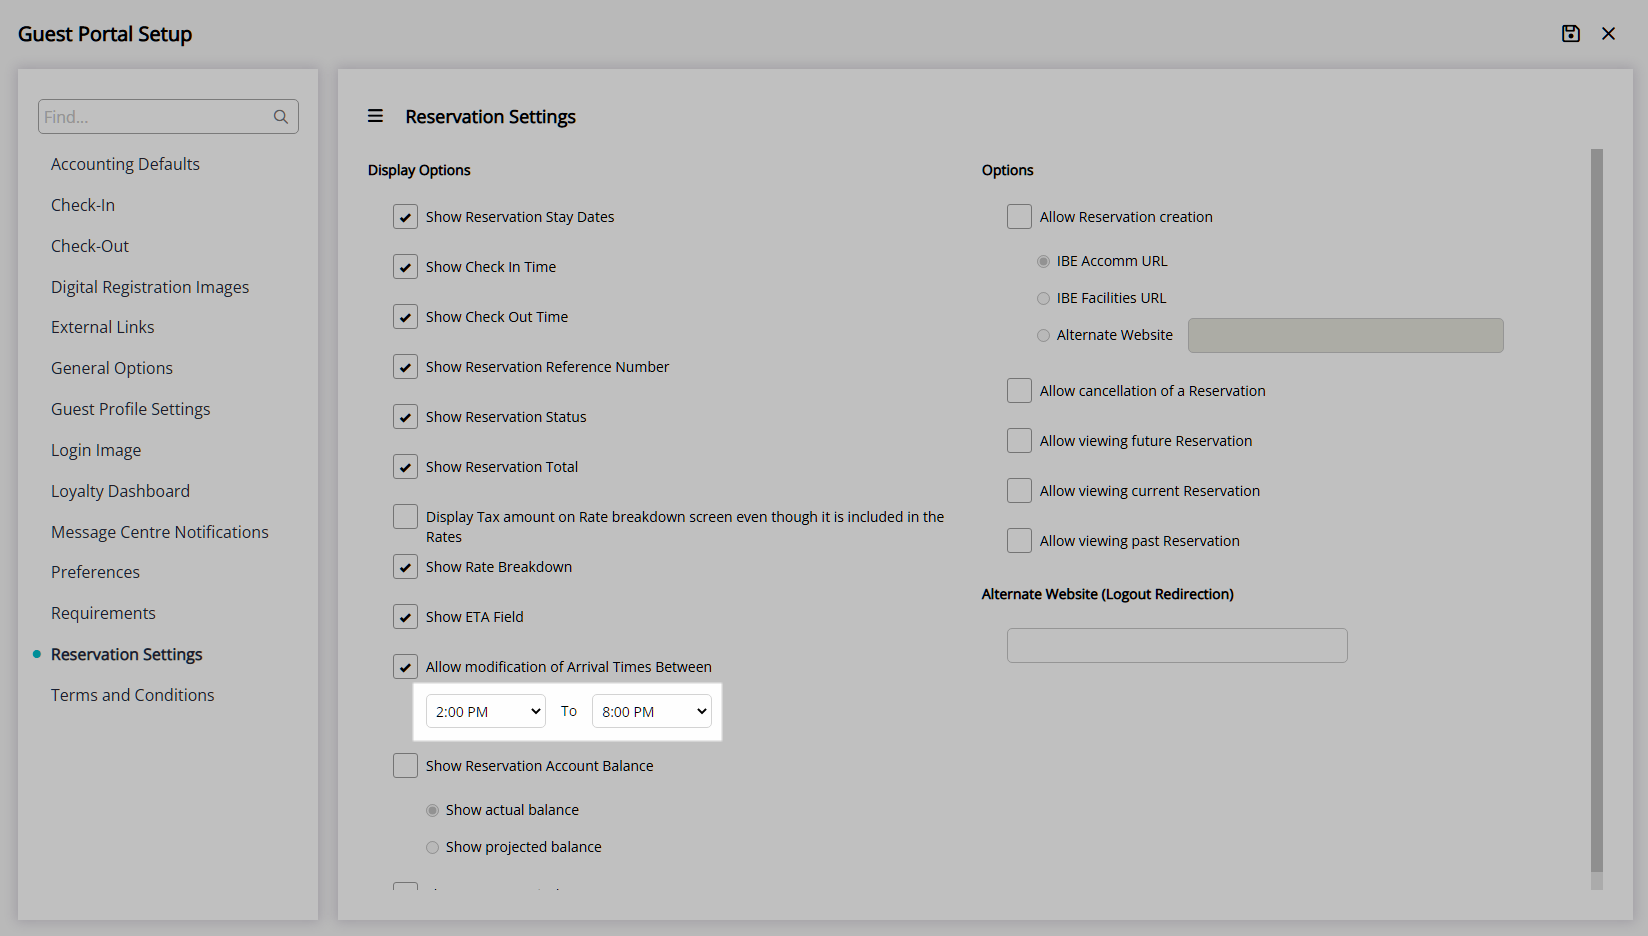
Optional: Select the checkbox 'Allow Modification of Arrival Times Between'.
- Select the Allowable Arrival Times.
-
Optional: Select the checkbox 'Allow Modification of Arrival Times Between'.
-
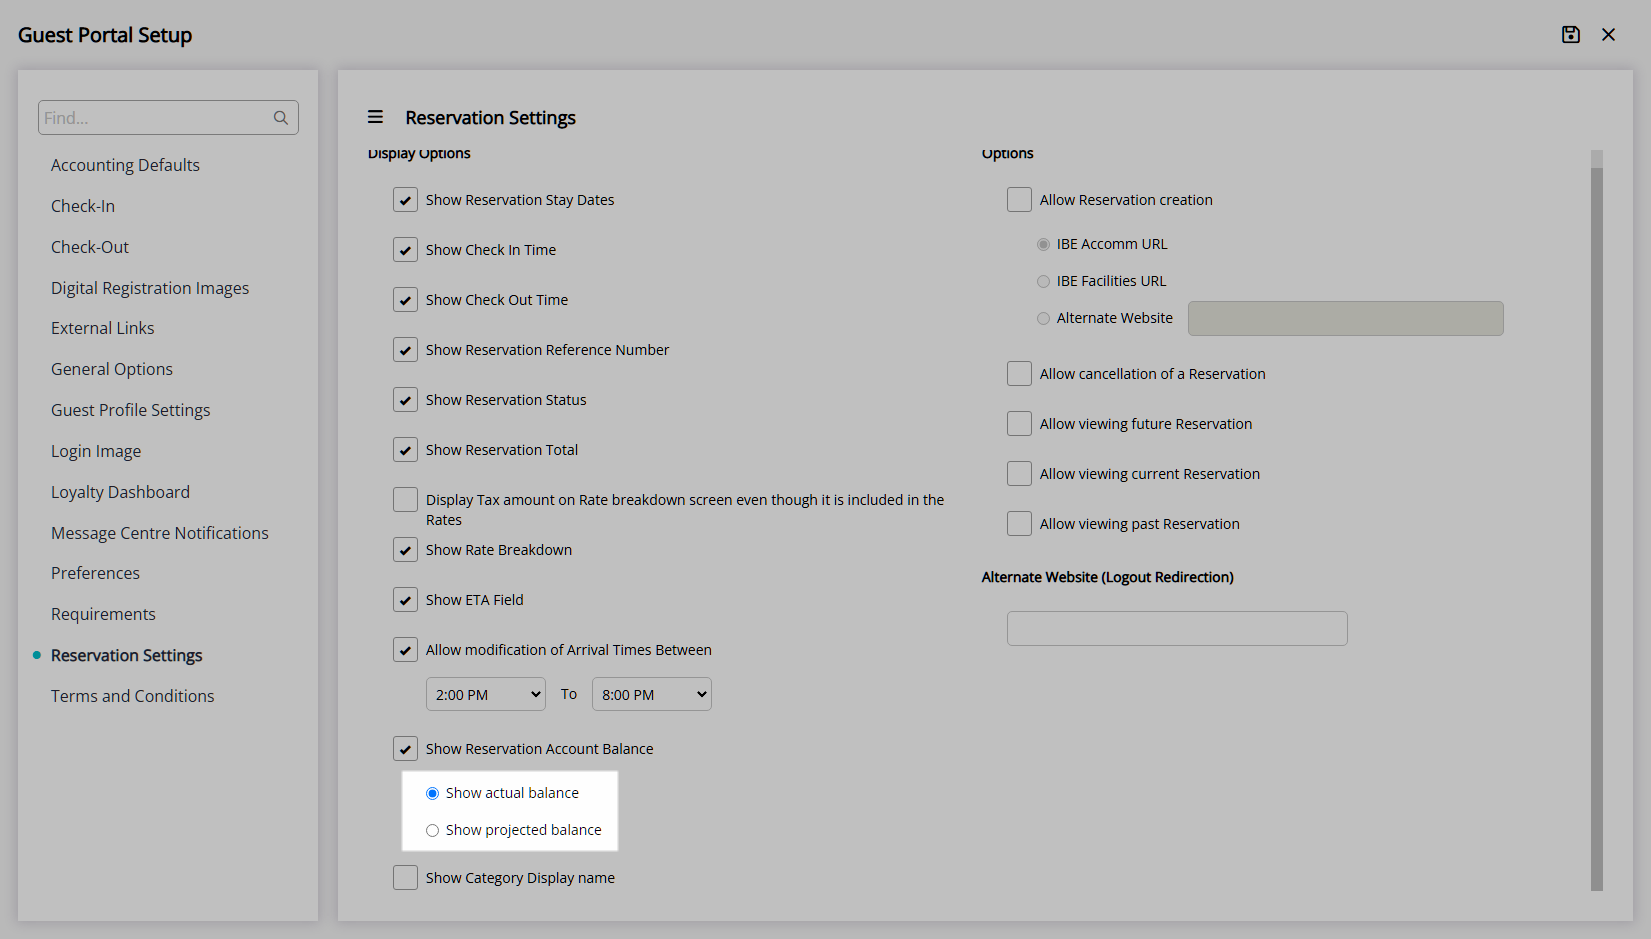
Optional: Select the checkbox 'Show Reservation Account Balance'.
- Select to display the Actual or Projected Balance.
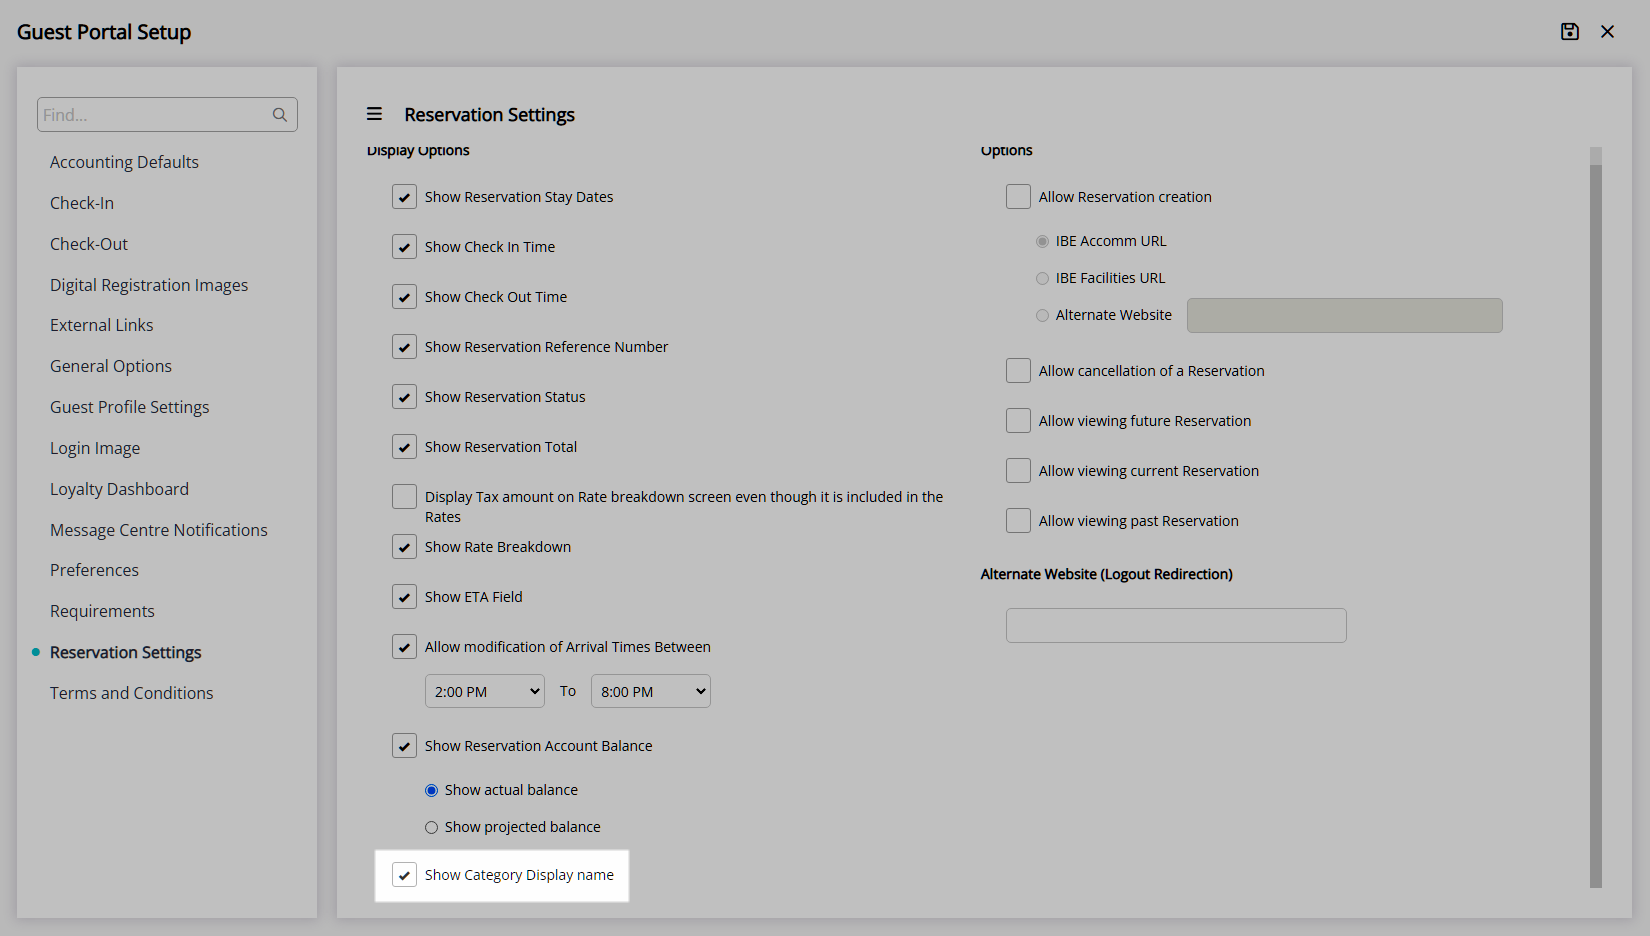
- Optional: Select the checkbox 'Show Category Display Name'.
-
Options.
-
Optional: Select the checkbox 'Allow Reservation Creation'.
- Select the RMS Internet Booking Engine to use or enter an external Booking Engine URL.
- Optional: Select the checkbox 'Allow Reservation Cancellation'.
- Select the checkbox 'Allow viewing Future Reservations'.
- Select the checkbox 'Allow viewing Current Reservations'.
- Optional: Select the checkbox 'Allow vieiwng Past Reservations'.
- Optional: Enter an Alternate Website to redirect on logout.
-
Optional: Select the checkbox 'Allow Reservation Creation'.
- Save.
-
Display Options.
Accounting Options
- Navigate to the 'Accounting Defaults' tab.
-
Accounting Options.
-
Optional: Select the checkbox 'Allow Credit Card Payments'.
- Optional: Select the checkbox 'Default Payment to Projected Balance'.
- Optional: Select the checkbox 'Allow Selection of Charges for Payment'.
-
Optional: Select the checkbox 'Charge a Credit Card Transaction Fee'.
- Enter the Credit Card Transaction Fee Percentage.
-
Optional: Select the checkbox 'Allow Printing/Emailing of Statements'.
- Select the checkbox for the Account Types.
- Optional: Select the checkbox 'Allow Printing of Tax Invoices'.
-
Optional: Select the checkbox 'Allow Credit Card Payments'.
-
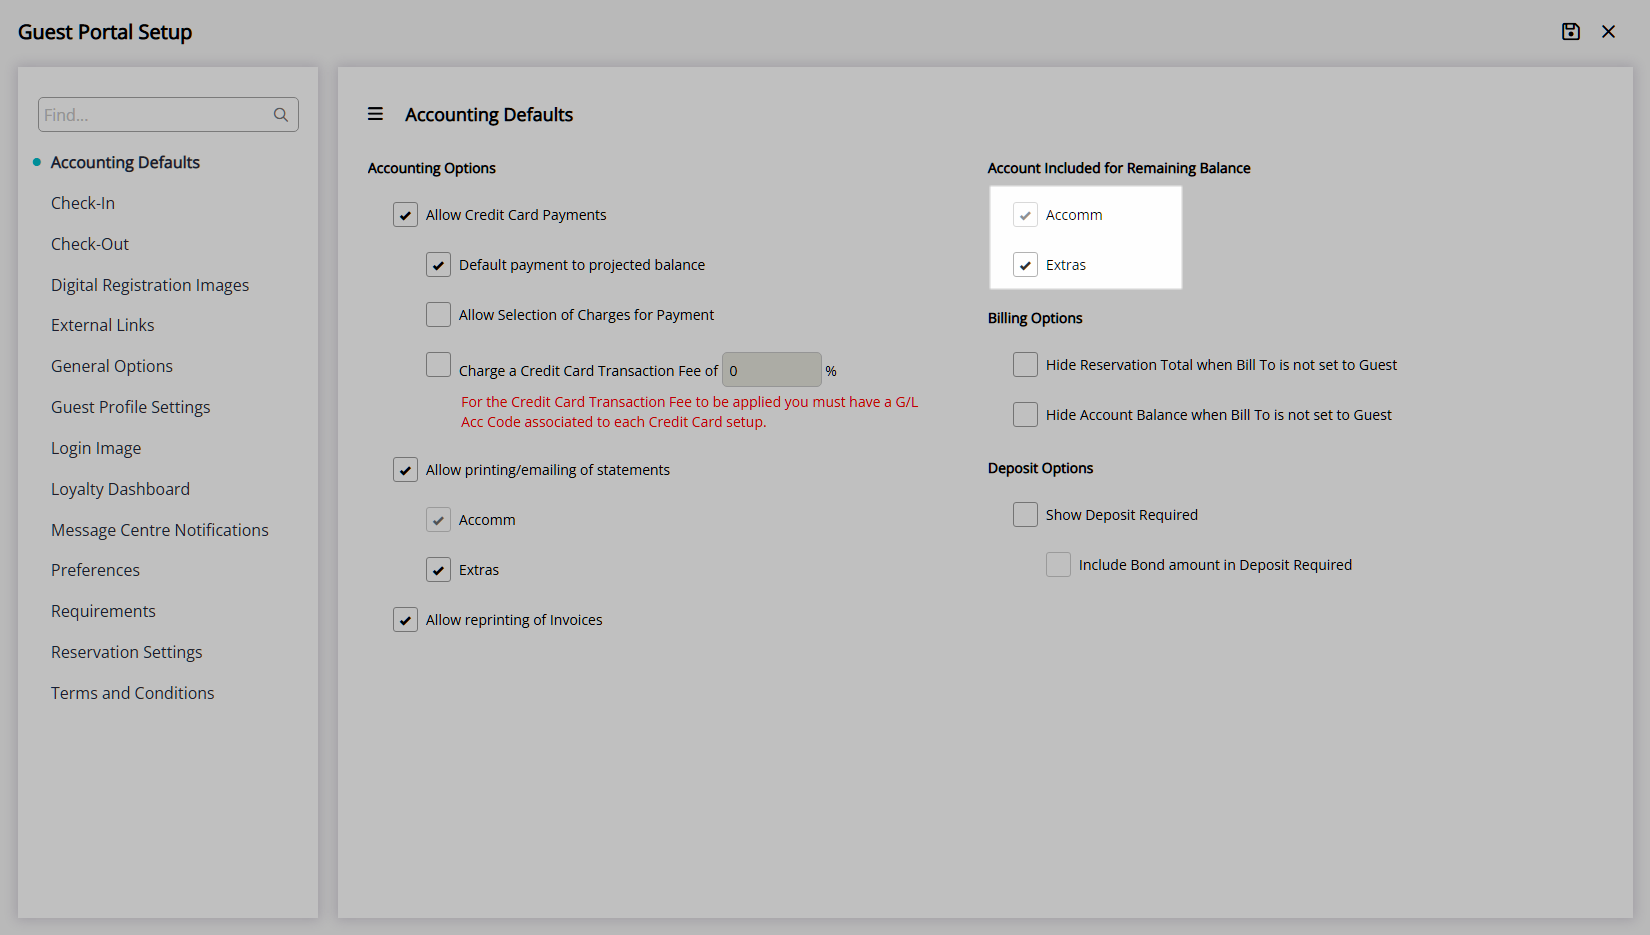
Account Included for Remaining Balance.
- Optional: Select the checkbox 'Extras' to be included in the Remaining Balance.
-
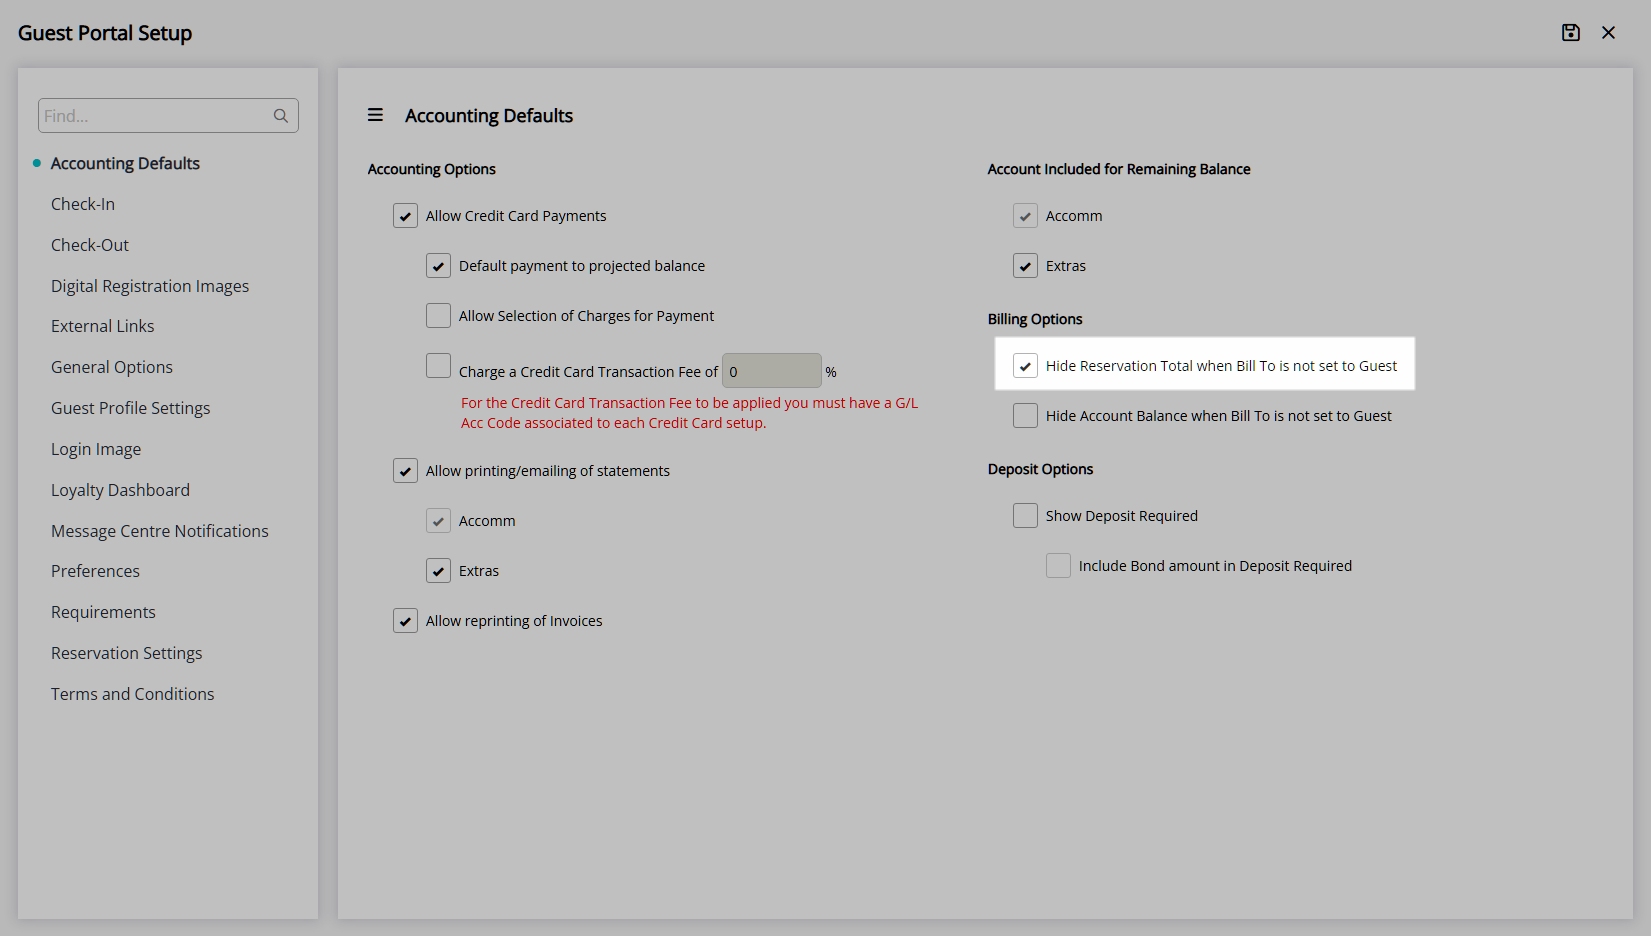
Billing Options.
- Optional: Select the checkbox 'Hide the Reservation Total when the Bill To is not set to Guest'.
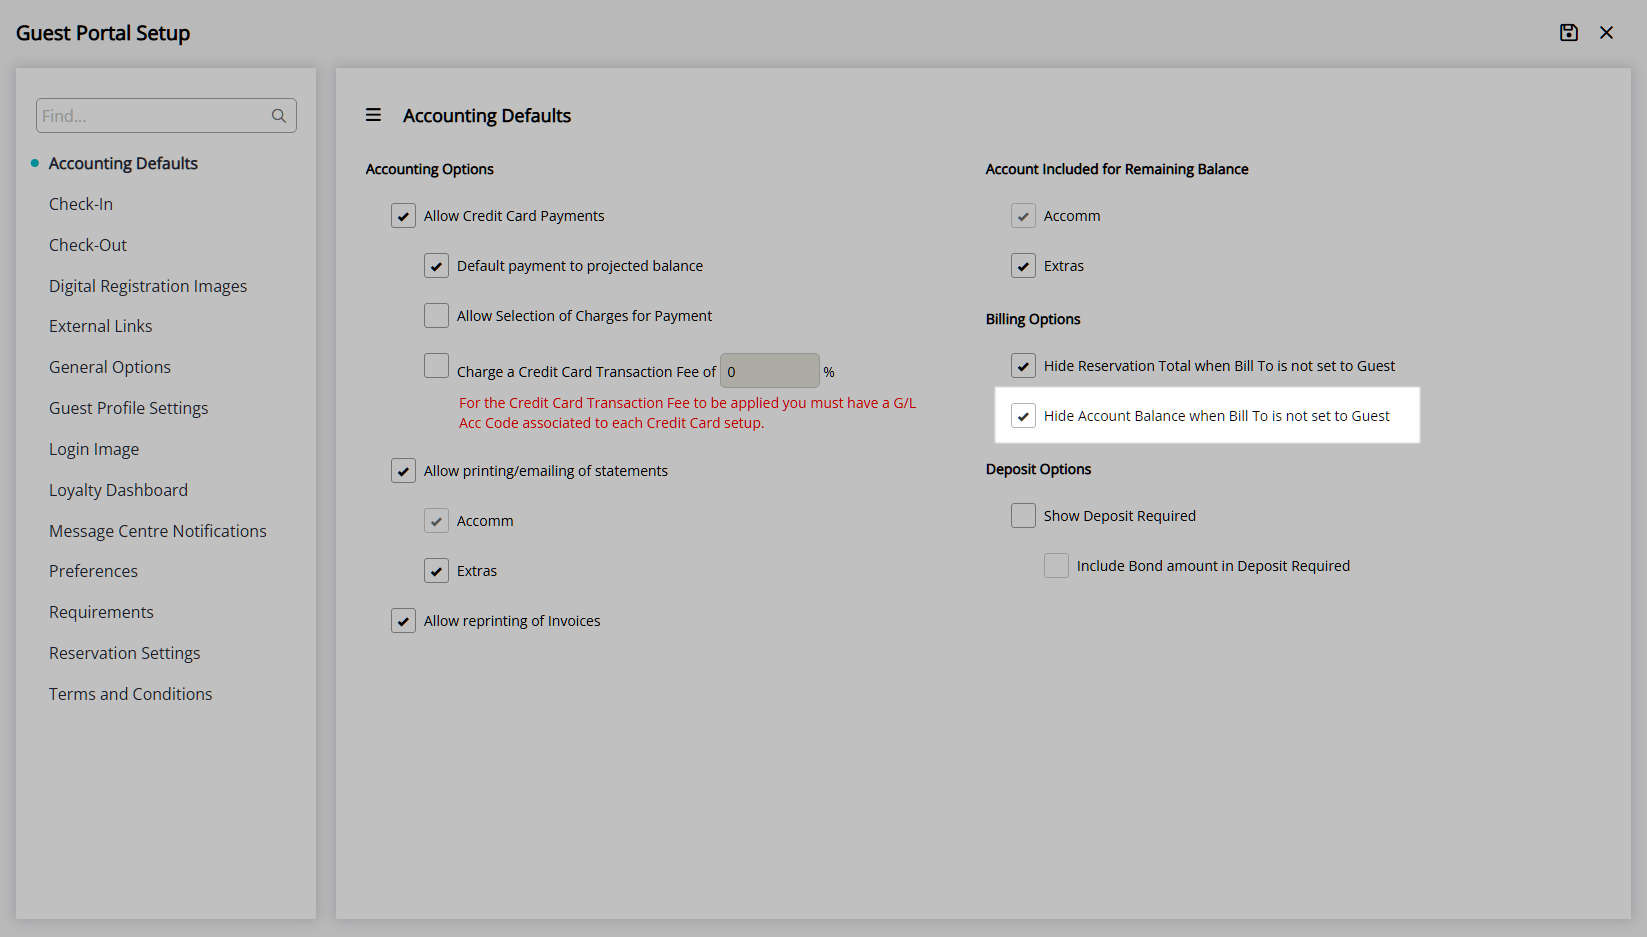
- Optional: Select the checkbox 'Hide the Account Balance when the Bill To is not set to Guest'.
-
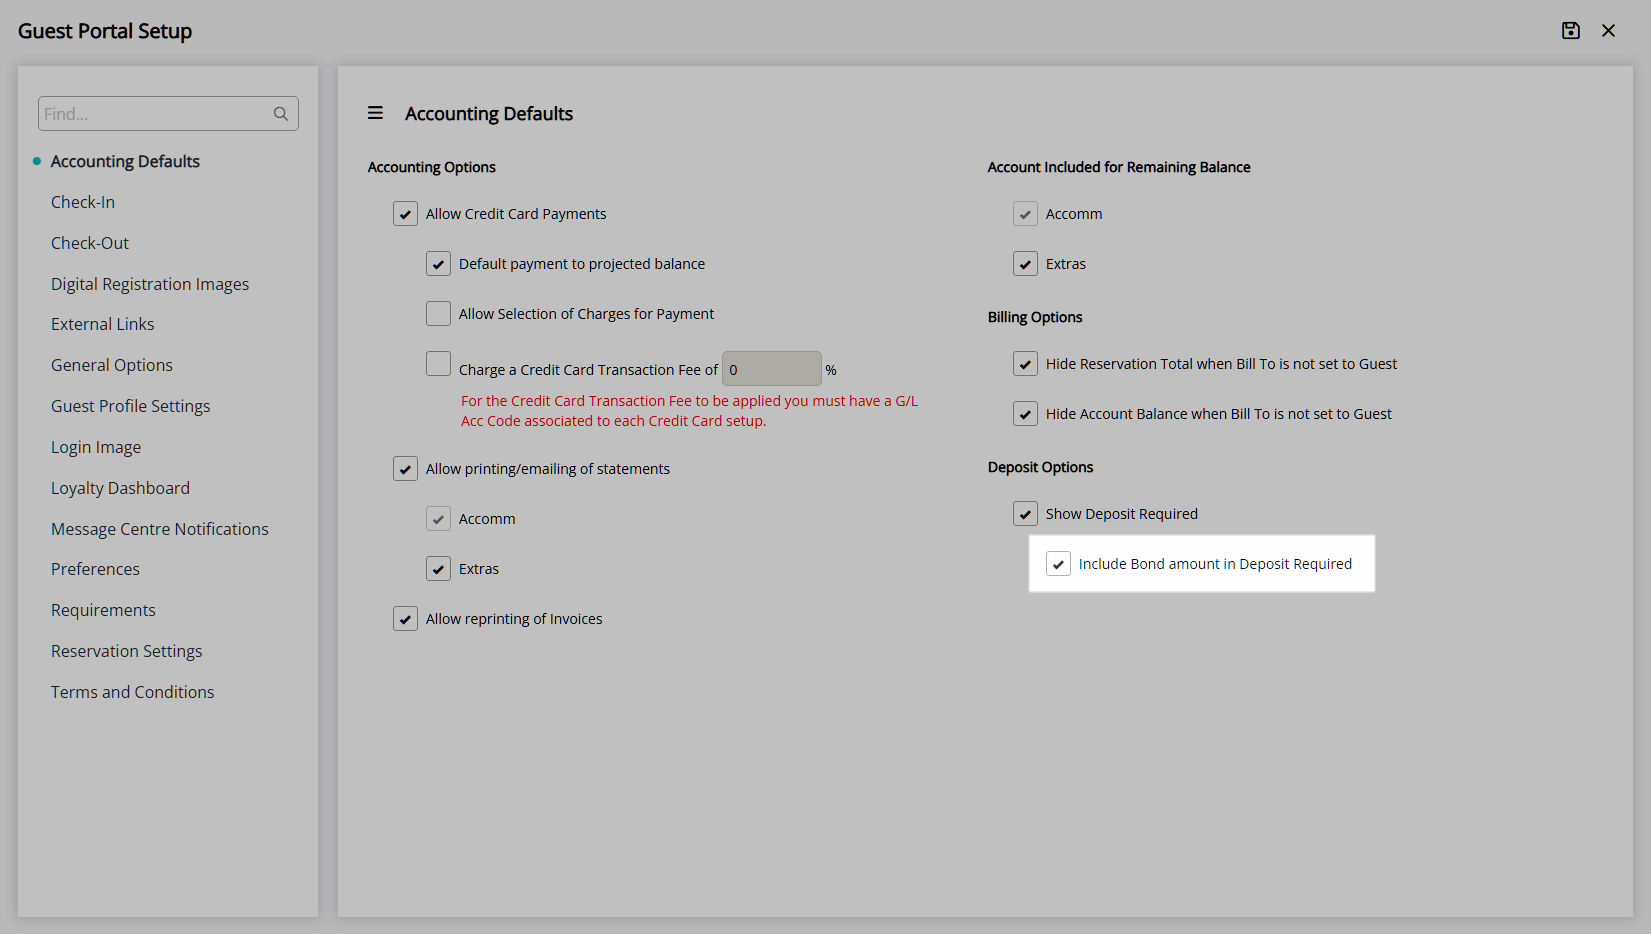
Deposit Options.
- Optional: Select the checkbox 'Show Deposit Required'.
- Optional: Select the checkbox 'Include Bond Amount in the Deposit Required'.
- Save.
-
Accounting Options.
Terms & Conditions
- Navigate to the 'Terms & Conditions' tab.
- Enter the Property Terms & Conditions.
- Optional: Enter Custom Terms & Conditions Checkbox Text.
- Save.
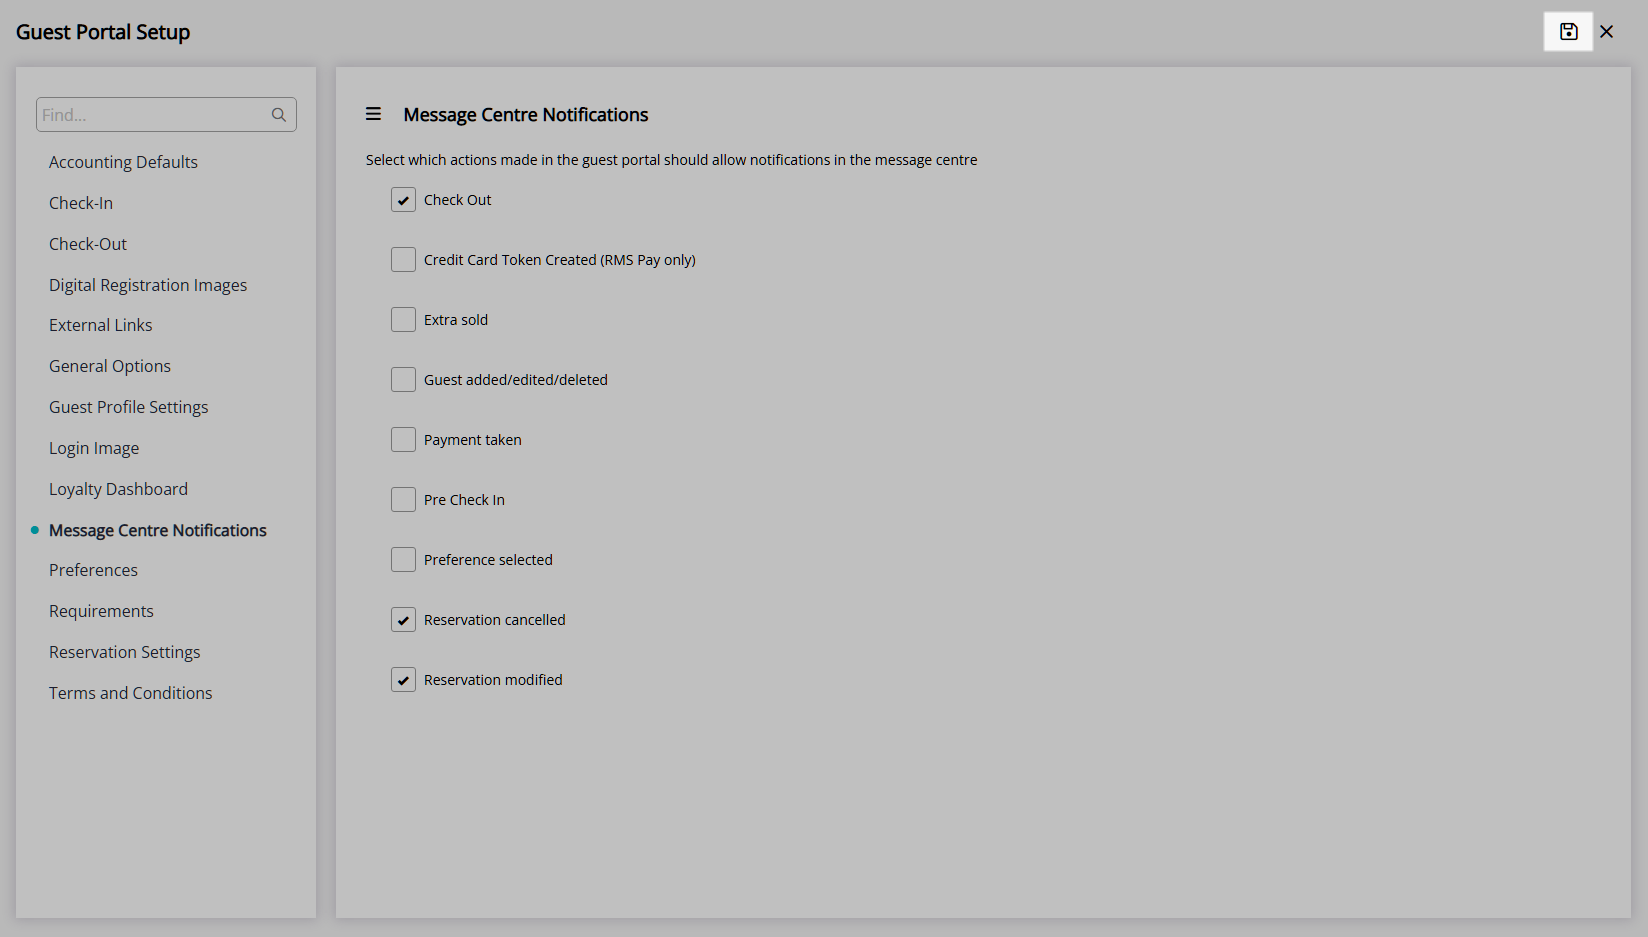
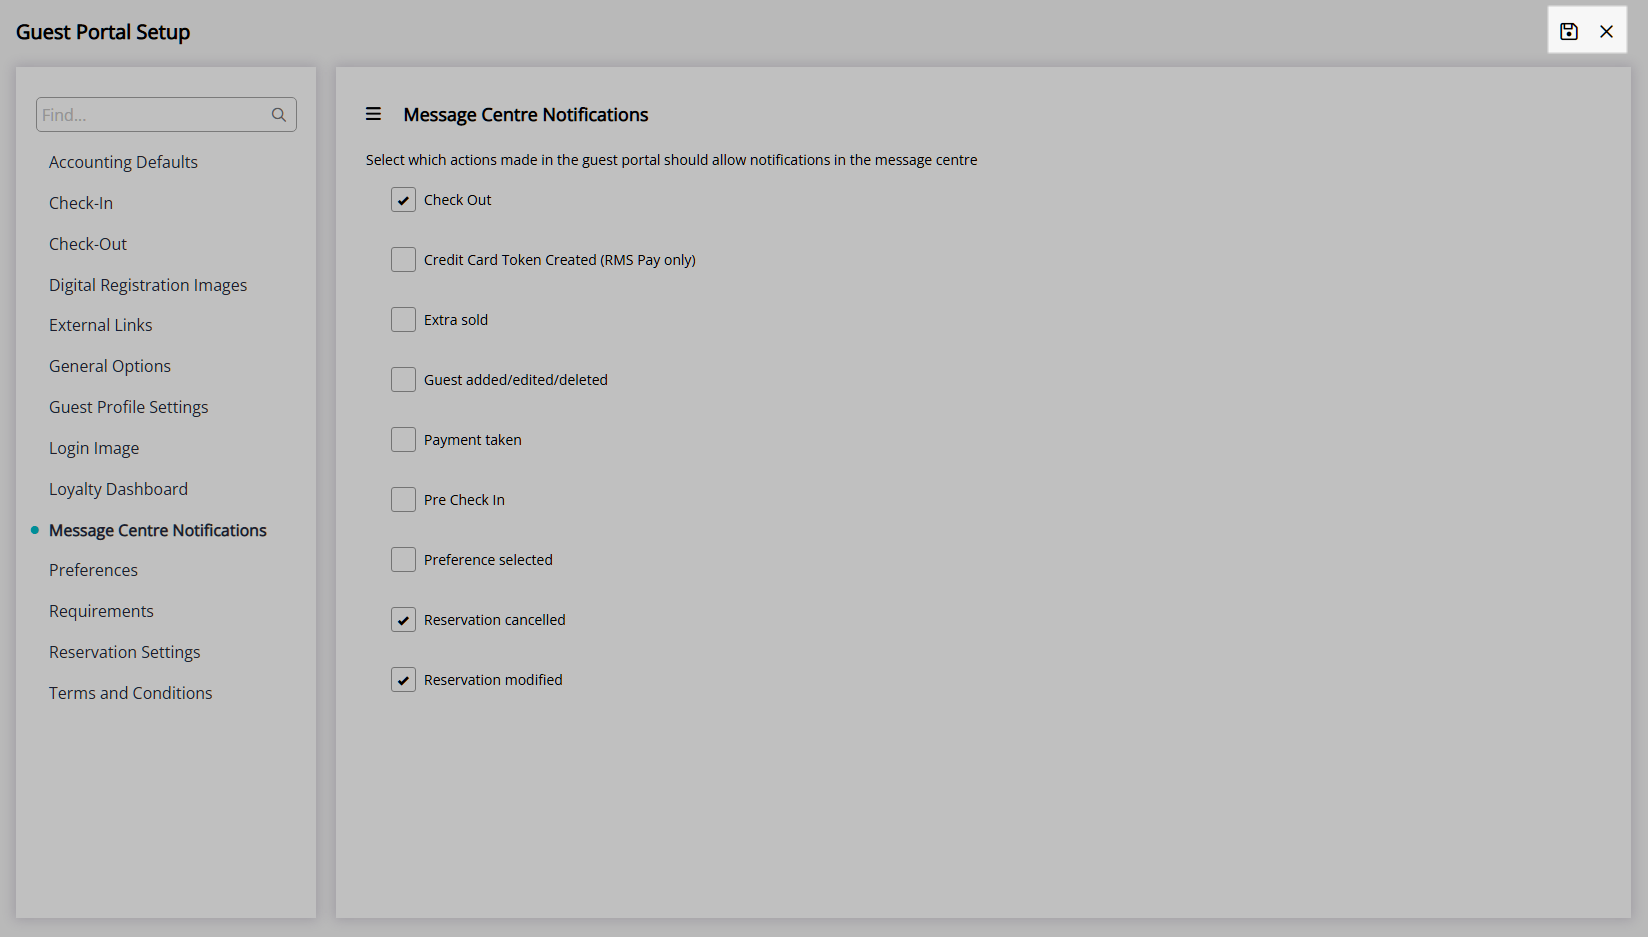
Message Centre Notifications
- Navigate to the 'Message Centre Notifications' tab.
- Select the checkbox for the Guest Portal Actions to trigger a Message Centre Notification.
- Save.
- Save/Exit.

Additional Guest Portal setup includes Pre-Check-in, Check-in & Check-out, Digital Check-in, Preferences, Requirements, Colour Theme and Photos.
Payments made via the Guest Portal require a Payment Gateway setup in RMS.
Photo identification enables upload of one document or image file that will be saved on the 'Photo' tab of the Guest Profile.
The Guest Portal can be accessed using the below URL and replacing 'xxxx' with the Property's RMS Client ID.
Enterprise customers can use the Enterprise RMS Client ID or an individual Property's RMS Client ID.
https://guestportal.rmscloud.com/Login/Index?clientId=xxxxxx
Using Auto Guest Merge will ensure Guest Profiles are maintained with the most recent contact information.
-
Guide
- Add Button
Guide
Guest Portal Activation
Go to Setup > Portal Access > Guest Portal in the Side Menu of RMS.
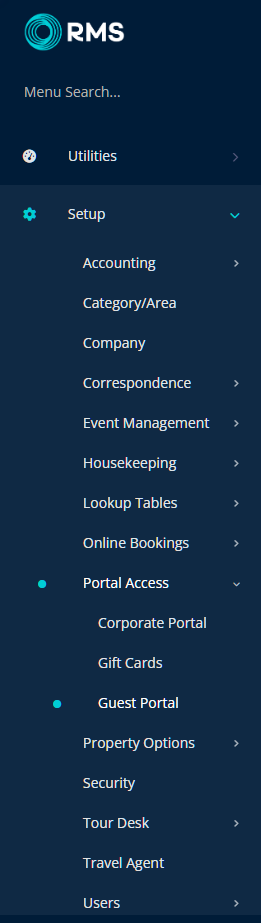
Navigate to the 'General Options' tab.
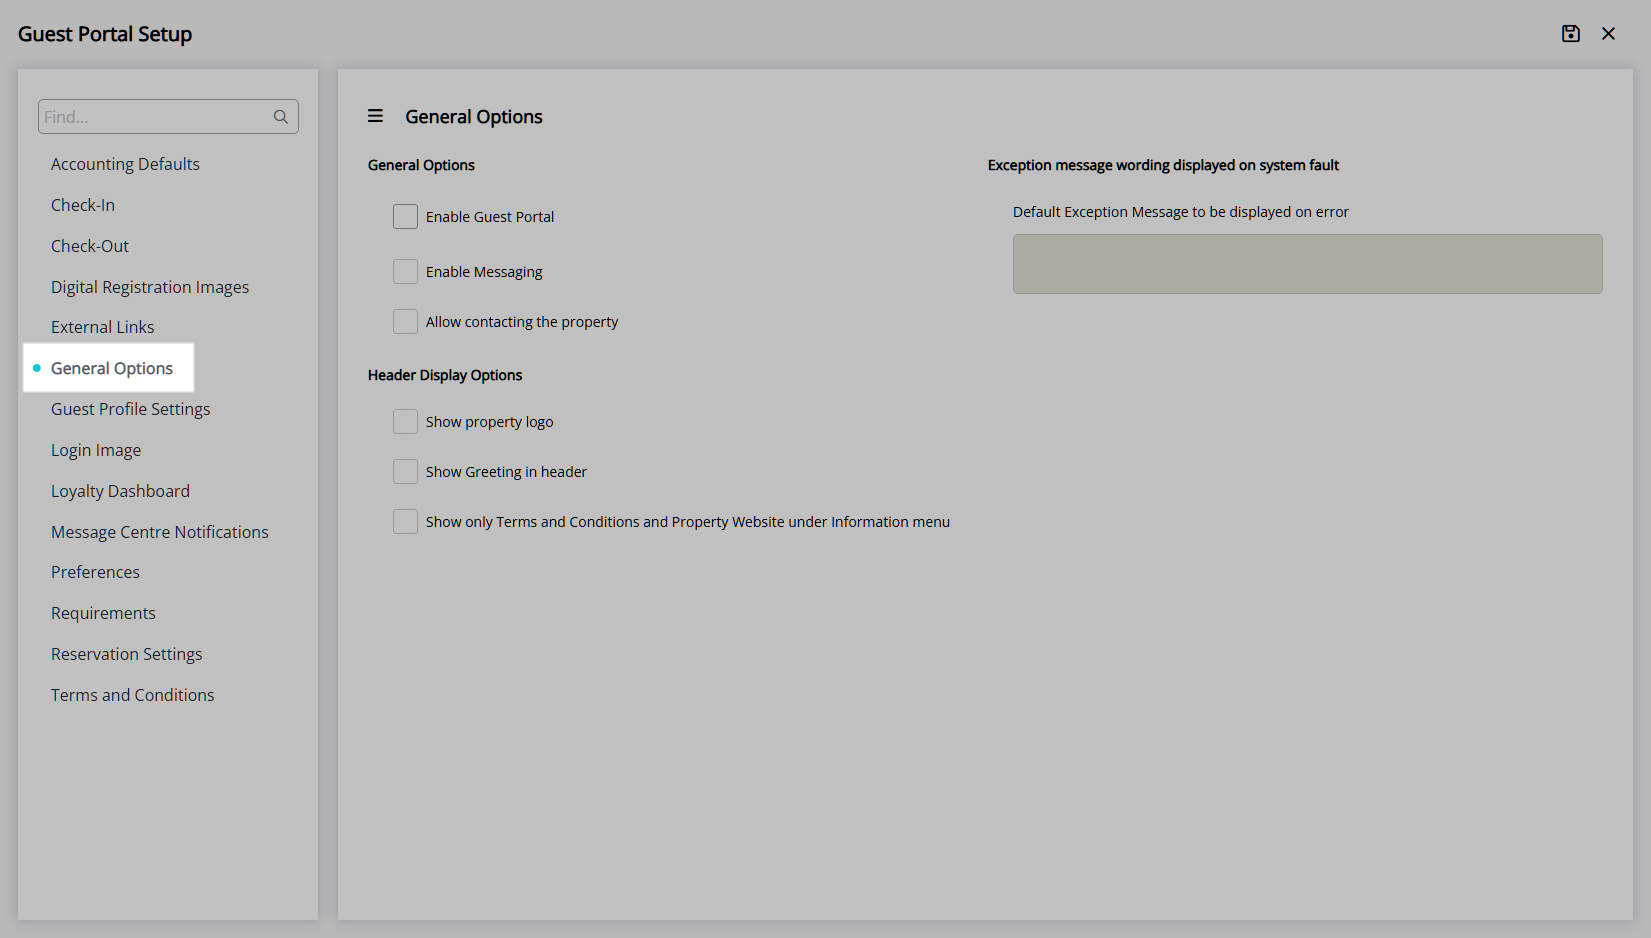
General Options.
Select the checkbox 'Enable Guest Portal'.
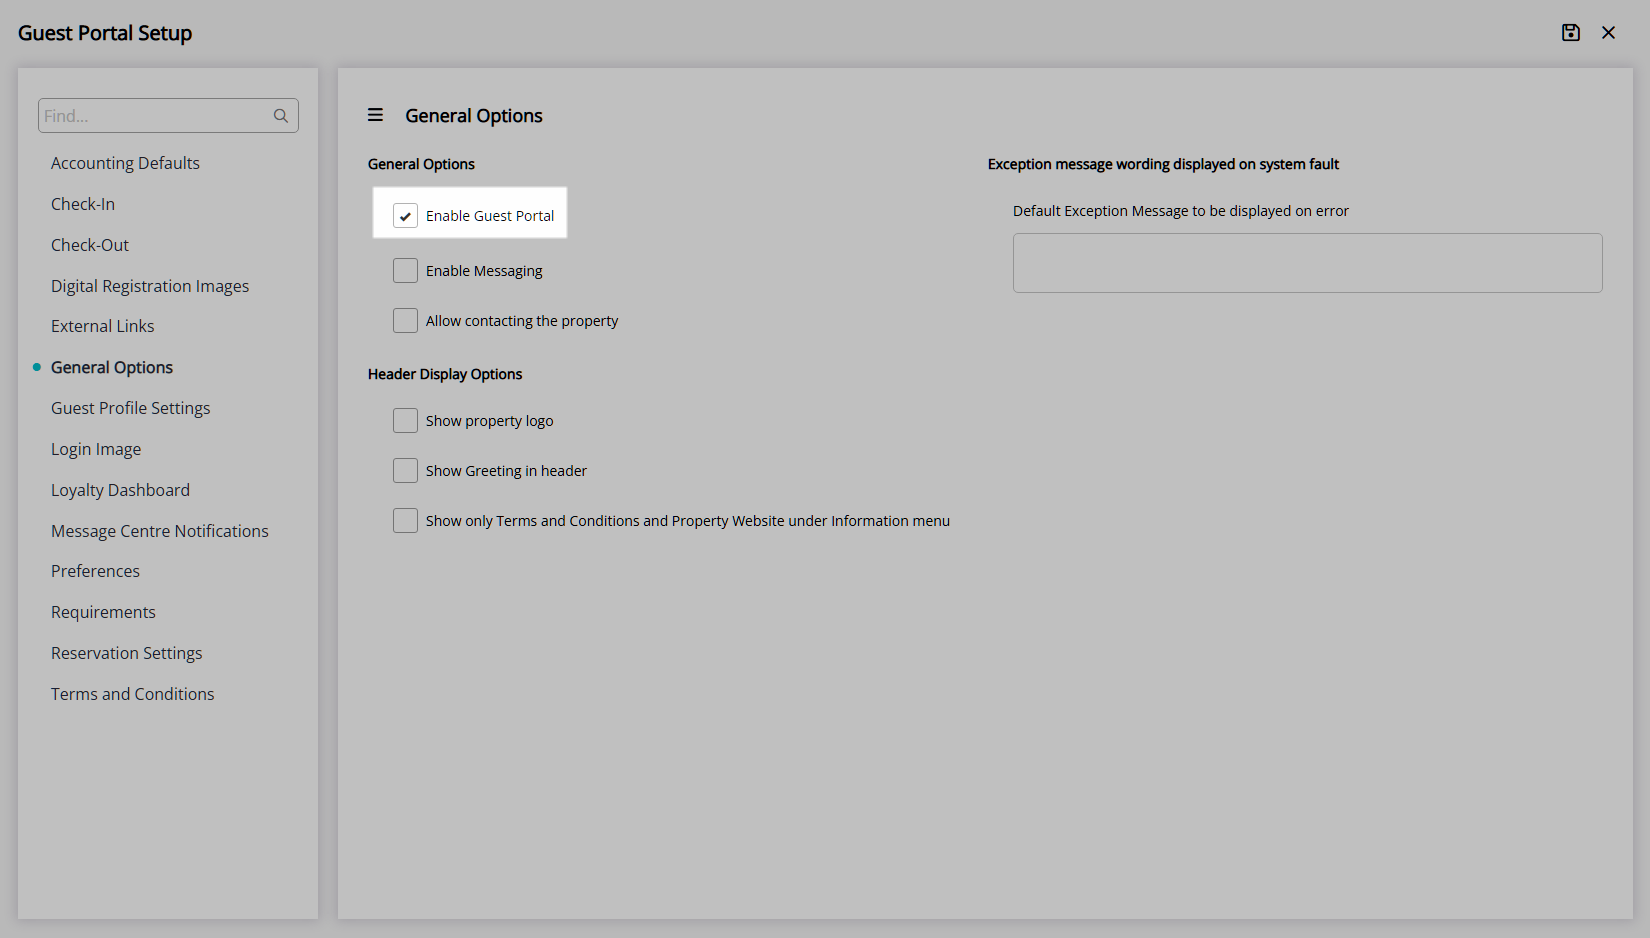
Optional: Select the checkbox 'Enable Messaging'.

Optional: Select the checkbox 'Allow contacting the Property'.
Header Display Options.
Optional: Select the checkbox 'Show Property Logo'.
Optional: Select the checkbox 'Show Greeting in header'.
Optional: Show only Terms & Conditions and Property Website under the 'Information' menu.
Select  ‘Save’ to store the changes made.
Guest Profile Options
Navigate to the 'Guest Profile Settings' tab.
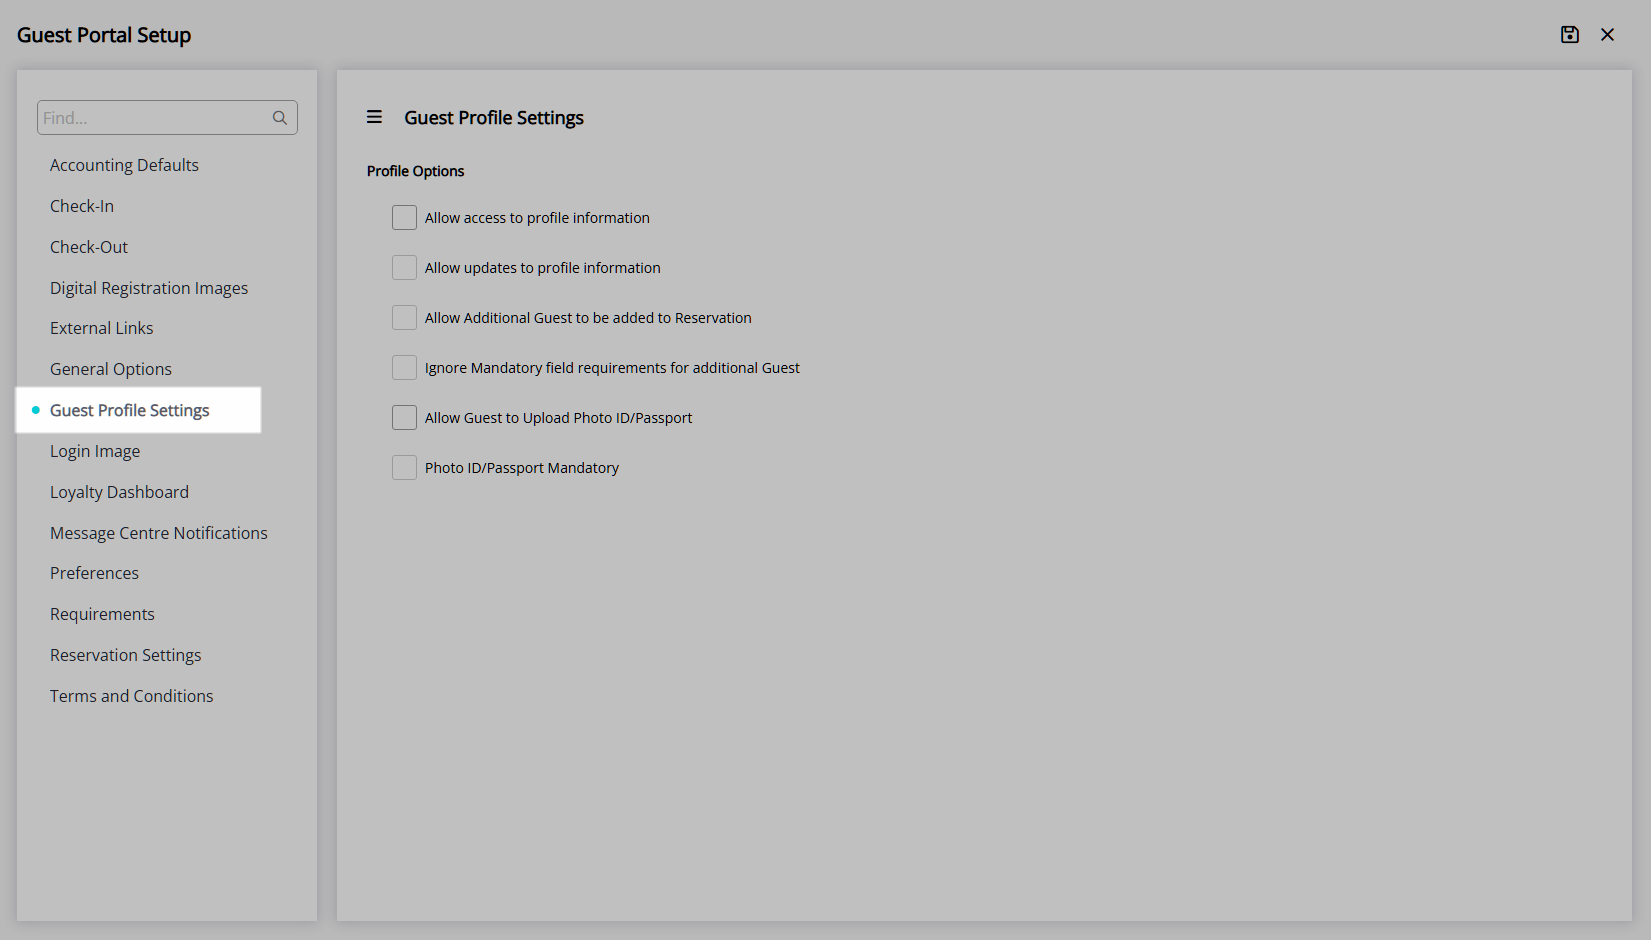
Profile Options.
Optional: Select the checkbox 'Allow access to profile information'.
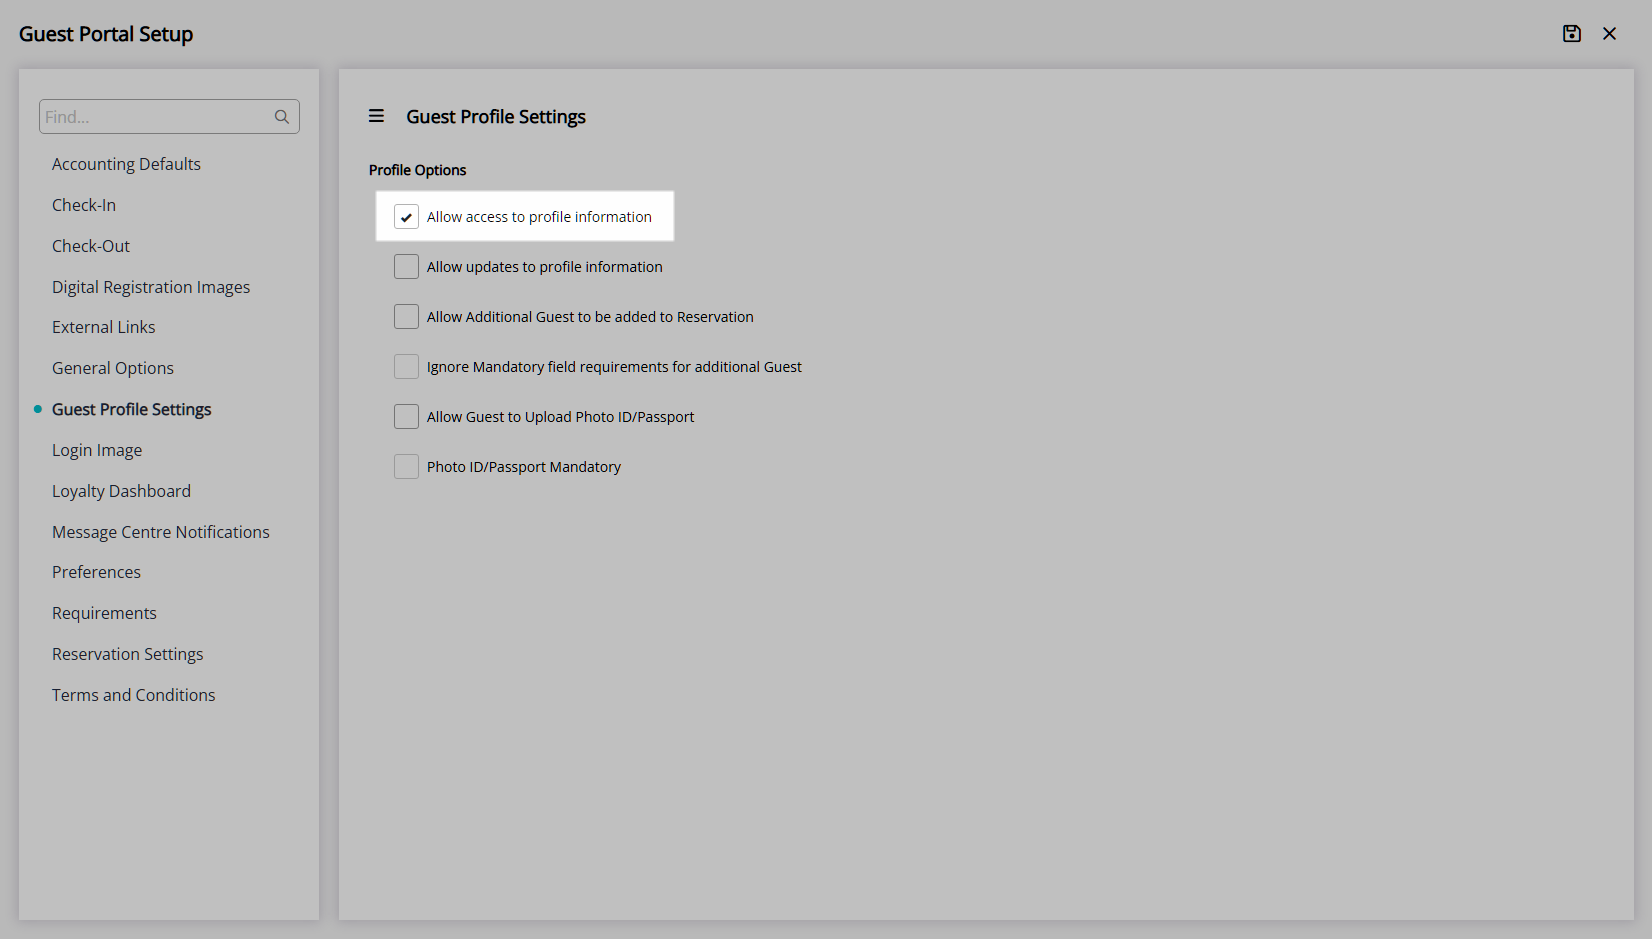
Optional: Select the checkbox 'Allow updates to profile information'.
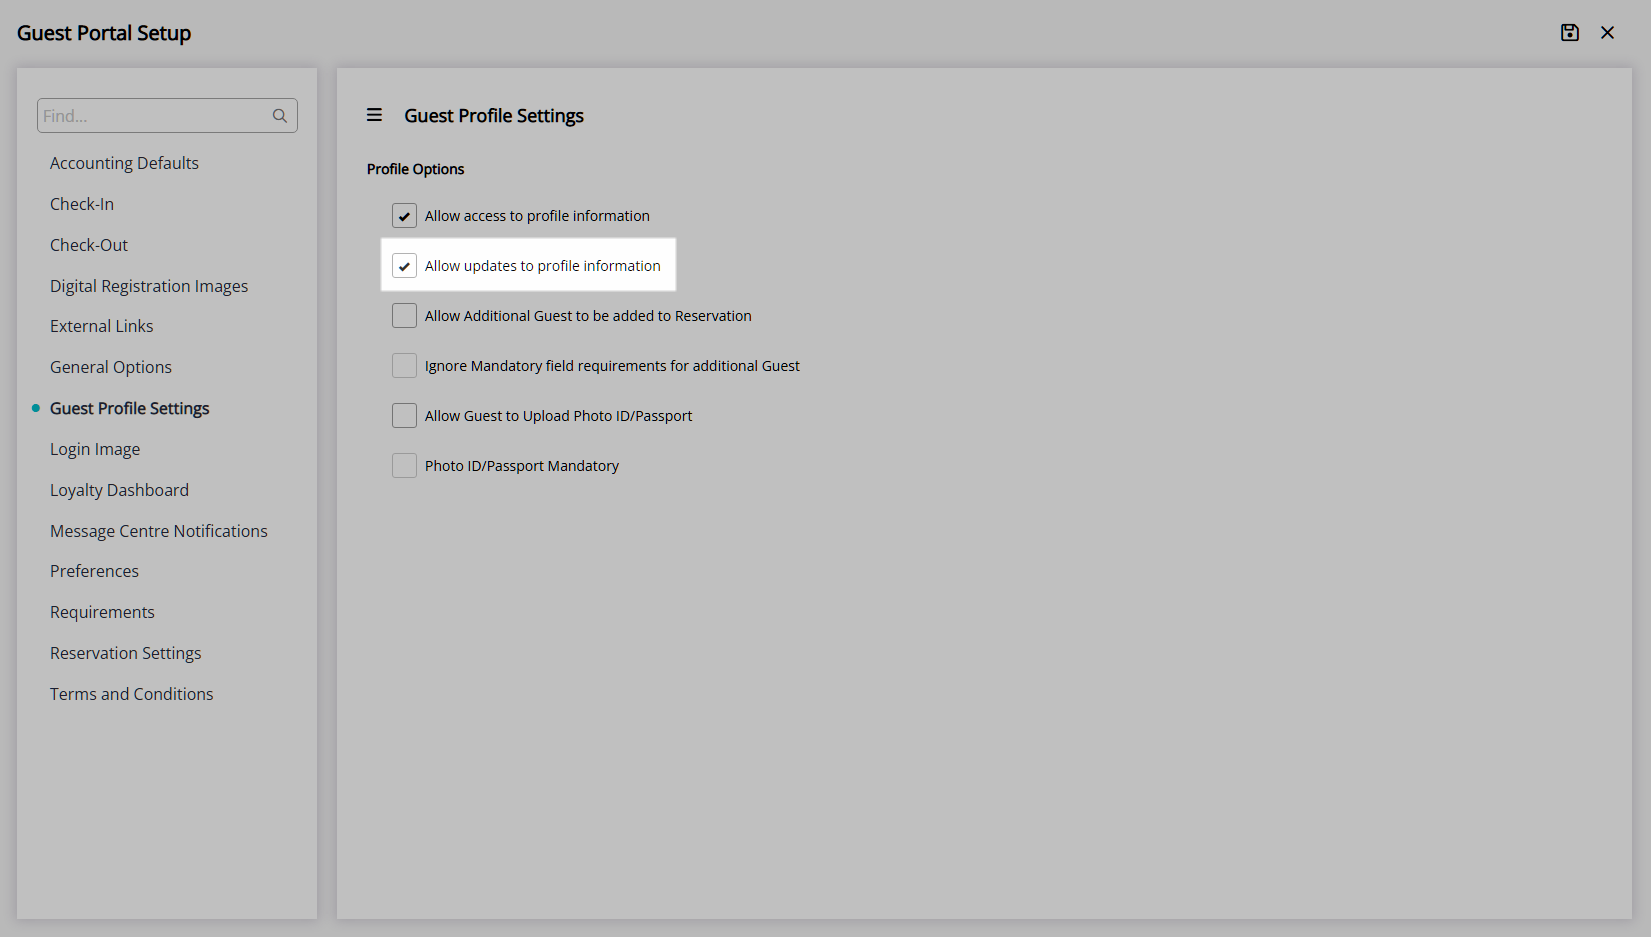
Optional: Select the checkbox 'Allow Additional Guests to be added to the Reservation'.
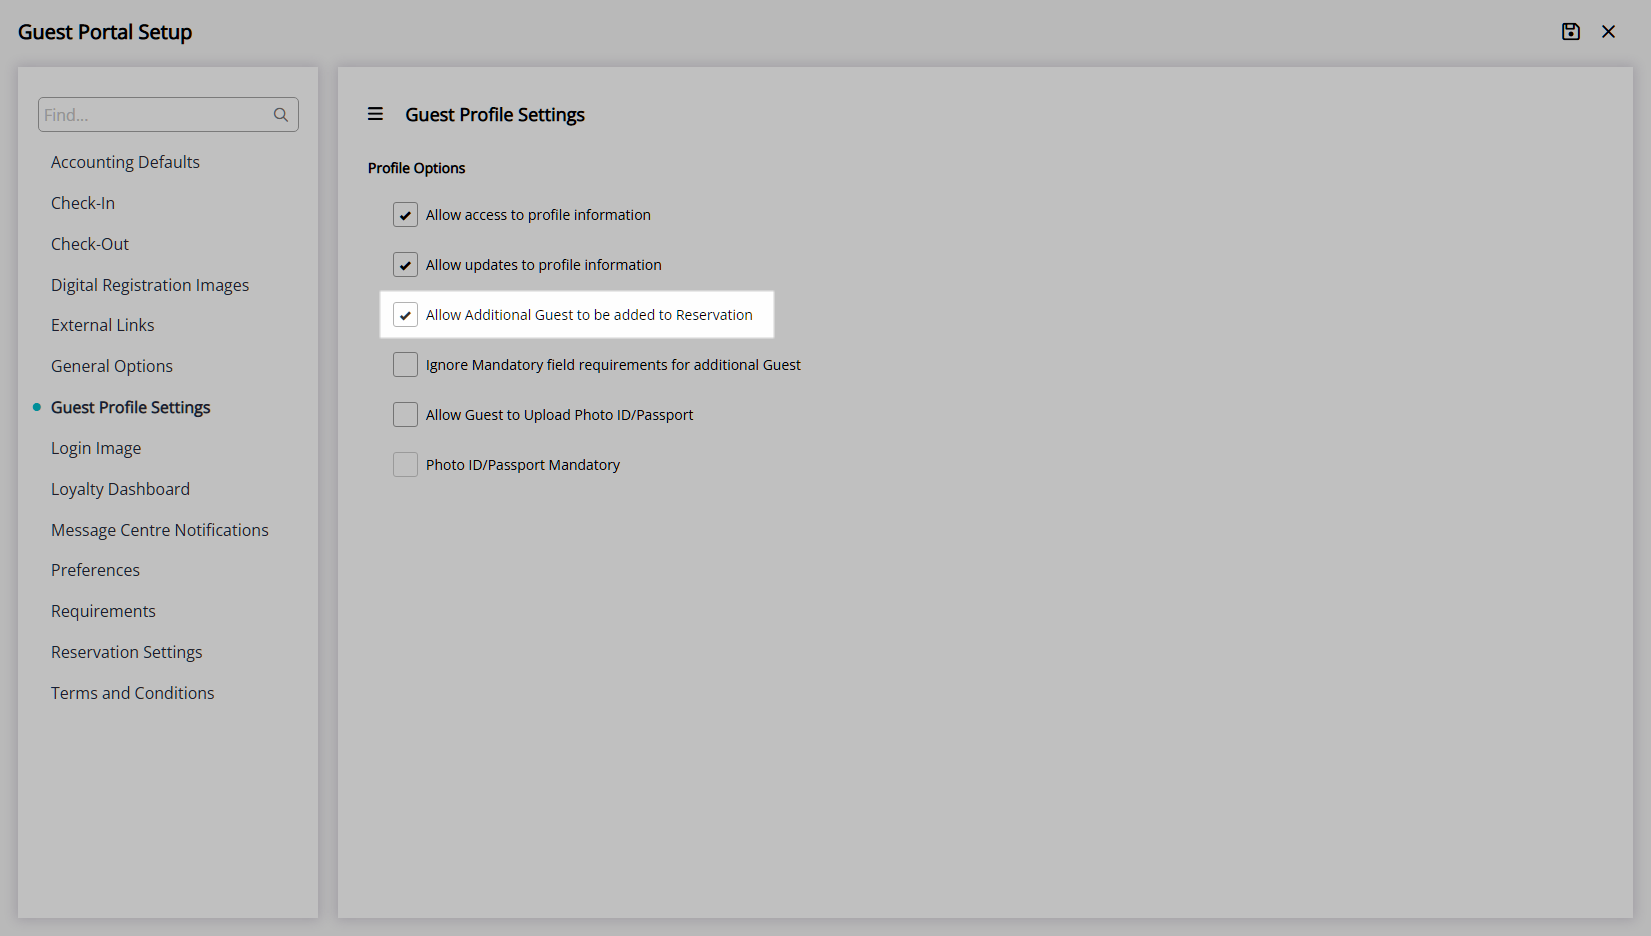
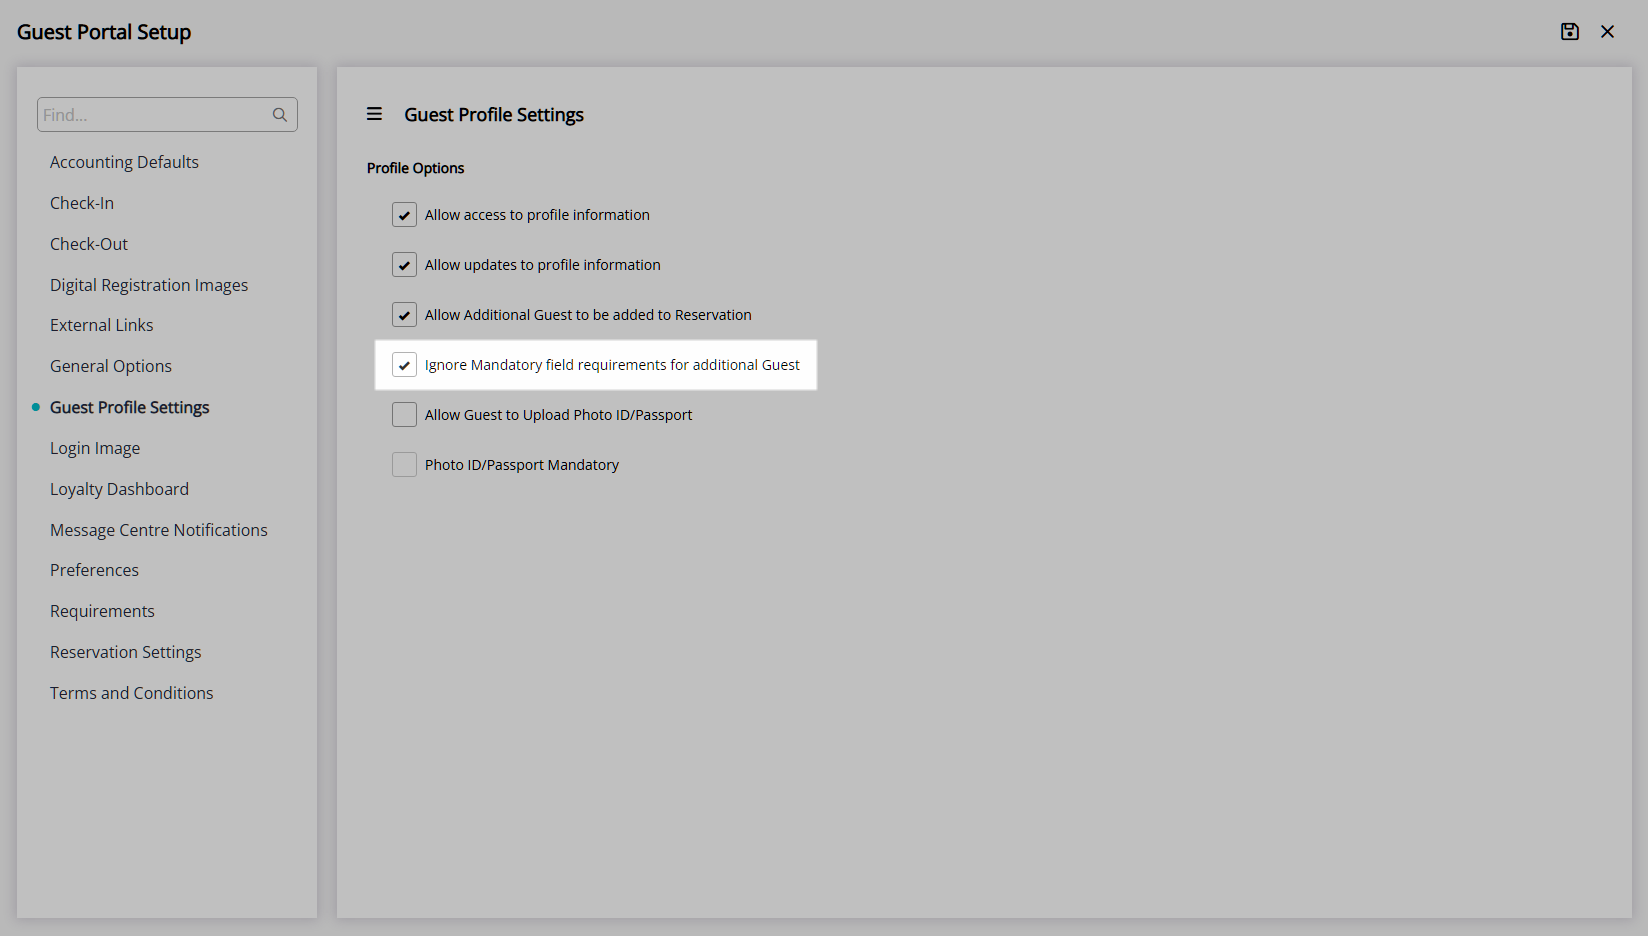
Optional: Select the checkbox 'Ignore Mandatory field requirements for additional Guests'.
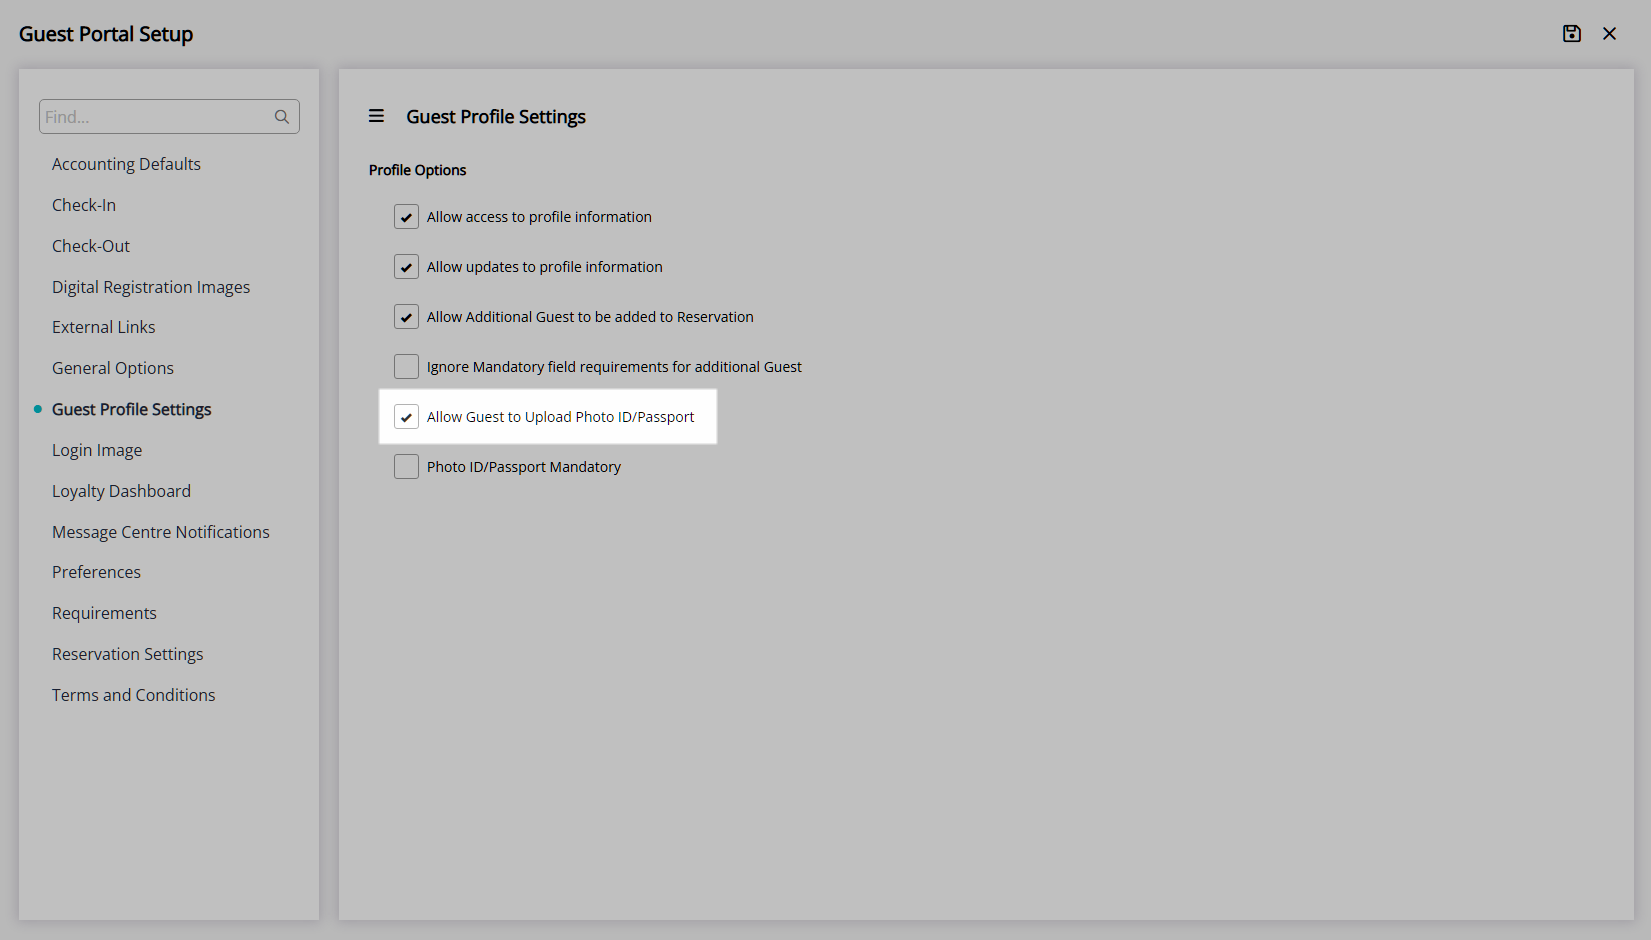
Optional: Select the checkbox 'Allow Guest to upload Photo ID/Passport'.
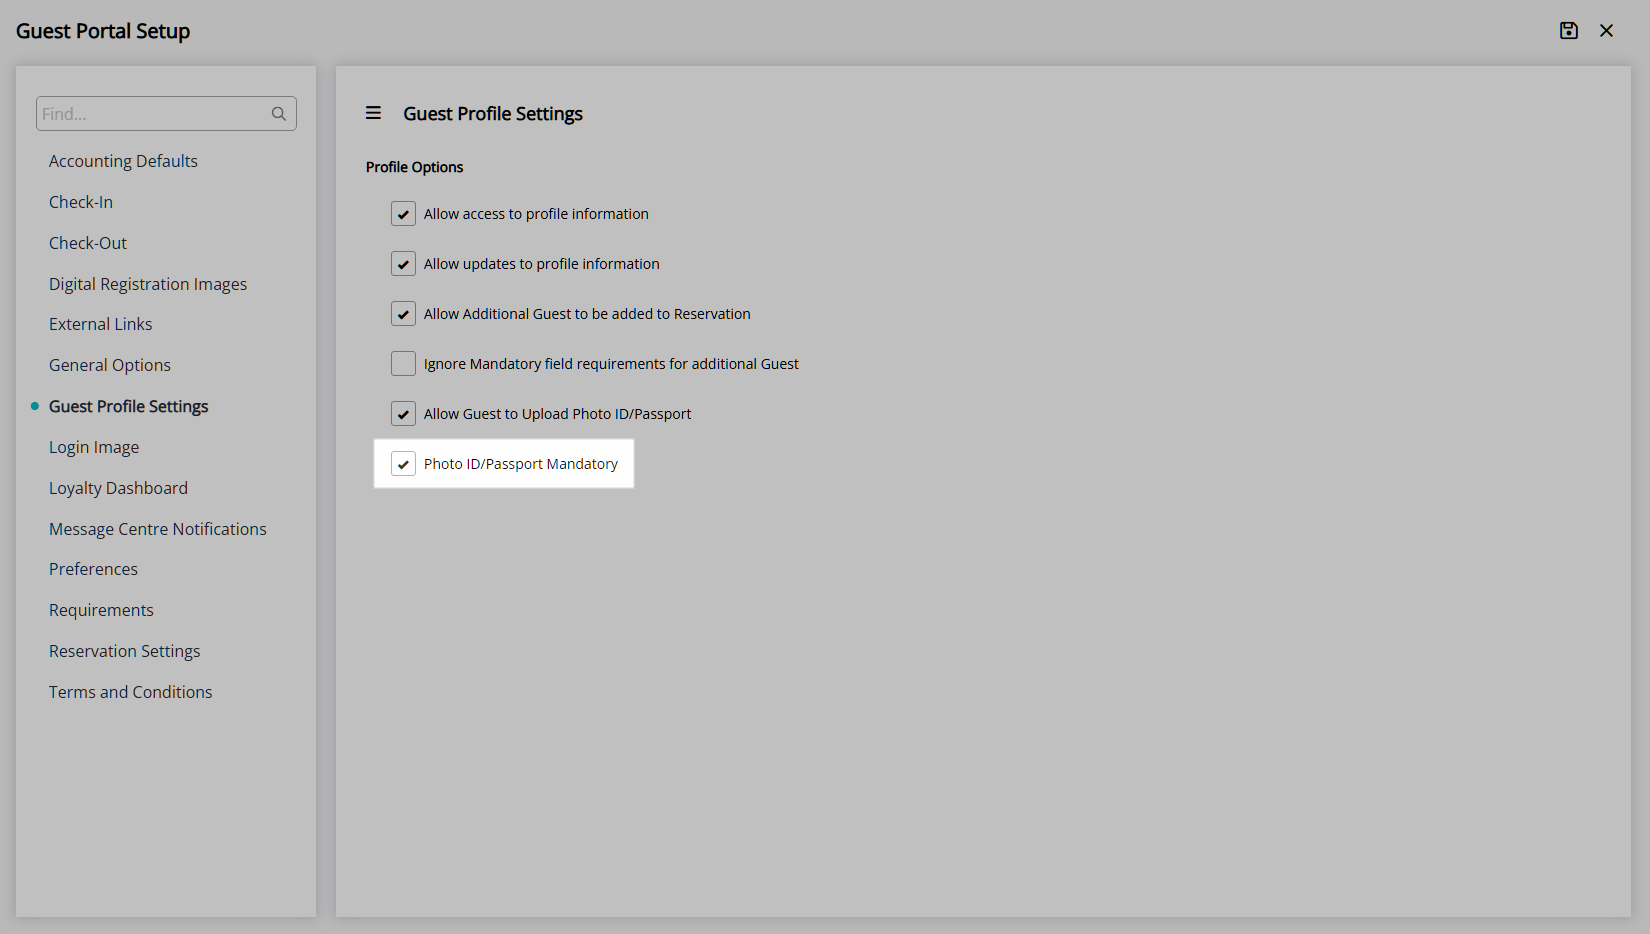
Optional: Select the checkbox 'Photo ID/Passport Mandatory'.
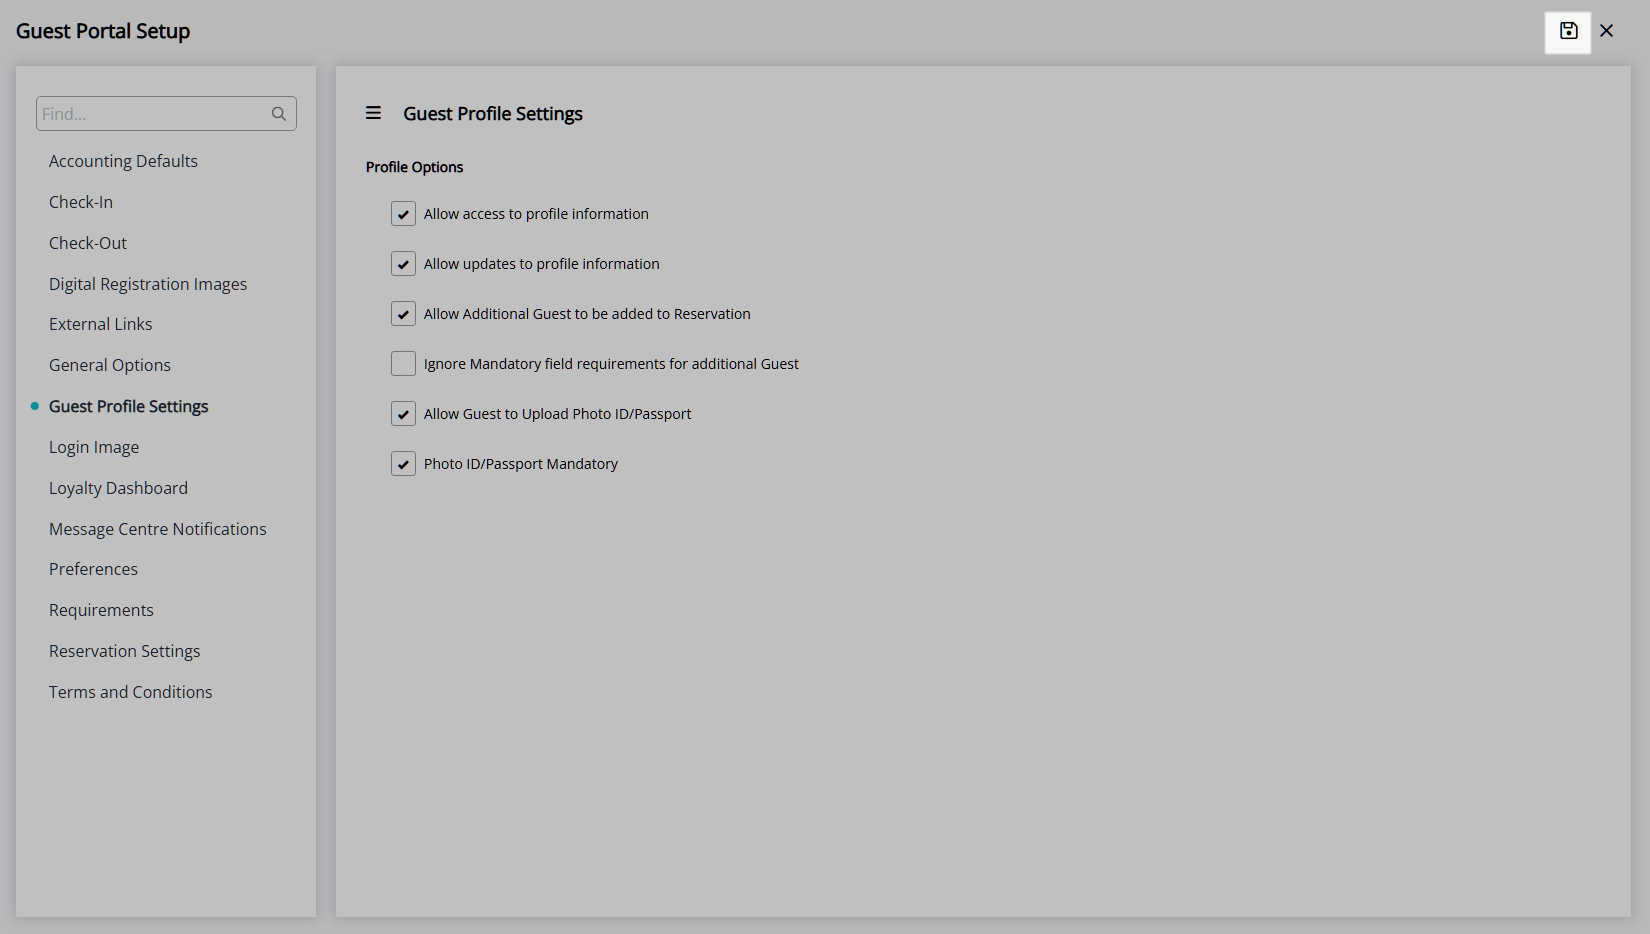
Select ![]() ‘Save’ to store the changes made.
‘Save’ to store the changes made.
Reservation Options
Navigate to the 'Reservation Settings' tab.
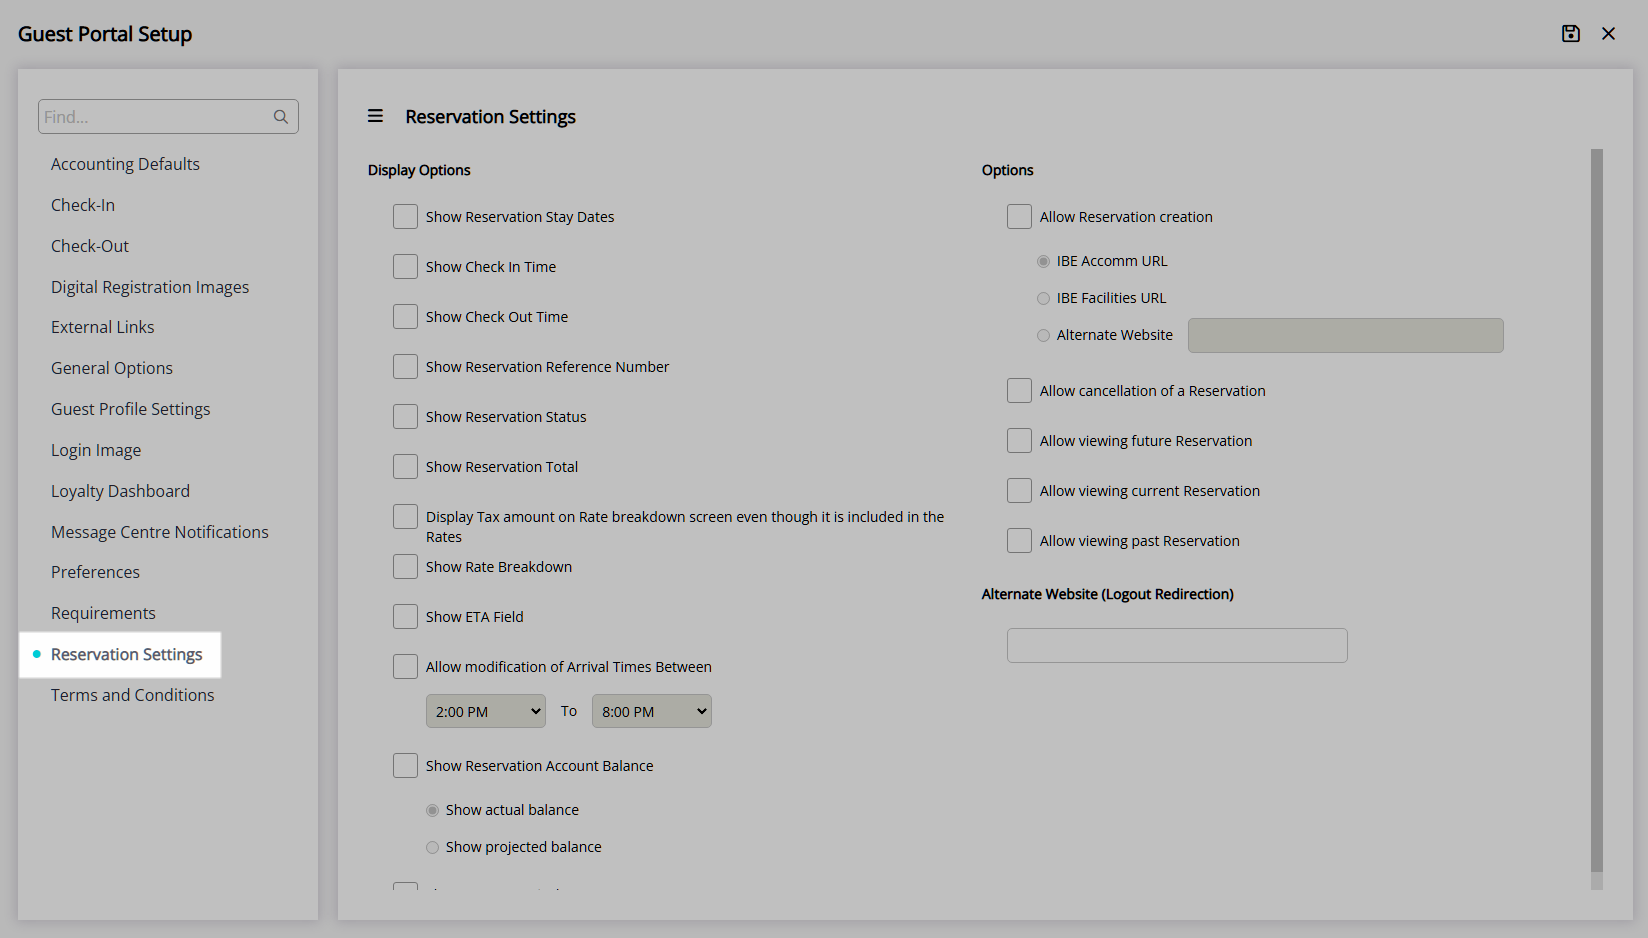
Display Options.
Select the checkbox 'Show Reservation Stay Dates'.
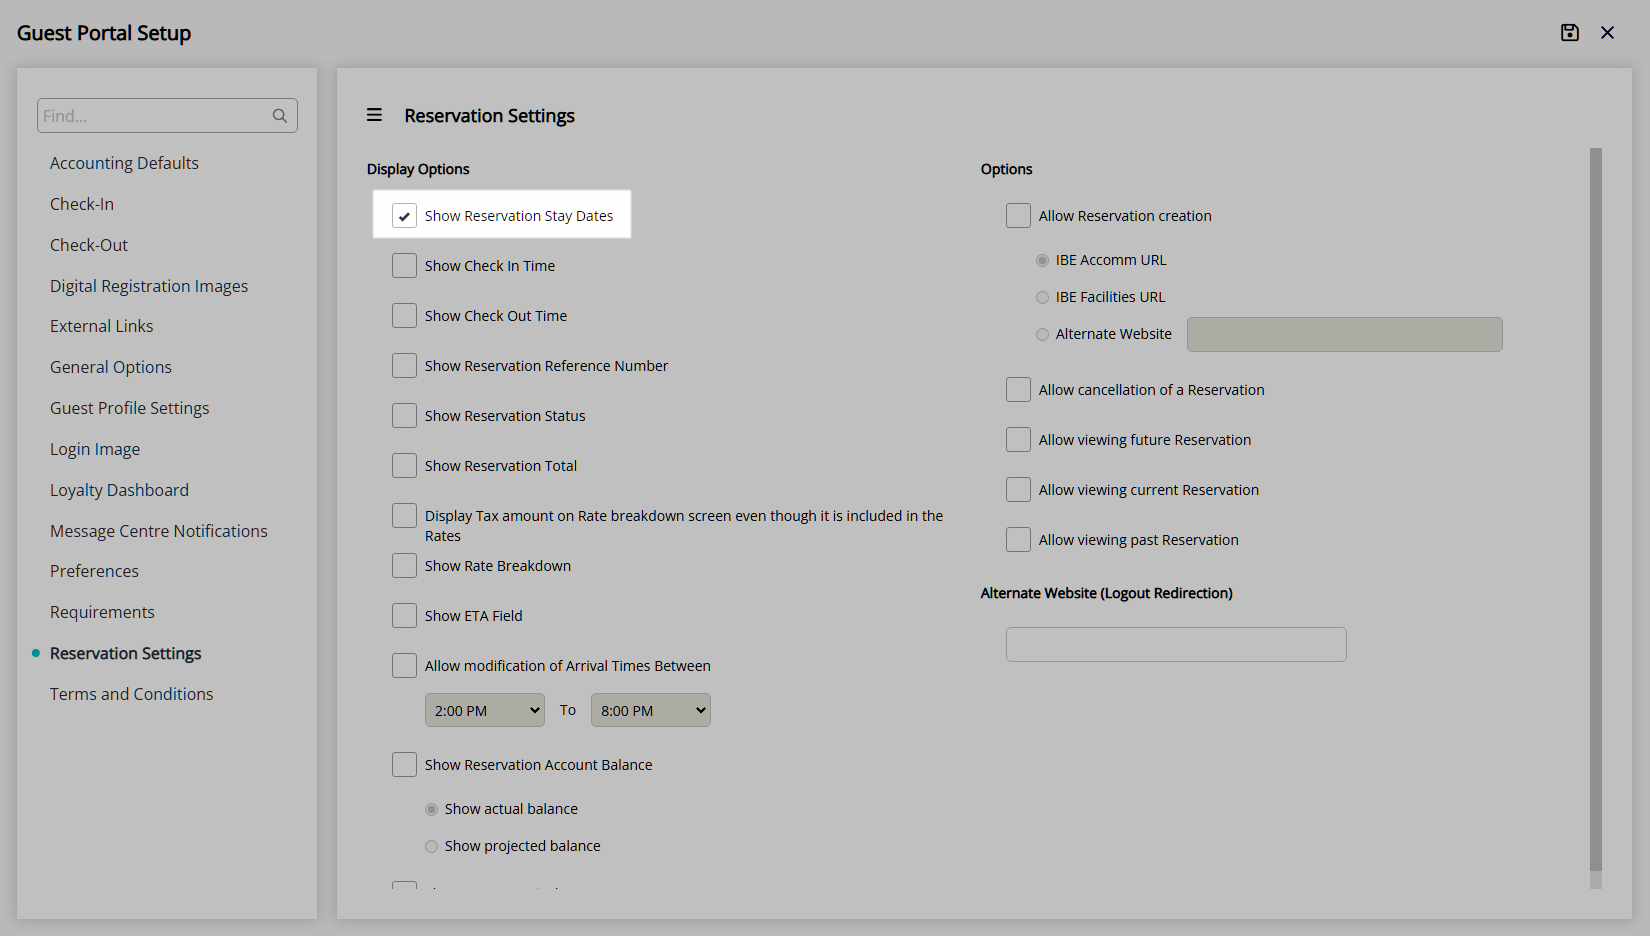
Optional: Select the checkbox 'Show Check-in Time'.
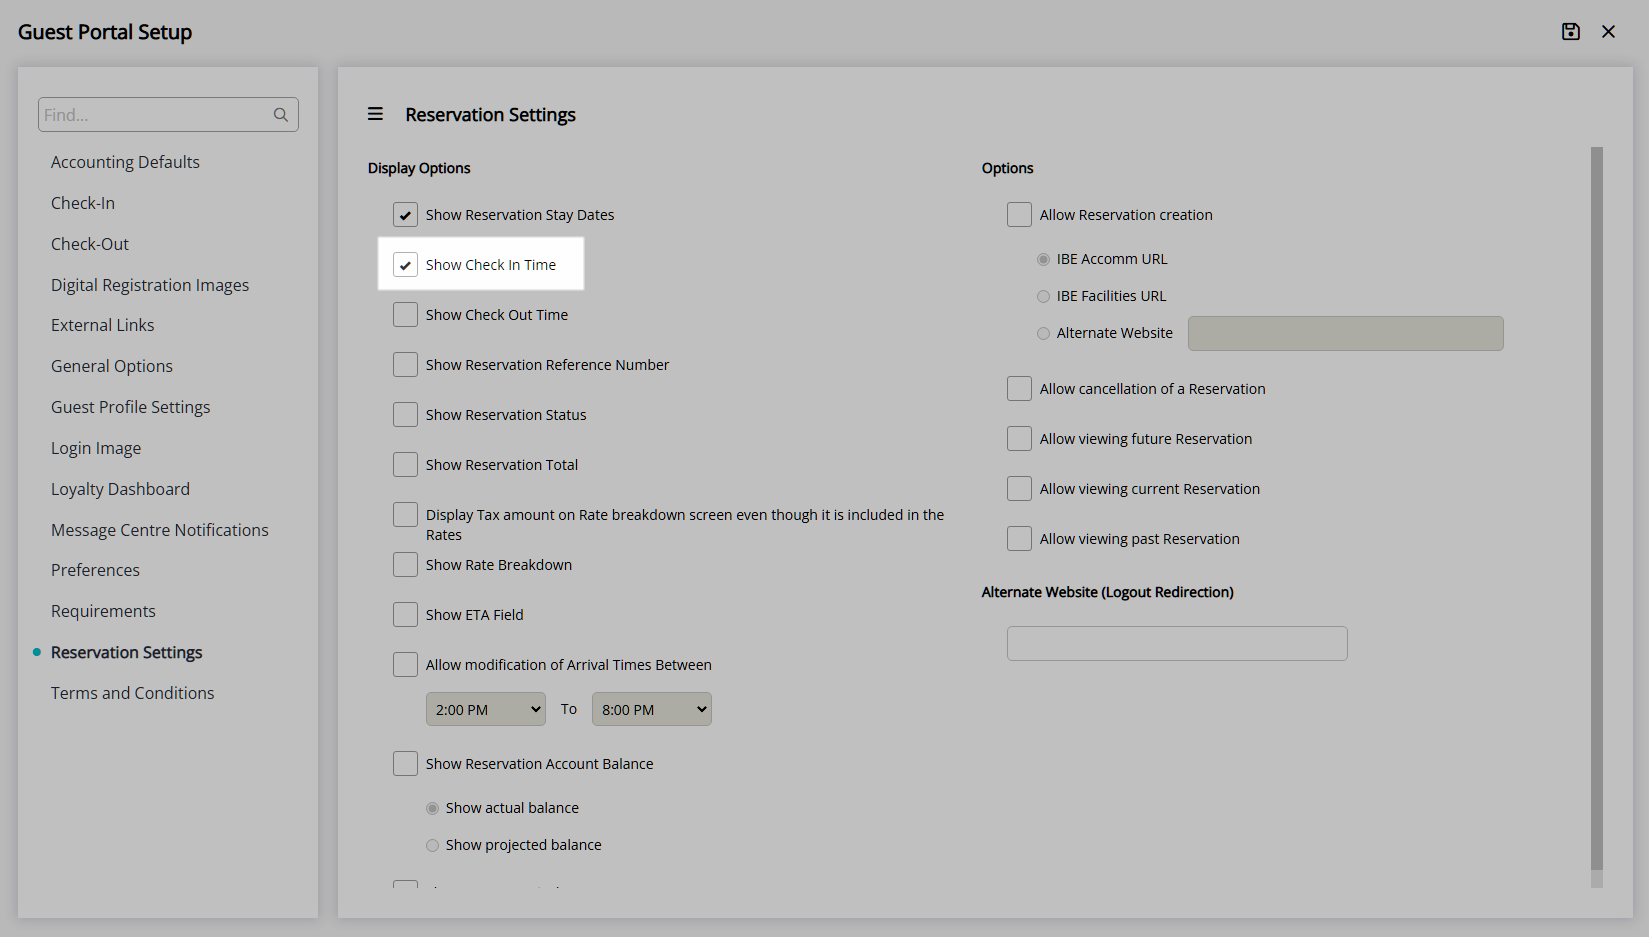
Optional: Select the checkbox 'Show Check-out Time'.
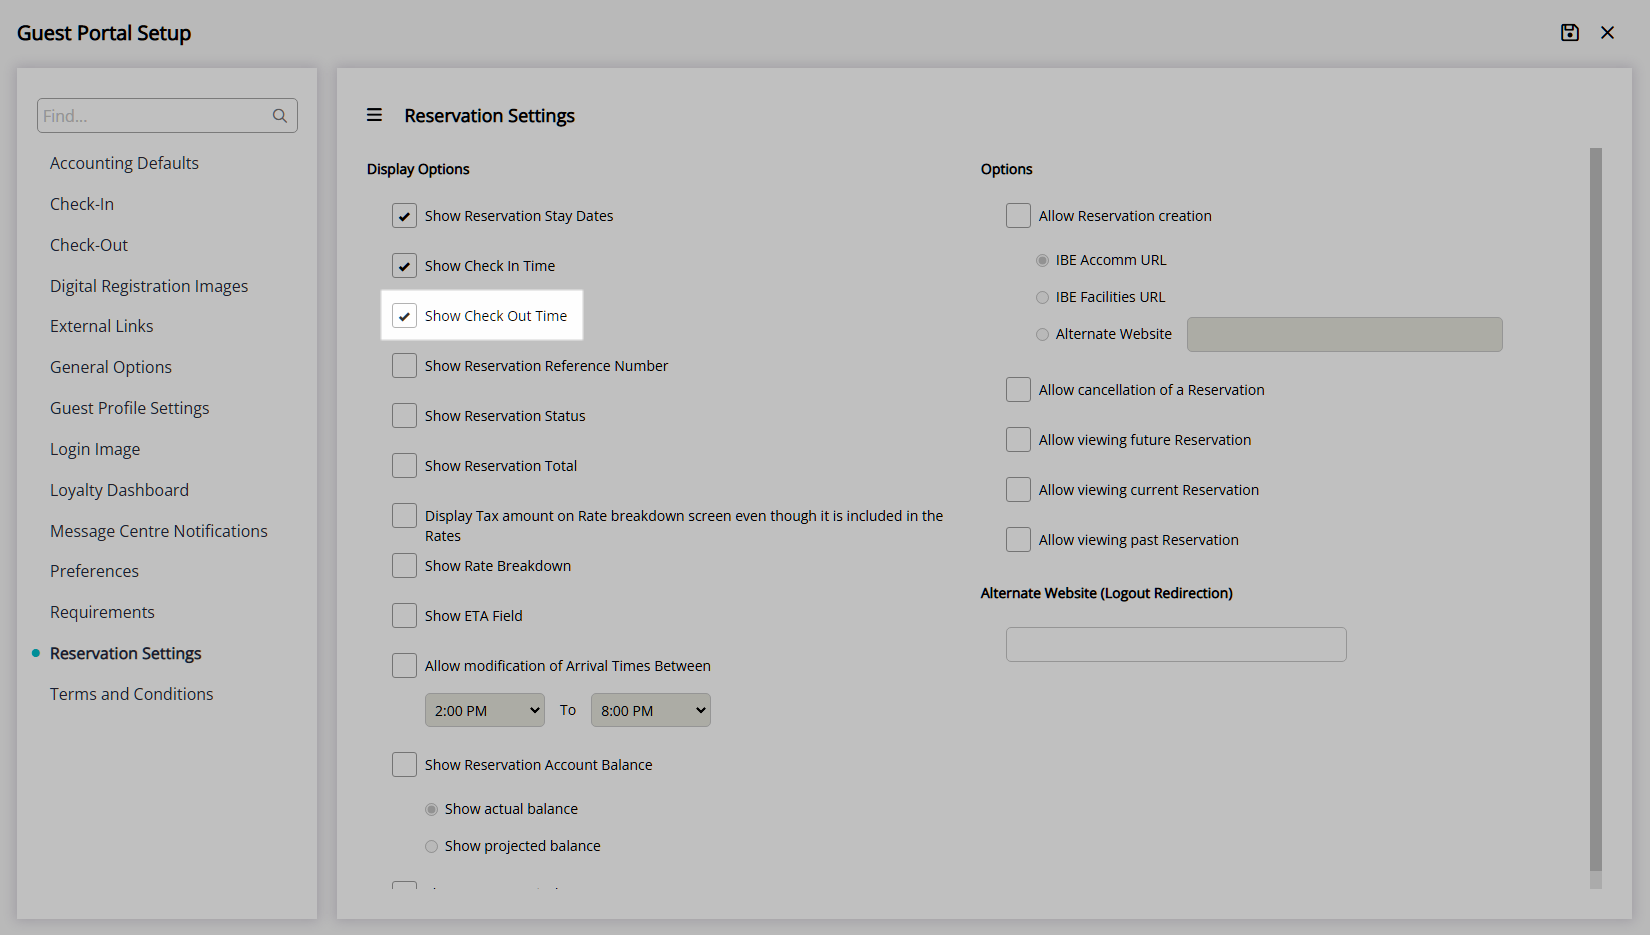
Select the checkbox 'Show Reservation Reference Number'.

Select the checkbox 'Show Reservation Status'.
Optional: Select the checkbox 'Show Reservation Total'.

Optional: Select the checkbox 'Display Tax Amount on the Rate Breakdown when Tax Inclusive'.
Optional: Select the checkbox 'Show Rate Breakdown'.

Optional: Select the checkbox 'Show ETA field'.
Optional: Select the checkbox 'Allow Modification of Arrival Times Between'.
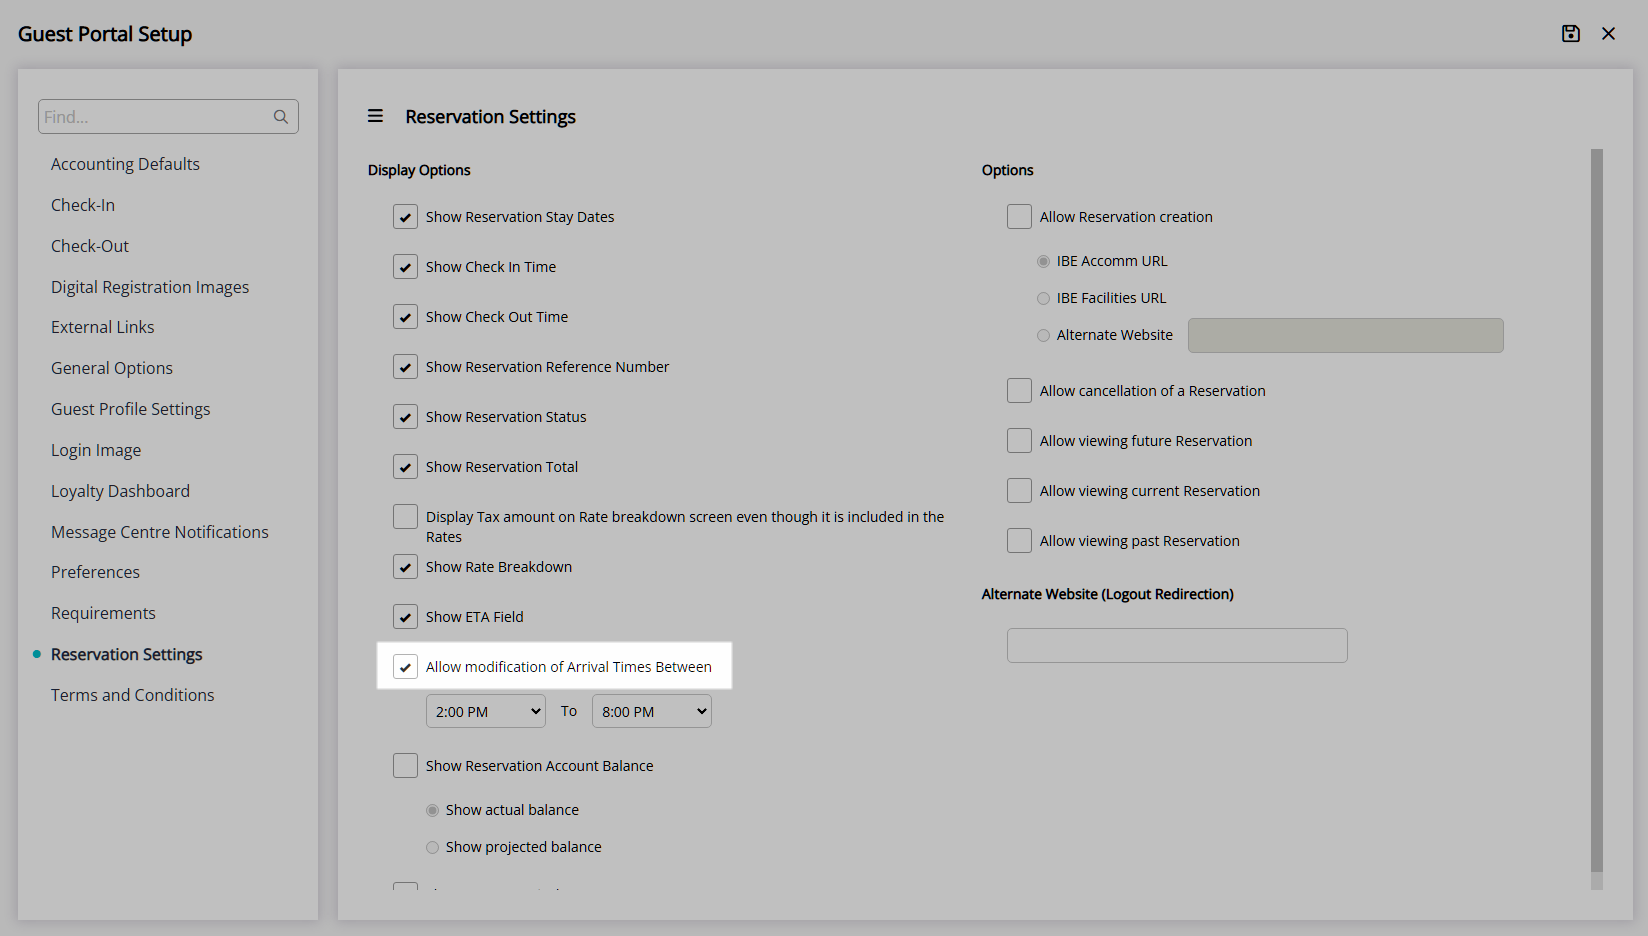
Select the Allowable Arrival Times.
Optional: Select the checkbox 'Show Reservation Account Balance'.
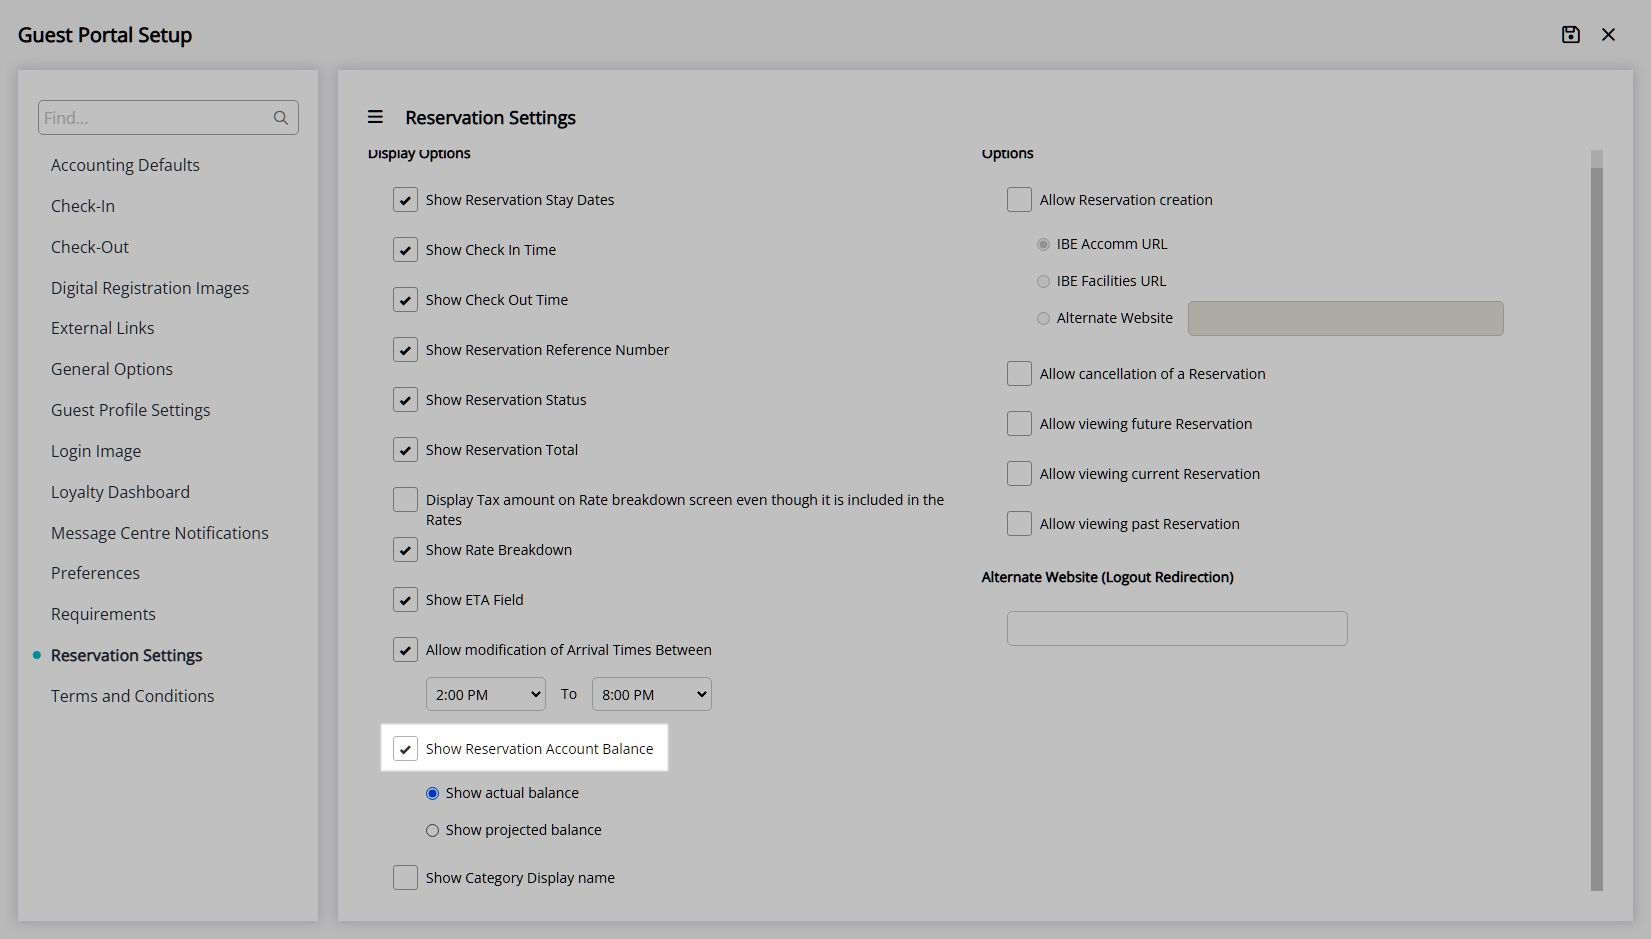
Select to display the Actual or Projected Balance.
Optional: Select the checkbox 'Show Category Display Name'.
Options.
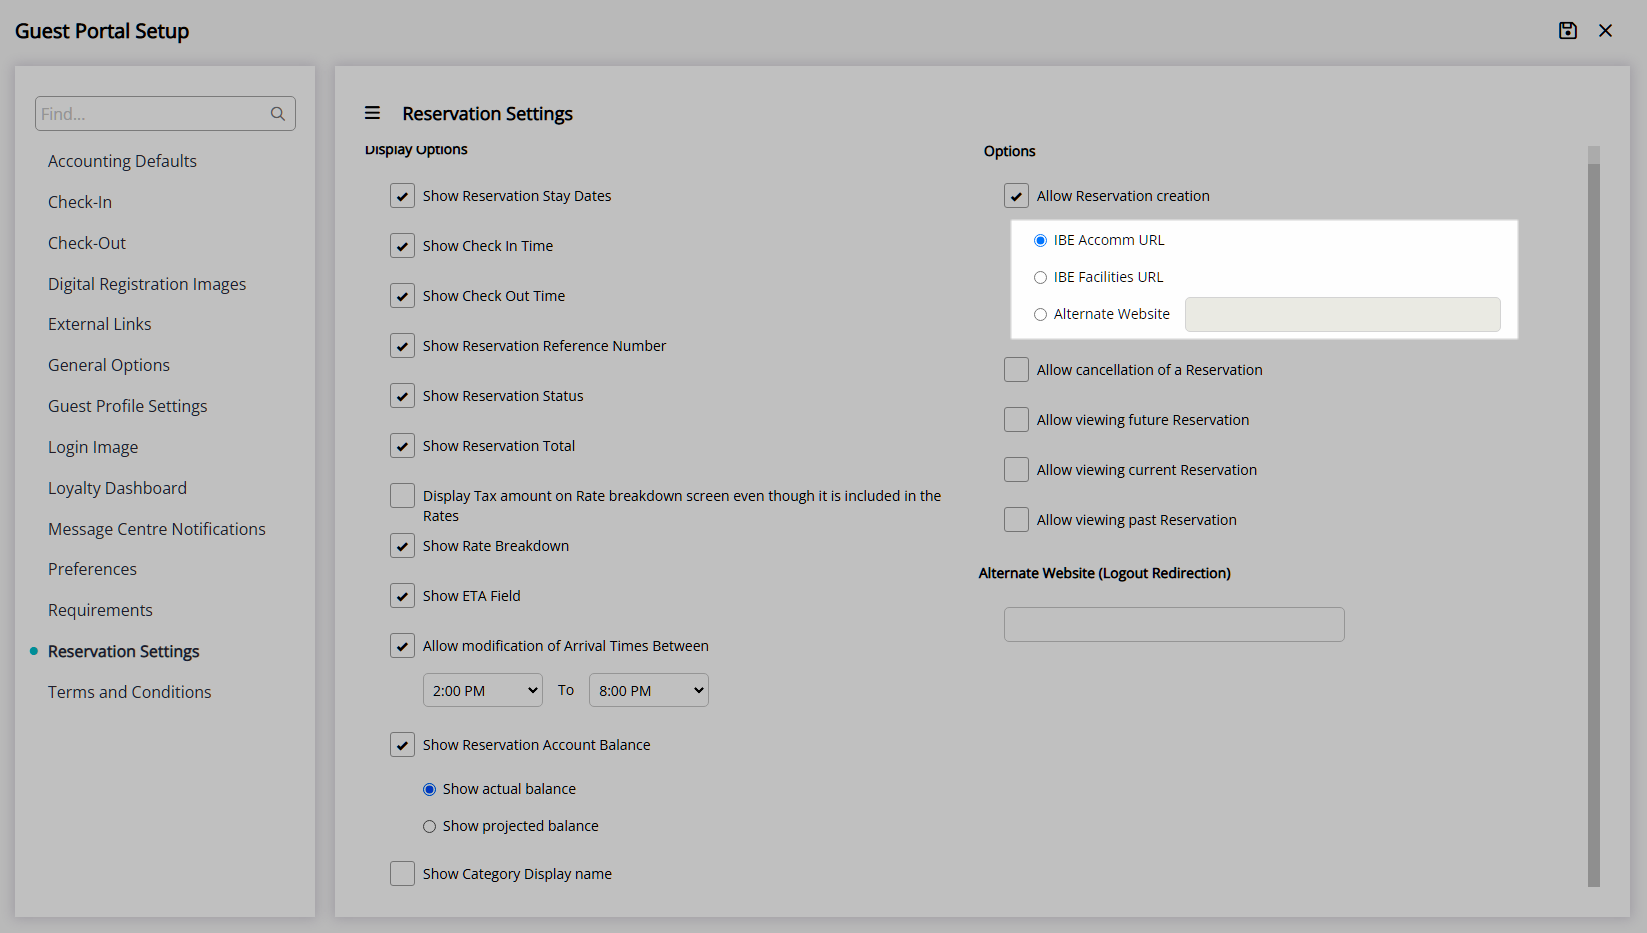
Optional: Select the checkbox 'Allow Reservation Creation'.
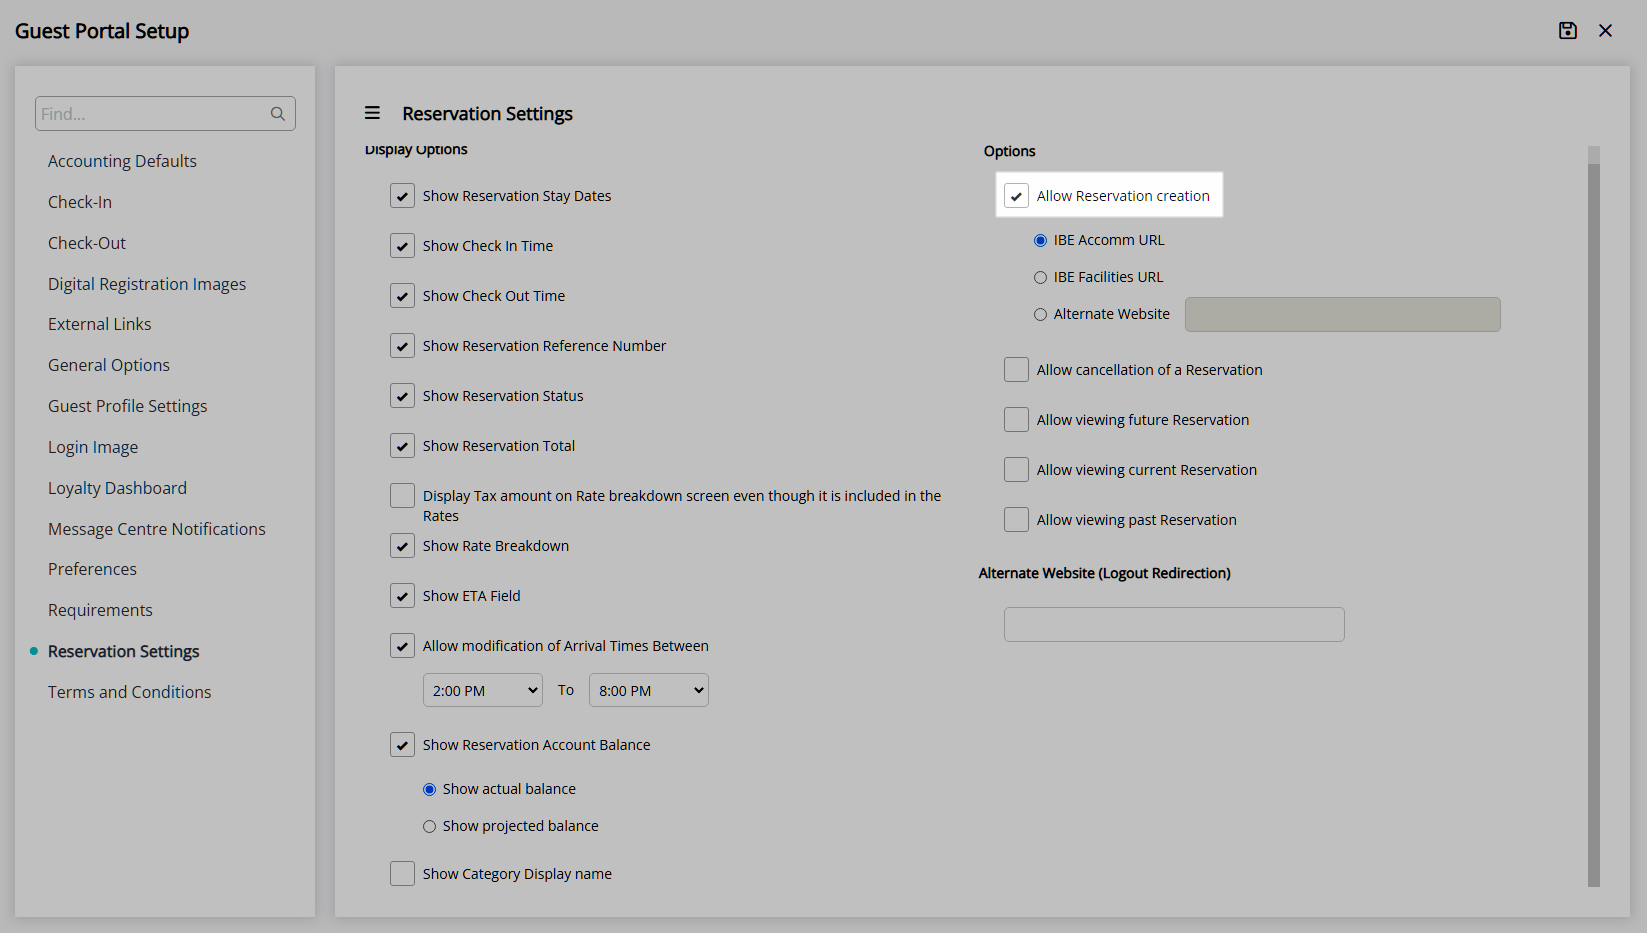
Select the RMS Internet Booking Engine to use or enter an external Booking Engine URL.
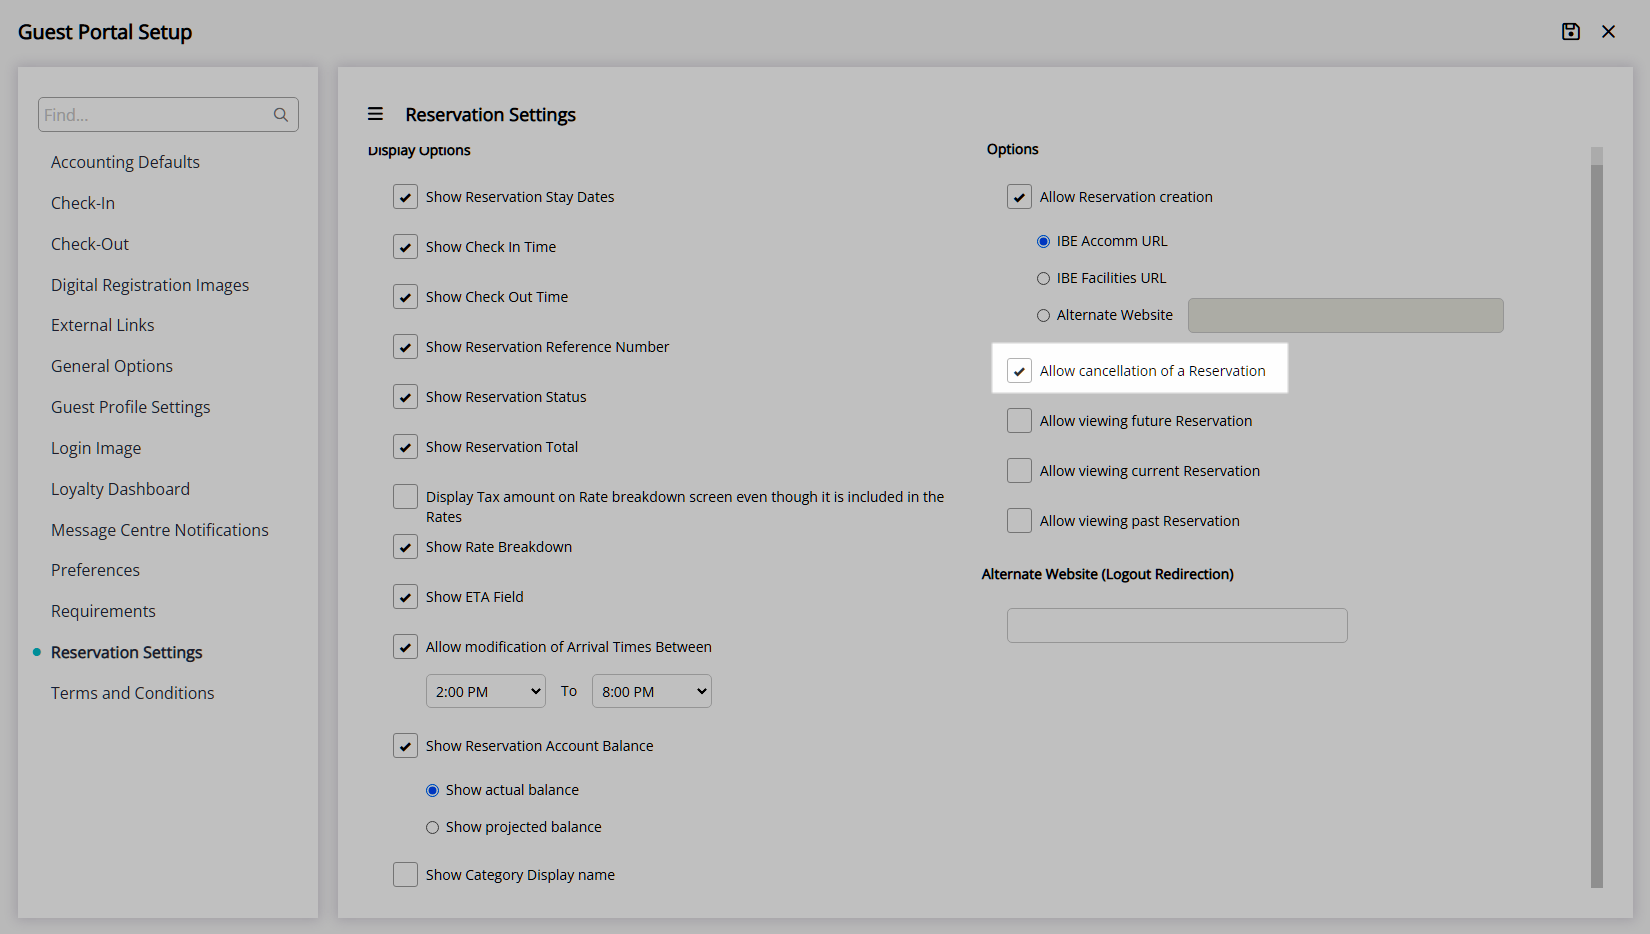
Optional: Select the checkbox 'Allow Reservation Cancellation'.
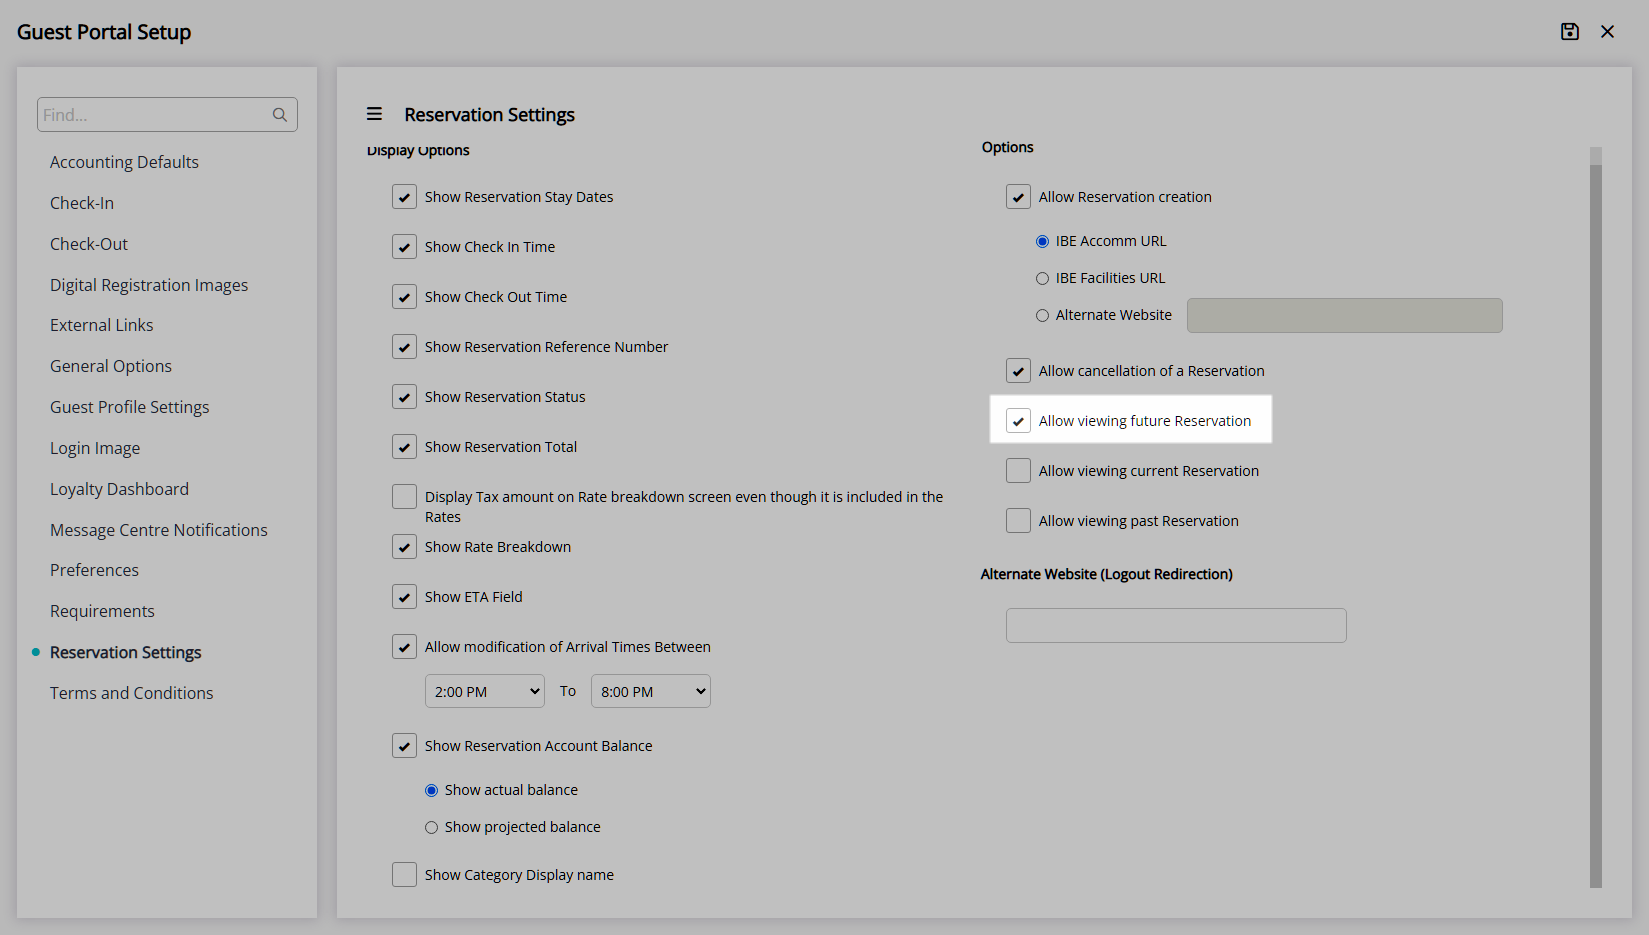
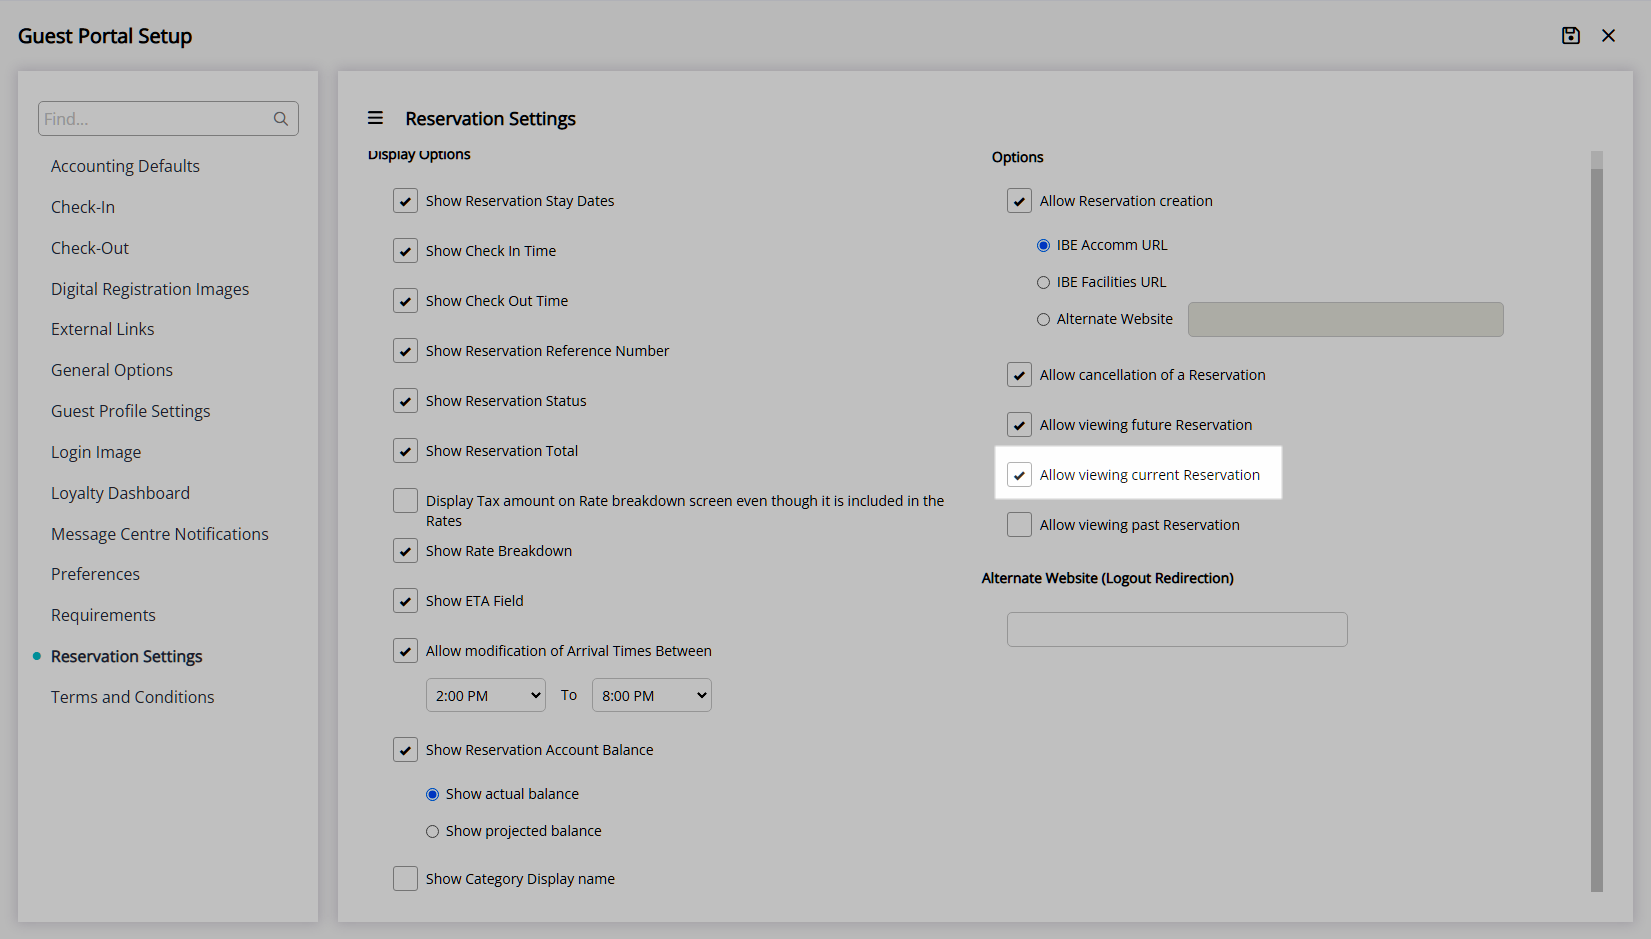
Select the checkbox 'Allow viewing Future Reservations'.
Select the checkbox 'Allow viewing Current Reservations'.
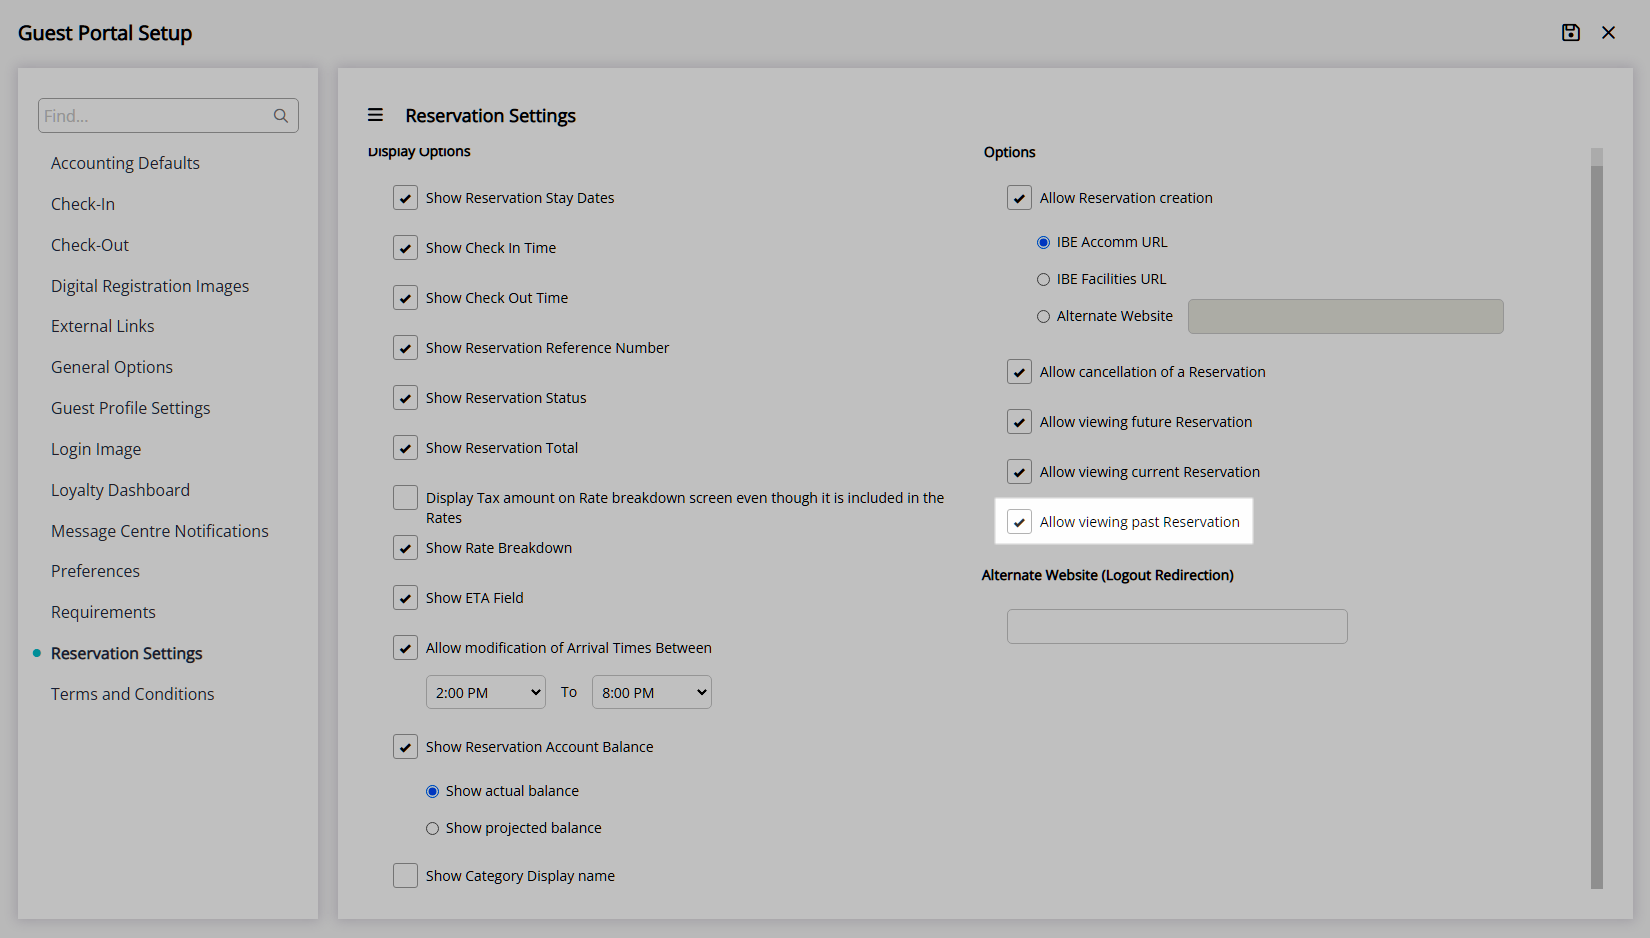
Optional: Select the checkbox 'Allow vieiwng Past Reservations'.
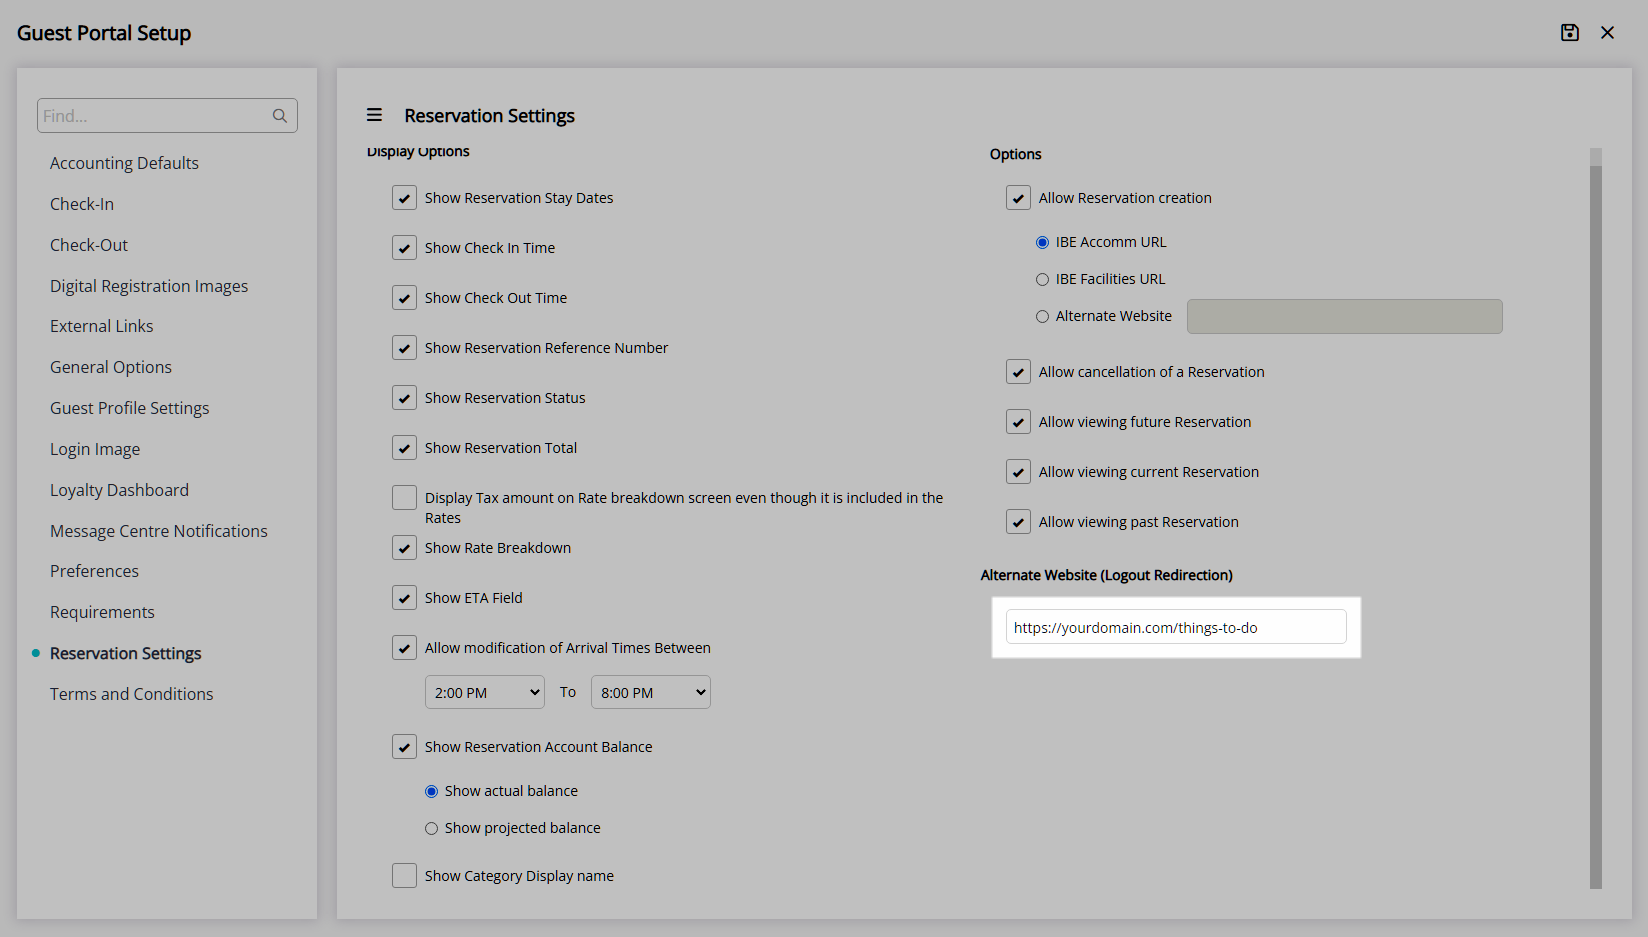
Optional: Enter an Alternate Website to redirect on logout.
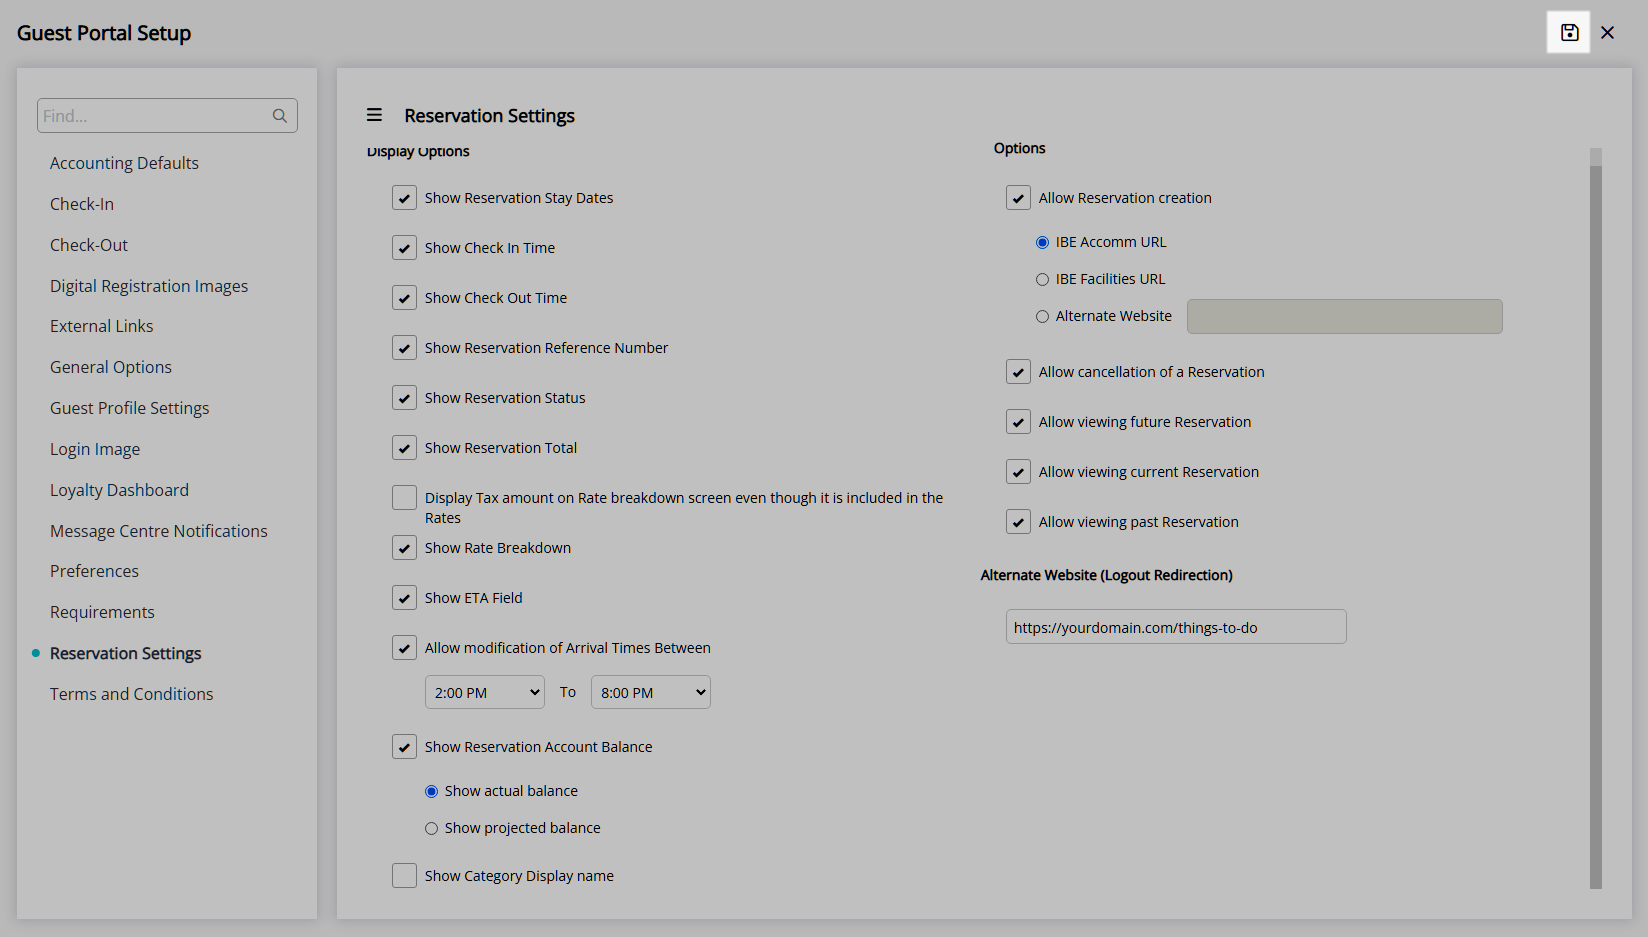
Select ![]() ‘Save’ to store the changes made.
‘Save’ to store the changes made.
Accounting Options
Navigate to the 'Accounting Defaults' tab.
Accounting Options.
Optional: Select the checkbox 'Allow Credit Card Payments'.
Optional: Select the checkbox 'Default Payment to Projected Balance'.
Optional: Select the checkbox 'Allow Selection of Charges for Payment'.

Optional: Select the checkbox 'Charge a Credit Card Transaction Fee' and enter the percentage
Optional: Select the checkbox 'Allow Printing/Emailing of Statements' and choose the Account Types..
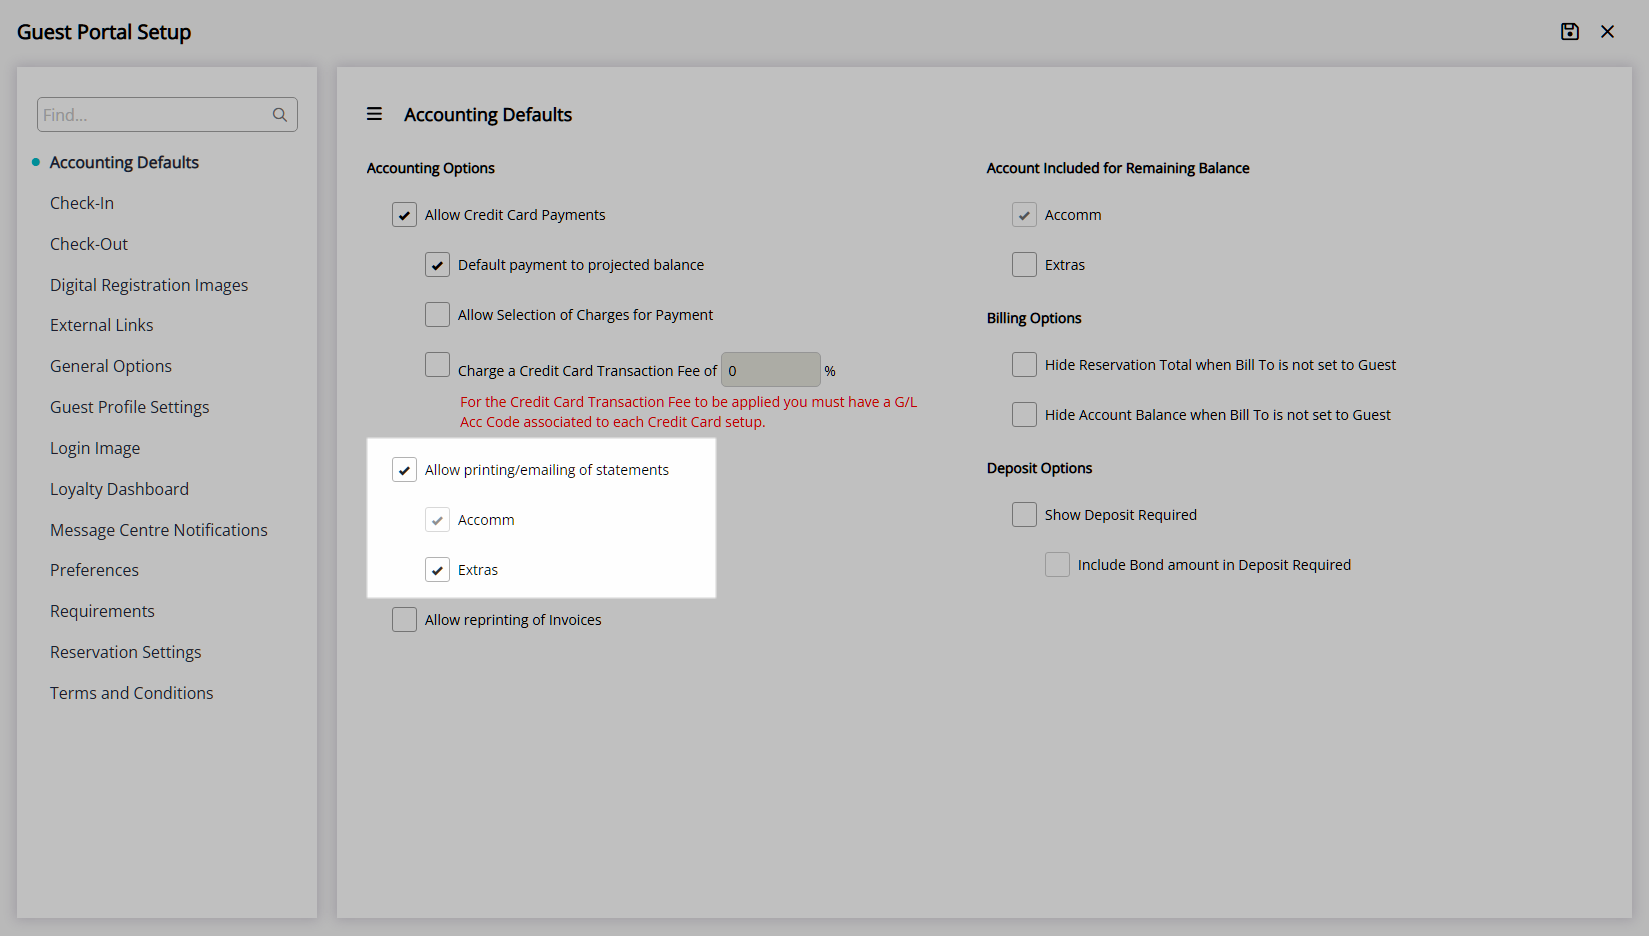
Optional: Select the checkbox 'Allow Printing of Tax Invoices'.

Account Included for Remaining Balance.
Optional: Select the checkbox 'Extras' to be included in the Remaining Balance.
Billing Options.
Optional: Select the checkbox 'Hide the Reservation Total when the Bill To is not set to Guest'.
Optional: Select the checkbox 'Hide the Account Balance when the Bill To is not set to Guest'.
Deposit Options.
Optional: Select the checkbox 'Show Deposit Required'.
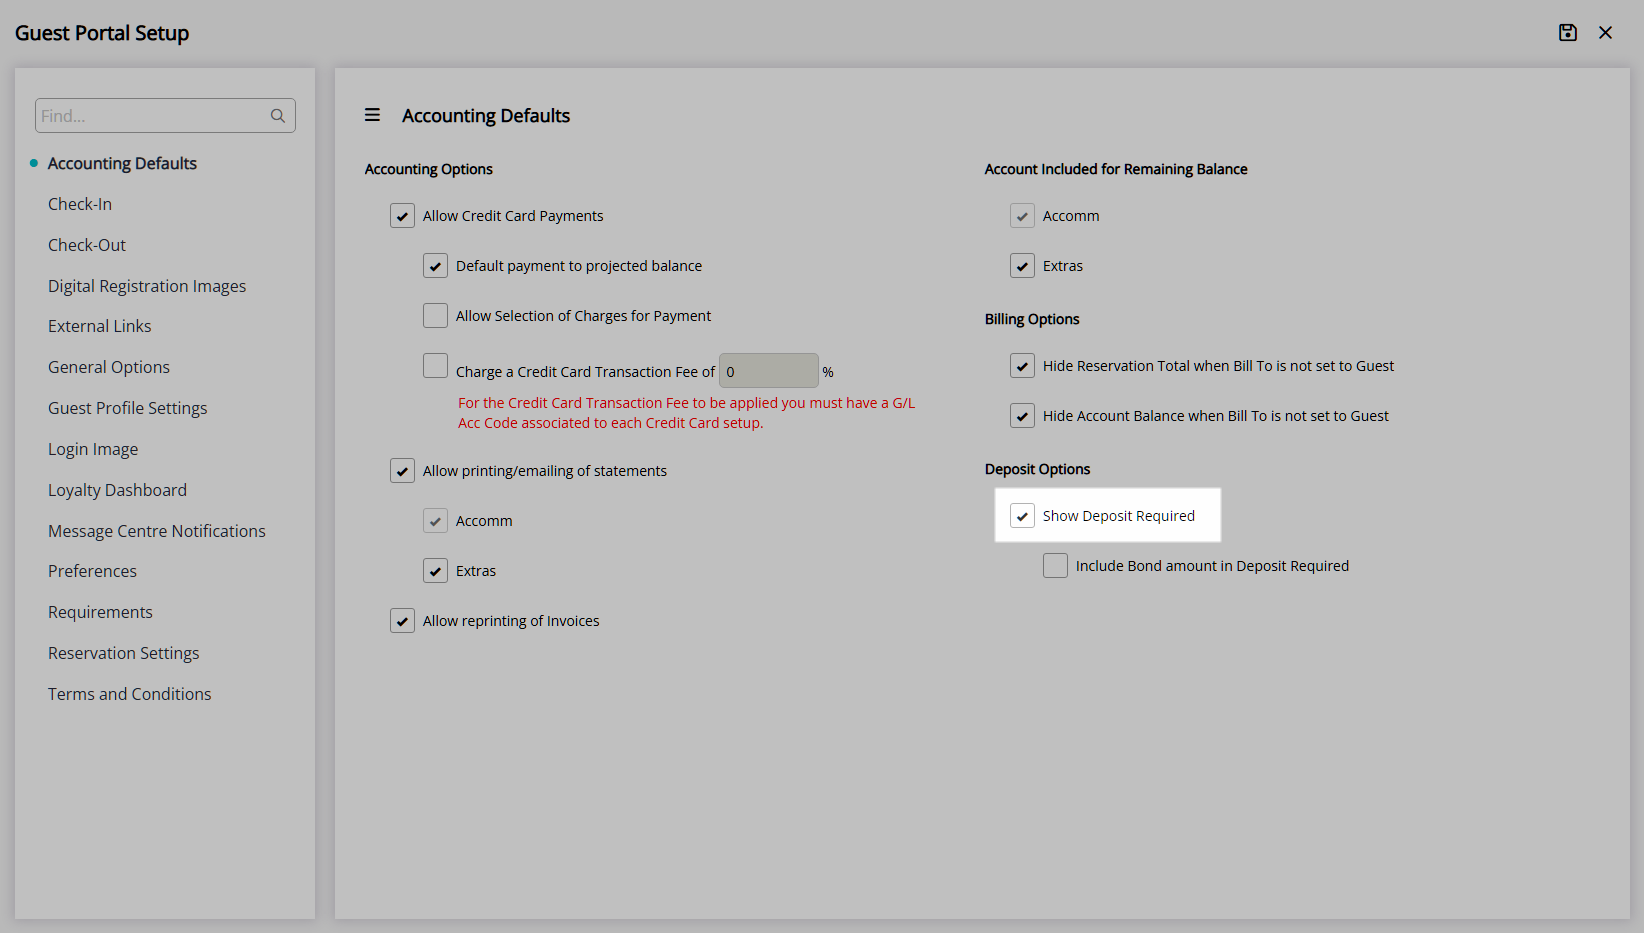
Optional: Select the checkbox 'Include Bond Amount in the Deposit Required'.
Select ![]() ‘Save’ to store the changes made.
‘Save’ to store the changes made.
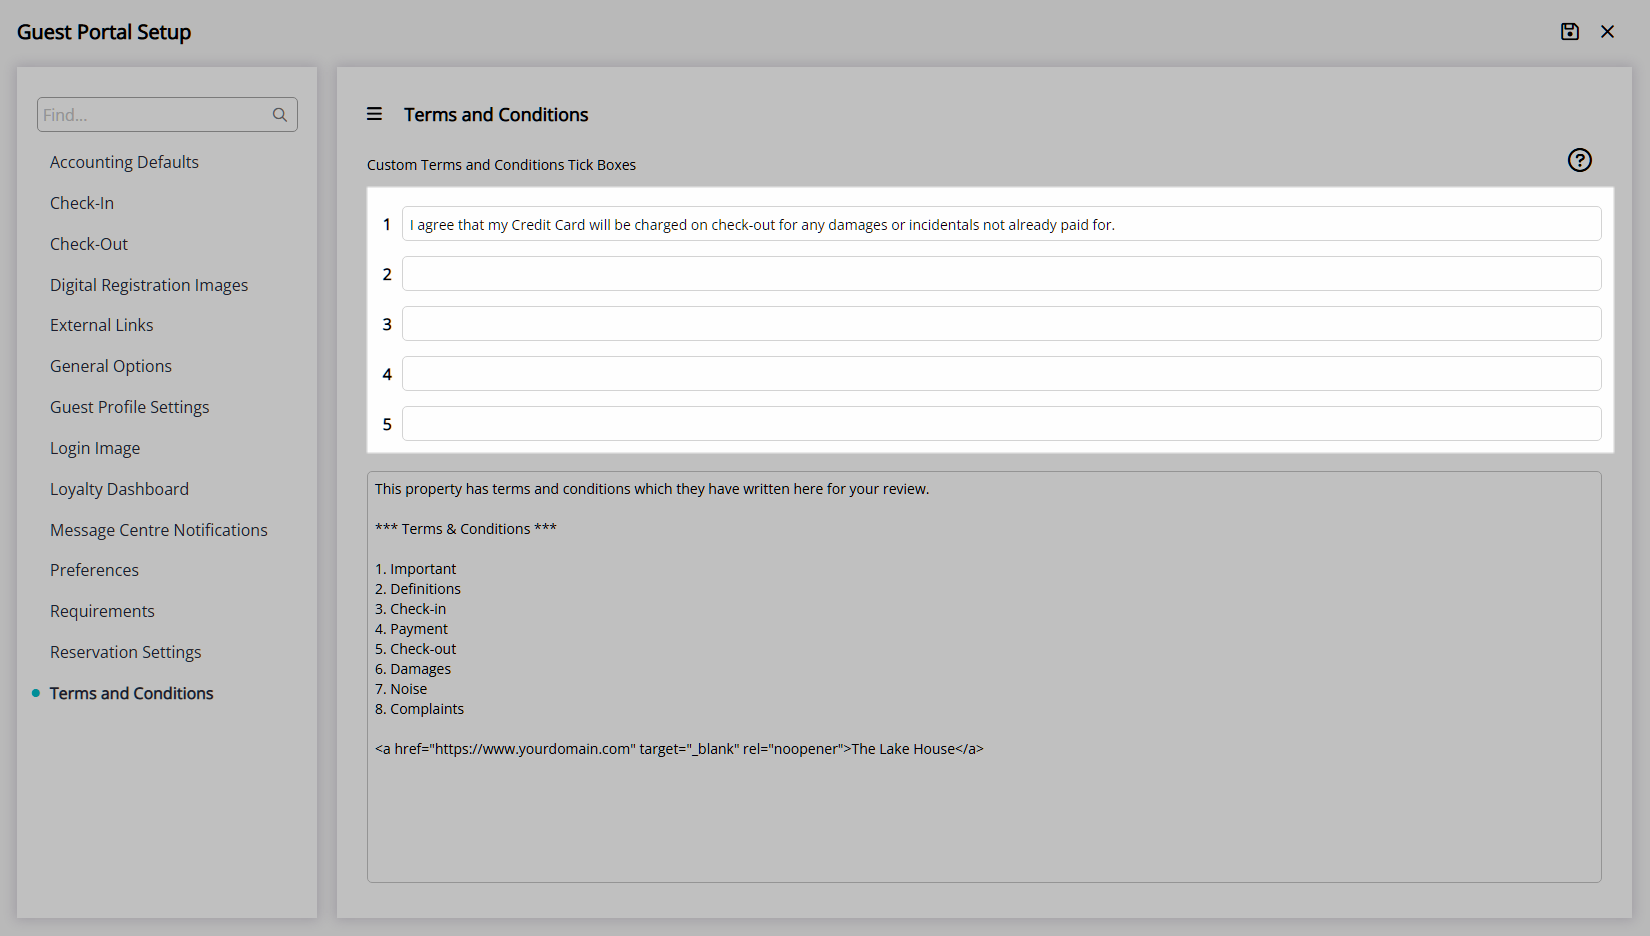
Terms & Conditions
Navigate to the 'Terms & Conditions' tab.
Enter the Property Terms & Conditions.

Optional: Enter Custom Terms & Conditions Checkbox Text.
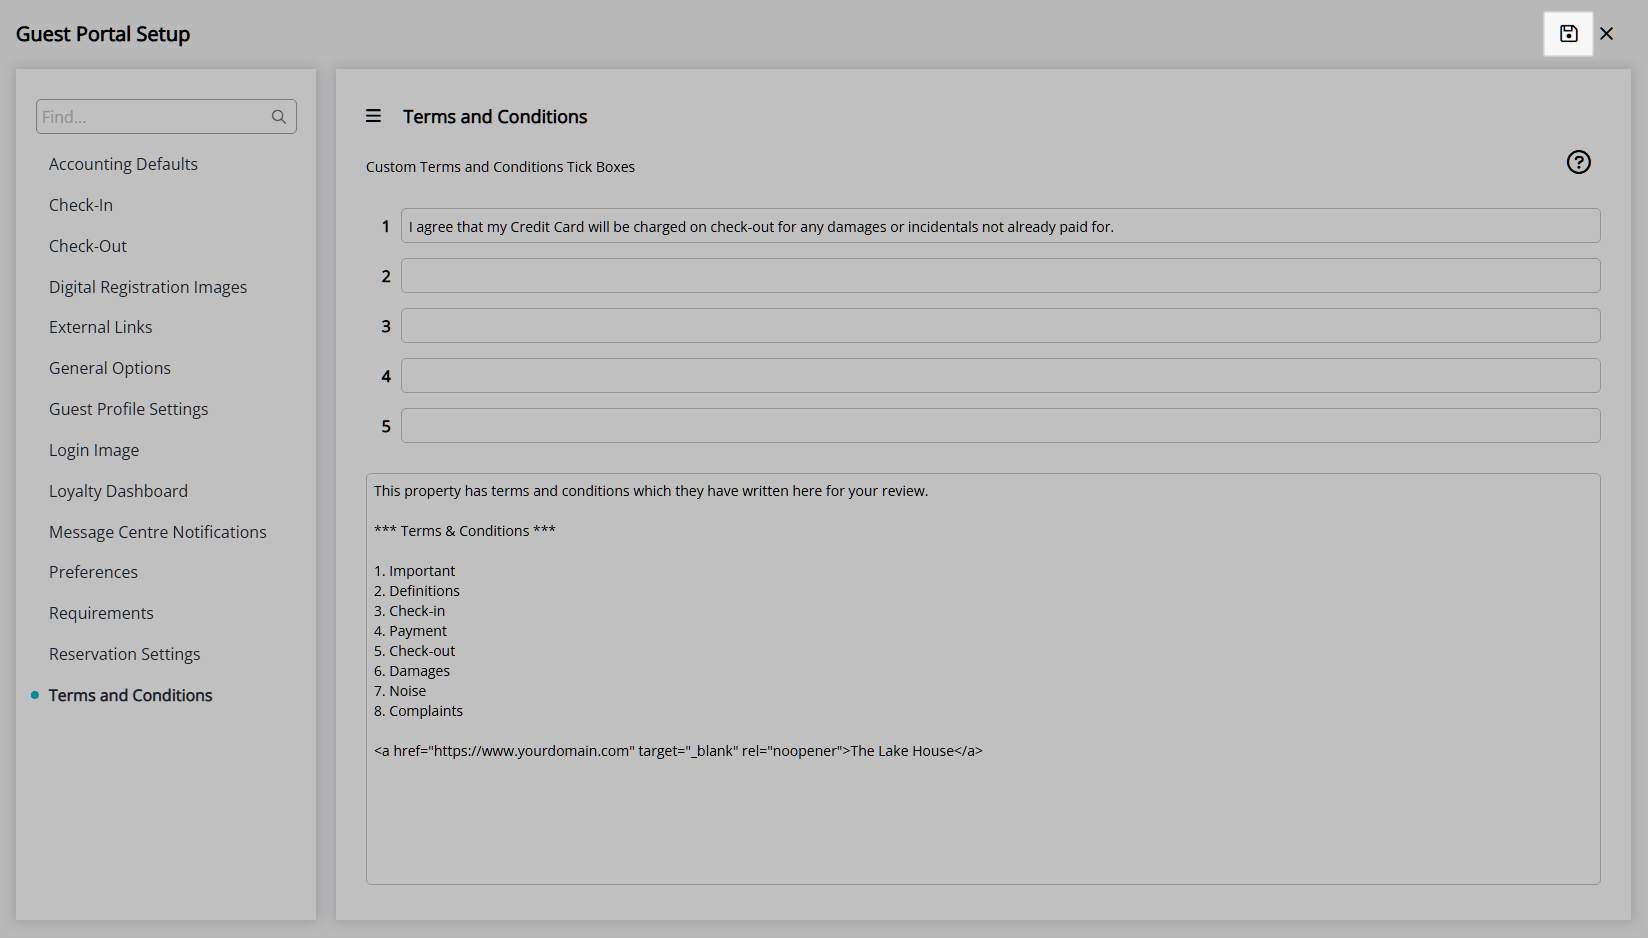
Select ![]() ‘Save’ to store the changes made.
‘Save’ to store the changes made.
Message Centre Notifications
Navigate to the 'Message Centre Notifications' tab.
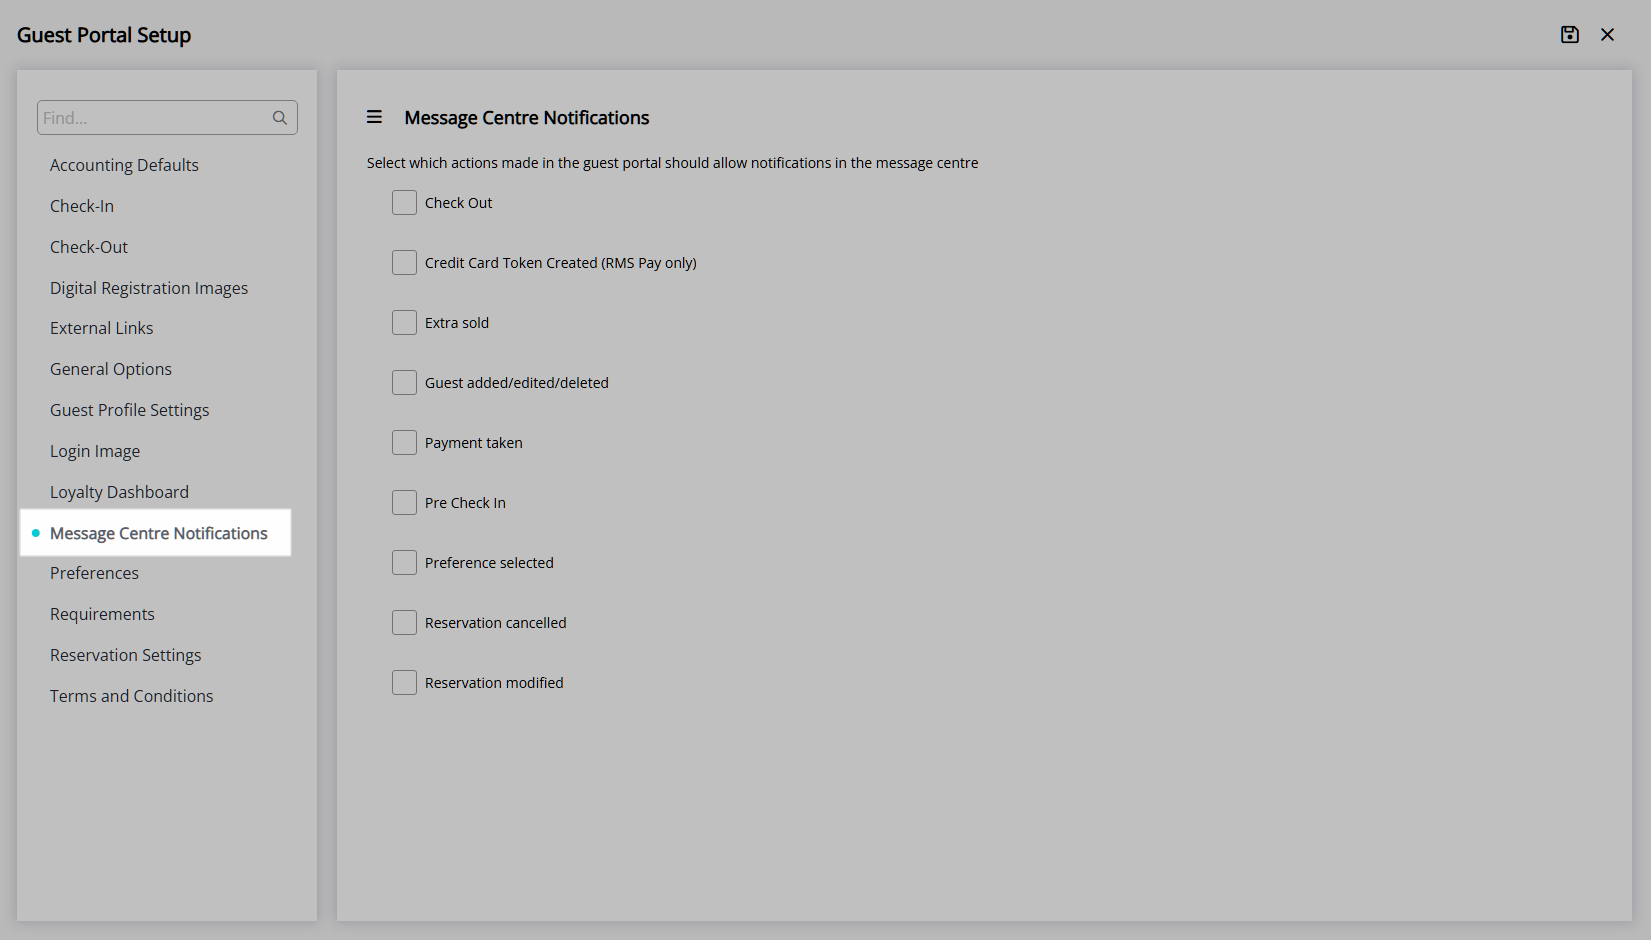
Select the checkbox for the Guest Portal Actions to trigger a Message Centre Notification.
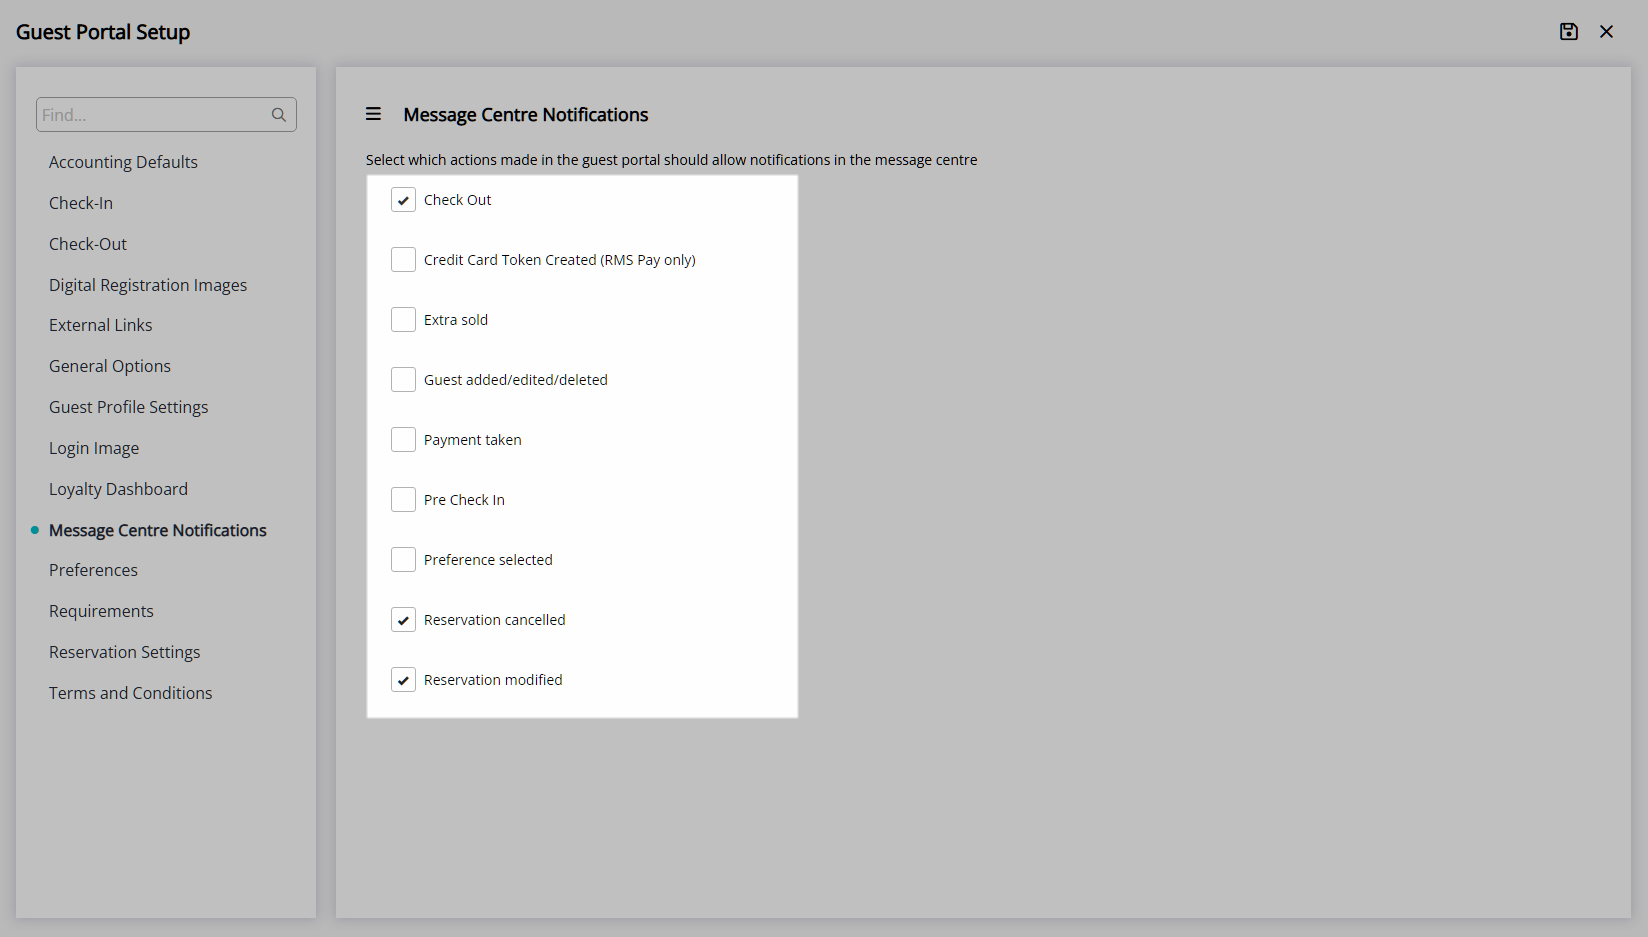
Select ![]() ‘Save’ to store the changes made.
‘Save’ to store the changes made.
Select ‘Save/Exit’ to store the changes made and leave the setup.
The Guest Portal URL can be added to the Property Website and the Guest Portal merge fields can be added to existing SMS and Form Letters to enable Guests to access the portal and manage their Reservations using the selected options.
Guests accessing the Guest Portal through the URL will be required to enter a mobile number or email address matching the information on the Guest Profile and enter the one-time-passcode.
Using the URL in the SMS or Form Letter will automatically log the Guest in for the Reservation the correspondence was sent from.
Setup
Have your System Administrator complete the following.
Guest Portal Activation
- Go to Setup > Portal Access > Guest Portal in the Side Menu of RMS.
- Navigate to the 'General Options' tab.
-
General Options.
- Select the checkbox 'Enable Guest Portal'.
- Optional: Select the checkbox 'Enable Messaging'.
- Optional: Select the checkbox 'Allow contacting the Property'.
-
Header Display Options.
- Optional: Select the checkbox 'Show Property Logo'.
- Optional: Select the checkbox 'Show Greeting in header'.
- Optional: Show only Terms & Conditions and Property Website under the 'Information' menu.
- Save.
-
General Options.
Guest Profile Options
- Navigate to the 'Guest Profile Settings' tab.
-
Profile Options.
-
Optional: Select the checkbox 'Allow access to profile information'.
- Optional: Select the checkbox 'Allow updates to profile information'.
-
Optional: Select the checkbox 'Allow Additional Guests to be added to the Reservation'.
- Optional: Select the checkbox 'Ignore Mandatory field requirements for additional Guests'.
-
Optional: Select the checkbox 'Allow Guest to upload Photo ID/Passport'.
- Optional: Select the checkbox 'Photo ID/Passport Mandatory'.
-
Optional: Select the checkbox 'Allow access to profile information'.
- Save.
-
Profile Options.
Reservation Options
- Navigate to the 'Reservation Settings' tab.
-
Display Options.
- Select the checkbox 'Show Reservation Stay Dates'.
- Optional: Select the checkbox 'Show Check-in Time'.
- Optional: Select the checkbox 'Show Check-out Time'.
- Select the checkbox 'Show Reservation Reference Number'.
- Select the checkbox 'Show Reservation Status'.
- Optional: Select the checkbox 'Show Reservation Total'.
- Optional: Select the checkbox 'Display Tax Amount on the Rate Breakdown when Tax Inclusive'.
- Optional: Select the checkbox 'Show Rate Breakdown'.
-
Optional: Select the checkbox 'Show ETA field'.
-
Optional: Select the checkbox 'Allow Modification of Arrival Times Between'.
- Select the Allowable Arrival Times.
-
Optional: Select the checkbox 'Allow Modification of Arrival Times Between'.
-
Optional: Select the checkbox 'Show Reservation Account Balance'.
- Select to display the Actual or Projected Balance.
- Optional: Select the checkbox 'Show Category Display Name'.
-
Options.
-
Optional: Select the checkbox 'Allow Reservation Creation'.
- Select the RMS Internet Booking Engine to use or enter an external Booking Engine URL.
- Optional: Select the checkbox 'Allow Reservation Cancellation'.
- Select the checkbox 'Allow viewing Future Reservations'.
- Select the checkbox 'Allow viewing Current Reservations'.
- Optional: Select the checkbox 'Allow vieiwng Past Reservations'.
- Optional: Enter an Alternate Website to redirect on logout.
-
Optional: Select the checkbox 'Allow Reservation Creation'.
- Save.
-
Display Options.
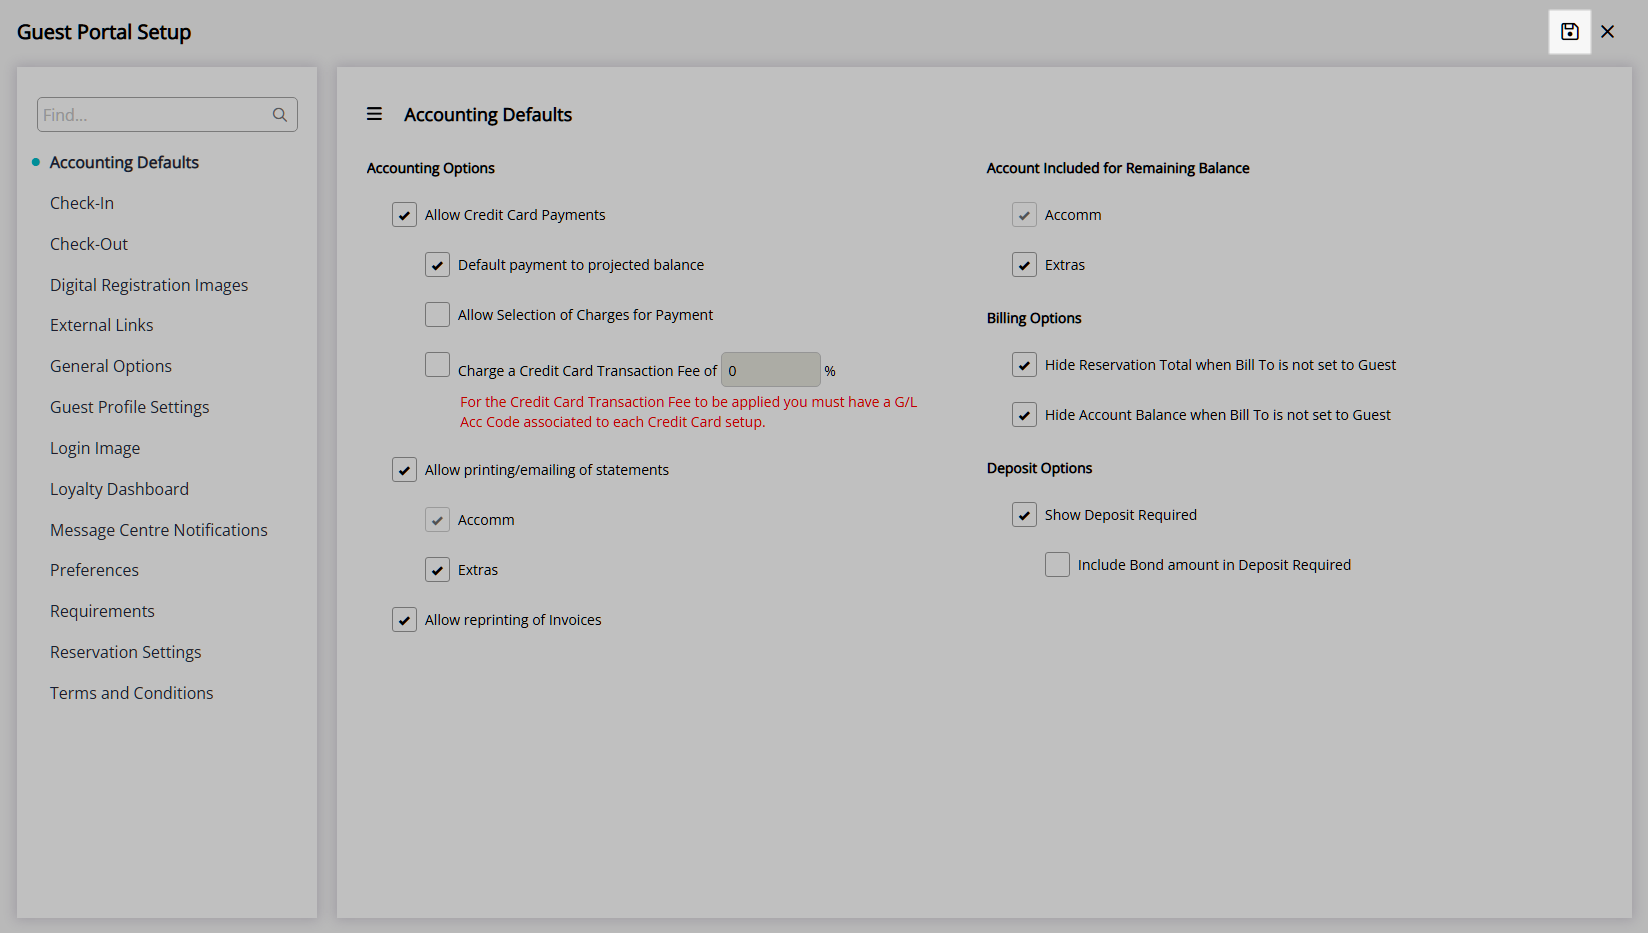
Accounting Options
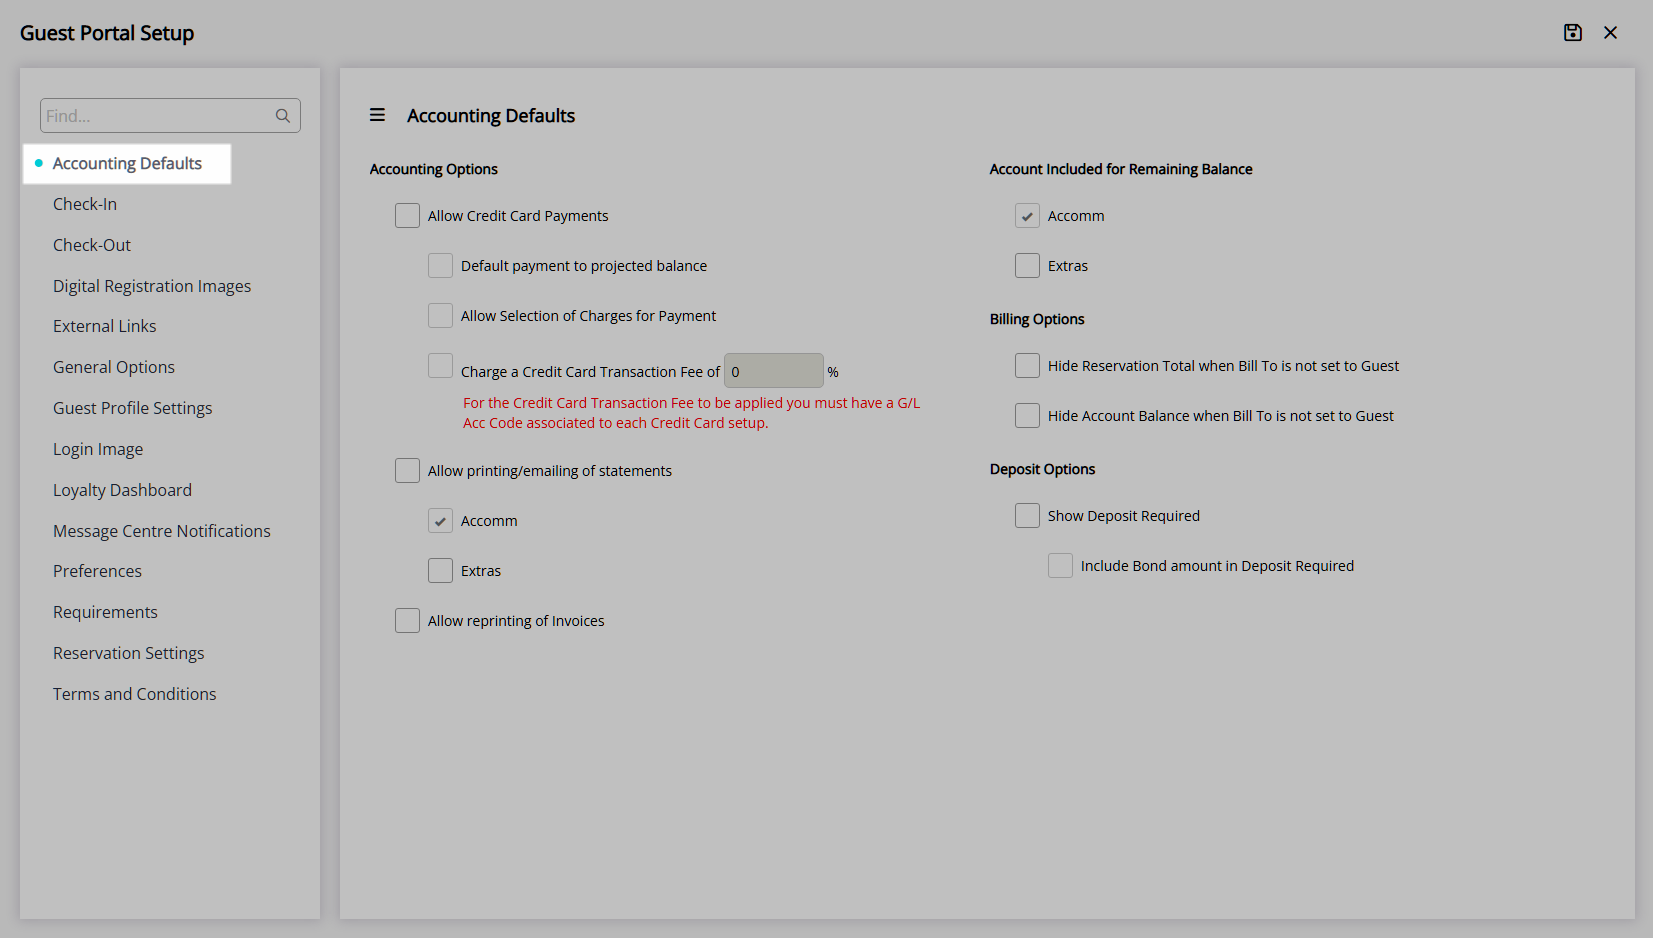
- Navigate to the 'Accounting Defaults' tab.
-
Accounting Options.
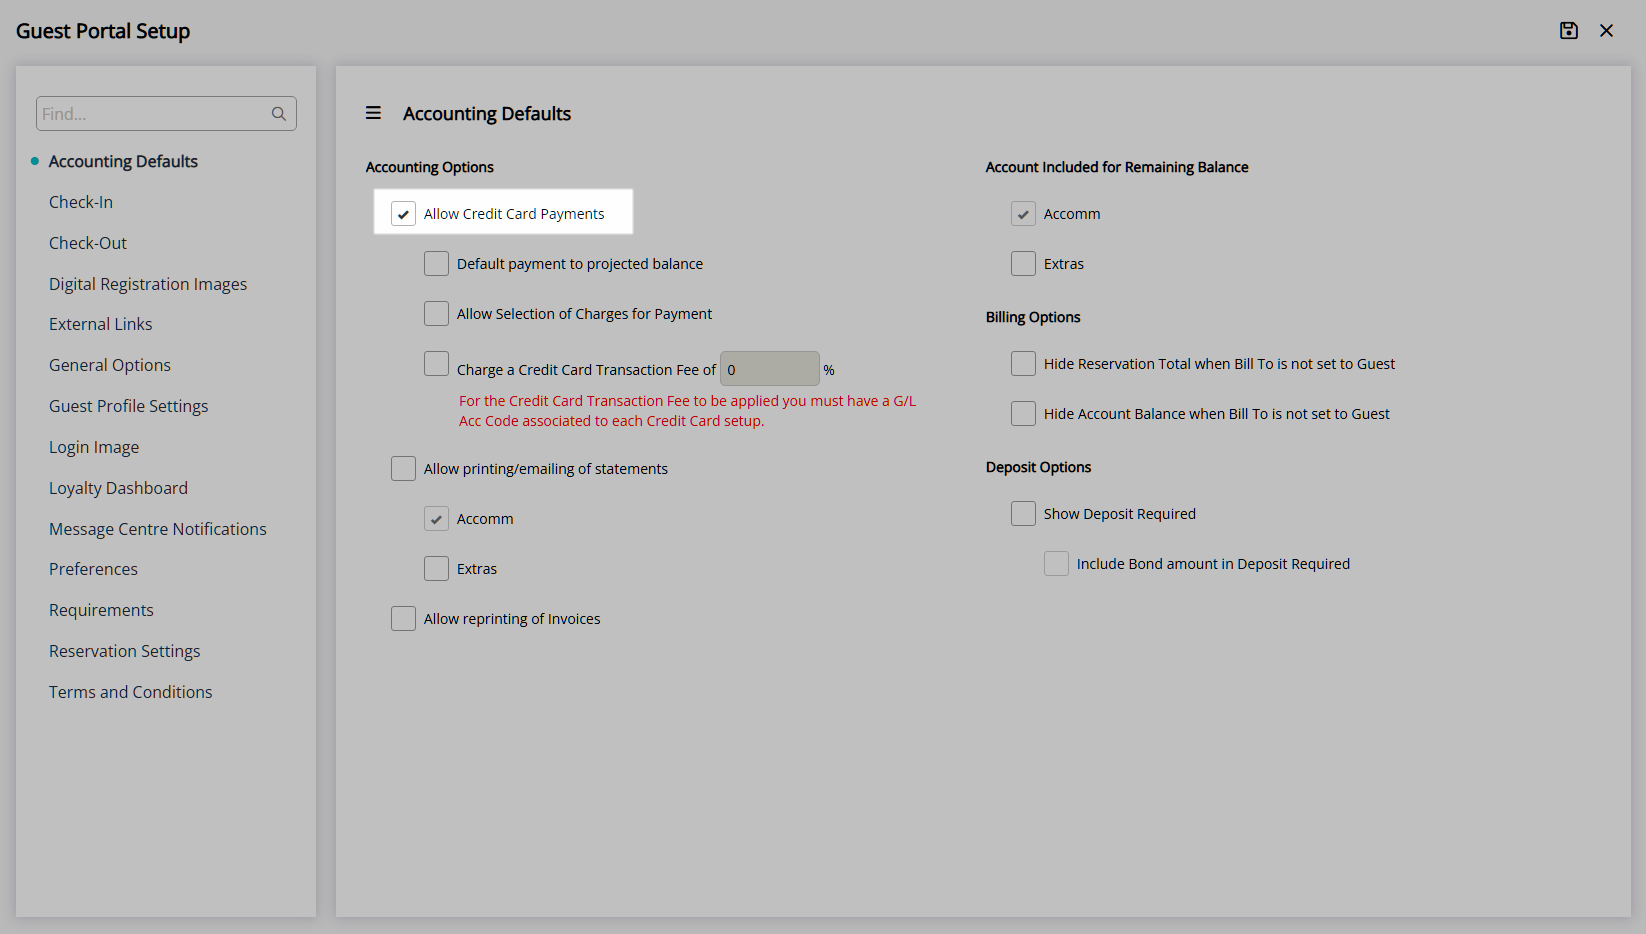
-
Optional: Select the checkbox 'Allow Credit Card Payments'.
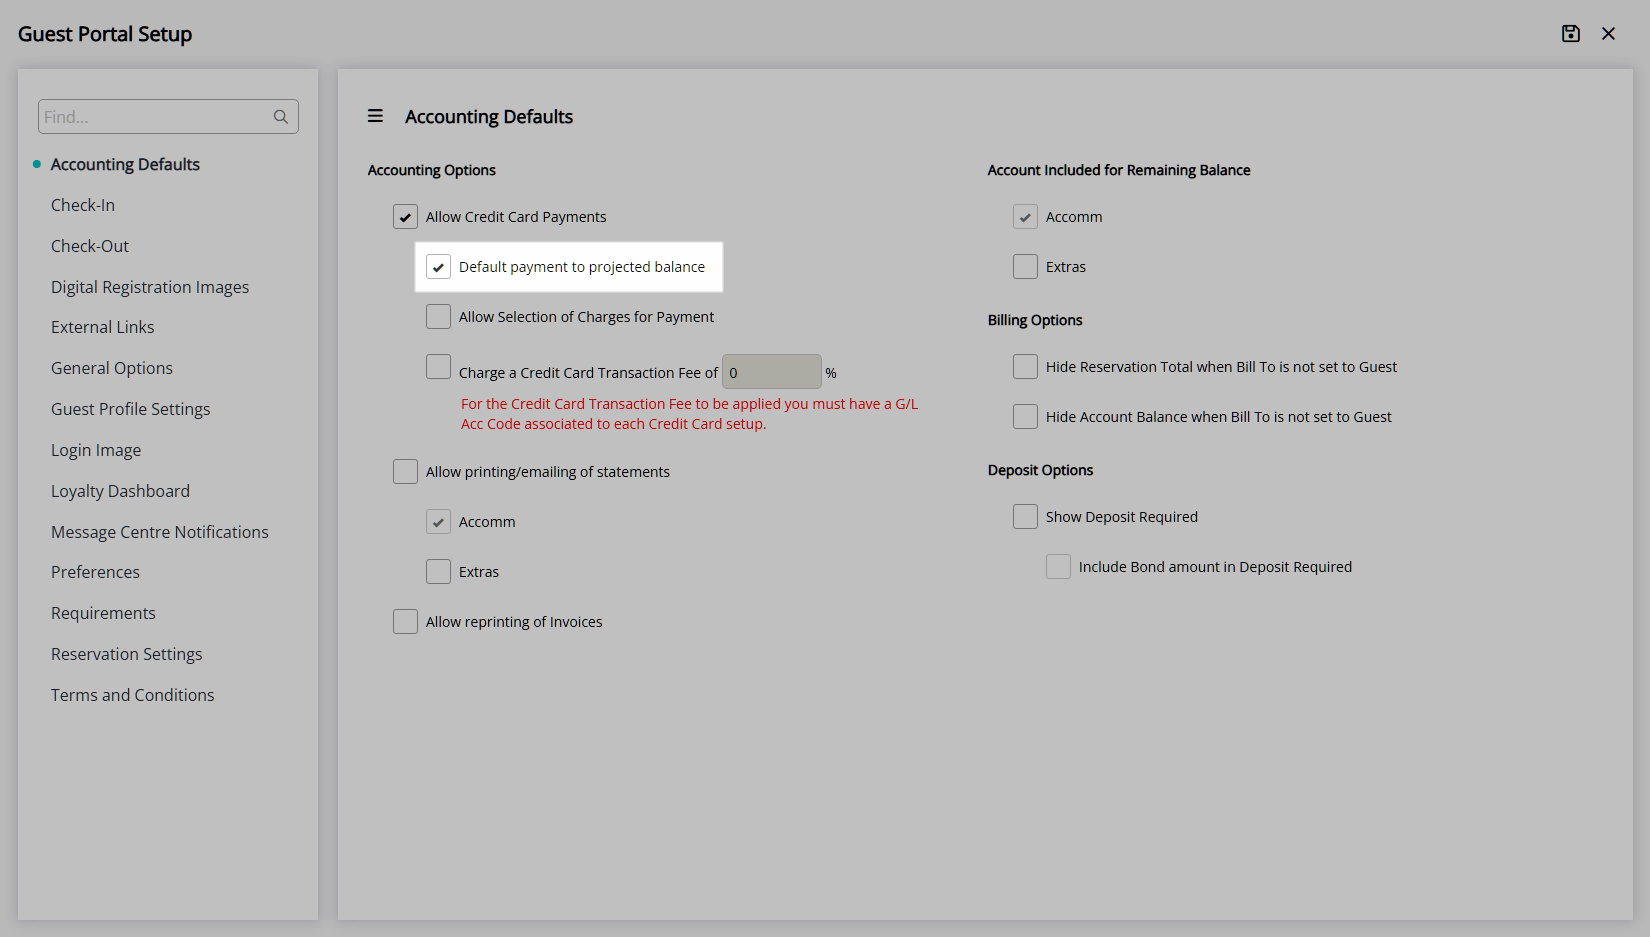
- Optional: Select the checkbox 'Default Payment to Projected Balance'.
- Optional: Select the checkbox 'Allow Selection of Charges for Payment'.
-
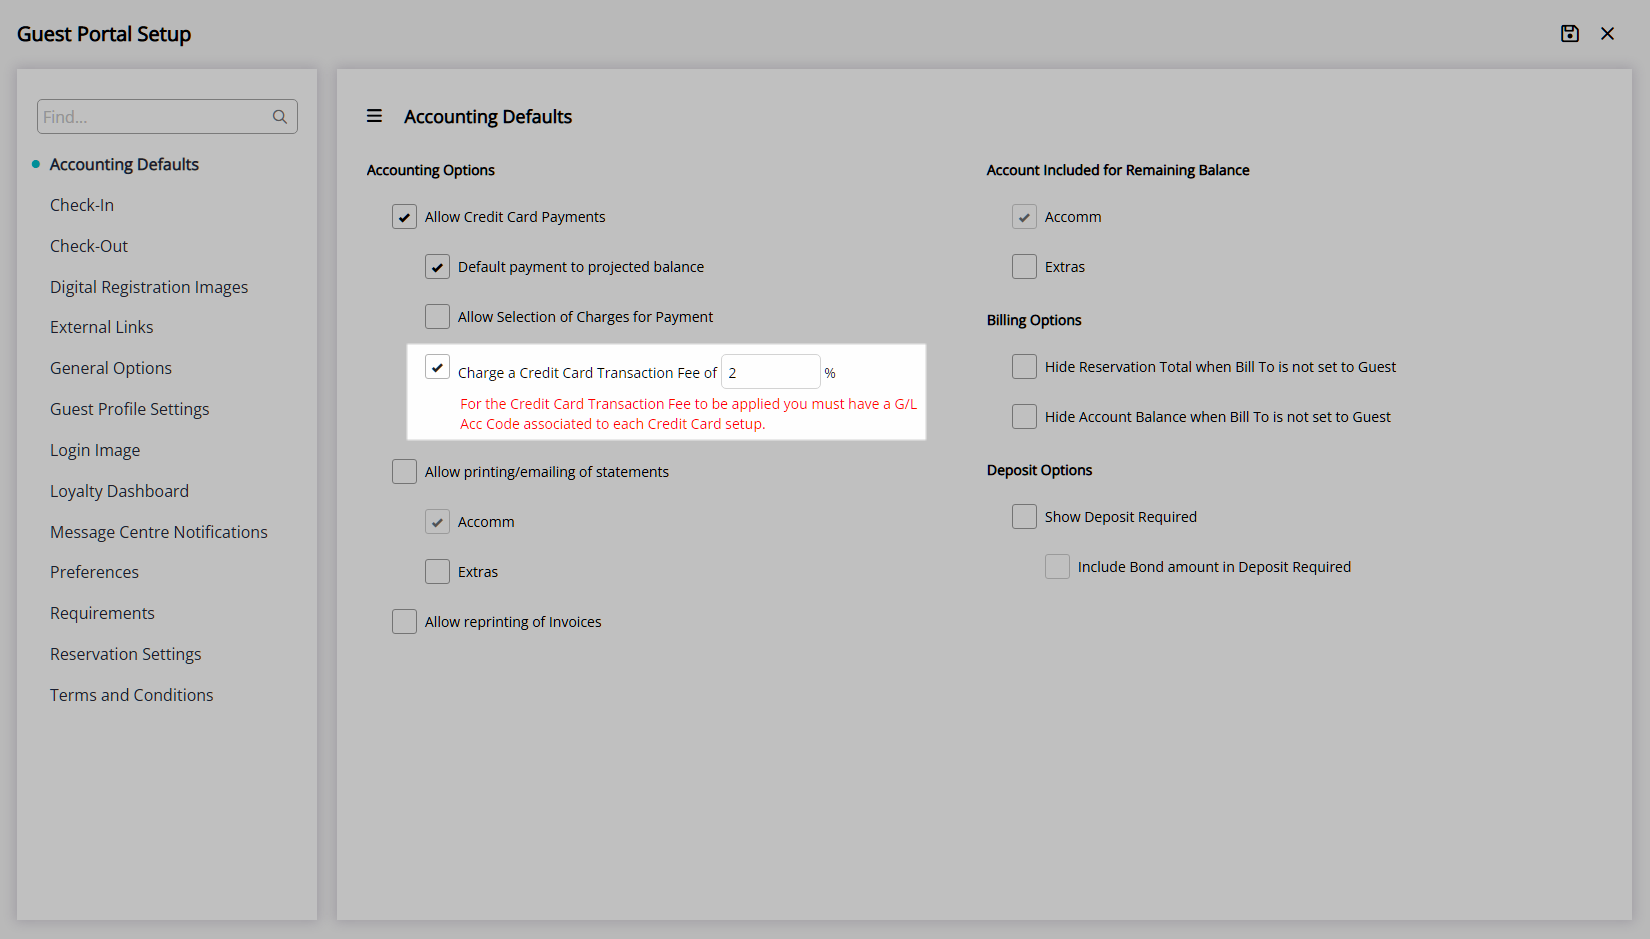
Optional: Select the checkbox 'Charge a Credit Card Transaction Fee'.
- Enter the Credit Card Transaction Fee Percentage.
-
Optional:Select the checkbox 'Allow Printing/Emailing of Statements'.
- Select the checkbox for the Account Types.
- Optional: Select the checkbox 'Allow Printing of Tax Invoices'.
-
Optional: Select the checkbox 'Allow Credit Card Payments'.
-
Account Included for Remaining Balance.
- Optional: Select the checkbox 'Extras' to be included in the Remaining Balance.
-
Billing Options.
- Optional: Select the checkbox 'Hide the Reservation Total when the Bill To is not set to Guest'.
- Optional: Select the checkbox 'Hide the Account Balance when the Bill To is not set to Guest'.
-
Deposit Options.
- Optional: Select the checkbox 'Show Deposit Required'.
- Optional: Select the checkbox 'Include Bond Amount in the Deposit Required'.
- Save.
-
Accounting Options.
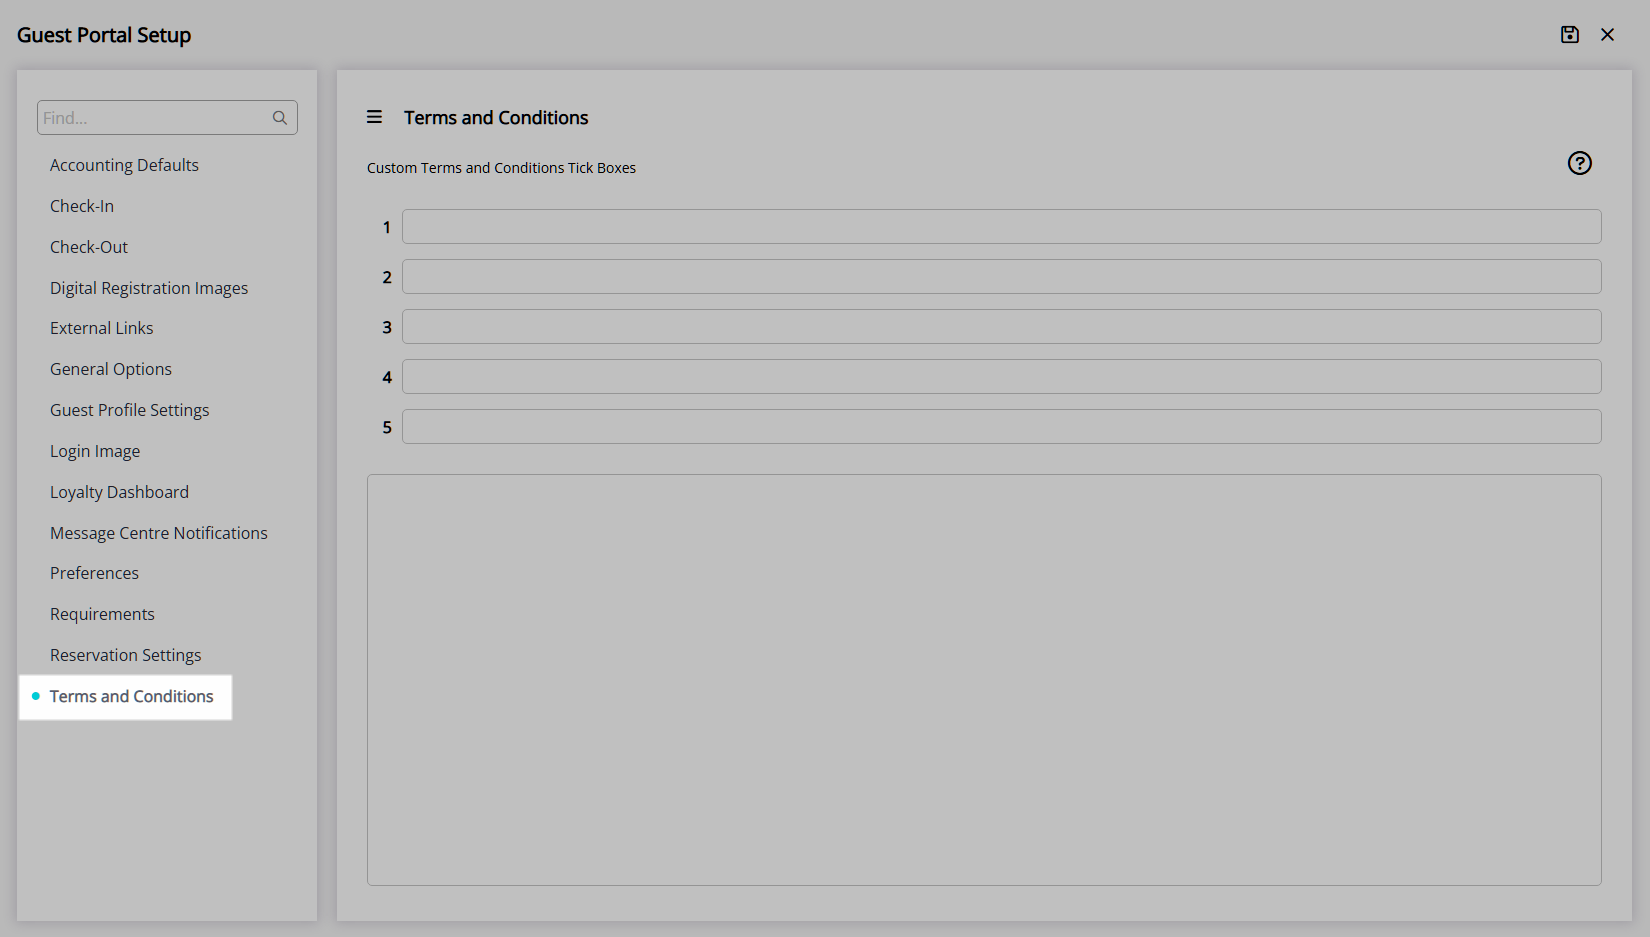
Terms & Conditions
- Navigate to the 'Terms & Conditions' tab.
- Enter the Property Terms & Conditions.
- Optional: Enter Custom Terms & Conditions Checkbox Text.
- Save.
Message Centre Notifications
- Navigate to the 'Message Centre Notifications' tab.
- Select the checkbox for the Guest Portal Actions to trigger a Message Centre Notification.
- Save.
- Save/Exit.
Additional Guest Portal setup includes Pre-Check-in, Check-in & Check-out, Digital Check-in, Preferences, Requirements, Colour Theme and Photos.
Payments made via the Guest Portal require a Payment Gateway setup in RMS.
Photo identification enables upload of one document or image file that will be saved on the 'Photo' tab of the Guest Profile.
The Guest Portal can be accessed using the below URL and replacing 'xxxx' with the Property's RMS Client ID.
Enterprise customers can use the Enterprise RMS Client ID or an individual Property's RMS Client ID.
https://guestportal.rmscloud.com/Login/Index?clientId=xxxxxx
Using Auto Guest Merge will ensure Guest Profiles are maintained with the most recent contact information.
-
Guide
- Add Button
Guide
Guest Portal Activation
Go to Setup > Portal Access > Guest Portal in the Side Menu of RMS.
Navigate to the 'General Options' tab.
General Options.
Select the checkbox 'Enable Guest Portal'.
Optional: Select the checkbox 'Enable Messaging'.
Optional: Select the checkbox 'Allow contacting the Property'.
Header Display Options.
Optional: Select the checkbox 'Show Property Logo'.
Optional: Select the checkbox 'Show Greeting in header'.
Optional: Show only Terms & Conditions and Property Website under the 'Information' menu.
Select ‘Save’ to store the changes made.
Guest Profile Options
Navigate to the 'Guest Profile Settings' tab.
Profile Options.
Optional: Select the checkbox 'Allow access to profile information'.
Optional: Select the checkbox 'Allow updates to profile information'.
Optional: Select the checkbox 'Allow Additional Guests to be added to the Reservation'.
Optional: Select the checkbox 'Ignore Mandatory field requirements for additional Guests'.
Optional: Select the checkbox 'Allow Guest to upload Photo ID/Passport'.
Optional: Select the checkbox 'Photo ID/Passport Mandatory'.
Select ![]() ‘Save’ to store the changes made.
‘Save’ to store the changes made.
Reservation Options
Navigate to the 'Reservation Settings' tab.
Display Options.
Select the checkbox 'Show Reservation Stay Dates'.
Optional: Select the checkbox 'Show Check-in Time'.
Optional: Select the checkbox 'Show Check-out Time'.
Select the checkbox 'Show Reservation Reference Number'.
Select the checkbox 'Show Reservation Status'.
Optional: Select the checkbox 'Show Reservation Total'.
Optional: Select the checkbox 'Display Tax Amount on the Rate Breakdown when Tax Inclusive'.
Optional: Select the checkbox 'Show Rate Breakdown'.
Optional: Select the checkbox 'Show ETA field'.
Optional: Select the checkbox 'Allow Modification of Arrival Times Between'.
Select the Allowable Arrival Times.
Optional: Select the checkbox 'Show Reservation Account Balance'.
Select to display the Actual or Projected Balance.
Optional: Select the checkbox 'Show Category Display Name'.
Options.
Optional: Select the checkbox 'Allow Reservation Creation'.
Select the RMS Internet Booking Engine to use or enter an external Booking Engine URL.
Optional: Select the checkbox 'Allow Reservation Cancellation'.
Select the checkbox 'Allow viewing Future Reservations'.
Select the checkbox 'Allow viewing Current Reservations'.
Optional: Select the checkbox 'Allow vieiwng Past Reservations'.
Optional: Enter an Alternate Website to redirect on logout.
Select ![]() ‘Save’ to store the changes made.
‘Save’ to store the changes made.
Accounting Options
Navigate to the 'Accounting Defaults' tab.
Accounting Options.
Optional: Select the checkbox 'Allow Credit Card Payments'.
Optional: Select the checkbox 'Default Payment to Projected Balance'.
Optional: Select the checkbox 'Allow Selection of Charges for Payment'.
Optional: Select the checkbox 'Charge a Credit Card Transaction Fee' and enter the percentage
Optional: Select the checkbox 'Allow Printing/Emailing of Statements' and choose the Account Types..
Optional: Select the checkbox 'Allow Printing of Tax Invoices'.
Account Included for Remaining Balance.
Optional: Select the checkbox 'Extras' to be included in the Remaining Balance.
Billing Options.
Optional: Select the checkbox 'Hide the Reservation Total when the Bill To is not set to Guest'.
Optional: Select the checkbox 'Hide the Account Balance when the Bill To is not set to Guest'.
Deposit Options.
Optional: Select the checkbox 'Show Deposit Required'.
Optional: Select the checkbox 'Include Bond Amount in the Deposit Required'.
Select ![]() ‘Save’ to store the changes made.
‘Save’ to store the changes made.
Terms & Conditions
Navigate to the 'Terms & Conditions' tab.
Enter the Property Terms & Conditions.
Optional: Enter Custom Terms & Conditions Checkbox Text.
Select ![]() ‘Save’ to store the changes made.
‘Save’ to store the changes made.
Message Centre Notifications
Navigate to the 'Message Centre Notifications' tab.
Select the checkbox for the Guest Portal Actions to trigger a Message Centre Notification.
Select ![]() ‘Save’ to store the changes made.
‘Save’ to store the changes made.
Select ‘Save/Exit’ to store the changes made and leave the setup.
The Guest Portal URL can be added to the Property Website and the Guest Portal merge fields can be added to existing SMS and Form Letters to enable Guests to access the portal and manage their Reservations using the selected options.
Guests accessing the Guest Portal through the URL will be required to enter a mobile number or email address matching the information on the Guest Profile and enter the one-time-passcode.
Using the URL in the SMS or Form Letter will automatically log the Guest in for the Reservation the correspondence was sent from.