Dynamic Pricing
Setup Dynamic Pricing in RMS.
Dynamic Pricing automates rate adjustments based on predefined sets of rules.
-
Information
-
Setup
- Add Button
Information
Dynamic Pricing is setup on the Rate Table to adjust the prices based on predefined sets of rules using occupancy & time.
Occupancy will be determined by the Property or Category based on the option selected in the Property Setup.
The Dynamic Pricing Profit/Loss Report can be used to review the fluctuations in revenue due to rate adjustments made by the set Dynamic Pricing rules.
Dynamic Pricing adjustments will be visible on the Total Rate Breakdown of a reservation.
Derived Rates where the nominated Master Rate includes Dynamic Pricing will include the Dynamic Pricing Adjustment in the calculation for the Derived Rate Amount.
The Dynamic Pricing options 'Use Existing Rate' and 'Create New Rate Based on Existing' will change the Rate Table referenced for prices when the Dynamic Pricing rule takes effect without modifying the existing Rate Lookups.

Category, Area, Reservation, Guest and Rate are default System Labels that can be customised.

System Administrators will require Security Profile access to setup this feature.
-
Setup
- Add Button
Setup
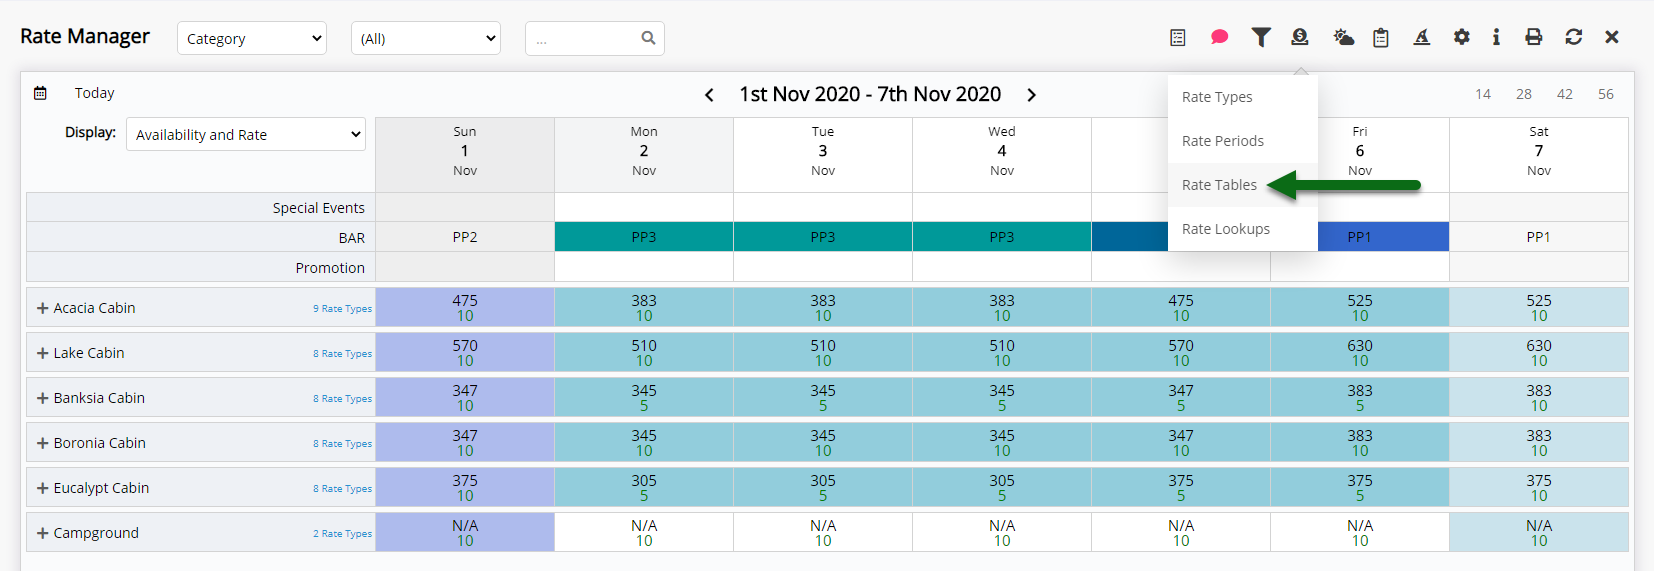
- Go to Charts > Rate Manager in RMS.
- Select the
 'Rates' icon and choose 'Rate Tables'.
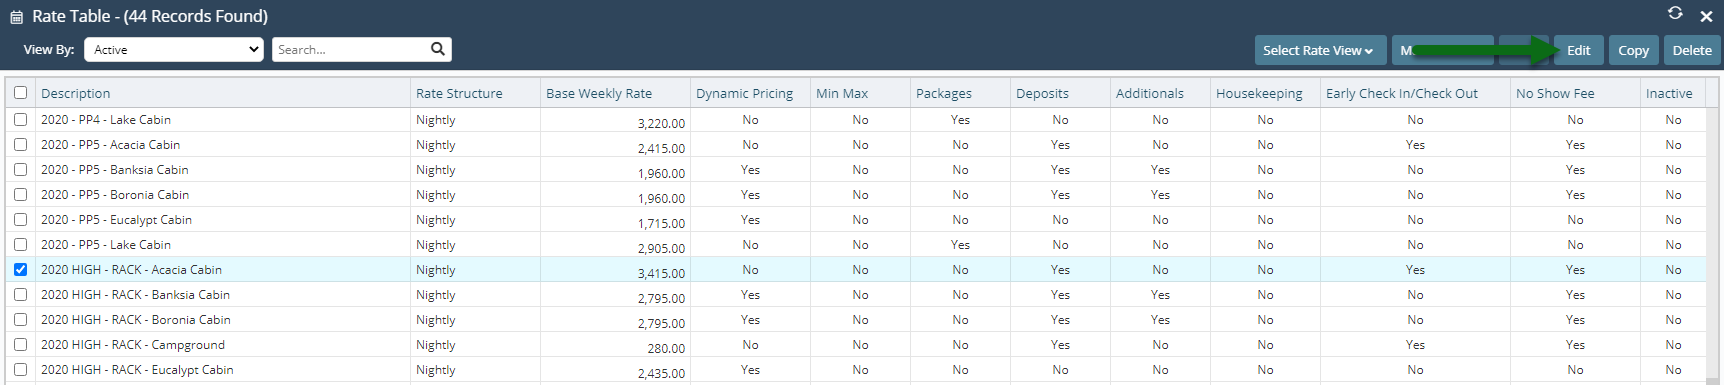
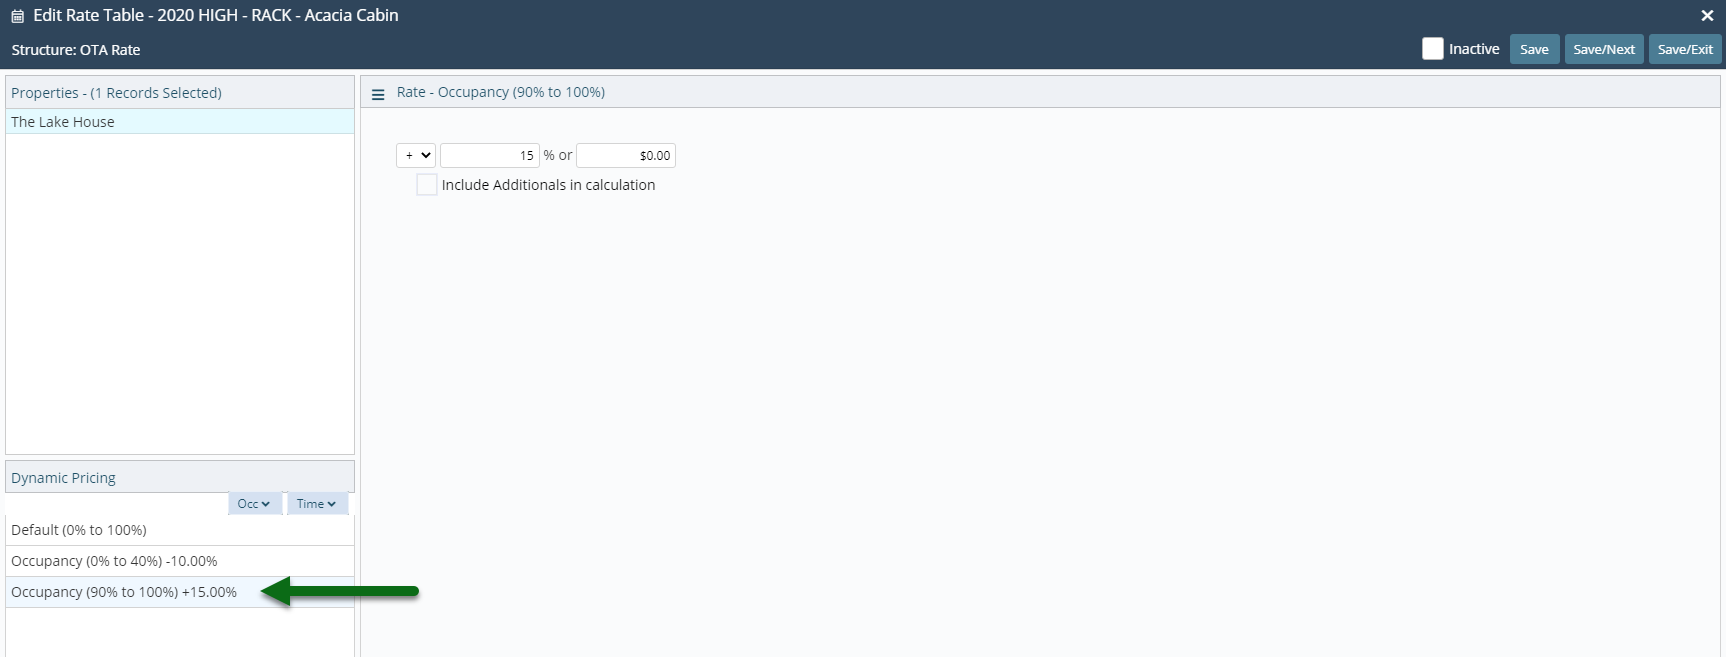
 - Select the Rate Table and choose 'Edit'.
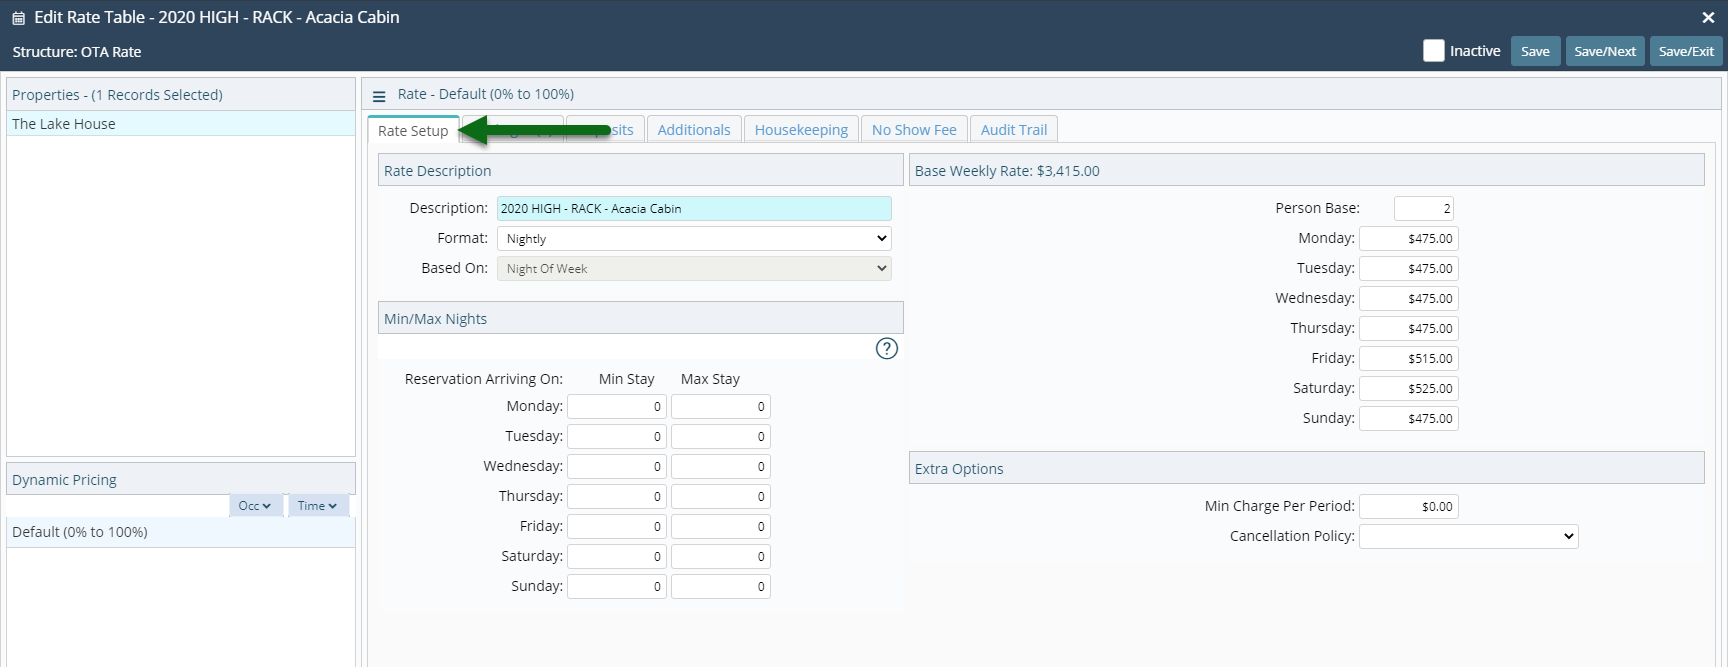
- Navigate to the 'Rate Setup' tab.
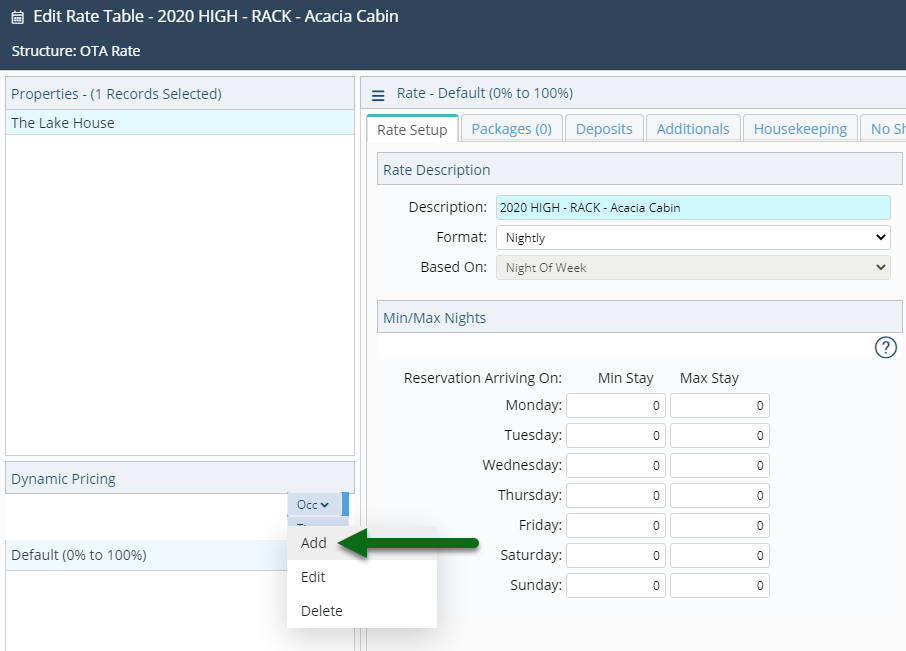
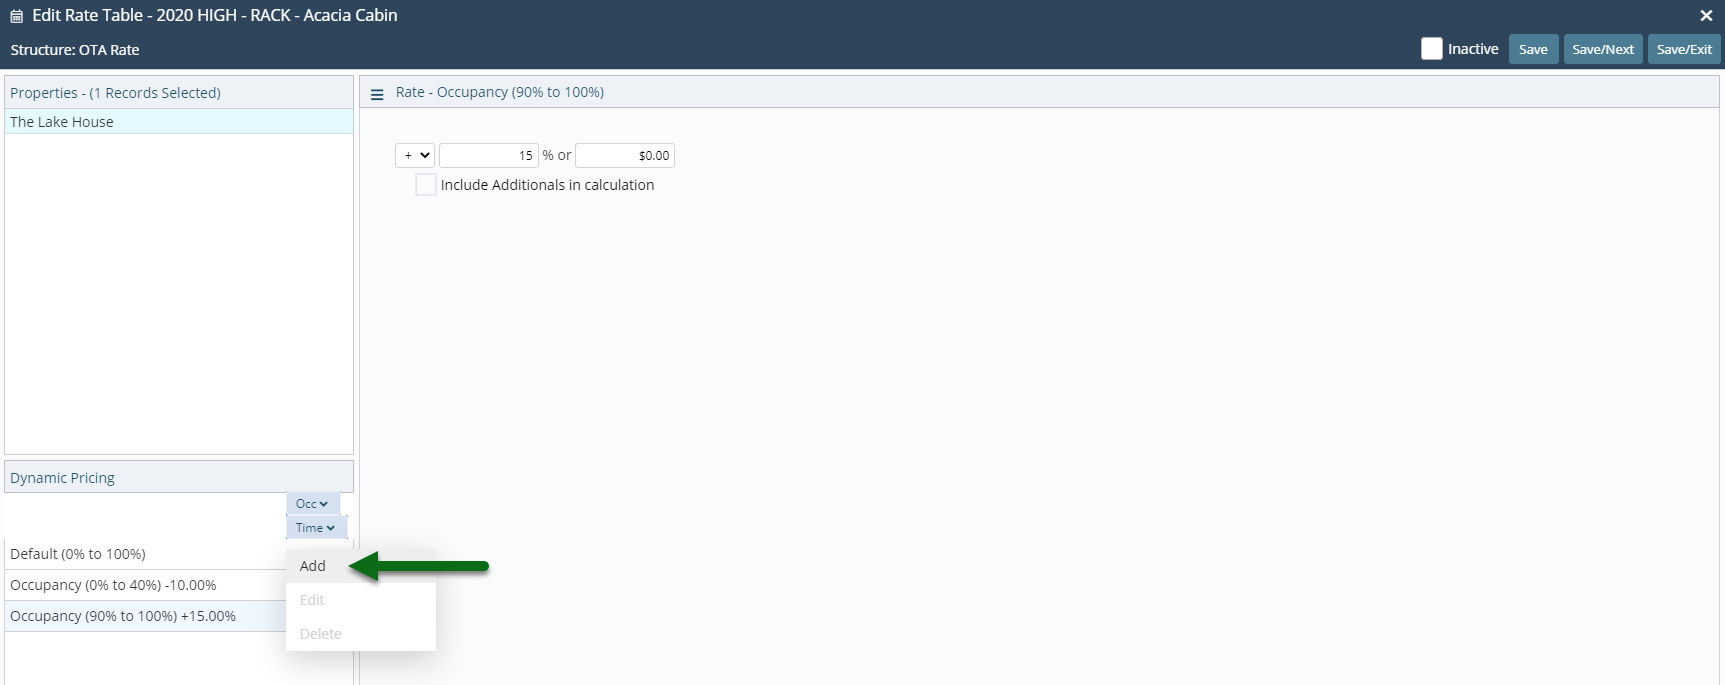
- Select the 'Occ' menu and choose 'Add'.
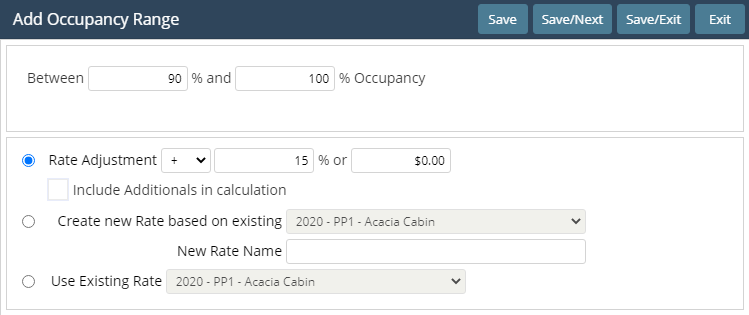
- Enter the Occupancy Range.
-
Option A: Select Rate Adjustment.
- Select the Adjustment Type.
- Enter the Adjustment Amount.
- Optional: Select the checkbox 'Include Additionals in calculation'.
-
Option B: Select 'Create New Rate Based on Existing'.
- Select an existing Rate Table.
- Enter the new Rate Table Name.
-
Option C: Select 'Use Existing Rate'.
- Select the existing Rate Table.
- Save/Next.
- Repeat Steps 6-10 for all Occupancy Ranges.
-
Optional: Add a Time Rule.
- Select an Occupancy Range.
- Select the 'Time' menu and choose 'Add'.
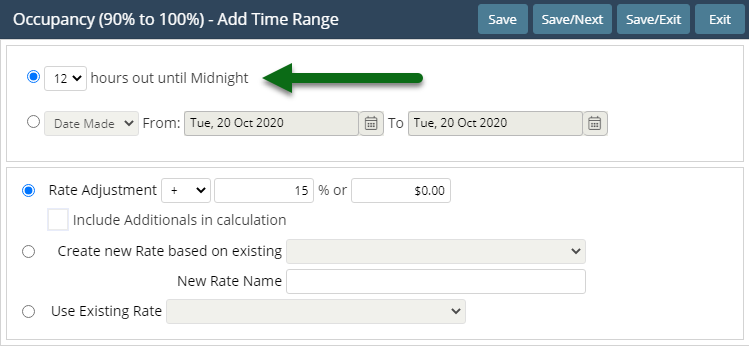
- Select the Time option.
- Select and Enter the Rate Adjustment.
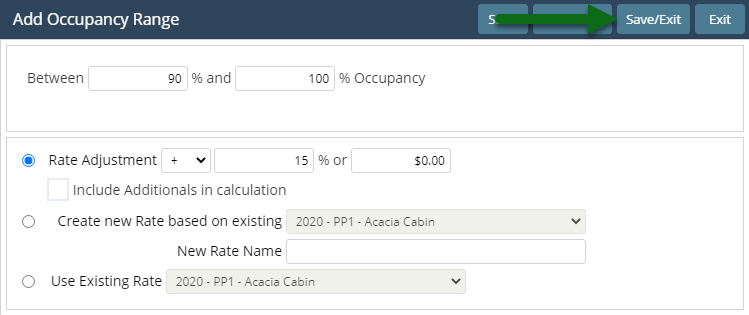
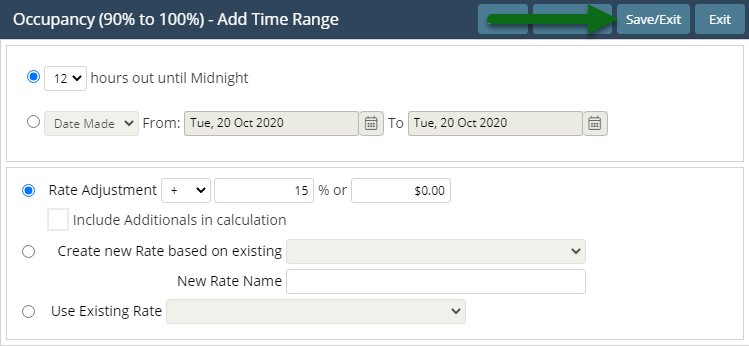
- Save/Exit.
- Save/Exit.
- Repeat for all required Rate Tables.

The Dynamic Pricing options 'Use Existing Rate' and 'Create New Rate Based on Existing' will change the Rate Table referenced for prices when the Dynamic Pricing rule takes effect without modifying the existing Rate Lookups.
Adding a Time Rule with an Adjustment to an existing Occupancy Range will use the first adjustment when the occupancy criteria is reached and the second adjustment when the time criteria is reached if within the specified occupancy range.
-
Guide
- Add Button
Guide
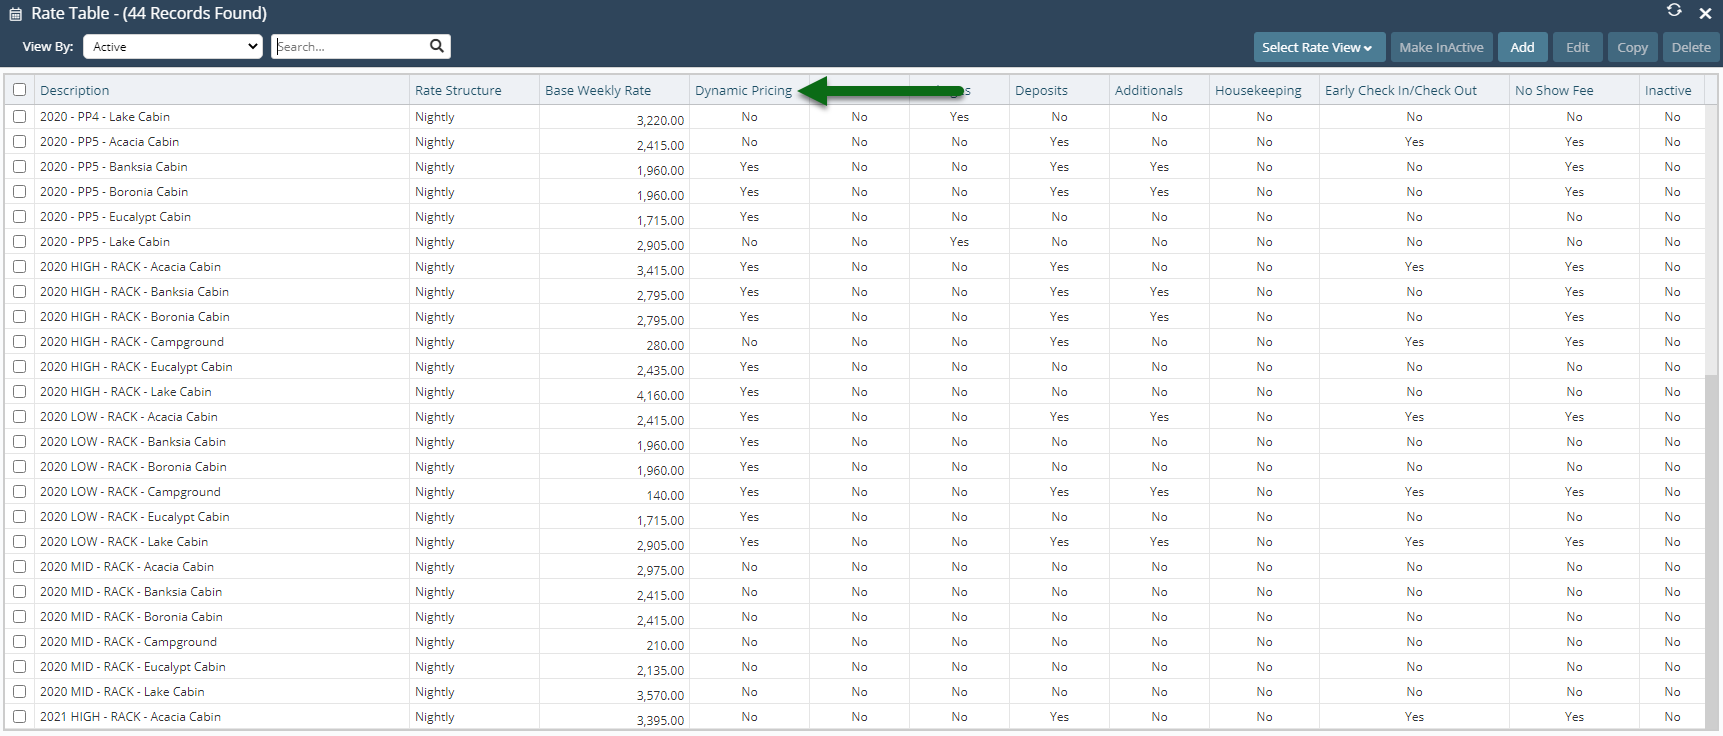
Go to Charts > Rate Manager in RMS.

Select the  'Rates' icon and choose 'Rate Tables'.
Select the Rate Table and choose 'Edit'.
Navigate to the 'Rate Setup' tab.
Select the 'Occ' menu and choose 'Add'.
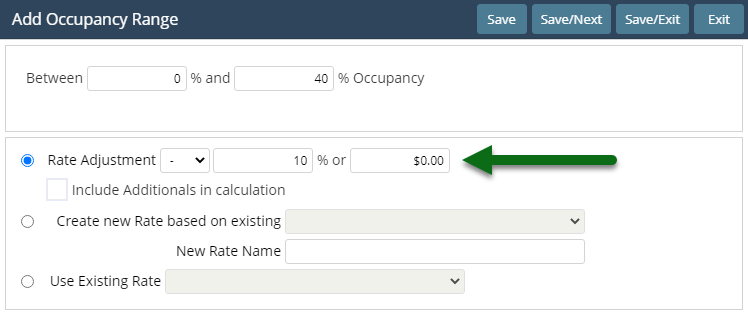
Enter the Occupancy Range.

Option A: Select Rate Adjustment.
Select the Adjustment Type and enter the Adjustment Amount.
Optional: Select the checkbox 'Include Additionals in calculation'.
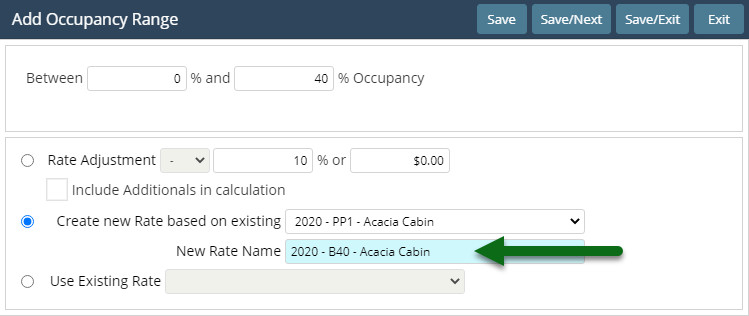
Option B: Select 'Create New Rate Based on Existing'.
Select an existing Rate Table and enter the new Rate Table Name.
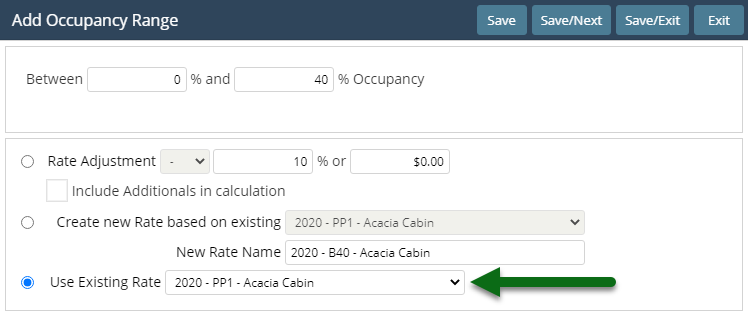
Option C: Select 'Use Existing Rate'.
Select the existing Rate Table.
Select 'Save/Next' to store the changes made and continue adding new Dynamic Pricing rules.
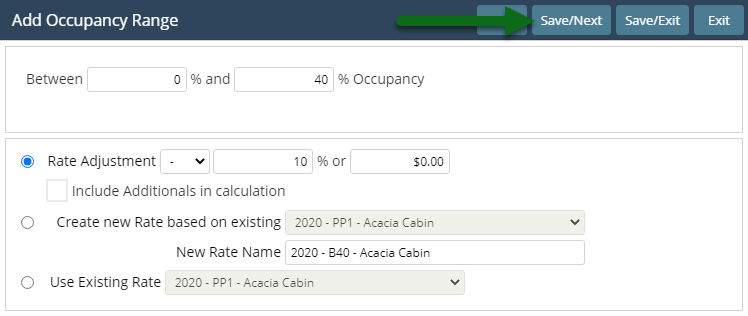
Repeat Steps 6-10 for all Occupancy Ranges.
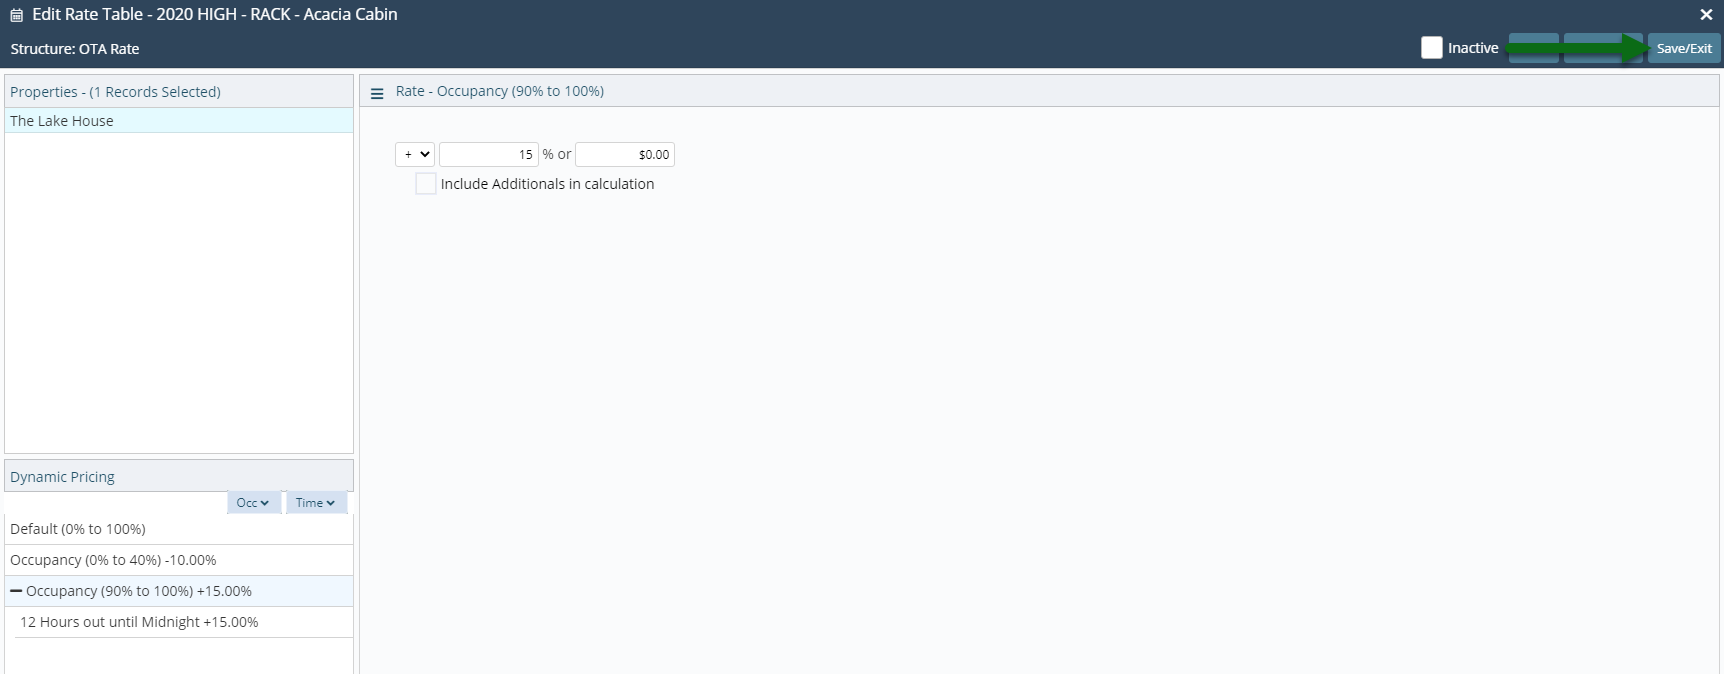
Select 'Save/Exit' to store the changes made and exit the setup.
Select an Occupancy Range.
Select the 'Time' menu and choose 'Add'.
Select the Time option and choose the Rate Adjustment.
Select 'Save/Exit' to store the changes made and exit the setup.
Repeat for all required Rate Tables.
Setup
- Go to Charts > Rate Manager in RMS.
- Select the 'Rates' icon and choose 'Rate Tables'.
- Select the Rate Table and choose 'Edit'.
- Navigate to the 'Rate Setup' tab.
- Select the 'Occ' menu and choose 'Add'.
- Enter the Occupancy Range.
-
Option A: Select Rate Adjustment.
- Select the Adjustment Type.
- Enter the Adjustment Amount.
- Optional: Select the checkbox 'Include Additionals in calculation'.
-
Option B: Select 'Create New Rate Based on Existing'.
- Select an existing Rate Table.
- Enter the new Rate Table Name.
-
Option C: Select 'Use Existing Rate'.
- Select the existing Rate Table.
- Save/Next.
- Repeat Steps 6-10 for all Occupancy Ranges.
-
Optional: Add a Time Rule.
- Select an Occupancy Range.
- Select the 'Time' menu and choose 'Add'.
- Select the Time option.
- Select and Enter the Rate Adjustment.
- Save/Exit.
- Save/Exit.
- Repeat for all required Rate Tables.
The Dynamic Pricing options 'Use Existing Rate' and 'Create New Rate Based on Existing' will change the Rate Table referenced for prices when the Dynamic Pricing rule takes effect without modifying the existing Rate Lookups.
Adding a Time Rule with an Adjustment to an existing Occupancy Range will use the first adjustment when the occupancy criteria is reached and the second adjustment when the time criteria is reached if within the specified occupancy range.
-
Guide
- Add Button
Guide
Go to Charts > Rate Manager in RMS.
Select the 'Rates' icon and choose 'Rate Tables'.
Select the Rate Table and choose 'Edit'.
Navigate to the 'Rate Setup' tab.
Select the 'Occ' menu and choose 'Add'.
Enter the Occupancy Range.
Option A: Select Rate Adjustment.
Select the Adjustment Type and enter the Adjustment Amount.
Optional: Select the checkbox 'Include Additionals in calculation'.
Option B: Select 'Create New Rate Based on Existing'.
Select an existing Rate Table and enter the new Rate Table Name.
Option C: Select 'Use Existing Rate'.
Select the existing Rate Table.
Select 'Save/Next' to store the changes made and continue adding new Dynamic Pricing rules.
Repeat Steps 6-10 for all Occupancy Ranges.
Select 'Save/Exit' to store the changes made and exit the setup.
Select an Occupancy Range.
Select the 'Time' menu and choose 'Add'.
Select the Time option and choose the Rate Adjustment.
Select 'Save/Exit' to store the changes made and exit the setup.
Repeat for all required Rate Tables.