Quick Quote Reservation
Create a new reservation using Quick Quote in RMS.
Quick Quote can be used to quote and create new Reservations.
-
Information
-
Use
- Add Button
Information
Quick Quote can be used to quote and create new Reservations.
Users can quote or create a Reservation using a variety of options including Mixed Rate Reservations (Rate Mixer).
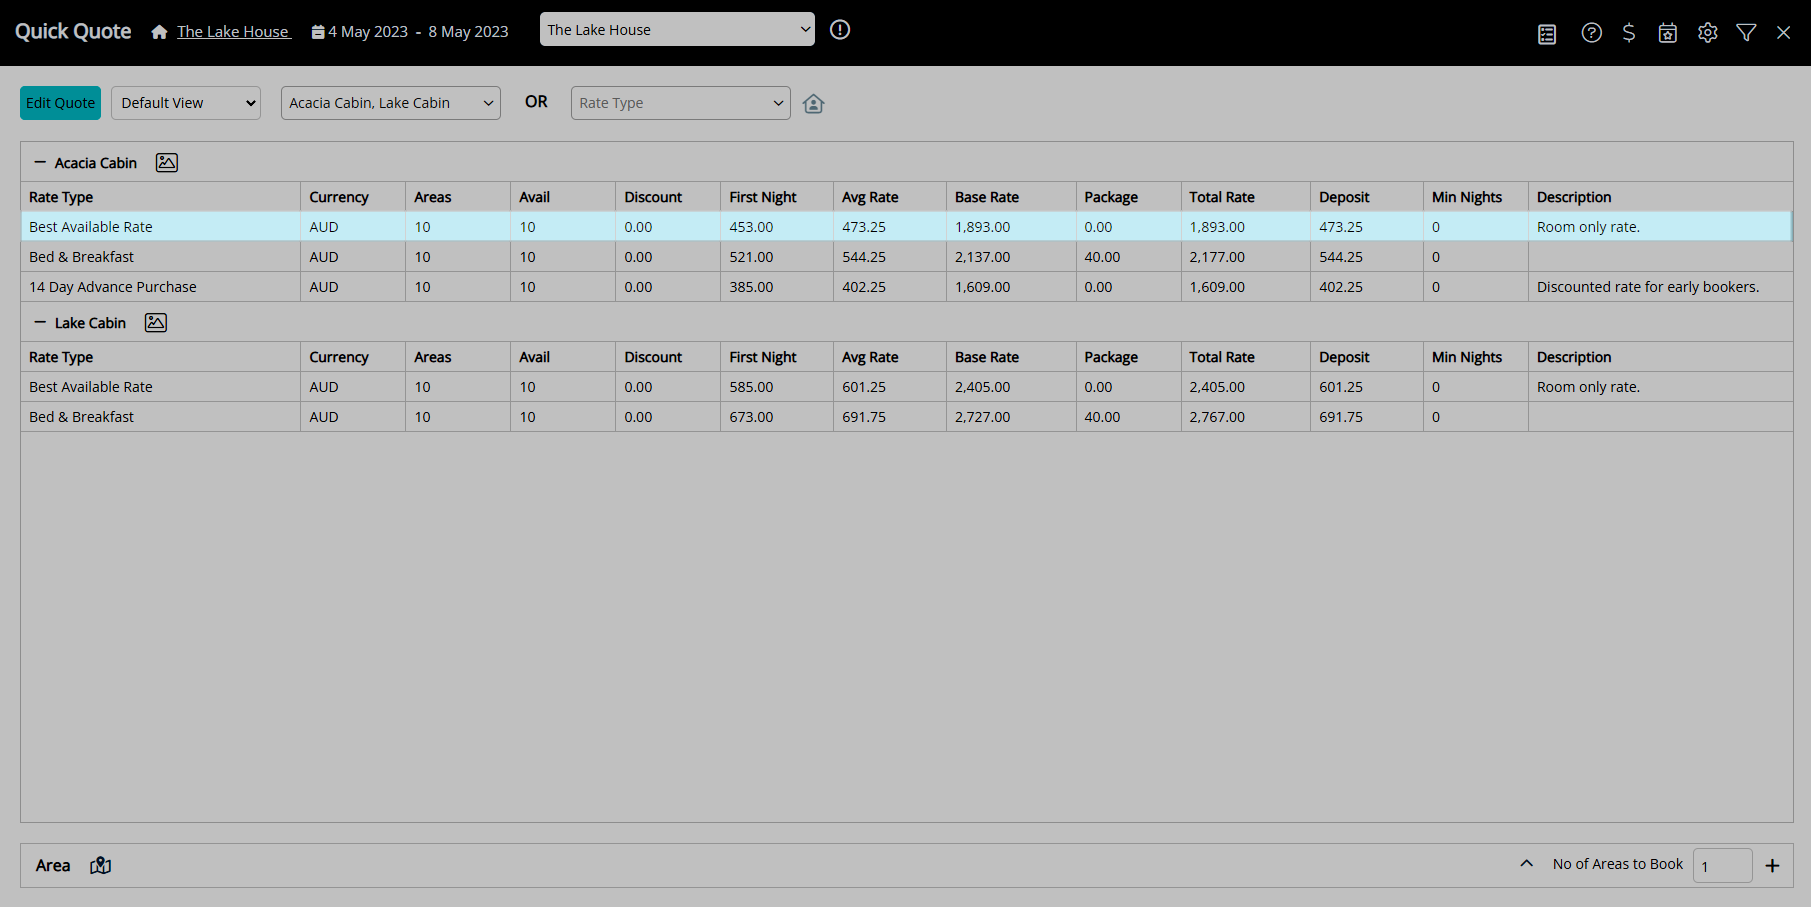
The four view types available on Quick Quote are Default View, Availability View, Long Stay and Hourly View.
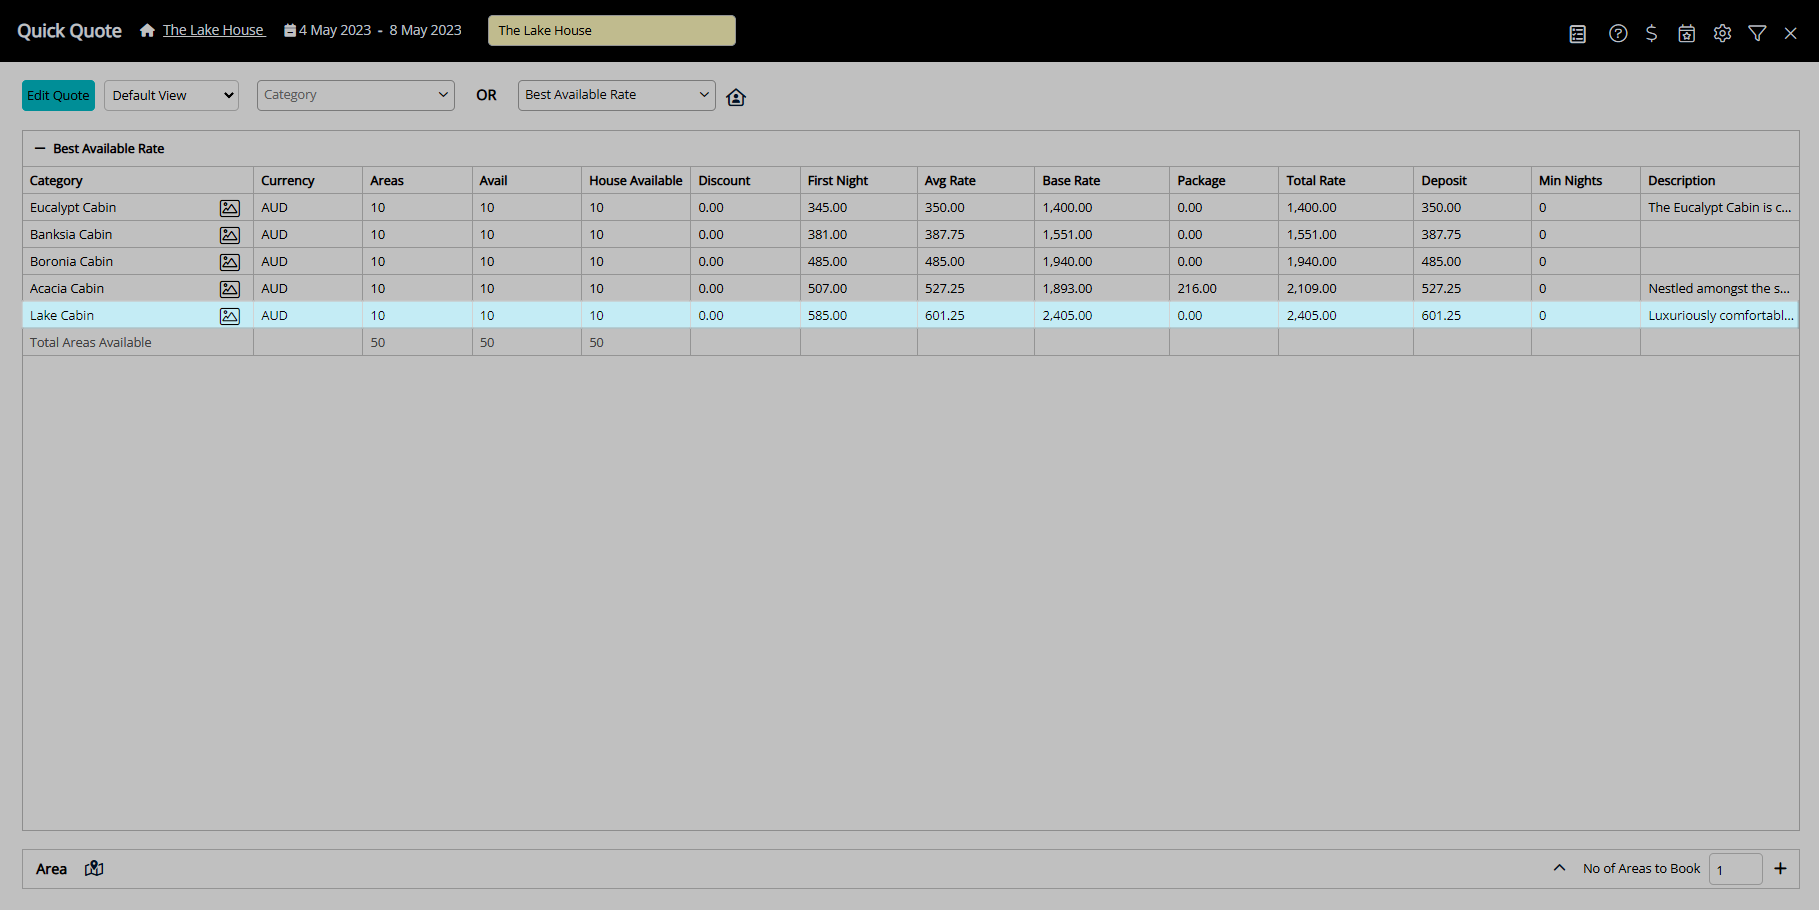
The Default View uses a collapsible style display for the selected Categories or Rate Types and includes a variety of information for the entire date range selected.
The Availability View displays a breakdown of the Total Rate, Nightly Rate & Nightly Availability for each date within the selected date range.
The Long Stay View is available for Long Stay Reservations staying more than 30 nights that will use a Long Stay Charge for their accommodation fees.
The Hourly View is available for Day Use Reservations that will use an Hourly Rate Type.
The  'Allotments' icon will display Guaranteed Allotment information when a Group or Travel Agent has been selected.
Photos setup for a Category can be viewed by selecting the  'Picture' icon.
Users can select the  'Interactive Map' icon to complete a Reservation using the Interactive Map.

The optimal ratio for Category and Area Photos is 1160 pixels x 620 pixels.
Category, Area, Rate & Reservation are default System Labels that can be customised.

Users will require Security Profile access to use this feature.
-
Use
- Add Button
Use
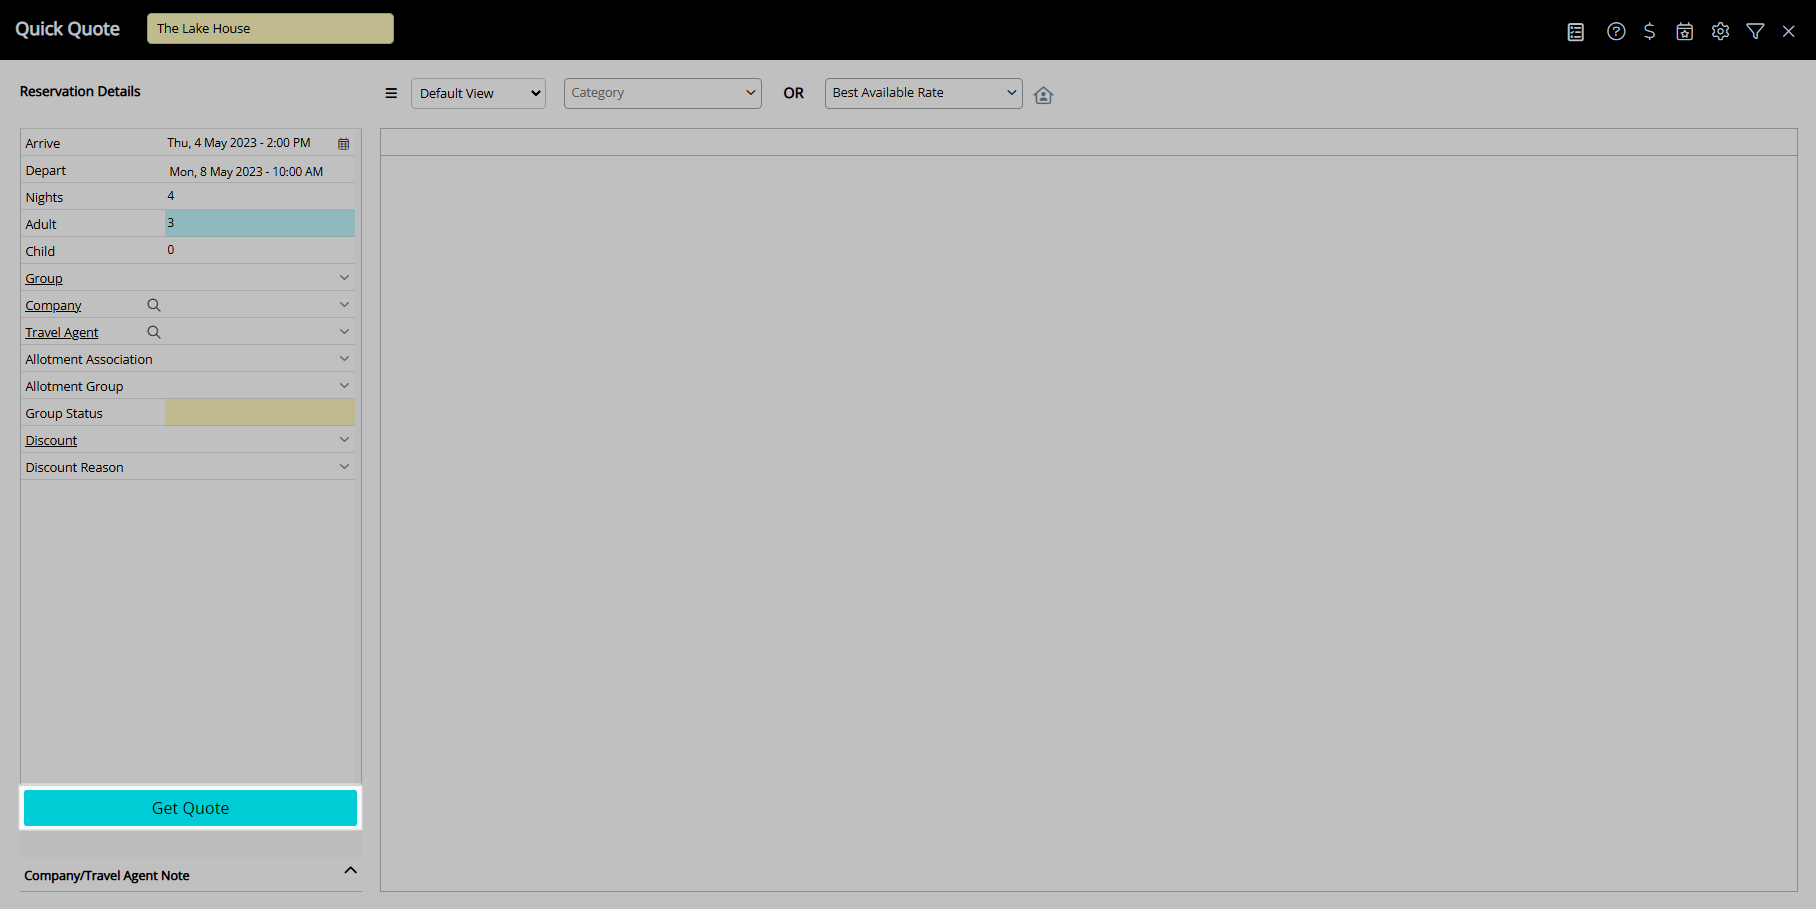
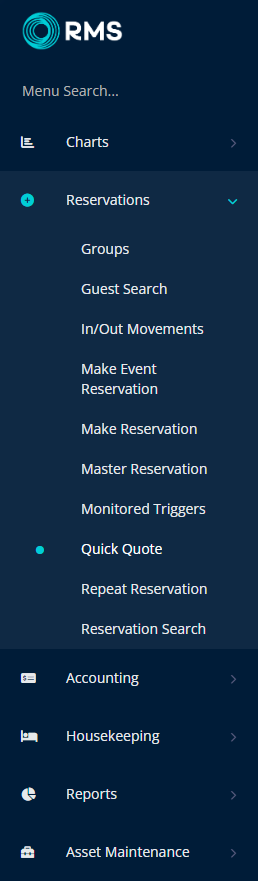
- Go to Reservations > Quick Quote in the Side Menu of RMS.
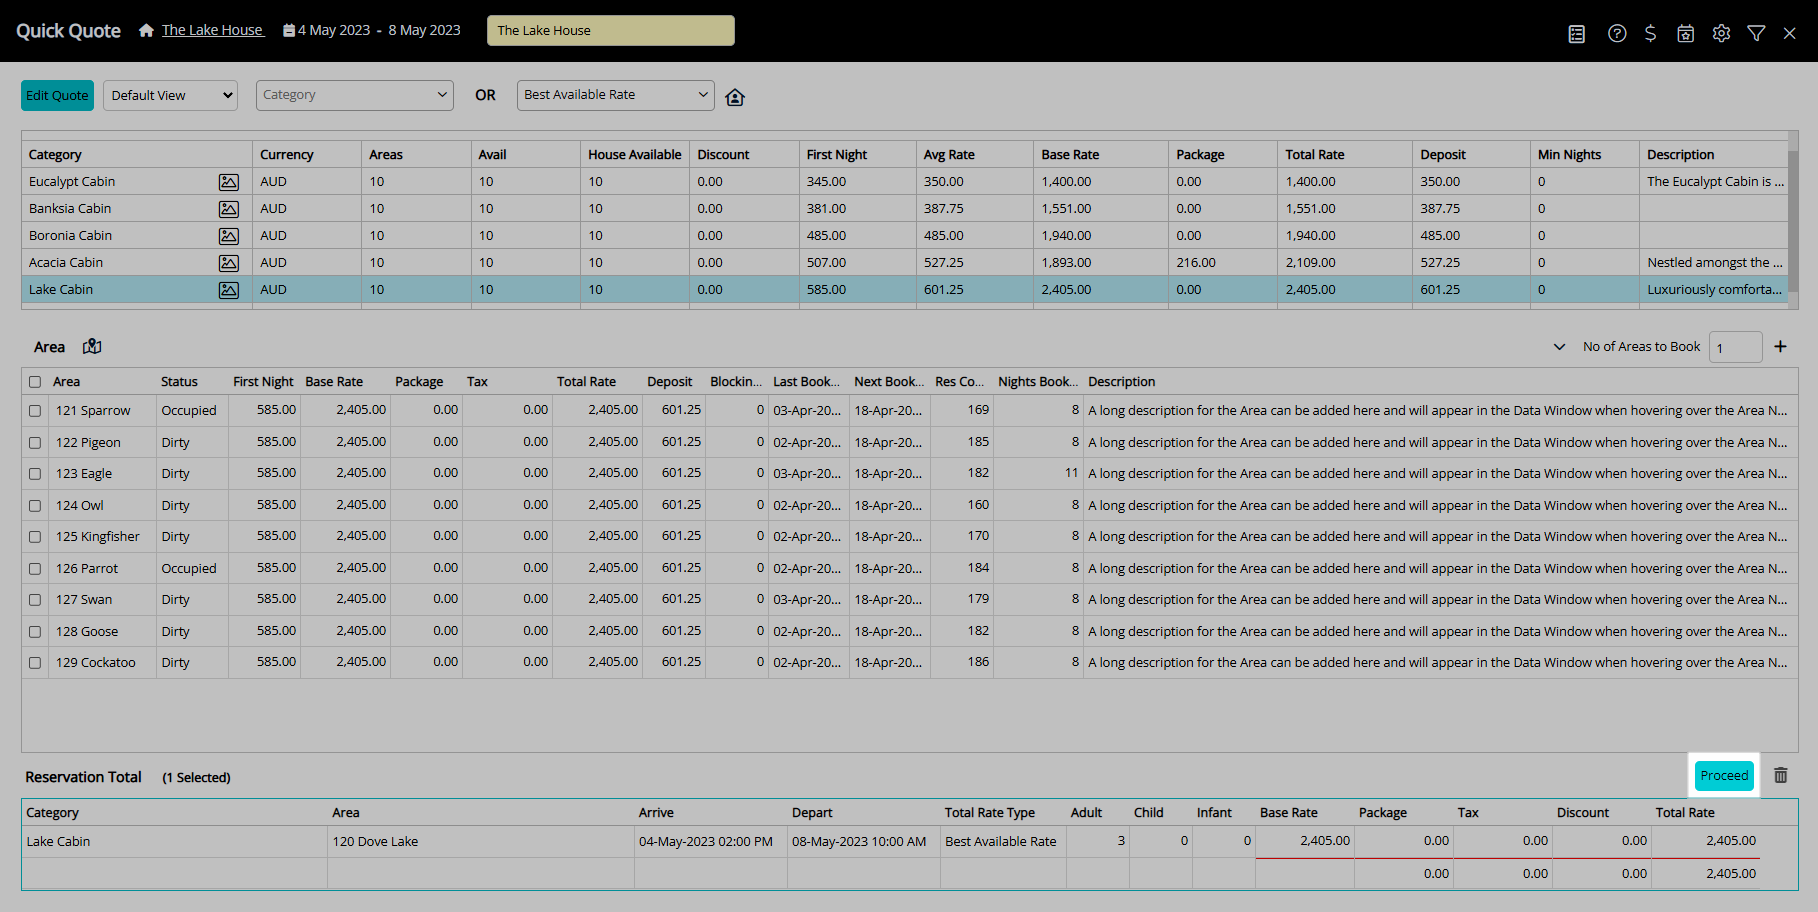
- Perform a Quick Quote Search and select 'Get Quote'.
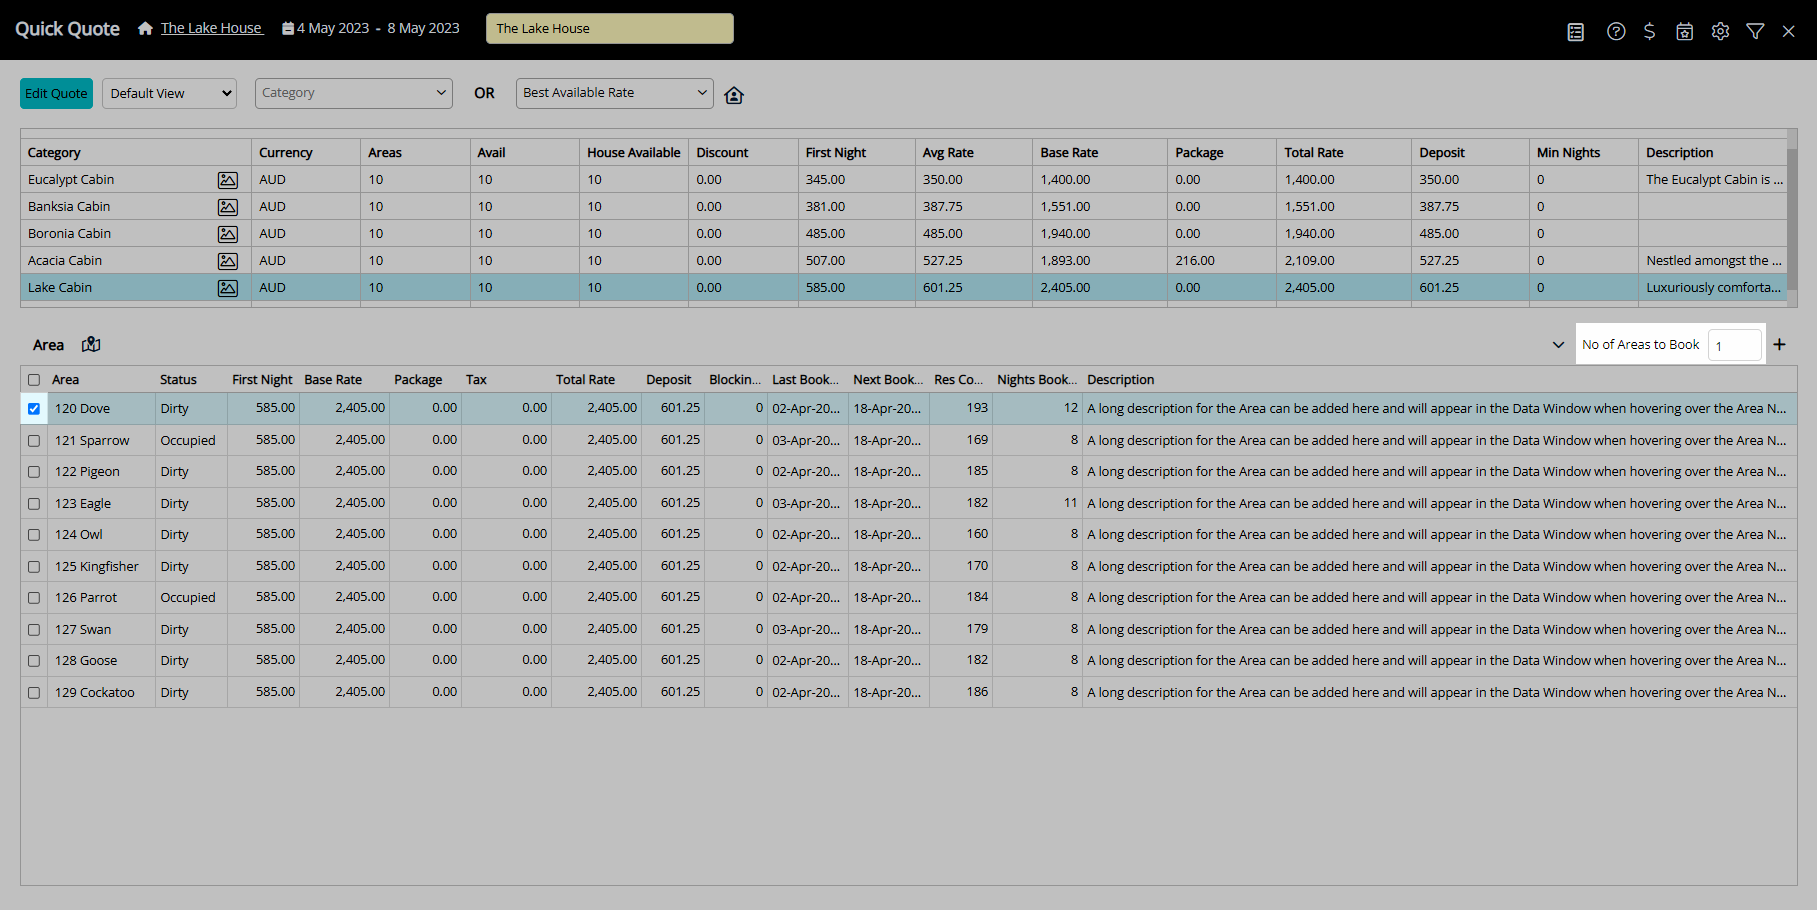
- Select a Category or Rate Type.
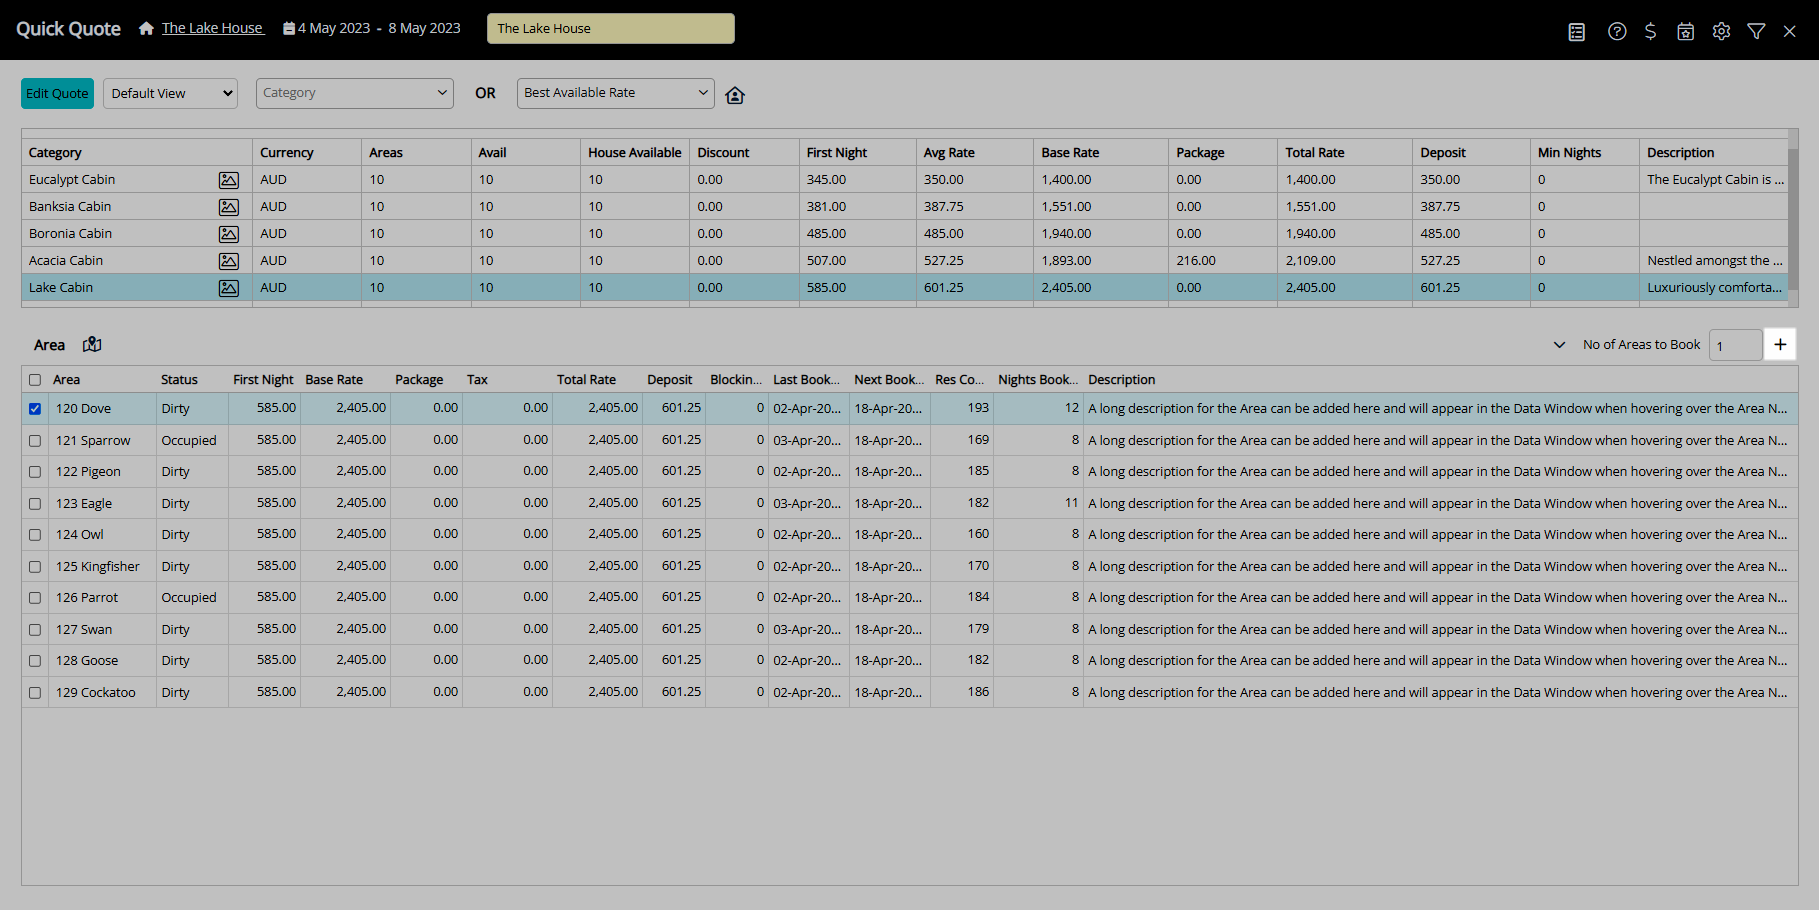
- Select the checkbox for the Area to Book or enter the Number of Areas to Book.
- Select the
 'Add to Reservation' icon.
 - Select 'Proceed'.
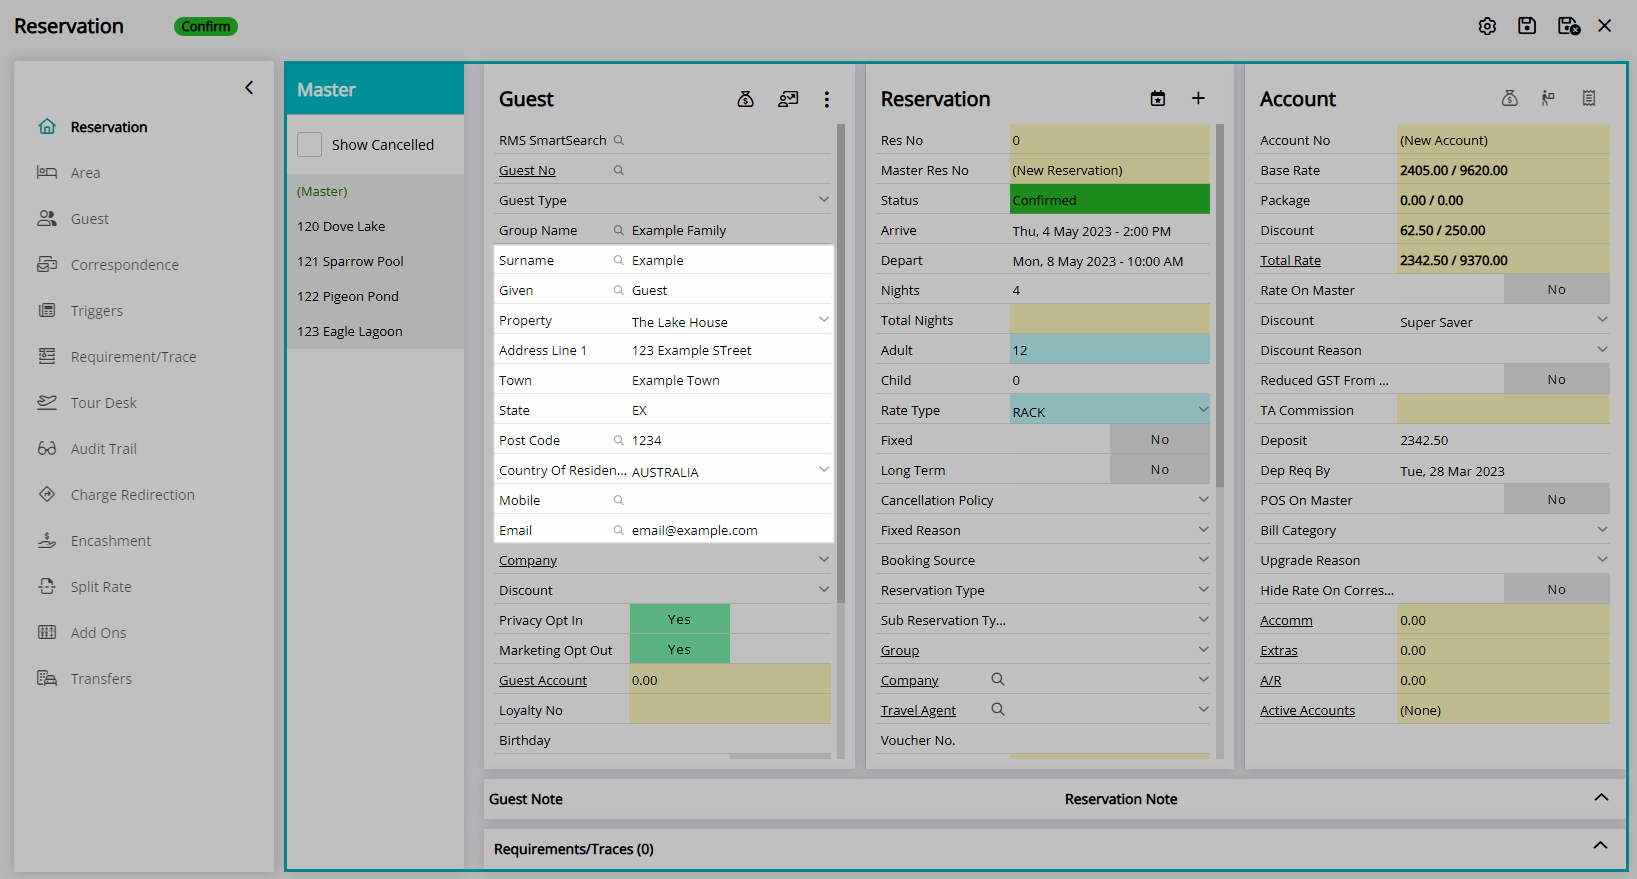
- Enter the Guest Details.
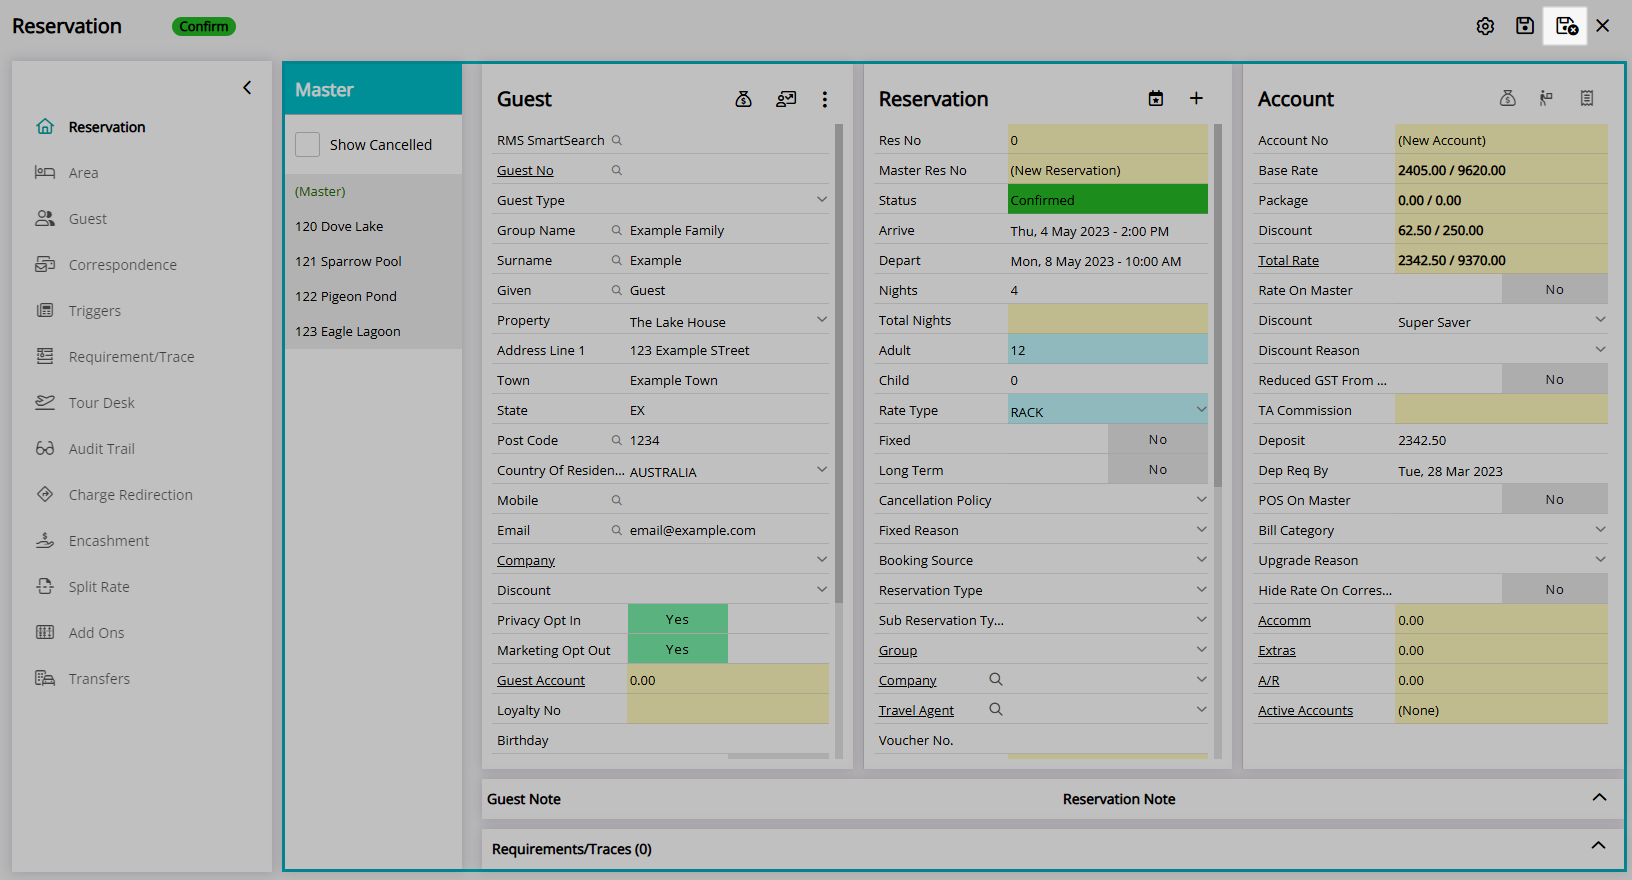
- Save/Exit.

Add the  'Quick Quote' icon to the Toolbar Menu for quick access from anywhere in RMS.
Additional Reservation Details will affect available Categories & Rate Types displayed.
Select the  'Picture' icon to view Photos setup for the Category or Area.
Select the ![]() ’Interactive Map' icon to complete a Reservation using Interactive Map.
’Interactive Map' icon to complete a Reservation using Interactive Map.
Properties setup as Book by Category can use ‘Number of Areas to Book’ to create a Reservation without allocating an Area.
-
Guide
- Add Button
Guide
Go to Reservations > Quick Quote in the Side Menu of RMS.

Perform a Quick Quote Search and select 'Get Quote'.
Select a Category or Rate Type.
Select the checkbox for the Area to Book or enter the Number of Areas to Book.

Select the ![]() 'Add to Reservation' icon.
'Add to Reservation' icon.
Select 'Proceed'.
Enter the Guest Details.
Select 'Save/Exit' to store the changes made and complete the Reservation.
Use
- Go to Reservations > Quick Quote in the Side Menu of RMS.
- Perform a Quick Quote Search and select 'Get Quote'.
- Select a Category or Rate Type.
- Select the checkbox for the Area to Book or enter the Number of Areas to Book.
- Select the 'Add to Reservation' icon.
- Select 'Proceed'.
- Enter the Guest Details.
- Save/Exit.
Add the  'Quick Quote' icon to the Toolbar Menu for quick access from anywhere in RMS.
Additional Reservation Details will affect available Categories & Rate Types displayed.
Select the  'Picture' icon to view Photos setup for the Category or Area.
Select the  ’Interactive Map' icon to complete a Reservation using the Interactive Map.
Properties setup as Book by Category can use the ‘Number of Areas to Book’ to create a Reservation without allocating an Area.
-
Guide
- Add Button
Guide
Go to Reservations > Quick Quote in the Side Menu of RMS.
Perform a Quick Quote Search and select 'Get Quote'.

Select a Category or Rate Type.


Select the checkbox for the Area to Book or enter the Number of Areas to Book.
Select the ![]() 'Add to Reservation' icon.
'Add to Reservation' icon.

Select 'Proceed'.

Enter the Guest Details.

Select 'Save/Exit' to store the changes made and complete the Reservation.
