Interactive Maps
Upload an interactive Property Map for use in RMS.
Interactive Maps are a feature that enables uploading a map of the Property that can be used for viewing Availability or creating Reservations in RMS and on the RMS Internet Booking Engine.
-
Information
-
Setup
- Add Button
Information
Interactive Maps are a feature that enables uploading a map of the Property that can be used for viewing Availability or creating Reservations in RMS and on the RMS Internet Booking Engine.
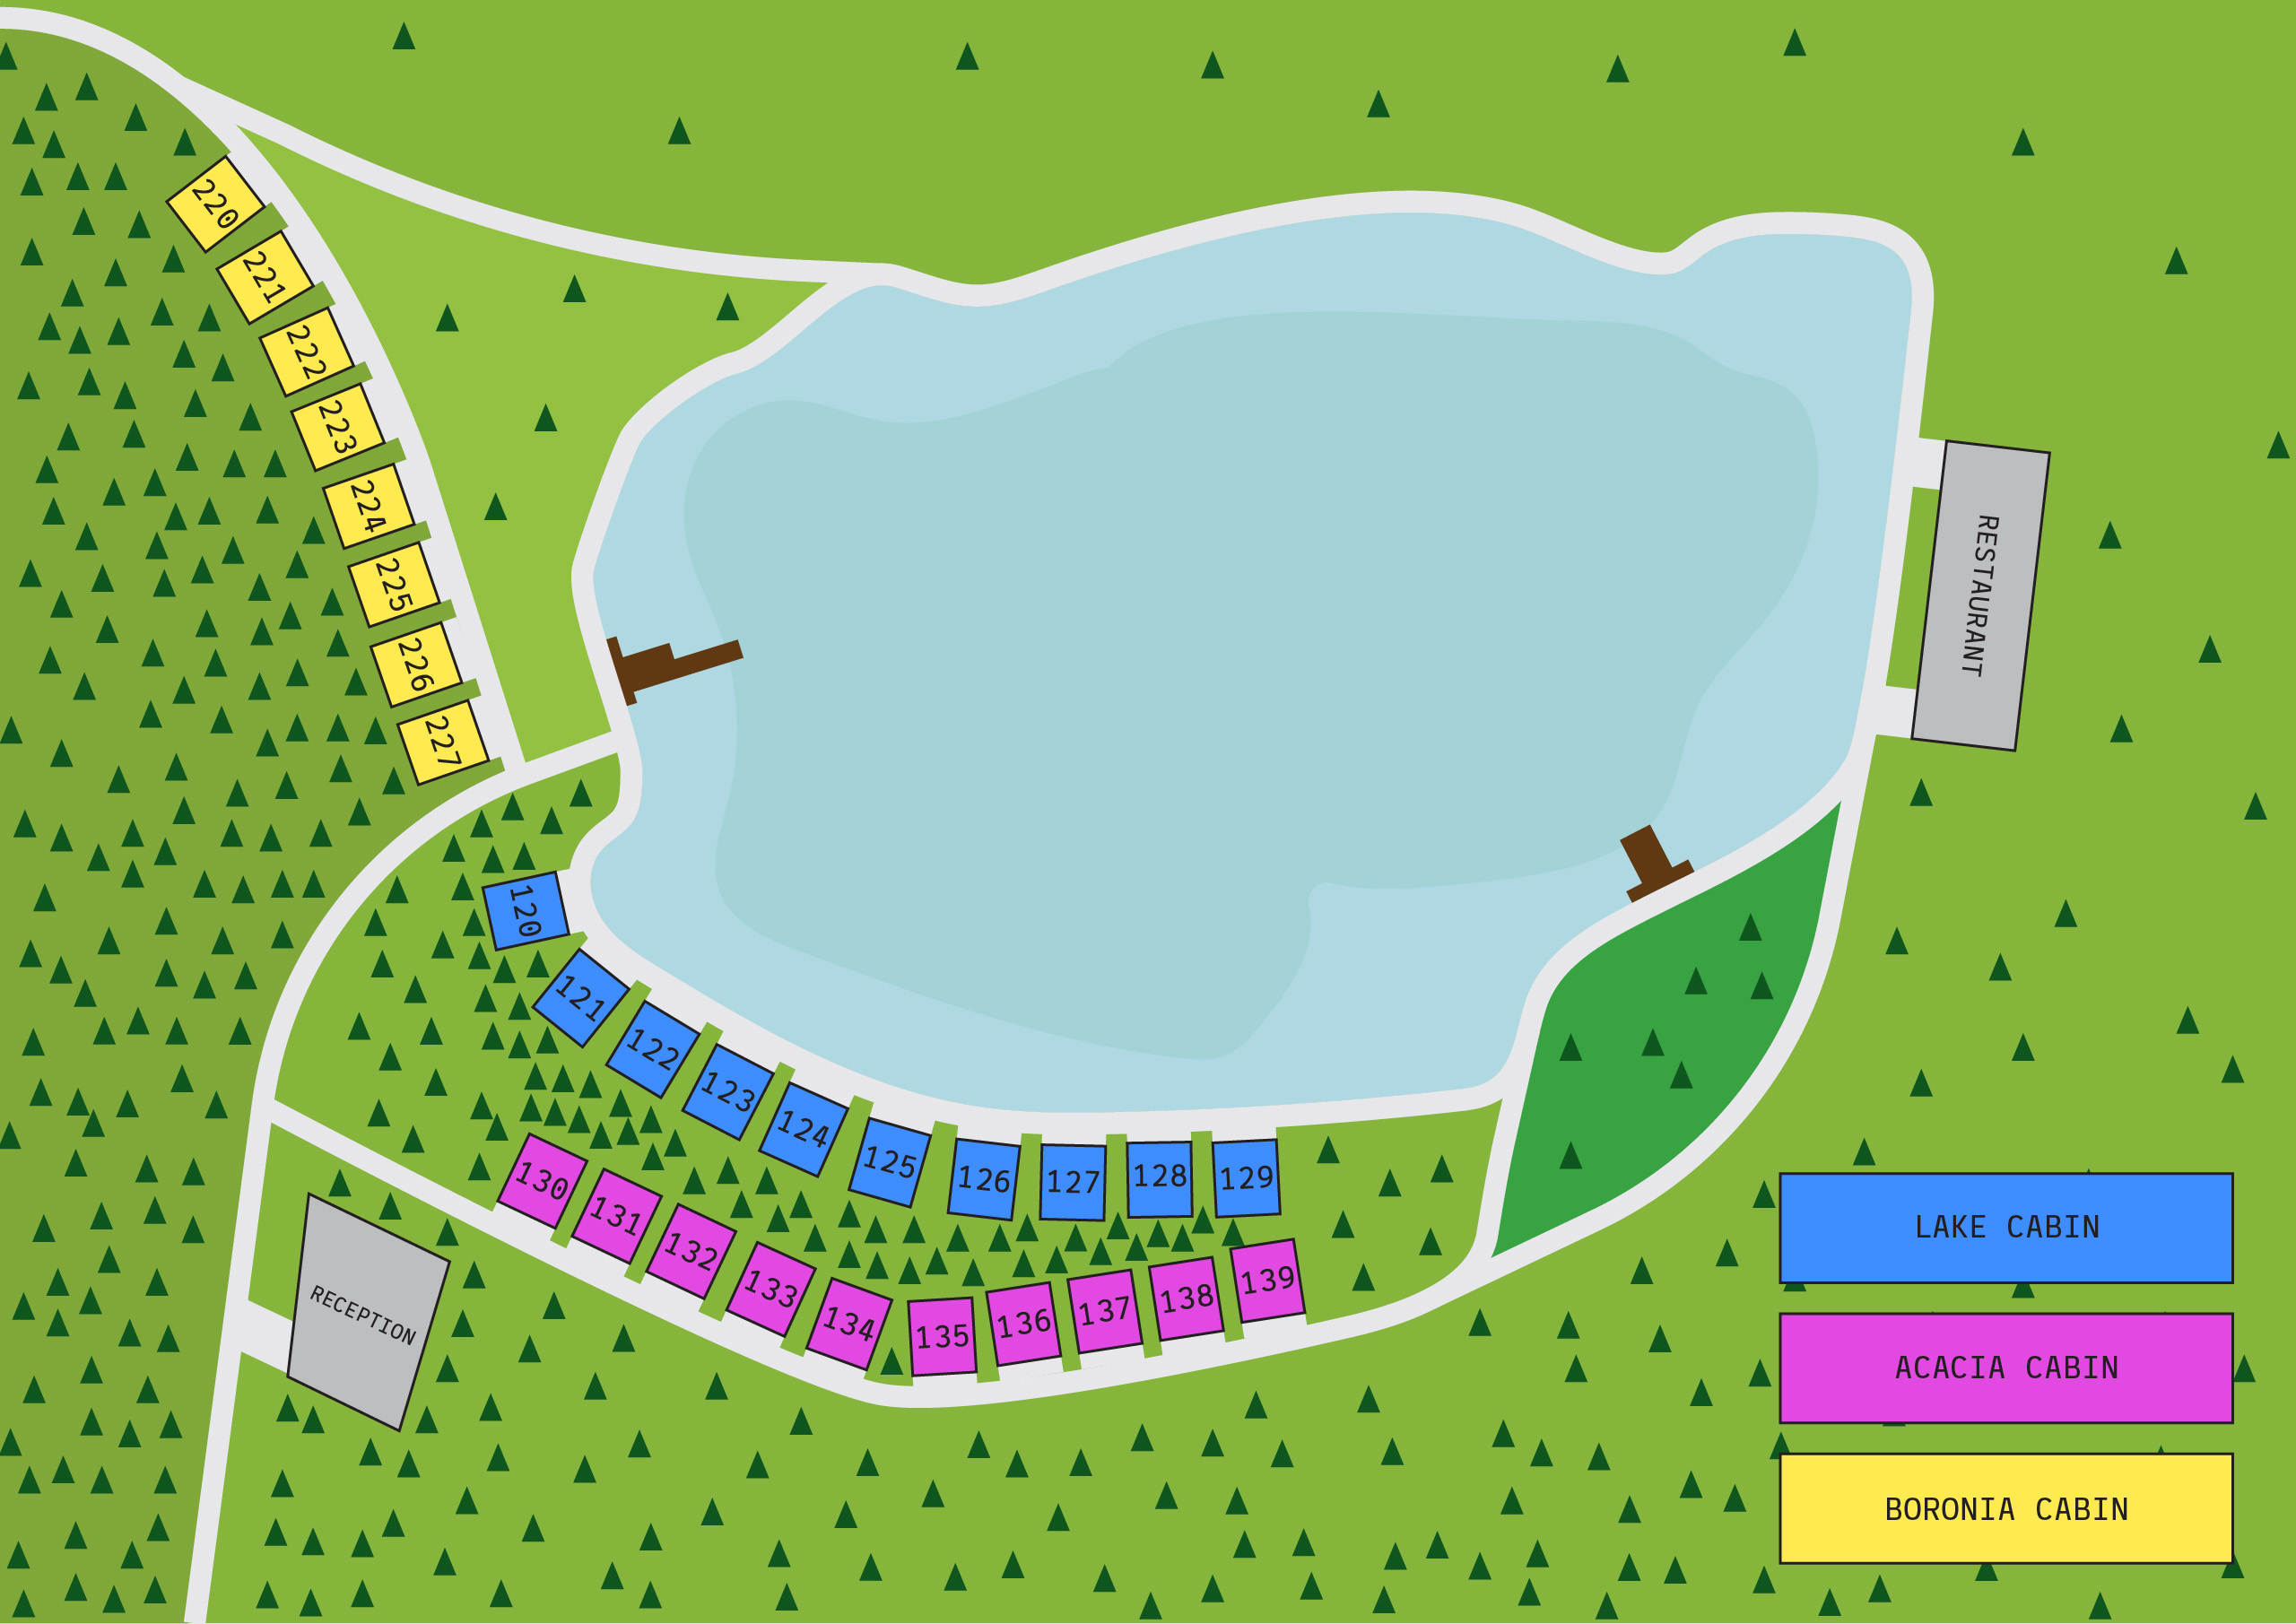
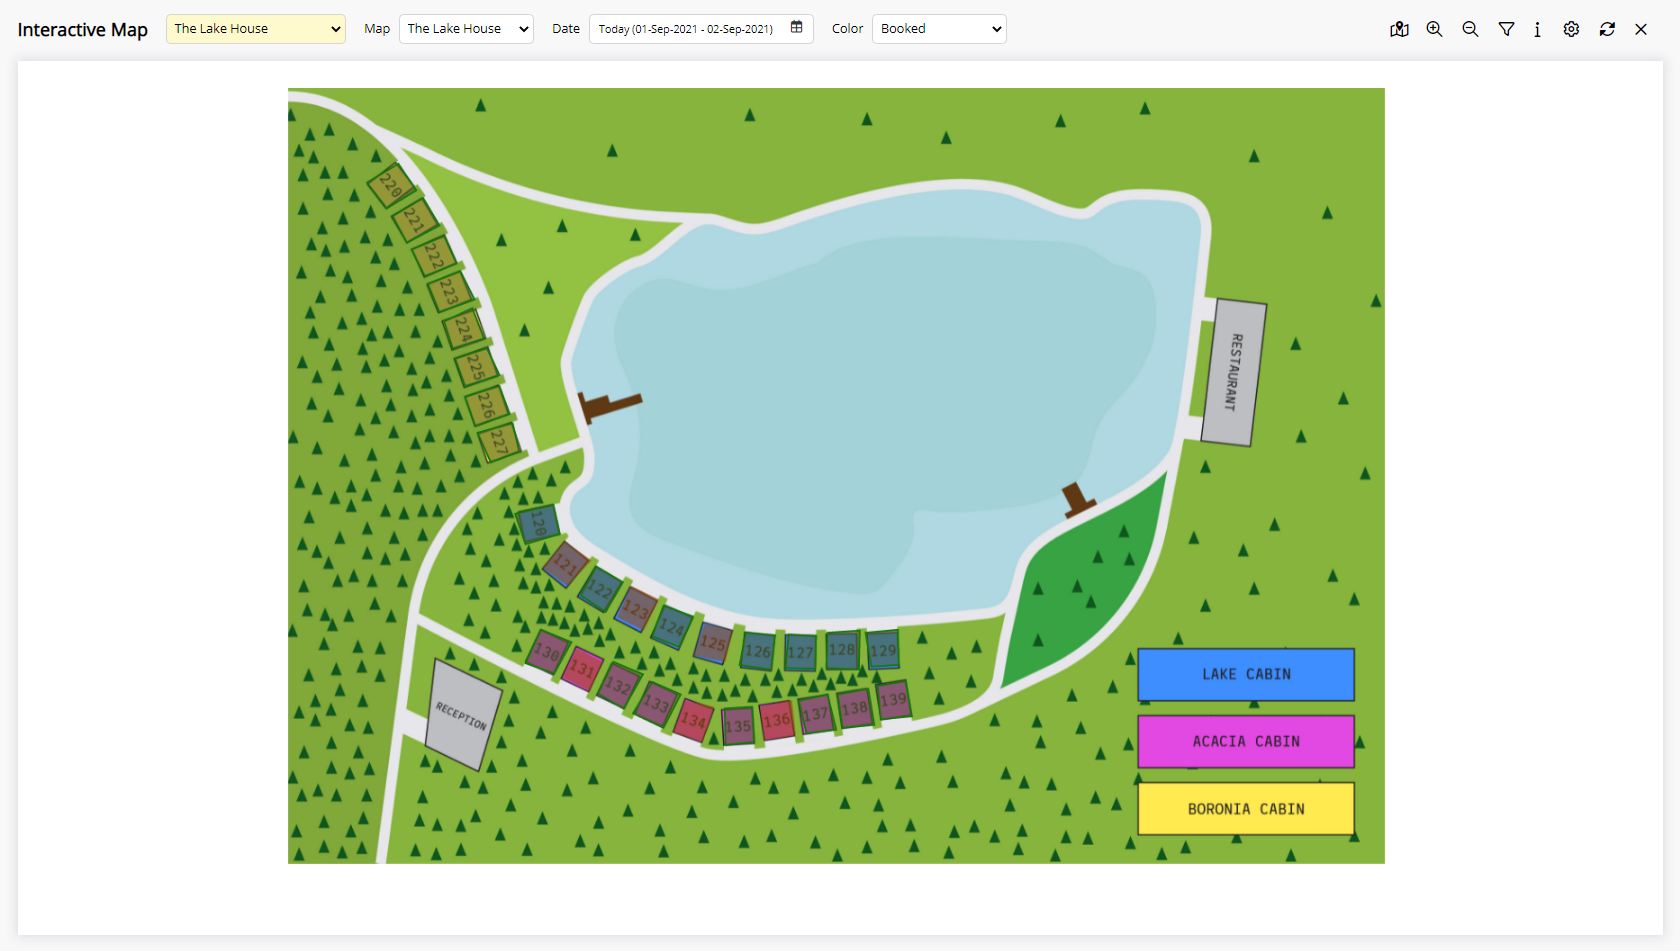
Property maps that work best as an Interactive Map are simple outlines of Areas with the Area Description and amenities, street names and key landmarks noted.
Property maps will need to be in JPG format and for optimal display on the RMS Internet Booking Engine will need to be at least 3200 x 1800 pixels.
Multiple maps can be uploaded for the same Property and selected by Map Name to switch views.
Interactive Maps can be used to view Availability or create Reservations and include Attribute filters that will highlight matching Areas using the selected colour.
Colour Overlays are used to highlight available, booked and attribute matched Areas as well as additional Linked Maps on the Interactive Map and can be customised.
Colour Views available on the Interactive Maps include Booked (Availability), Booking Source, Company, Credit Status, Expected Departures, Gender, Rate Type, Reservation Type, Reservation Status and Travel Agent.

Interactive Maps are a complimentary optional feature included in the base RMS subscription.
Properties must supply their own map images.
Category, Area, Reservation, Guest, and Rate are default System Labels that can be customised.

Users will require Security Profile access to use this feature.
-
Setup
- Add Button
Setup
Have your System Administrator complete the following.
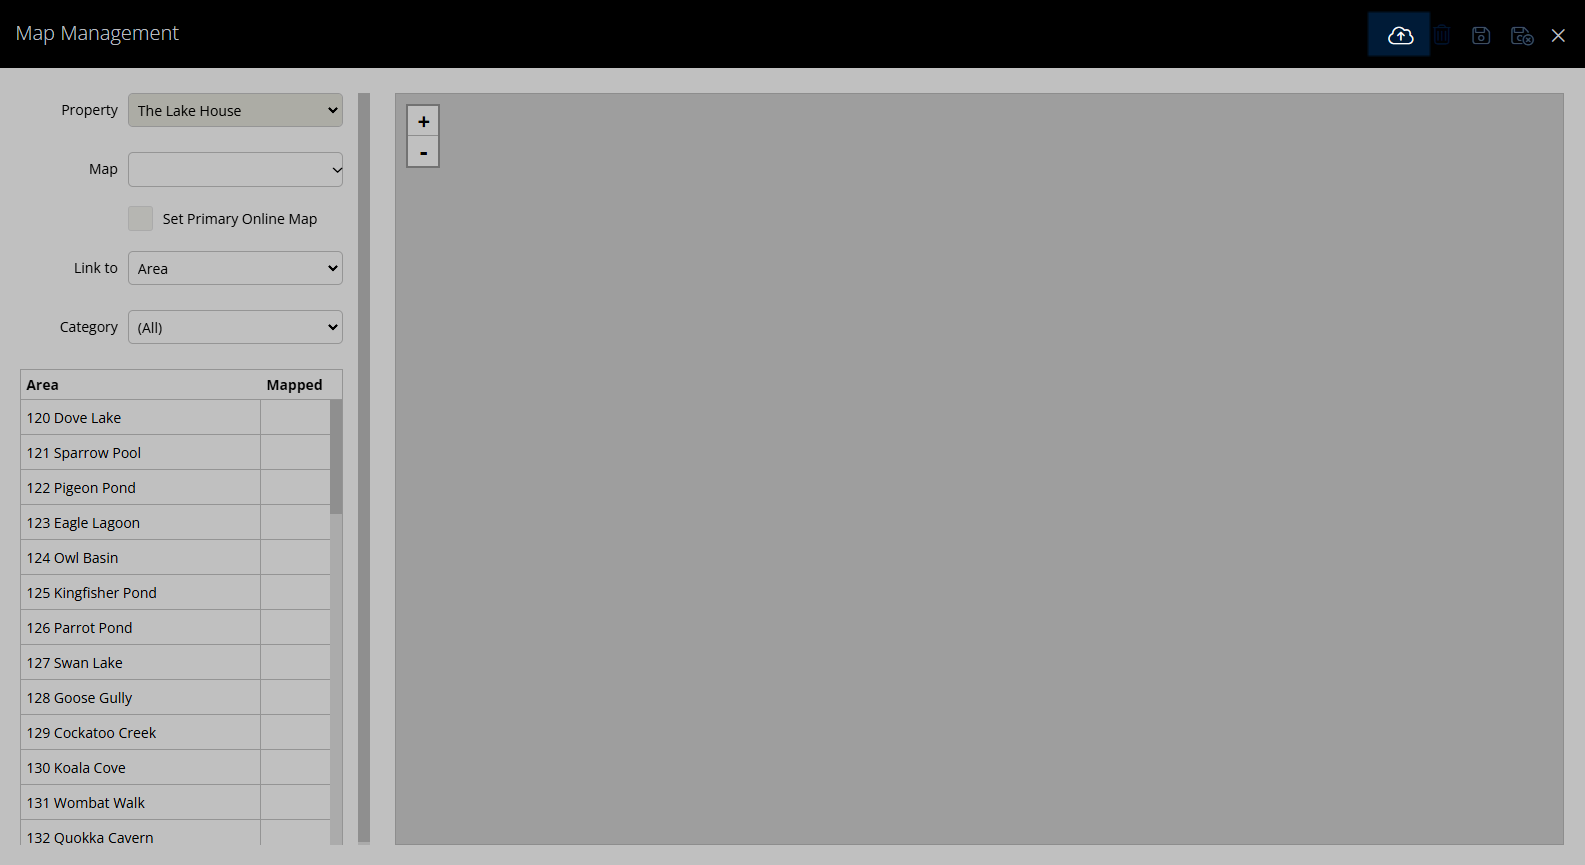
- Go to Charts > Interactive Map in the Side Menu of RMS.
- Select the
 'Map Management' icon.
 - Select the
 'Add Interactive Map' icon.
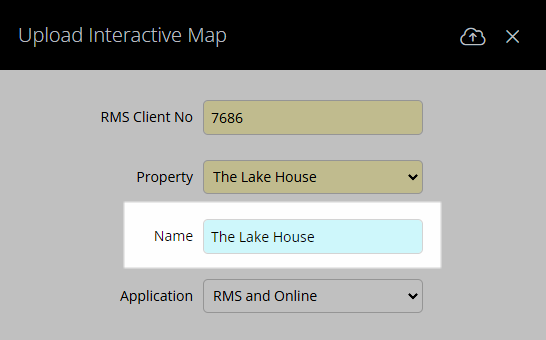
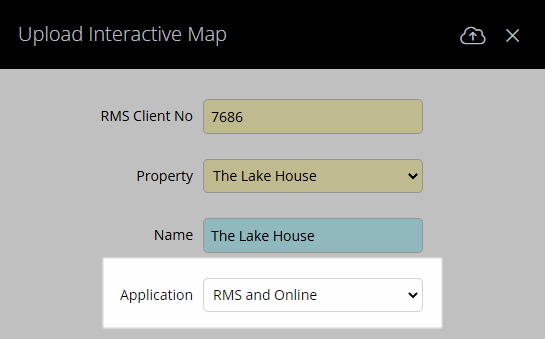
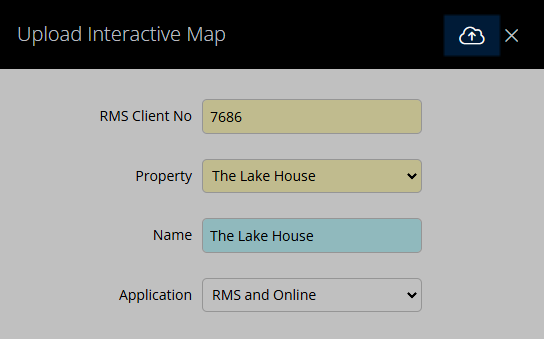
 - Select a Property.
- Enter a Sub Map Name.
- Select the Map Application.
- Select the
 'Upload' icon.
 - Select the Map File and choose 'Open'.
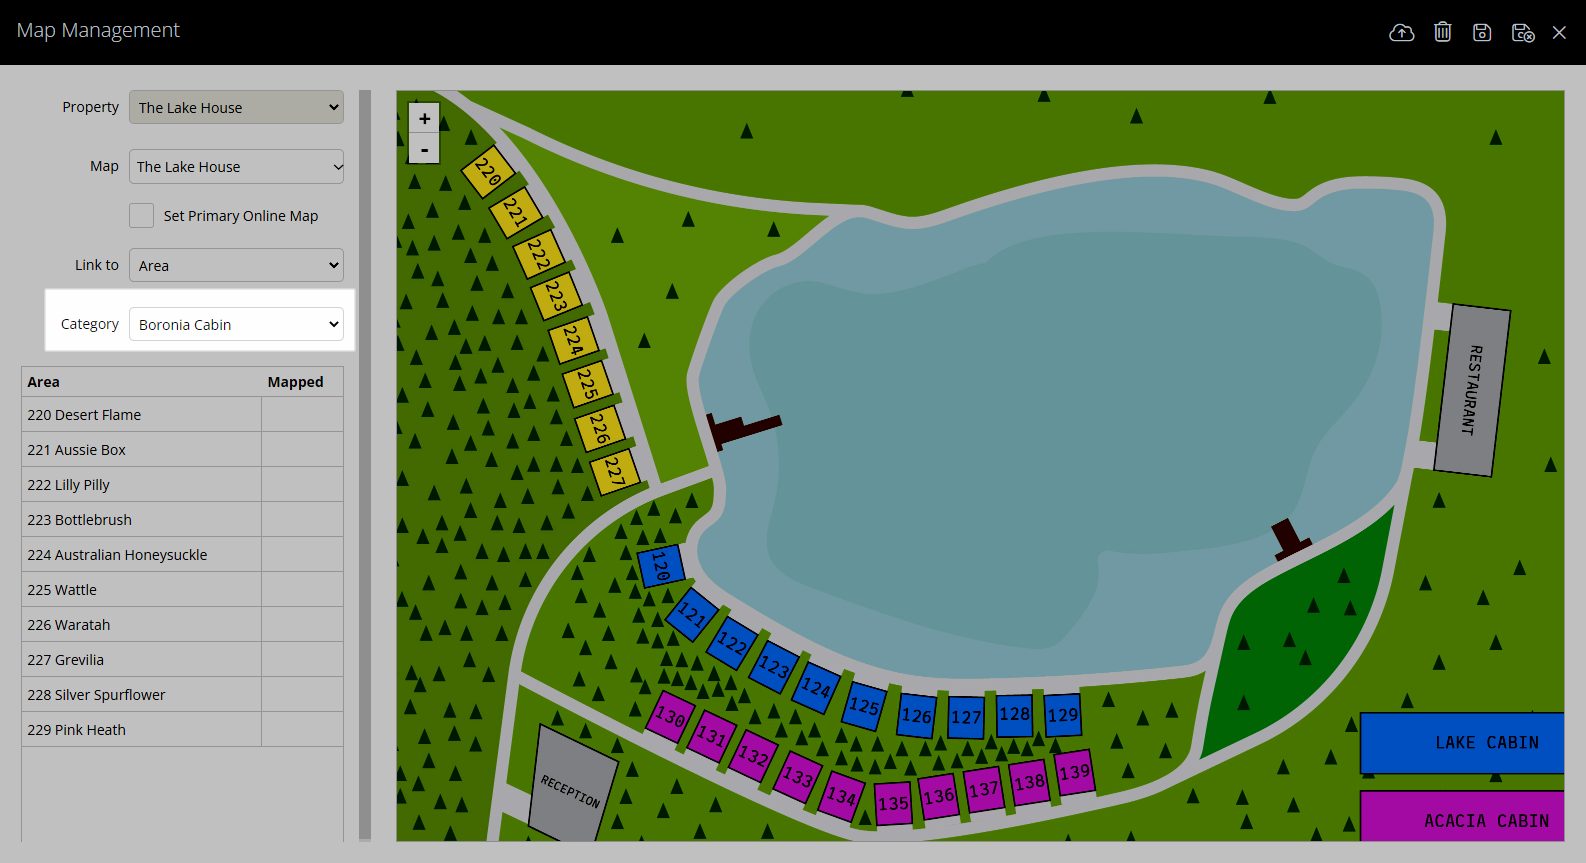
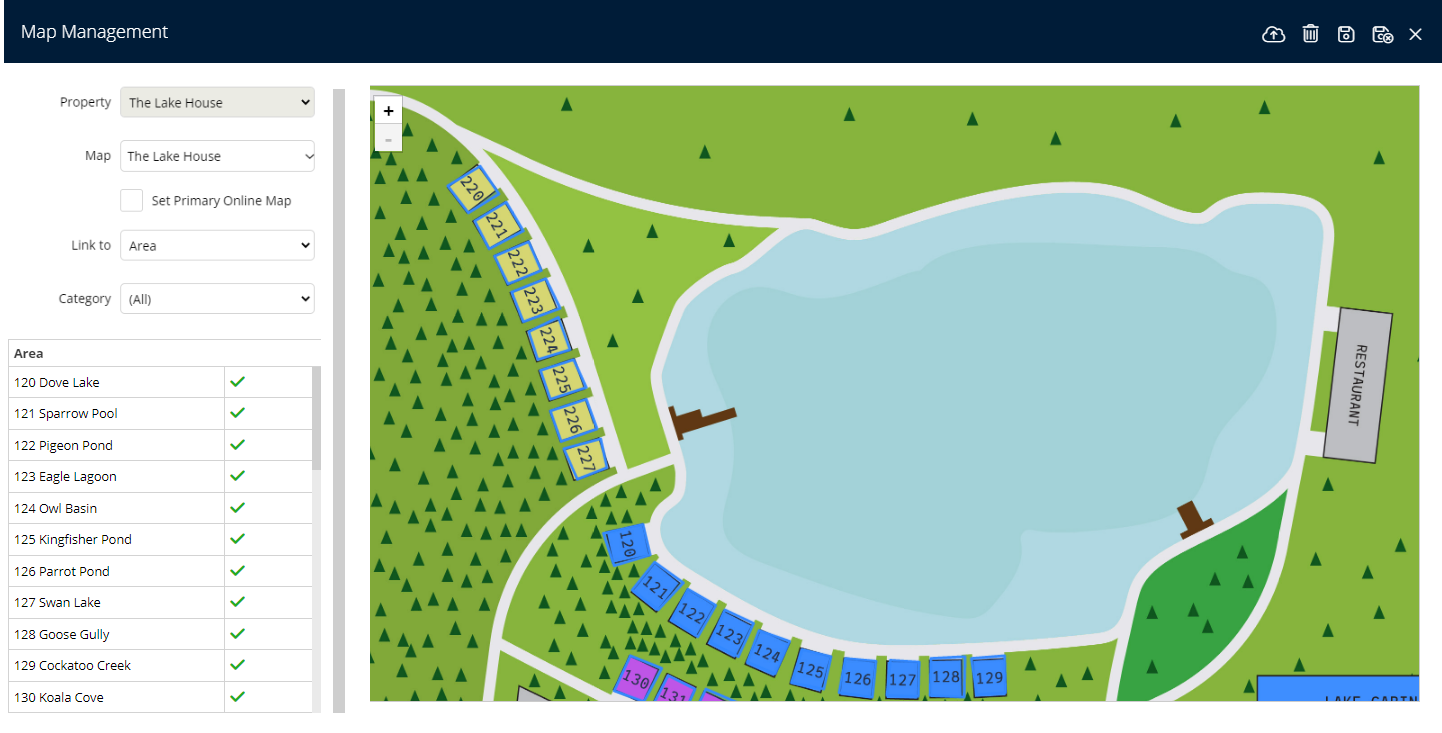
- Select a Category.
- Select an Area.
- Click on the Area Borders to draw the Map Outline.
- Repeat Steps 10 & 11 for all Areas in the Category.
- Repeat Steps 9-12 for all Categories.
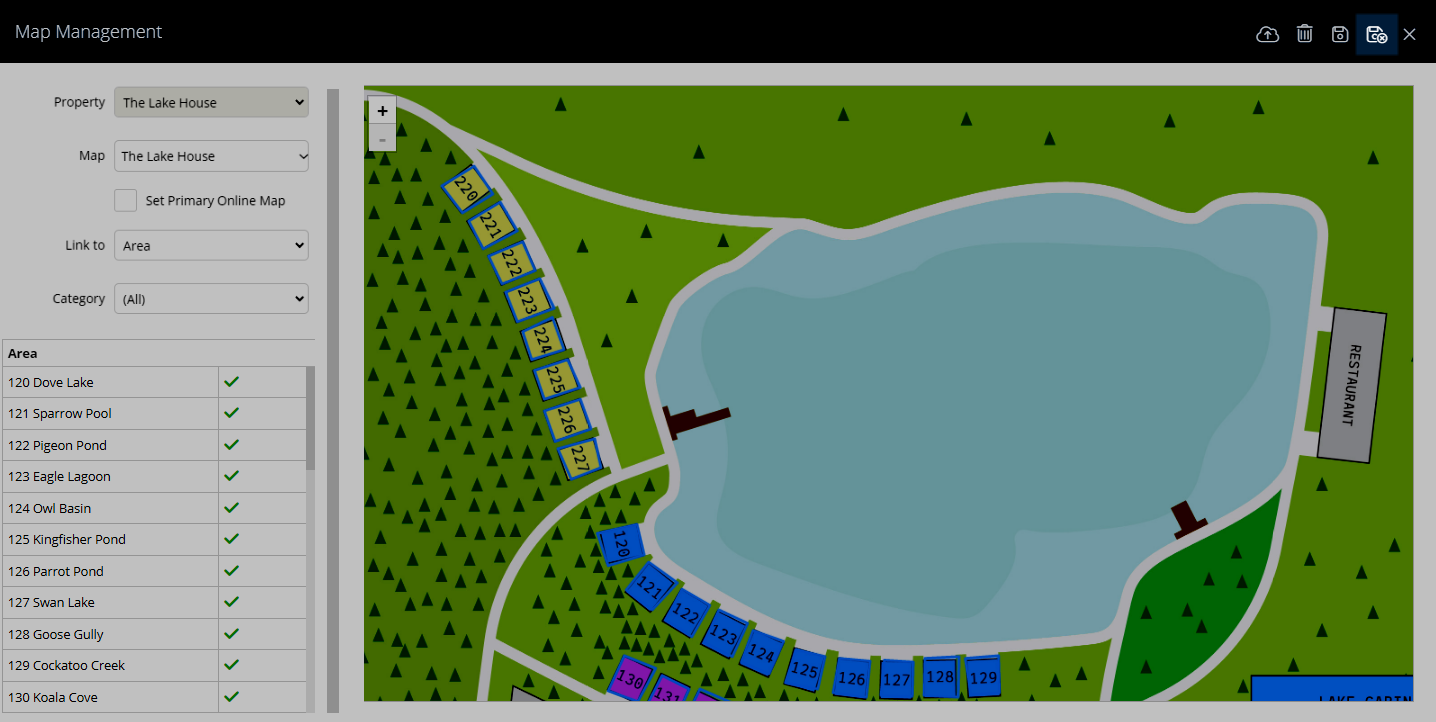
- Save/Exit.

The Sub Map Name at Step 5 must be 'Main' if using the Interactive Map for the RMS Internet Booking Engine.

Right click the mouse to undo partial Area Borders at Step 11.
-
Guide
- Add Button
Guide
Go to Charts > Interactive Map in the Side Menu of RMS.
Select the  'Map Management' icon.
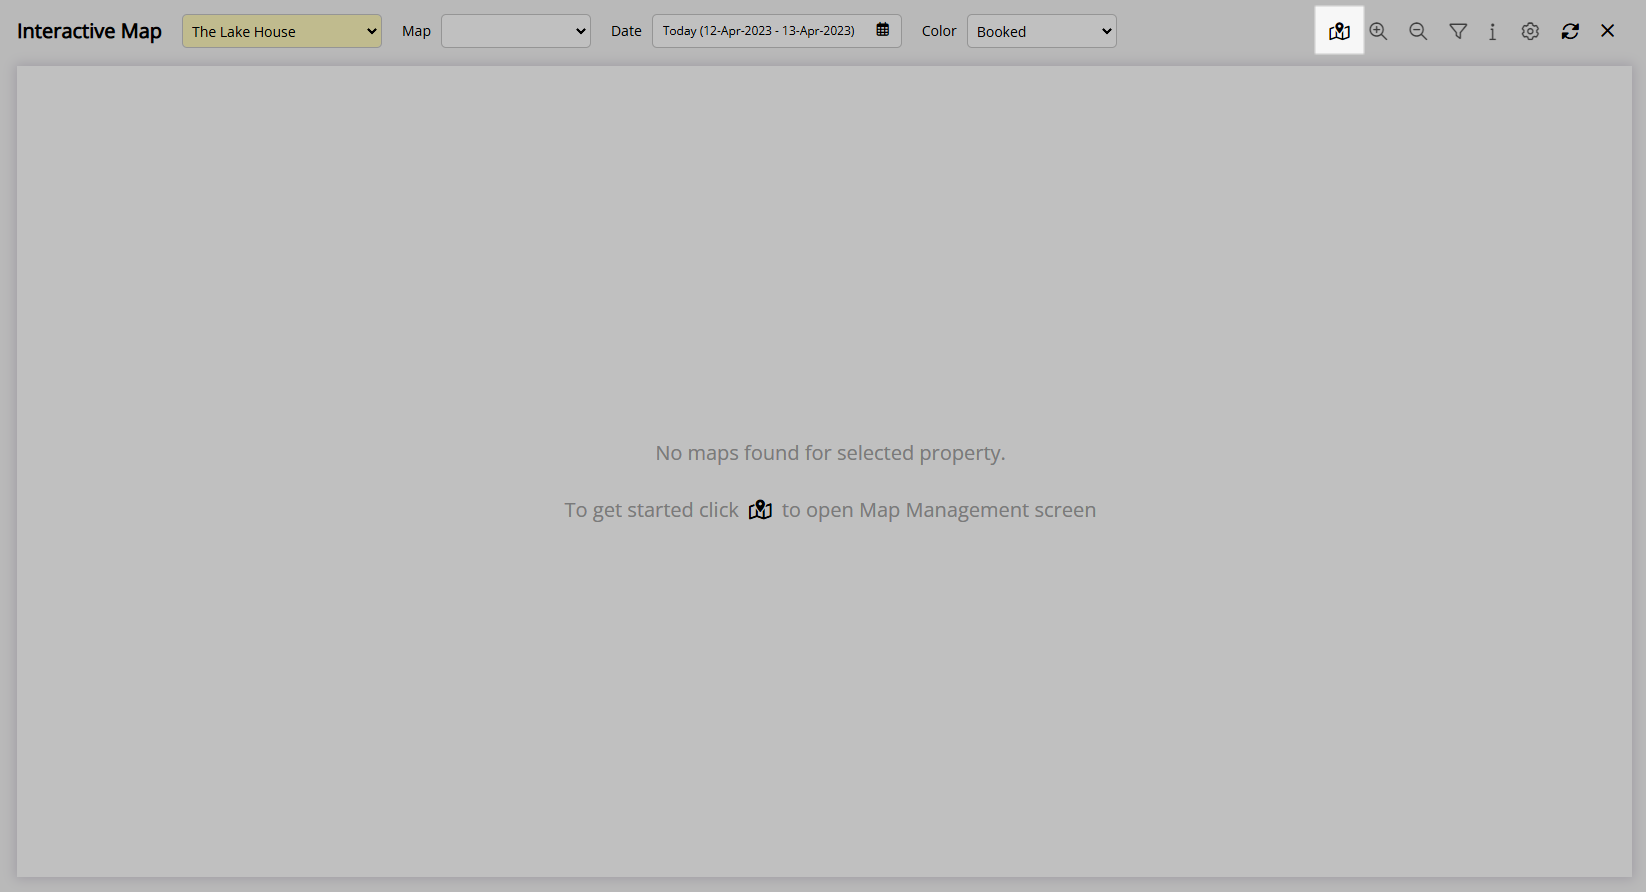
Select the ![]() 'Add Interactive Map' icon.
'Add Interactive Map' icon.

Select a Property.
Enter a Sub Map Name.
Select the Map Application.

Select the  'Upload' icon.

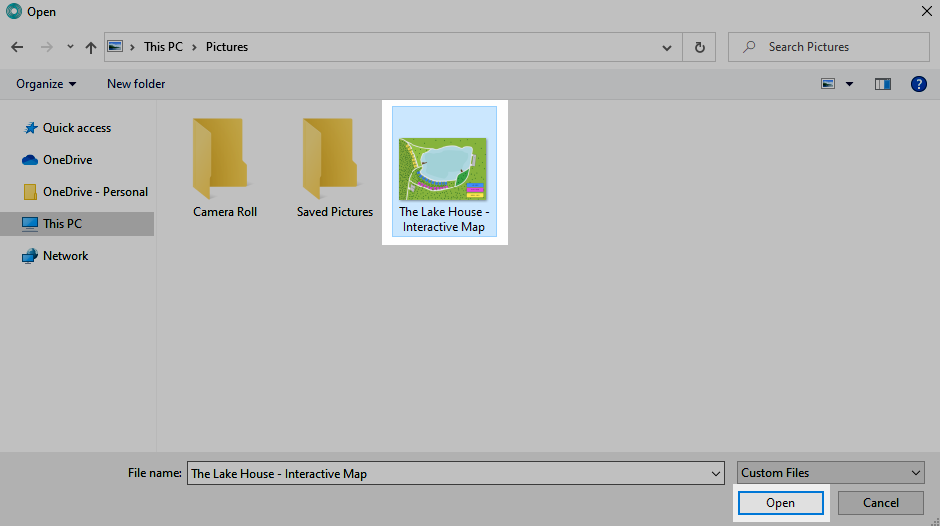
Select the Map File and choose 'Open'.

Select a Category.
Select an Area.

Click on the Area Borders to draw the Map Outline and repeat for all Areas in the Category.

Repeat mapping the Area Borders for all Categories.
Select  'Save/Exit' to store the changes made and leave the setup.
The Interactive Map will now be available for use with the mapped Area Borders determining the interactive section for each Area.
Setup
Have your System Administrator complete the following.
- Go to Charts > Interactive Map in the Side Menu of RMS.
- Select the 'Map Management' icon.
- Select the 'Add Interactive Map' icon.
- Select a Property.
- Enter a Sub Map Name.
- Select the Map Application.
- Select the 'Upload' icon.
- Select the Map File and choose 'Open'.
- Select a Category.
- Select an Area.
- Click on the Area Borders to draw the Map Outline.
- Repeat Steps 10 & 11 for all Areas in the Category.
- Repeat Steps 9-12 for all Categories.
- Save/Exit.
The Sub Map Name at Step 5 must be 'Main' if using the Interactive Map for the RMS Internet Booking Engine.
Right click the mouse to undo partial Area Borders at Step 11.
-
Guide
- Add Button
Guide
Go to Charts > Interactive Map in RMS.
Select the 'Map Management' icon.

Select the  'Add Interactive Map' icon.
Select a Property.

Enter a Sub Map Name.

Select the Map Application.
Select the  'Upload' icon.
Select the Map File and choose 'Open'.
Select a Category.

Select an Area.
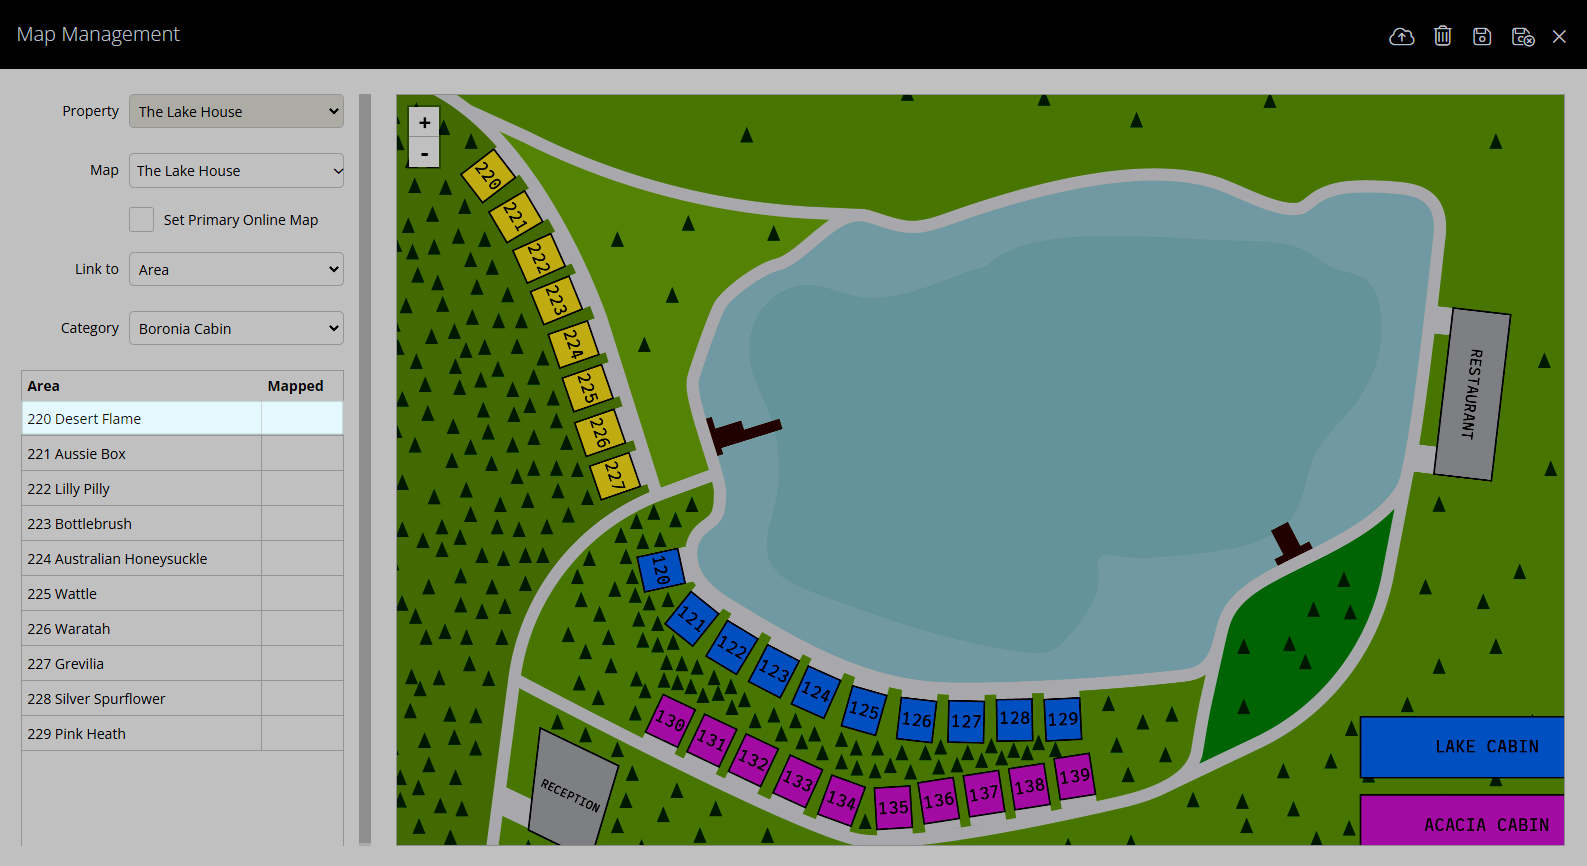
Click on the Area Borders to draw the Map Outline and repeat for all Areas in the Category.
Repeat mapping the Area Borders for all Categories.
 Select
  'Save/Exit' to store the changes made and leave the setup.

The Interactive Map will now be available for use with the mapped Area Borders determining the interactive section for each Area.