Travel Agent Allotments
Setup allotments on a Travel Agent in RMS.
Travel Agent Allotments reserve available inventory for use by the Travel Agent.
-
Information
-
Setup
- Add Button
Information
Travel Agent Allotments reserve available inventory for use by the Travel Agent.
A Travel Agent is a business that can be added and used in RMS for Reservations, Accounts Receivable and the Corporate Portal.
Allotments are allocations of inventory bookable by a specific business or third party and can be allocated at a Property, Category or Area level.
Guaranteed Allotments secures the inventory as only being available for booking by the Travel Agent until released back for House Use.
Multiple Release can be used to setup contractual agreements that include staged releases of inventory back to House Use when using Category Allotments.

Category, Area and Guest are default System Labels that can be customised.

Users will require Security Profile access to use this feature.
-
Setup
- Add Button
Setup
Have your System Administrator complete the following.
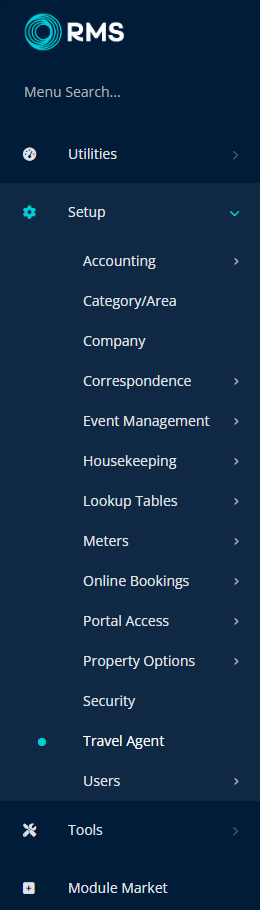
- Go to Setup > Travel Agent in RMS.
- Select the
 'Edit' icon on an existing Travel Agent.
 - Navigate to the 'Allotment' tab.
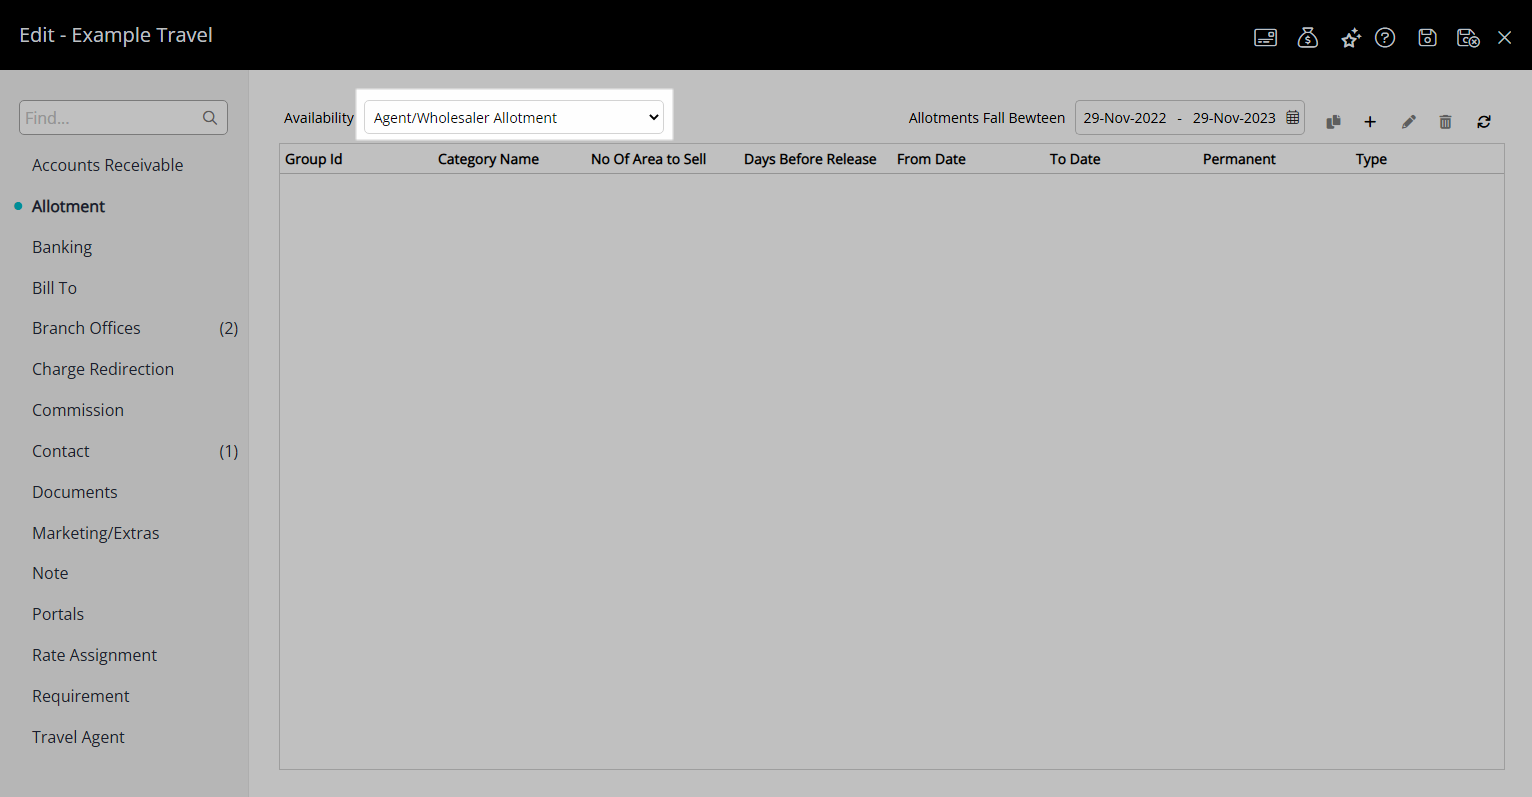
- Select the Availability option 'Agent/Wholesaler Allotment'.
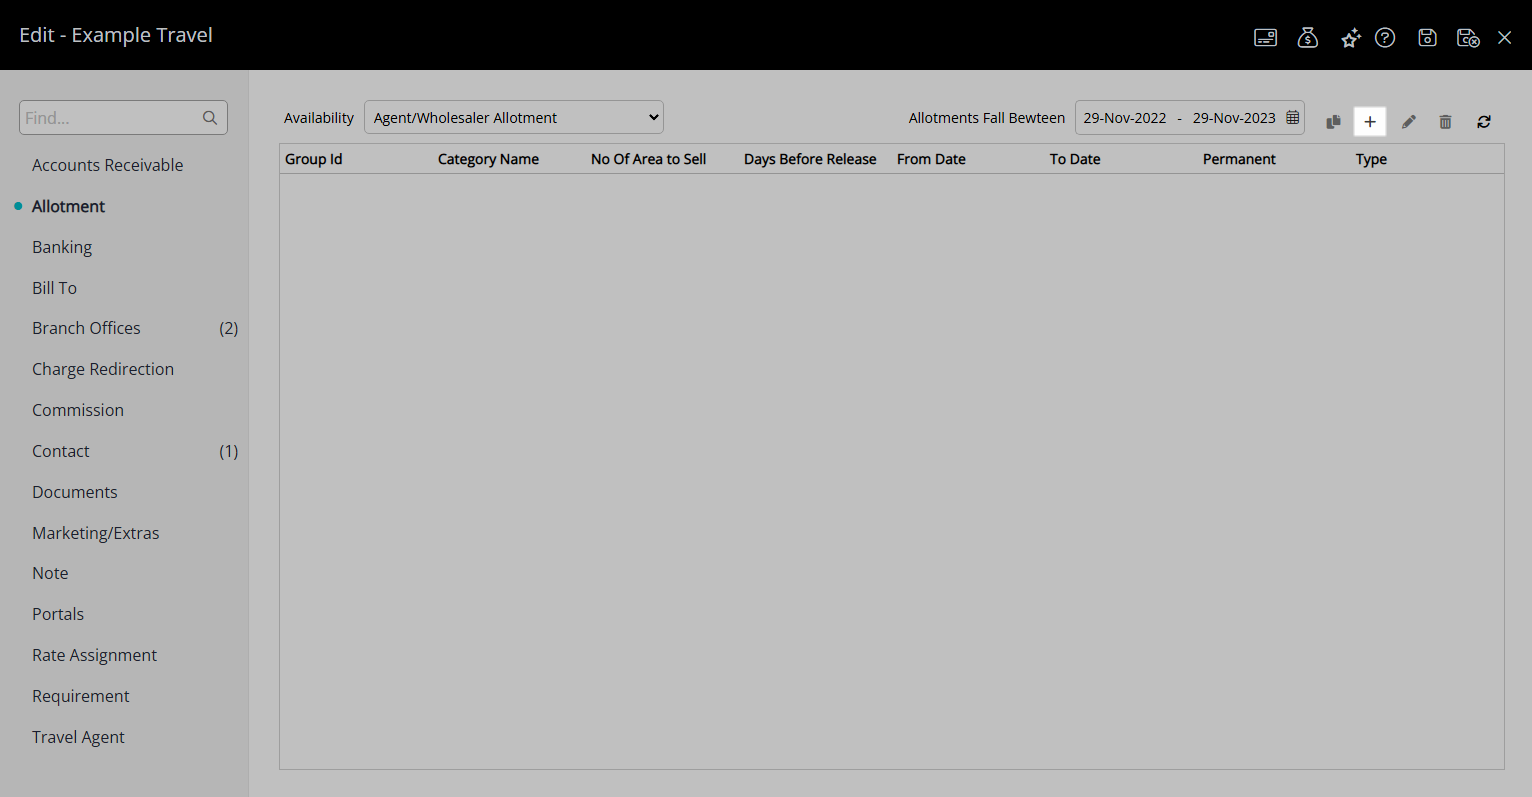
- Select the
 'Add' icon.
 - Select a Date Range.
- Optional: Select the checkbox 'Set Permanently'.
- Optional: Select the checkbox 'Guaranteed Allotment'.
- Select the Allotment Type.
- Optional: Select the checkbox 'Do Not Sell Above Allotment'.
- Optional: Select the checkbox for Available Days of the Week.
- Enter the Allotment Release.
-
Multiple Release:
- Select the checkbox 'Multiple Release'.
- Enter the Ordinal Inventory Release.
- Enter the Ordinal Release Period.
-
Single Release:
- Enter the Days Before Release.
- Enter the Days After Release.
-
Multiple Release:
- Enter the Allotments.
- Optional: Enter the Reporting ADR.
- Save/Exit.

Multiple Release is only available when using Category Allotments.
Days After Release can be used when 'Set Permanently' is selected to continually roll forward the future bookable period for the Allotment.
-
Guide
- Add Button
Guide
Go to Setup > Travel Agent in RMS.
Select the ![]() 'Edit' icon on an existing Travel Agent.
'Edit' icon on an existing Travel Agent.

Navigate to the 'Allotment' tab.
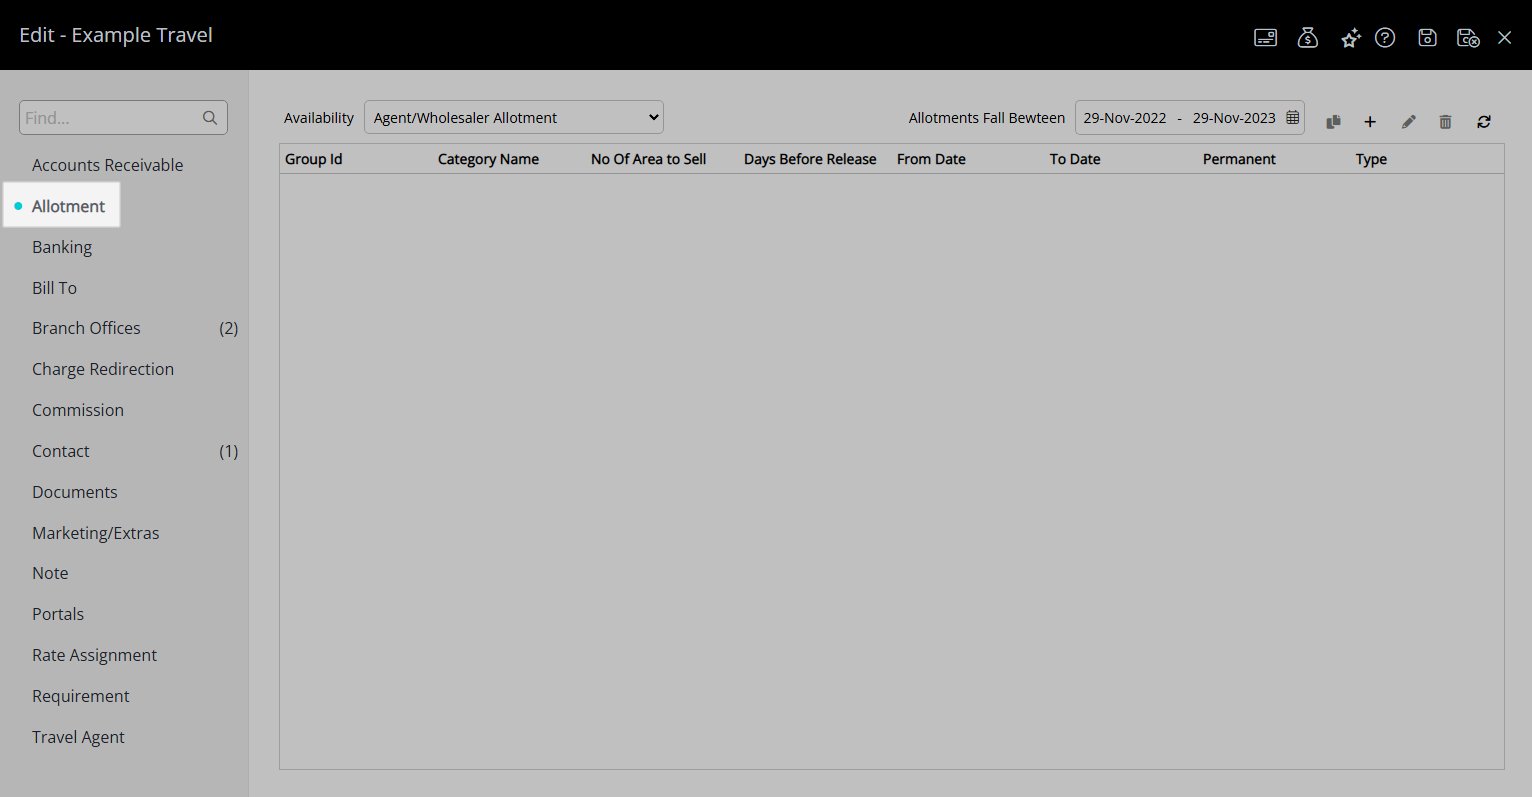
Select the Availability option 'Agent/Wholesaler Allotment'.
Select the  'Add' icon.
Select a Date Range.
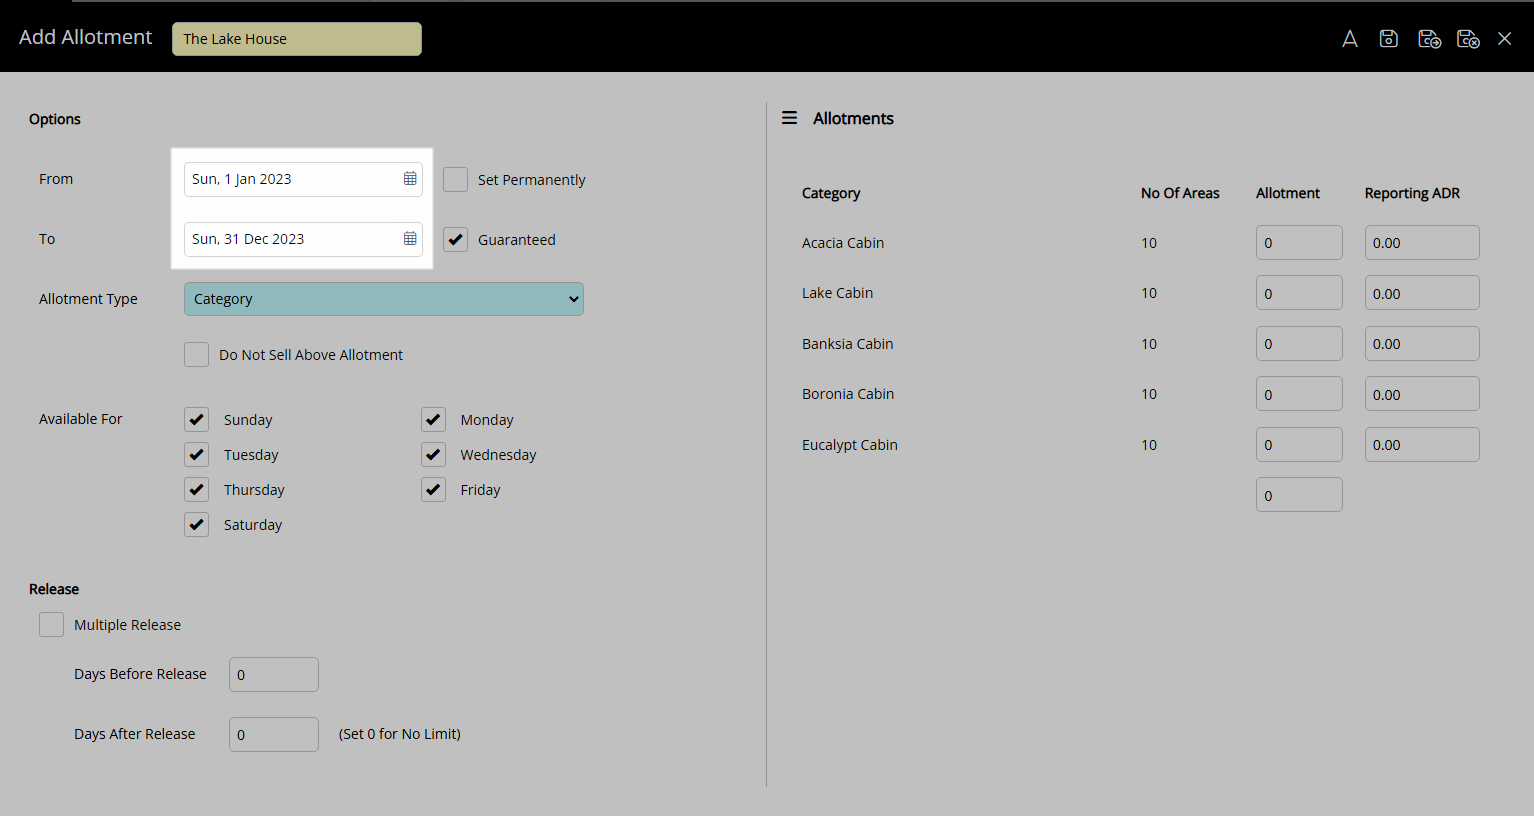
Optional: Select the checkbox 'Set Permanently'.
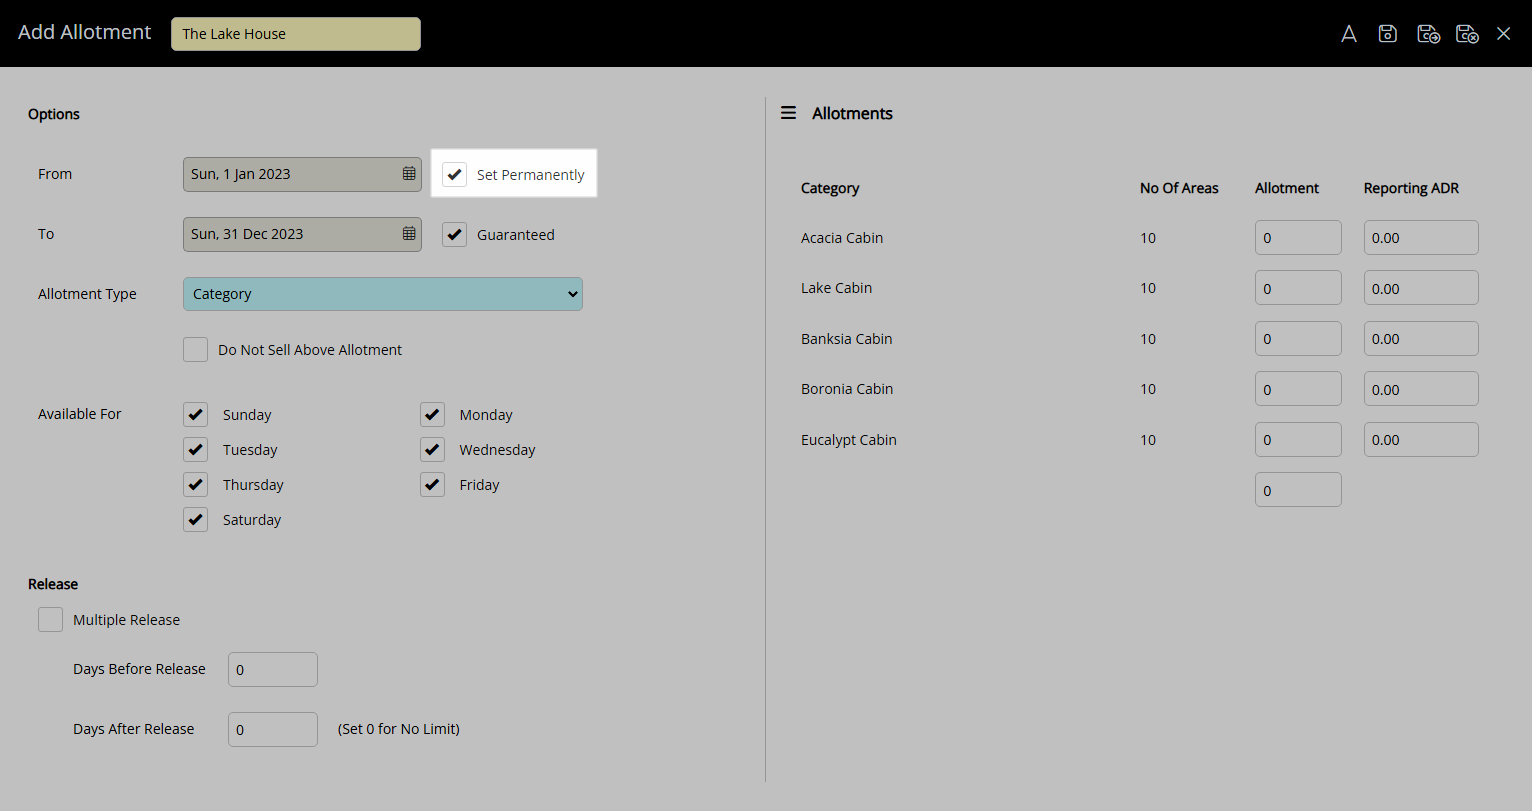
Optional: Select the checkbox 'Guaranteed Allotment'.

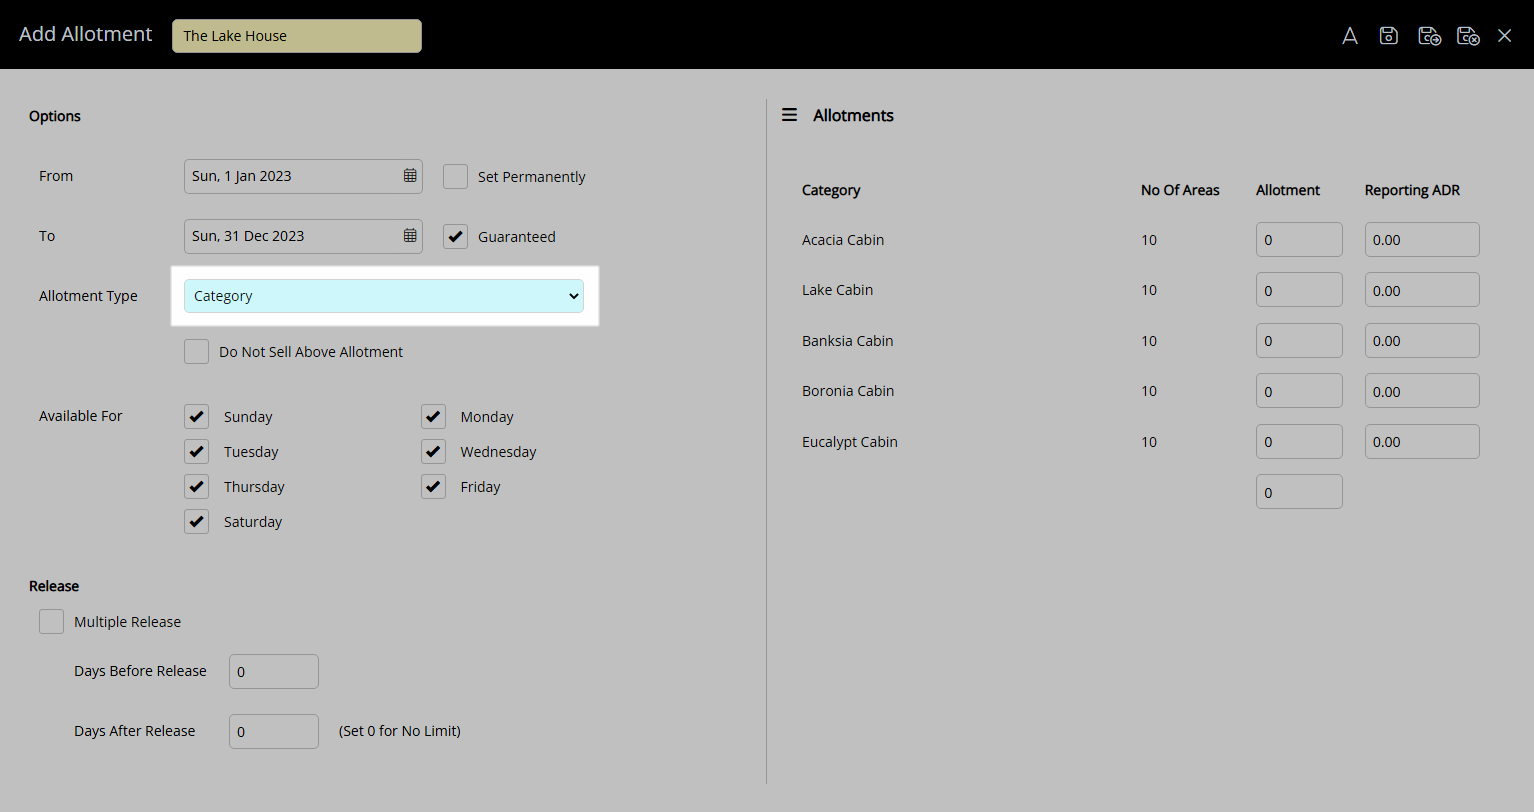
Select the Allotment Type.
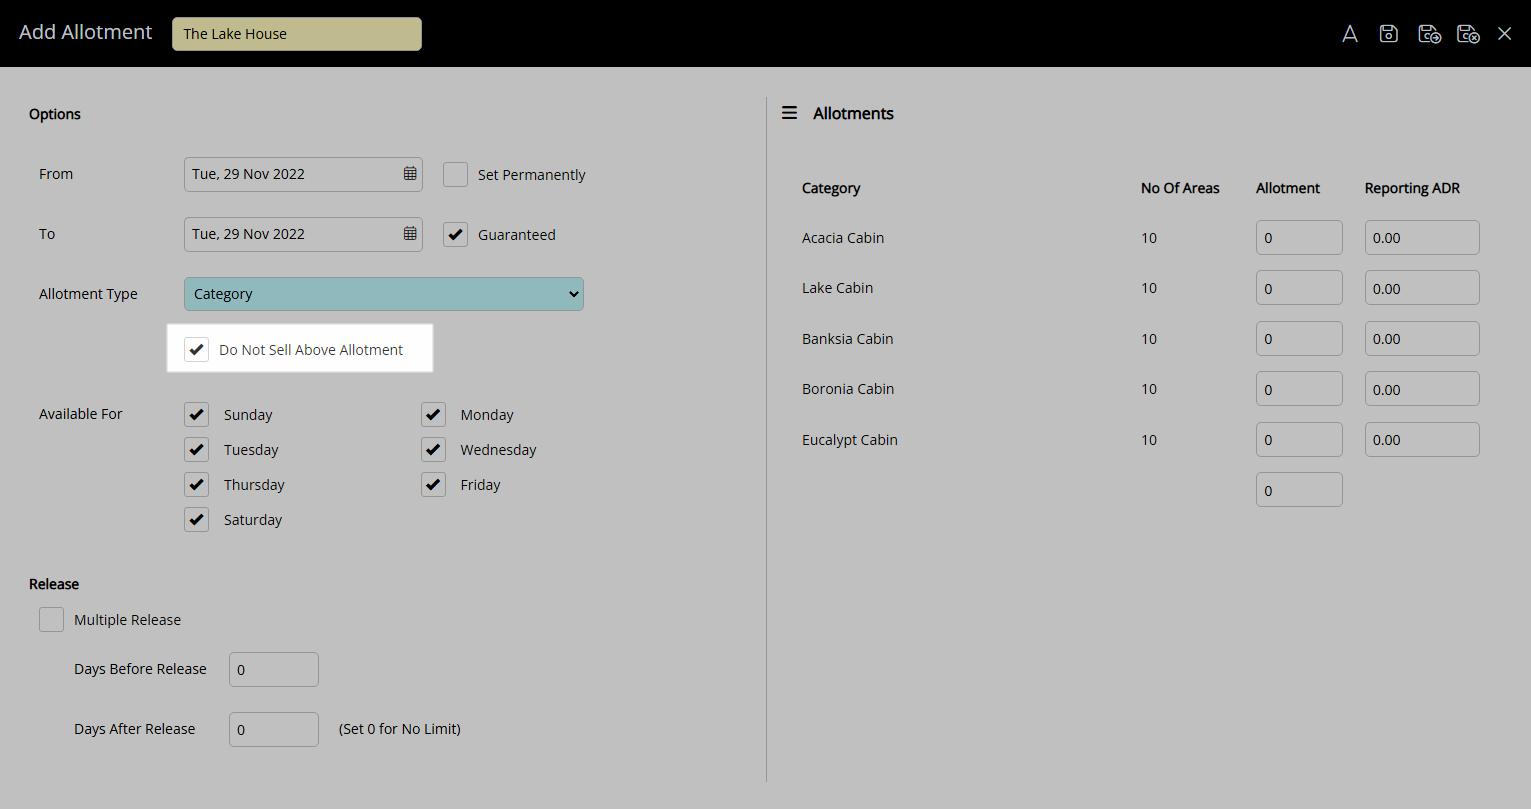
Optional: Select the checkbox 'Do Not Sell Above Allotment'.
Optional: Select the checkbox for Available Days of the Week.
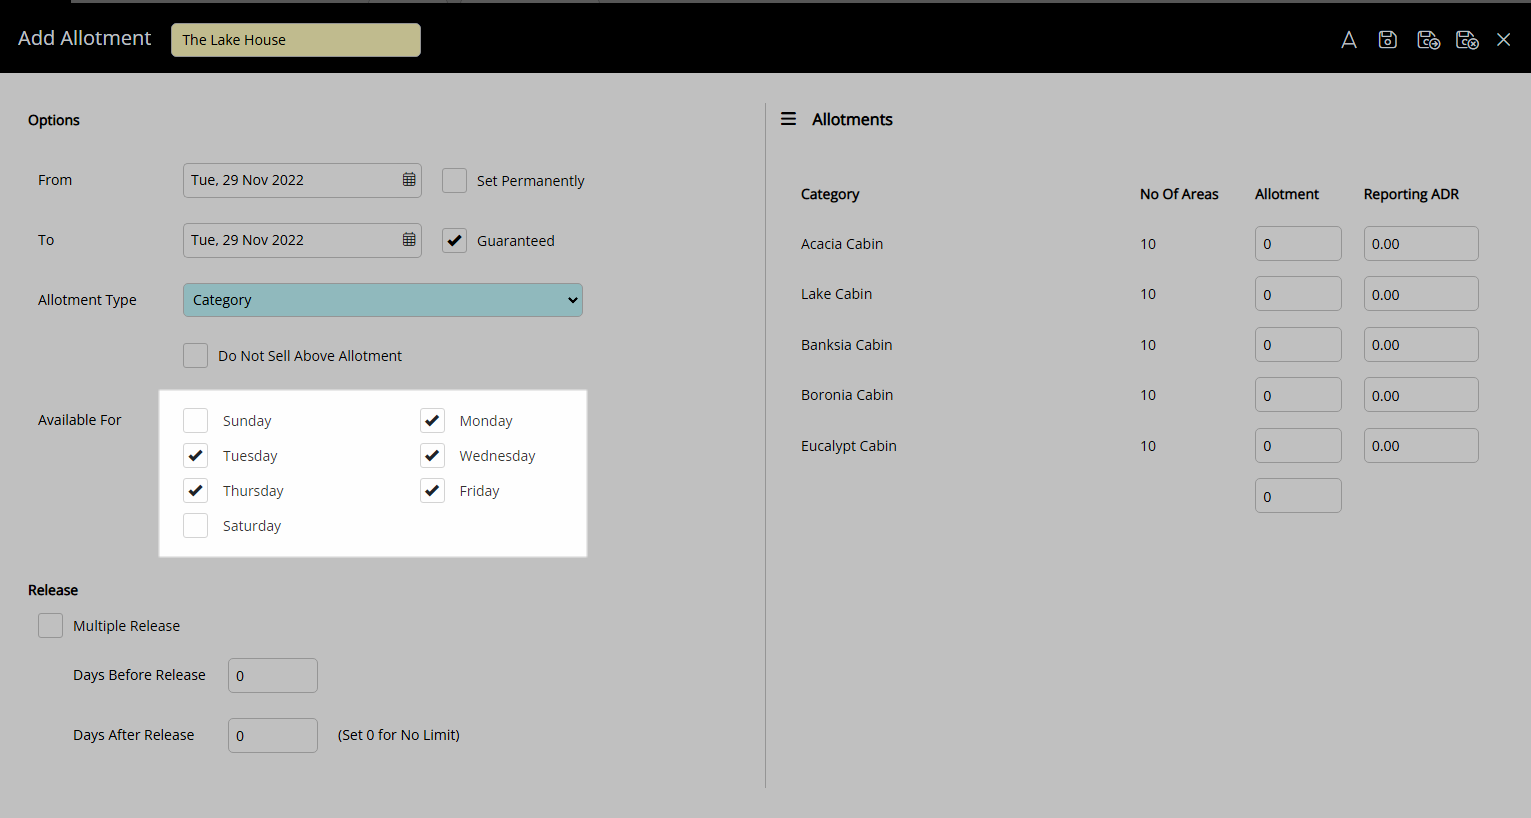
Enter the Allotment Release.
Multiple Release:
Select the checkbox 'Multiple Release'.
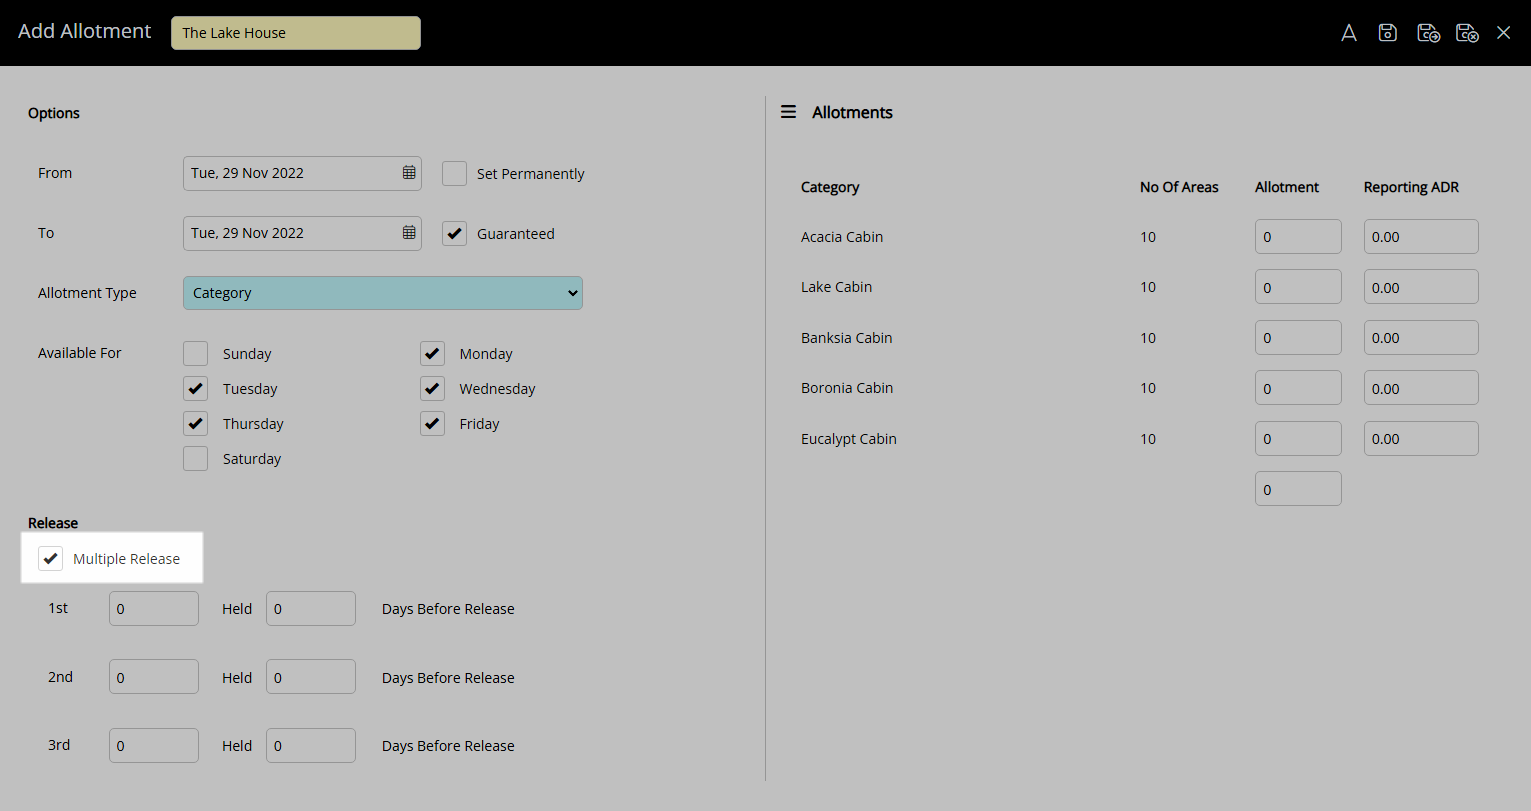
Enter the Ordinal Inventory Release.
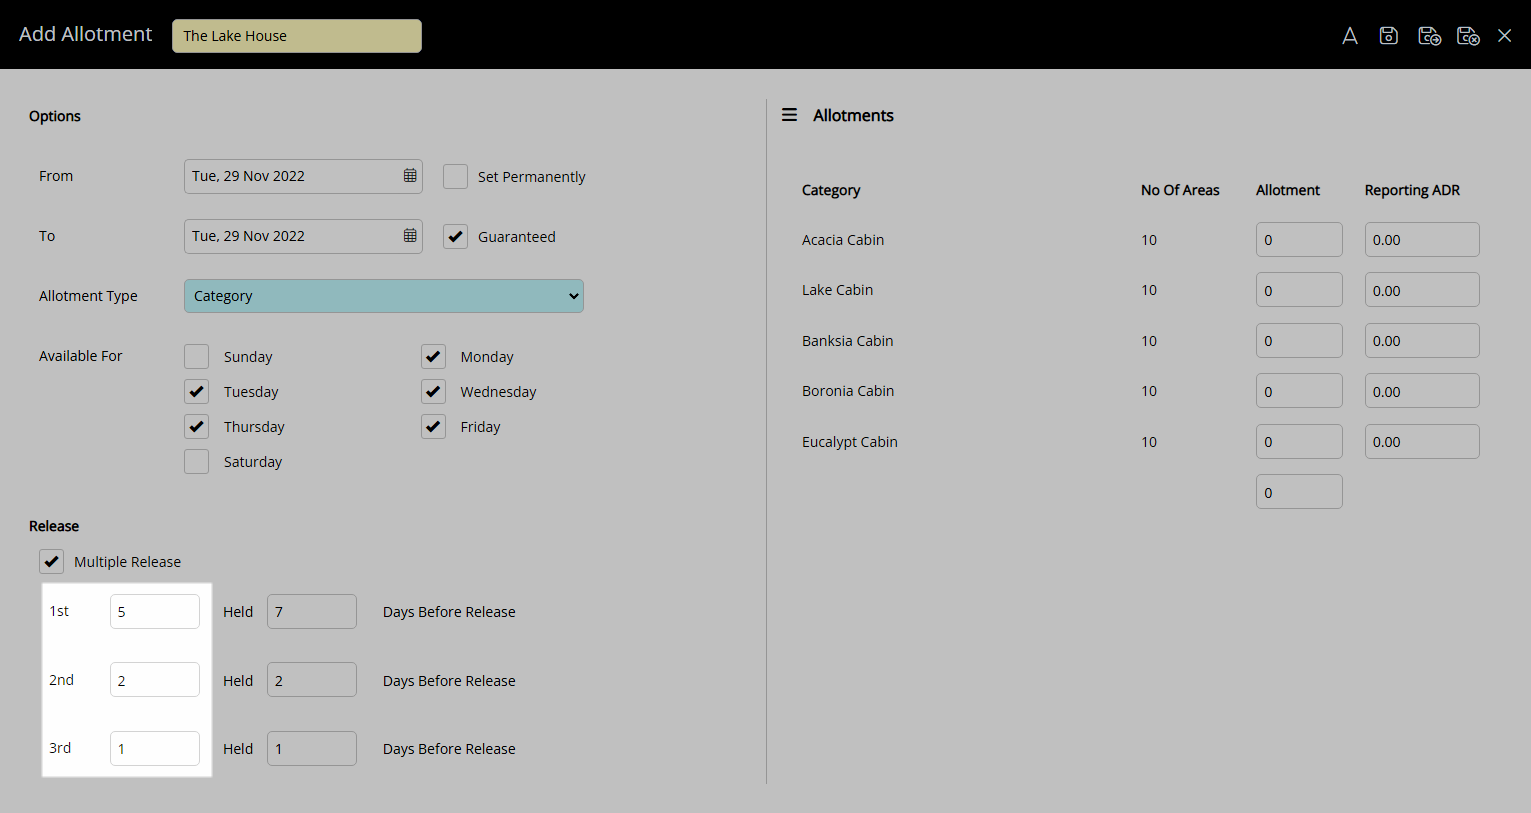
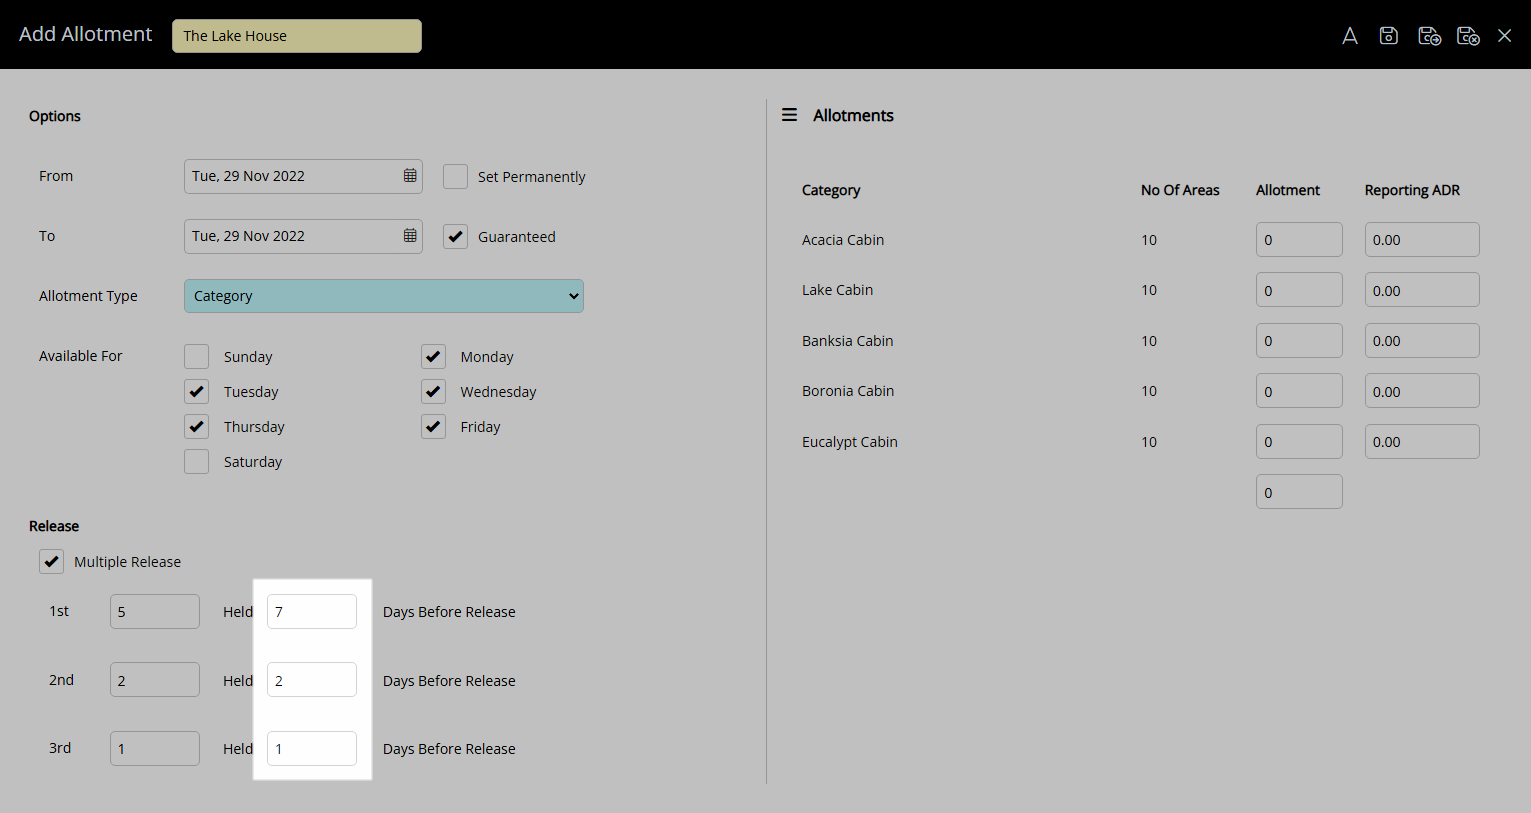
Enter the Ordinal Release Period.
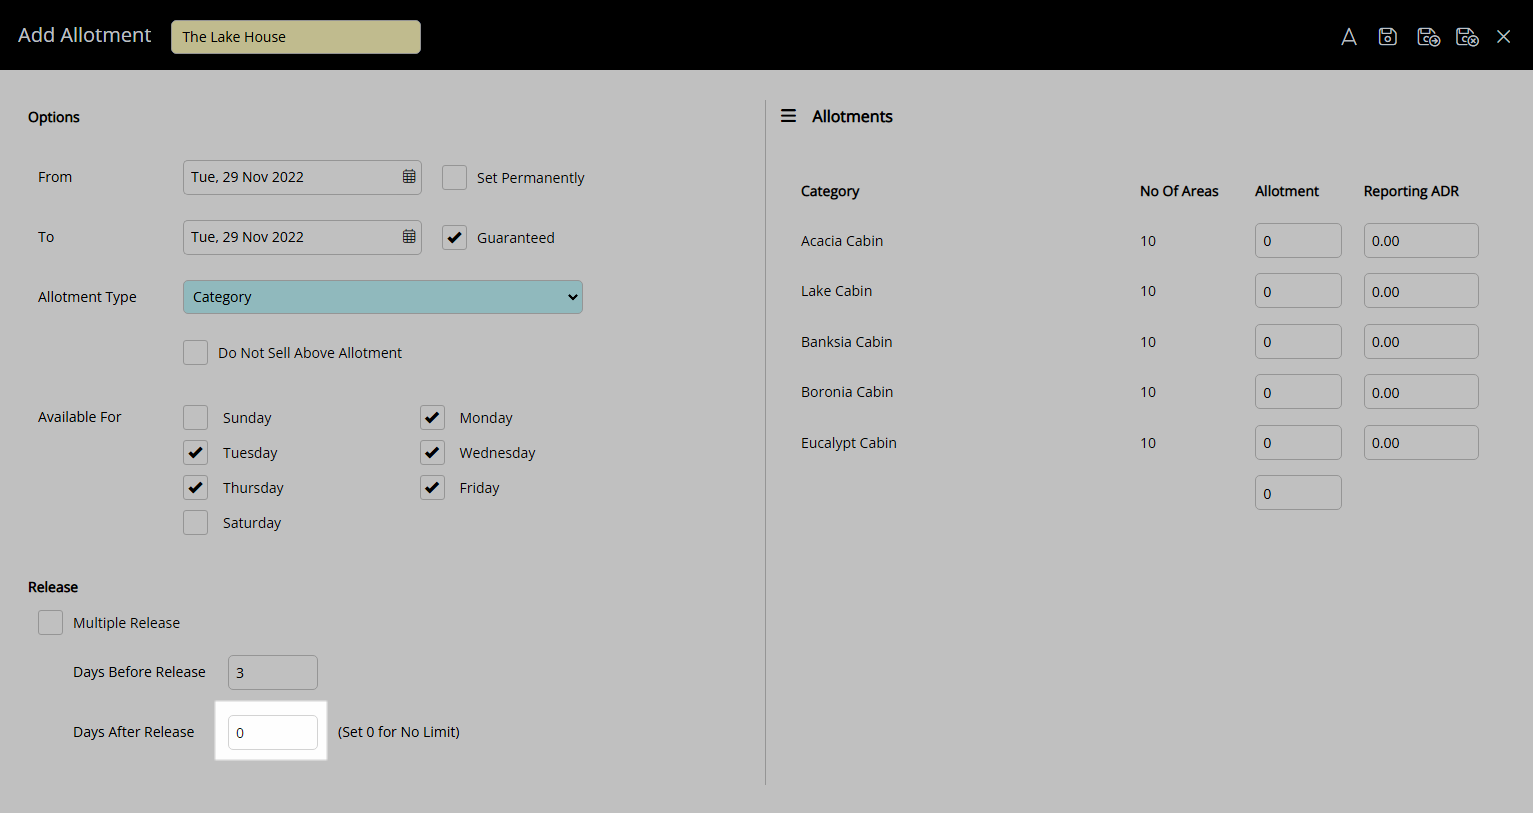
Single Release:
Enter the Days Before Release.

Enter the Days After Release.
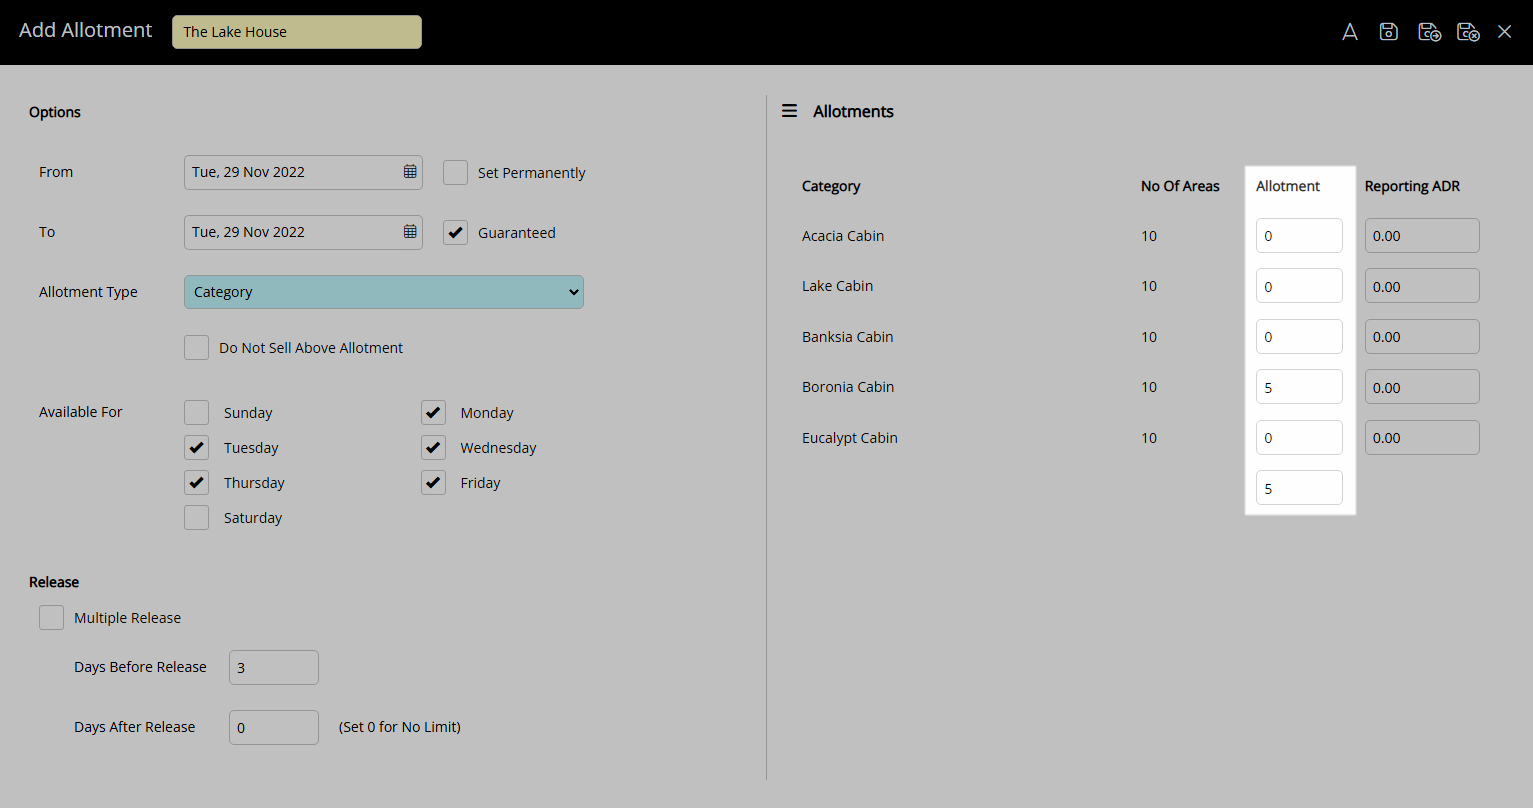
Enter the Allotments.
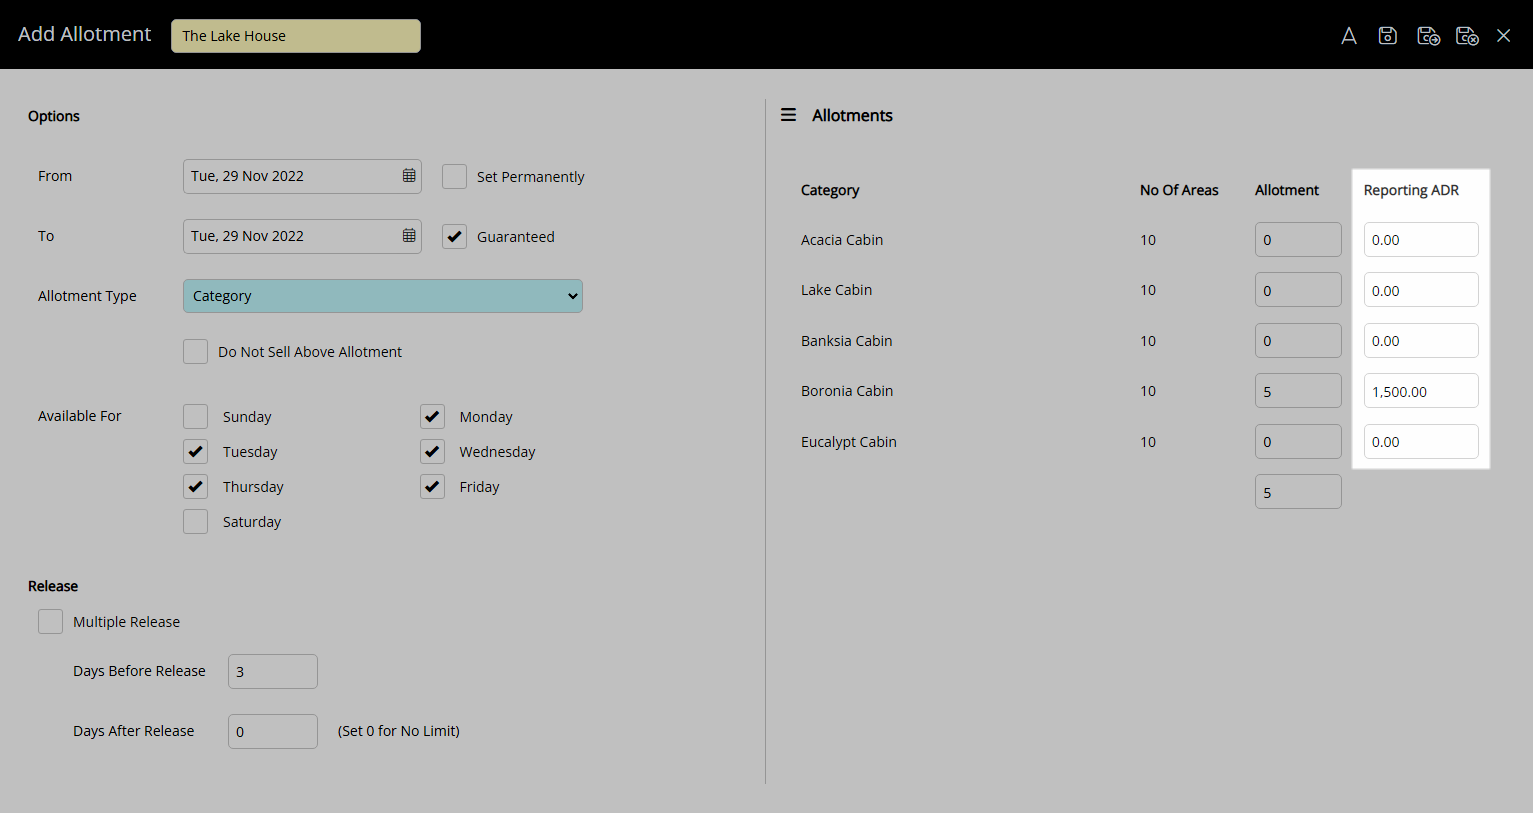
Optional: Enter the Reporting ADR.
Select  'Save/Exit' to store the changes made and return to the Travel Agent setup.
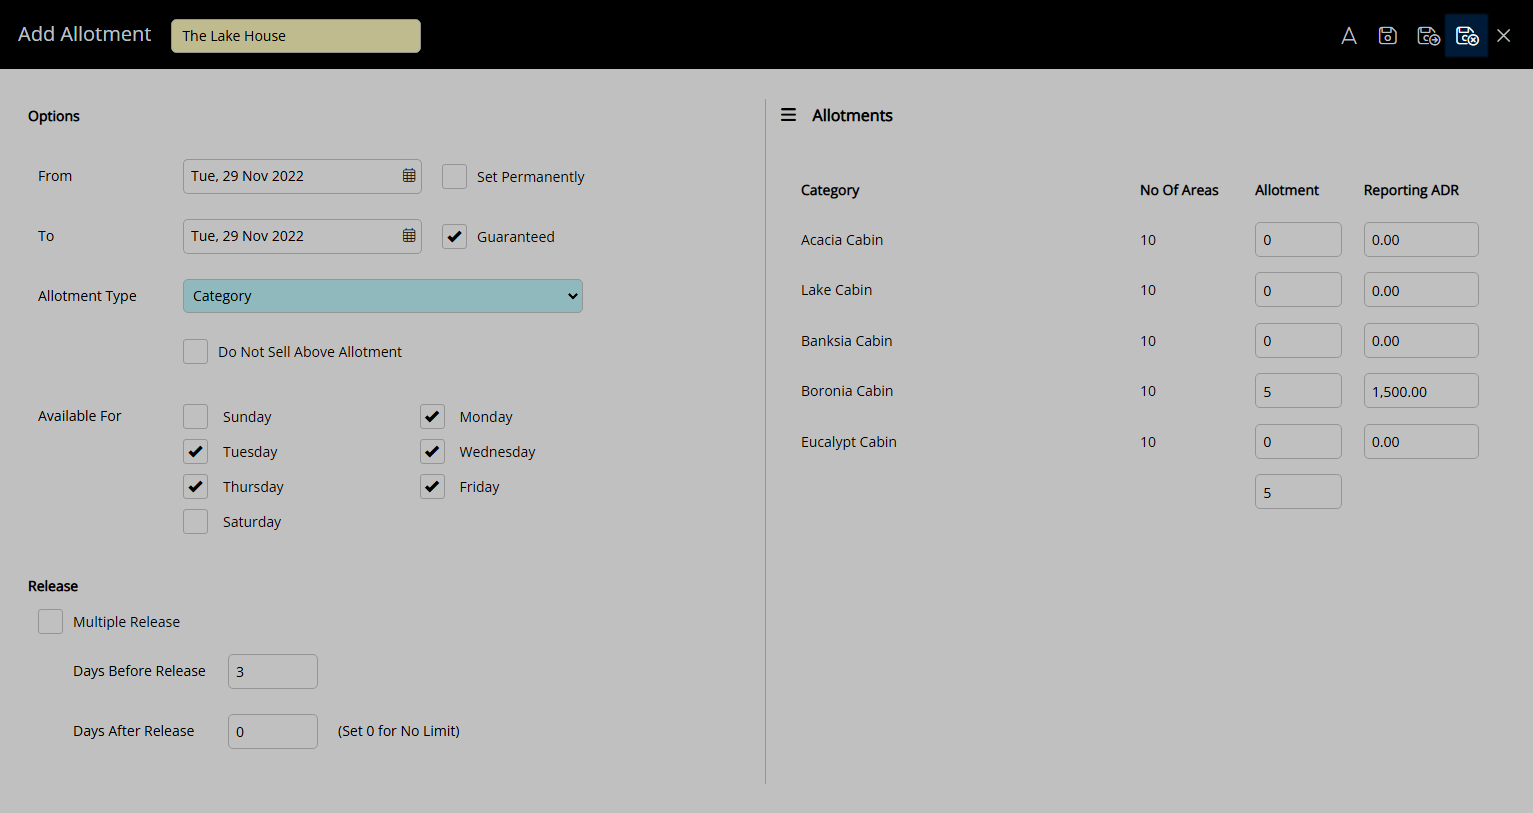
Availability will include the Travel Agent Allotments with inventory released back using the entered Single Release or Multiple Release periods.
Setup
Have your System Administrator complete the following.
- Go to Setup > Travel Agent in RMS.
- Select the
 'Edit' icon on an existing Travel Agent.
 - Navigate to the 'Allotment' tab.
- Select the Availability option 'Agent/Wholesaler Allotment'.
- Select the
 'Add' icon.
 - Select a Date Range.
- Optional: Select the checkbox 'Set Permanently'.
- Optional: Select the checkbox 'Guaranteed Allotment'.
- Select the Allotment Type.
- Optional: Select the checkbox 'Do Not Sell Above Allotment'.
- Optional: Select the checkbox for Available Days of the Week.
- Enter the Allotment Release.
-
Multiple Release:
- Select the checkbox 'Multiple Release'.
- Enter the Ordinal Inventory Release.
- Enter the Ordinal Release Period.
-
Single Release:
- Enter the Days Before Release.
- Enter the Days After Release.
-
Multiple Release:
- Enter the Allotments.
- Optional: Enter the Reporting ADR.
- Save/Exit.

Multiple Release is only available when using Category Allotments.
Days After Release can be used when 'Set Permanently' is selected to continually roll forward the future bookable period for the Allotment.
-
Guide
- Add Button
Guide
Go to Setup > Travel Agent in RMS.
Select the ![]() 'Edit' icon on an existing Travel Agent.
'Edit' icon on an existing Travel Agent.
Navigate to the 'Allotment' tab.
Select the Availability option 'Agent/Wholesaler Allotment'.
Select the 'Add' icon.
Select a Date Range.
Optional: Select the checkbox 'Set Permanently'.
Optional: Select the checkbox 'Guaranteed Allotment'.
Select the Allotment Type.
Optional: Select the checkbox 'Do Not Sell Above Allotment'.
Optional: Select the checkbox for Available Days of the Week.
Enter the Allotment Release.
Multiple Release:
Select the checkbox 'Multiple Release'.
Enter the Ordinal Inventory Release.
Enter the Ordinal Release Period.
Single Release:
Enter the Days Before Release.
Enter the Days After Release.
Enter the Allotments.
Optional: Enter the Reporting ADR.
Select 'Save/Exit' to store the changes made and return to the Travel Agent setup.
Availability will include the Travel Agent Allotments with inventory released back using the entered Single Release or Multiple Release periods.