Rate, Category & Availability View Options
Setup the display of Rates, Categories and Availability on the RMS Internet Booking Engine.
The Rate, Category & Availability options determine how this information will be displayed on the RMS Internet Booking Engine.
-
Information
-
Setup
- Add Button
Information
The Rate, Category & Availability options determine how this information will be displayed on the RMS Internet Booking Engine.
The Available Rate View will determine if the Rates displayed after an availability search on the RMS Internet Booking Engine include Rate Types that are not available for the selected dates or length of stay, or if only bookable Rates are listed.
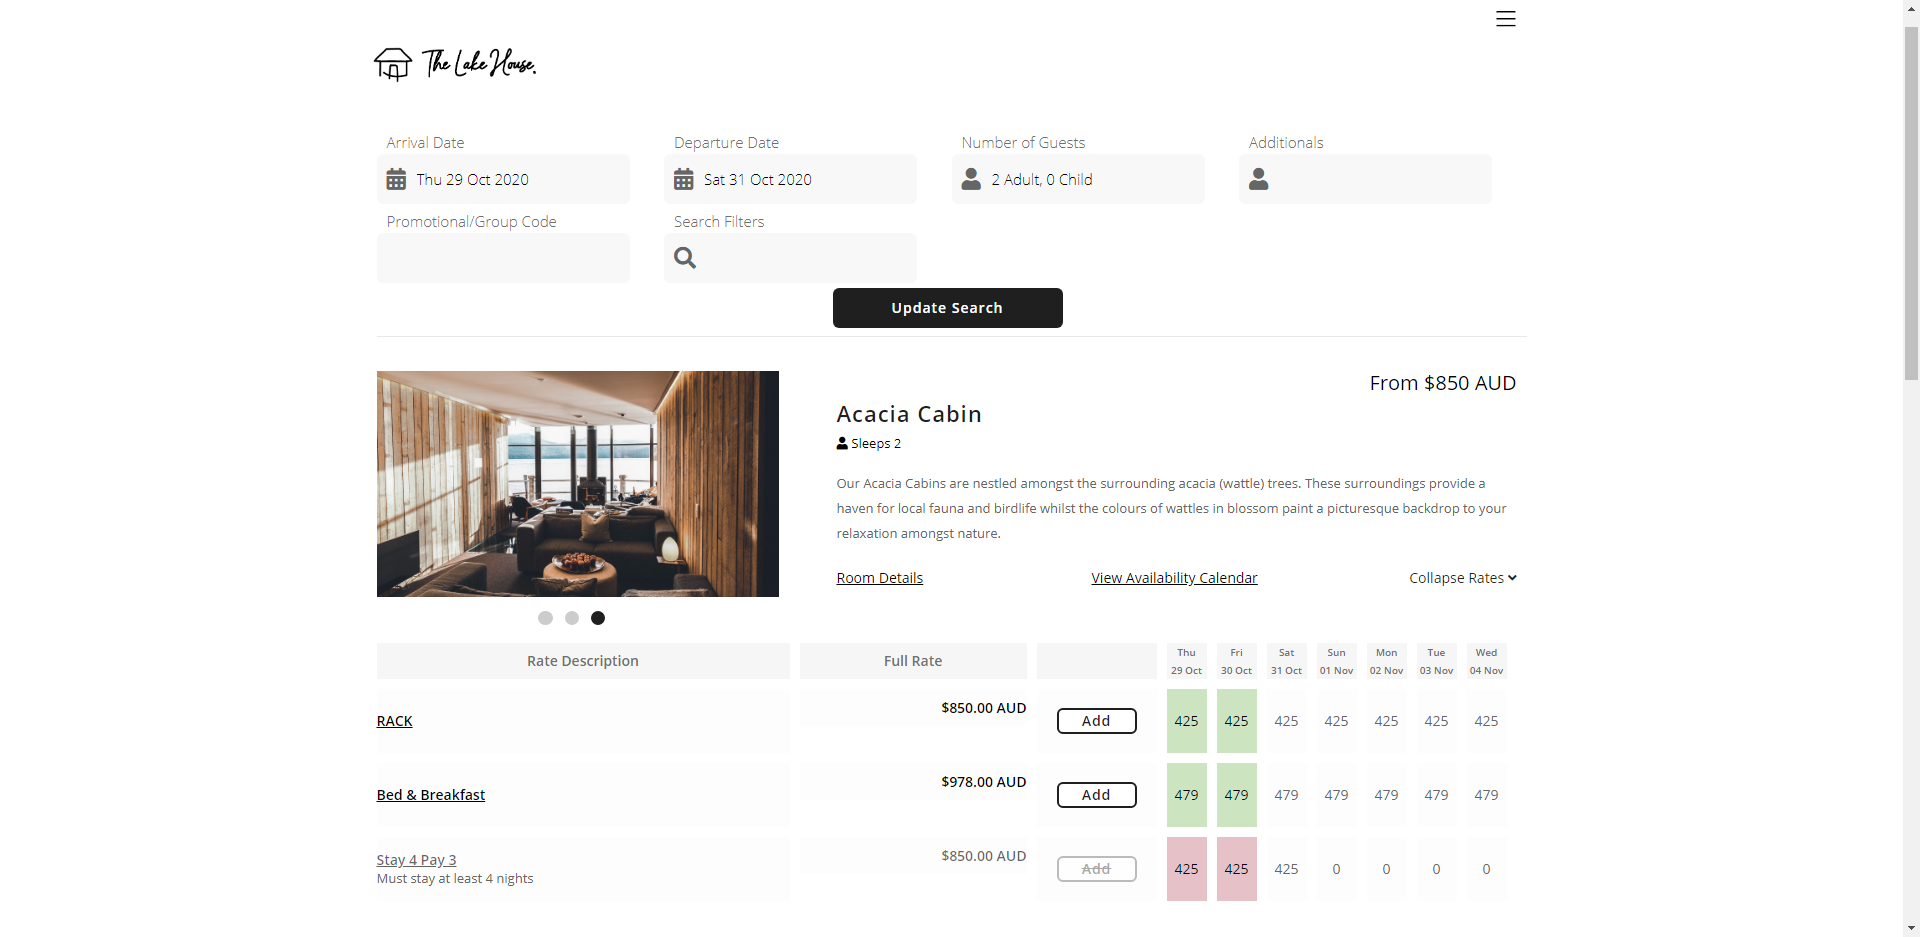
The Available Category View determines if all Categories will display after an availability search on the RMS Internet Booking Engine or if only available Categories for the entered search criteria will be listed.
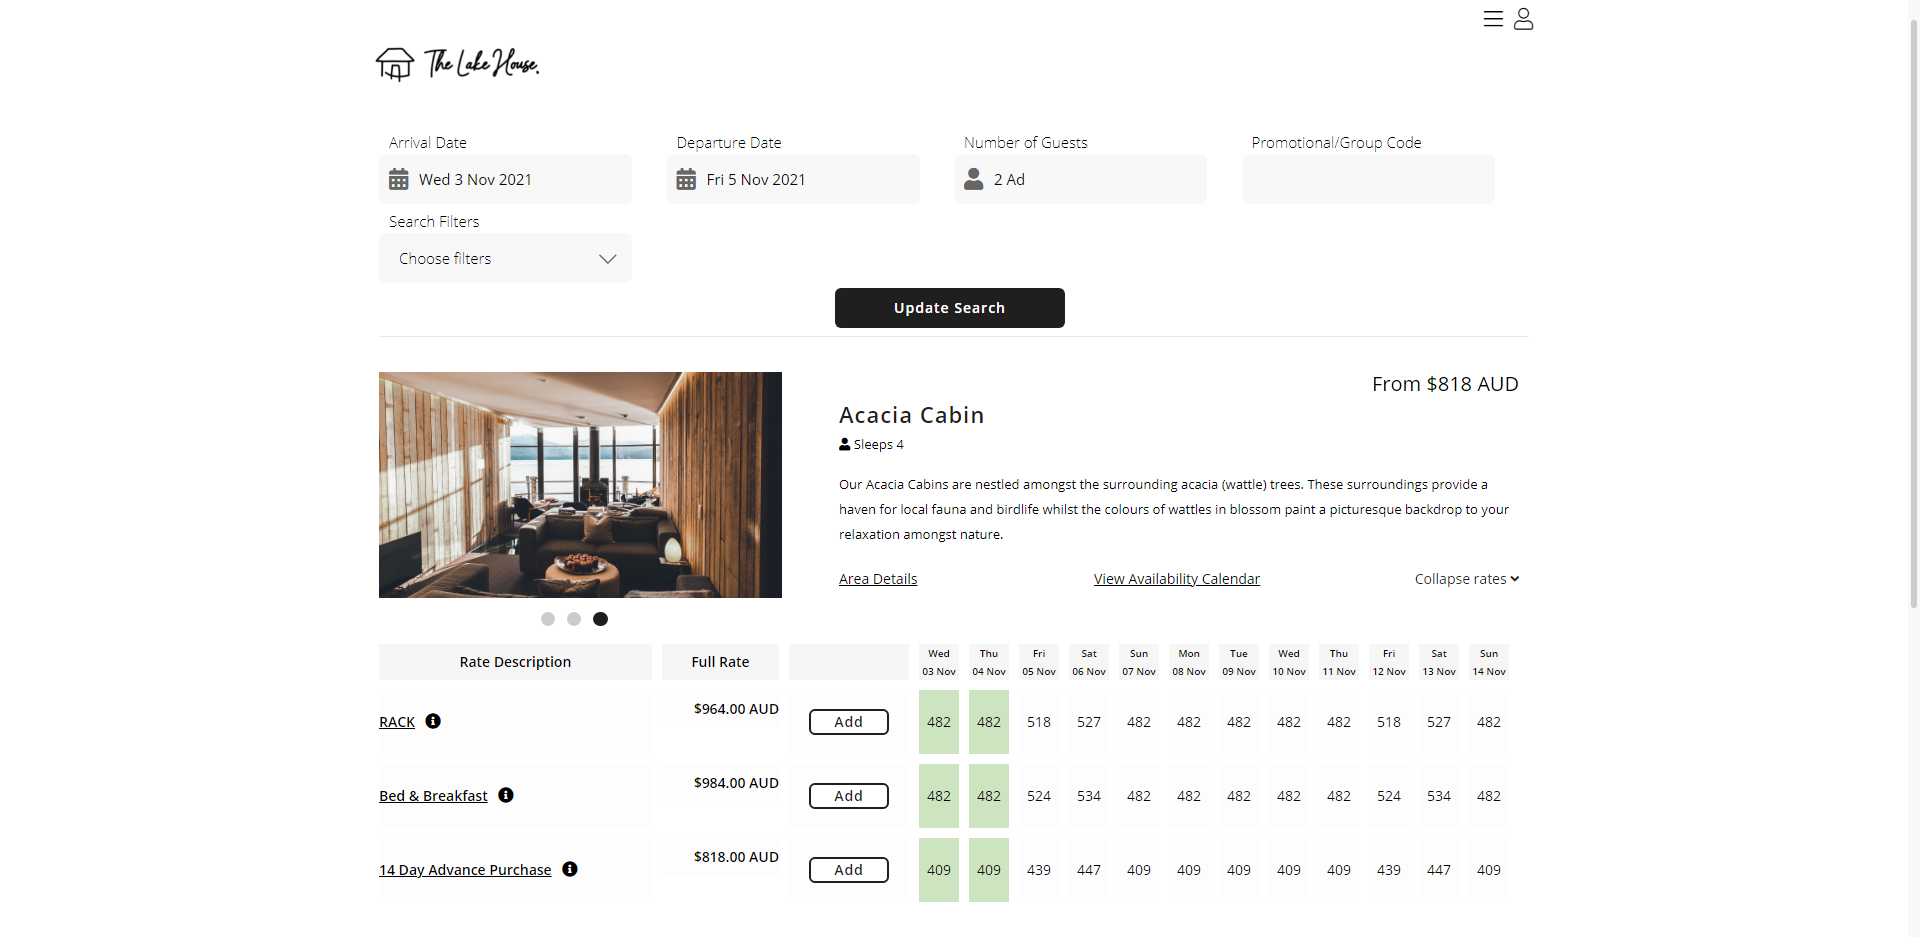
The Rate View determines how rate information is displayed to the guest after performing an availability search on the RMS Internet Booking Engine and includes a 7 or 12 day of nightly rate display, the Total Rate only or a Map View.
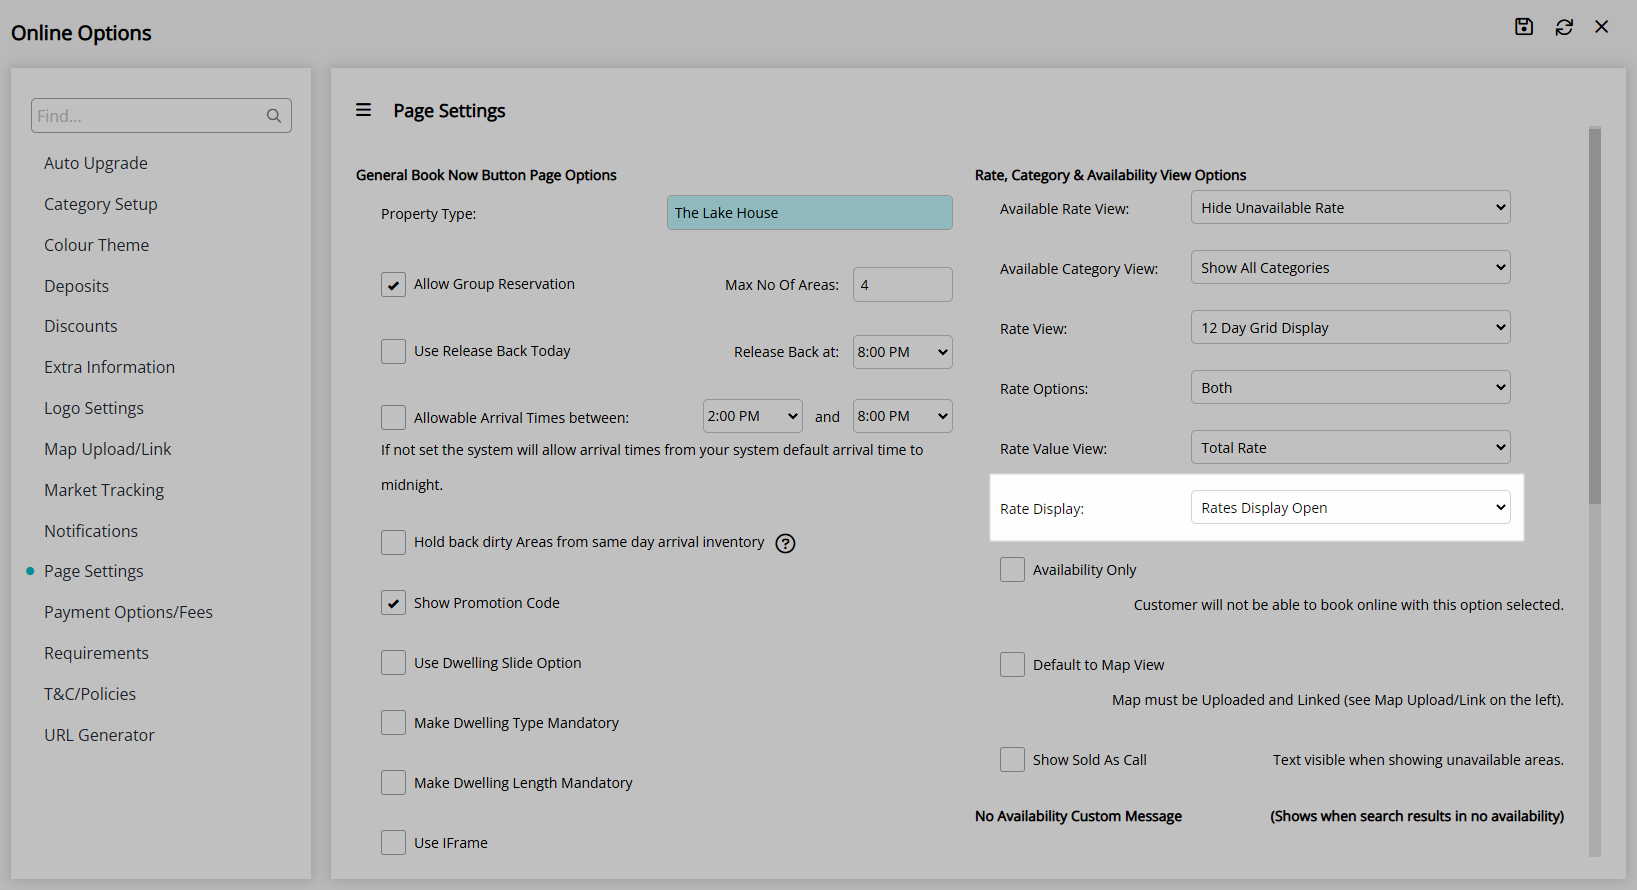
The ‘Rates Display Open’ option is only available when using the Rate View of ‘7 Day Grid Display’ or 12 Day ‘Grid Display’
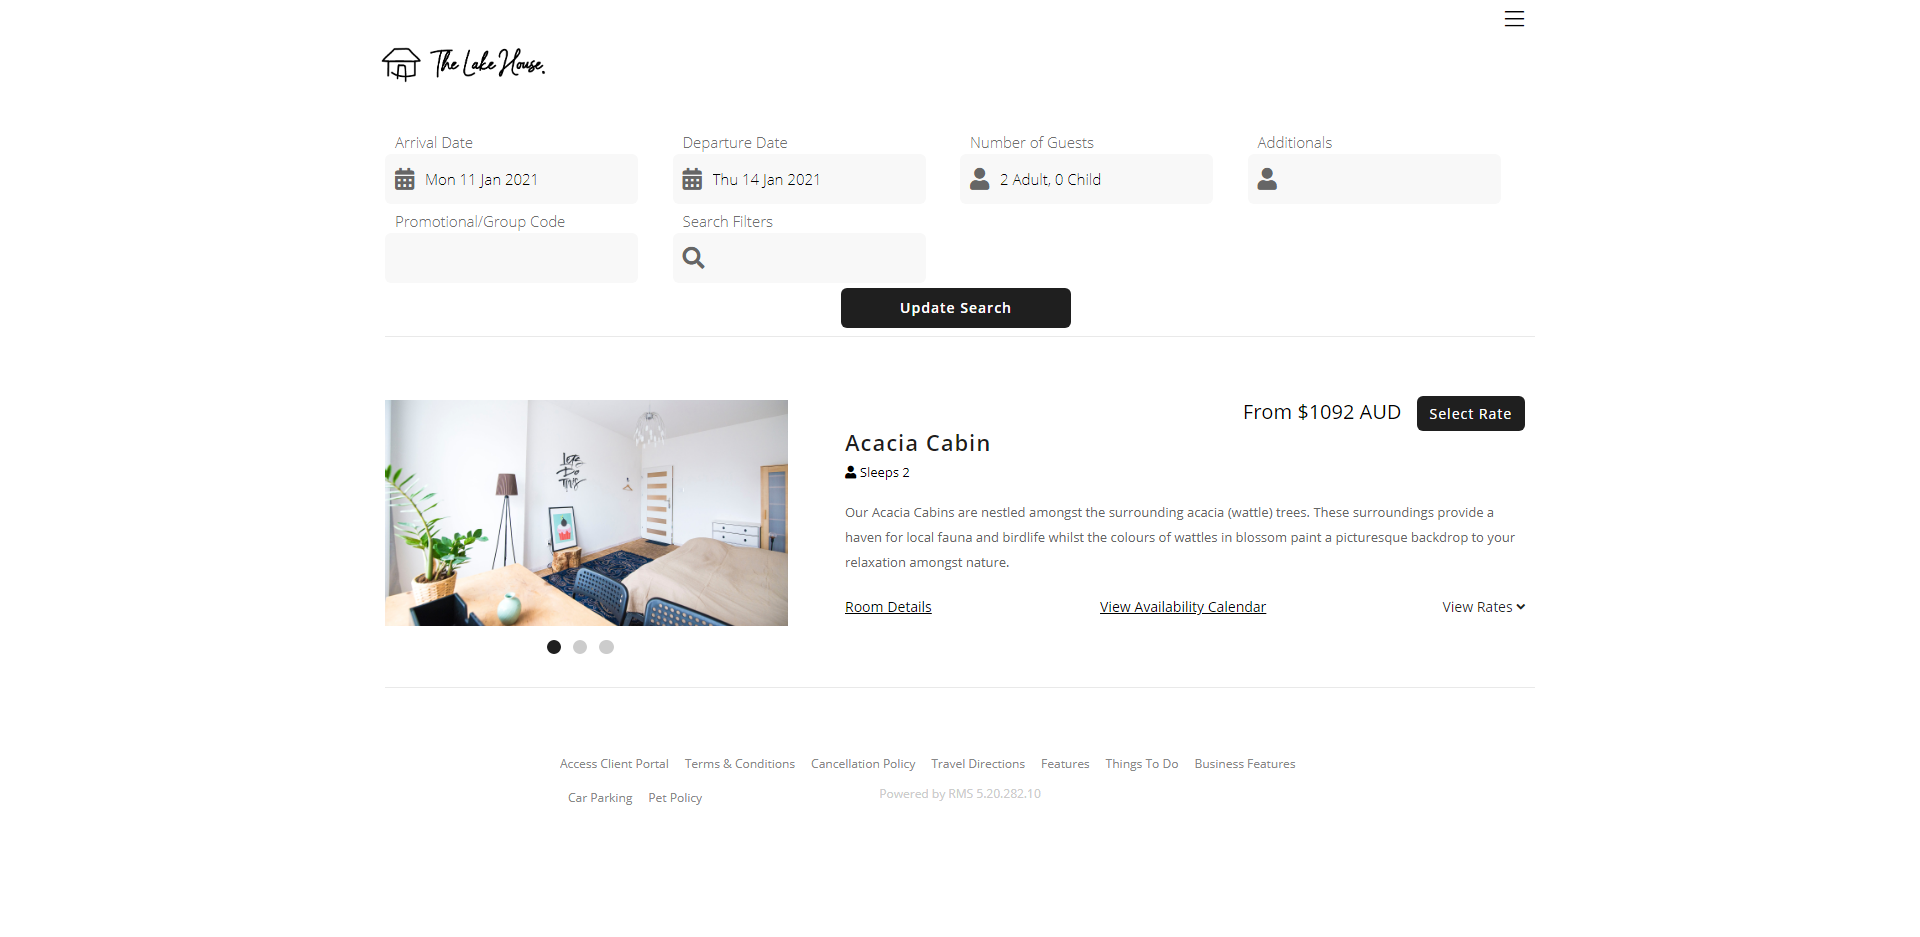
Guests will need to select ‘View Rate’ to display the Rates when using the ‘Rates Display Closed’ option.
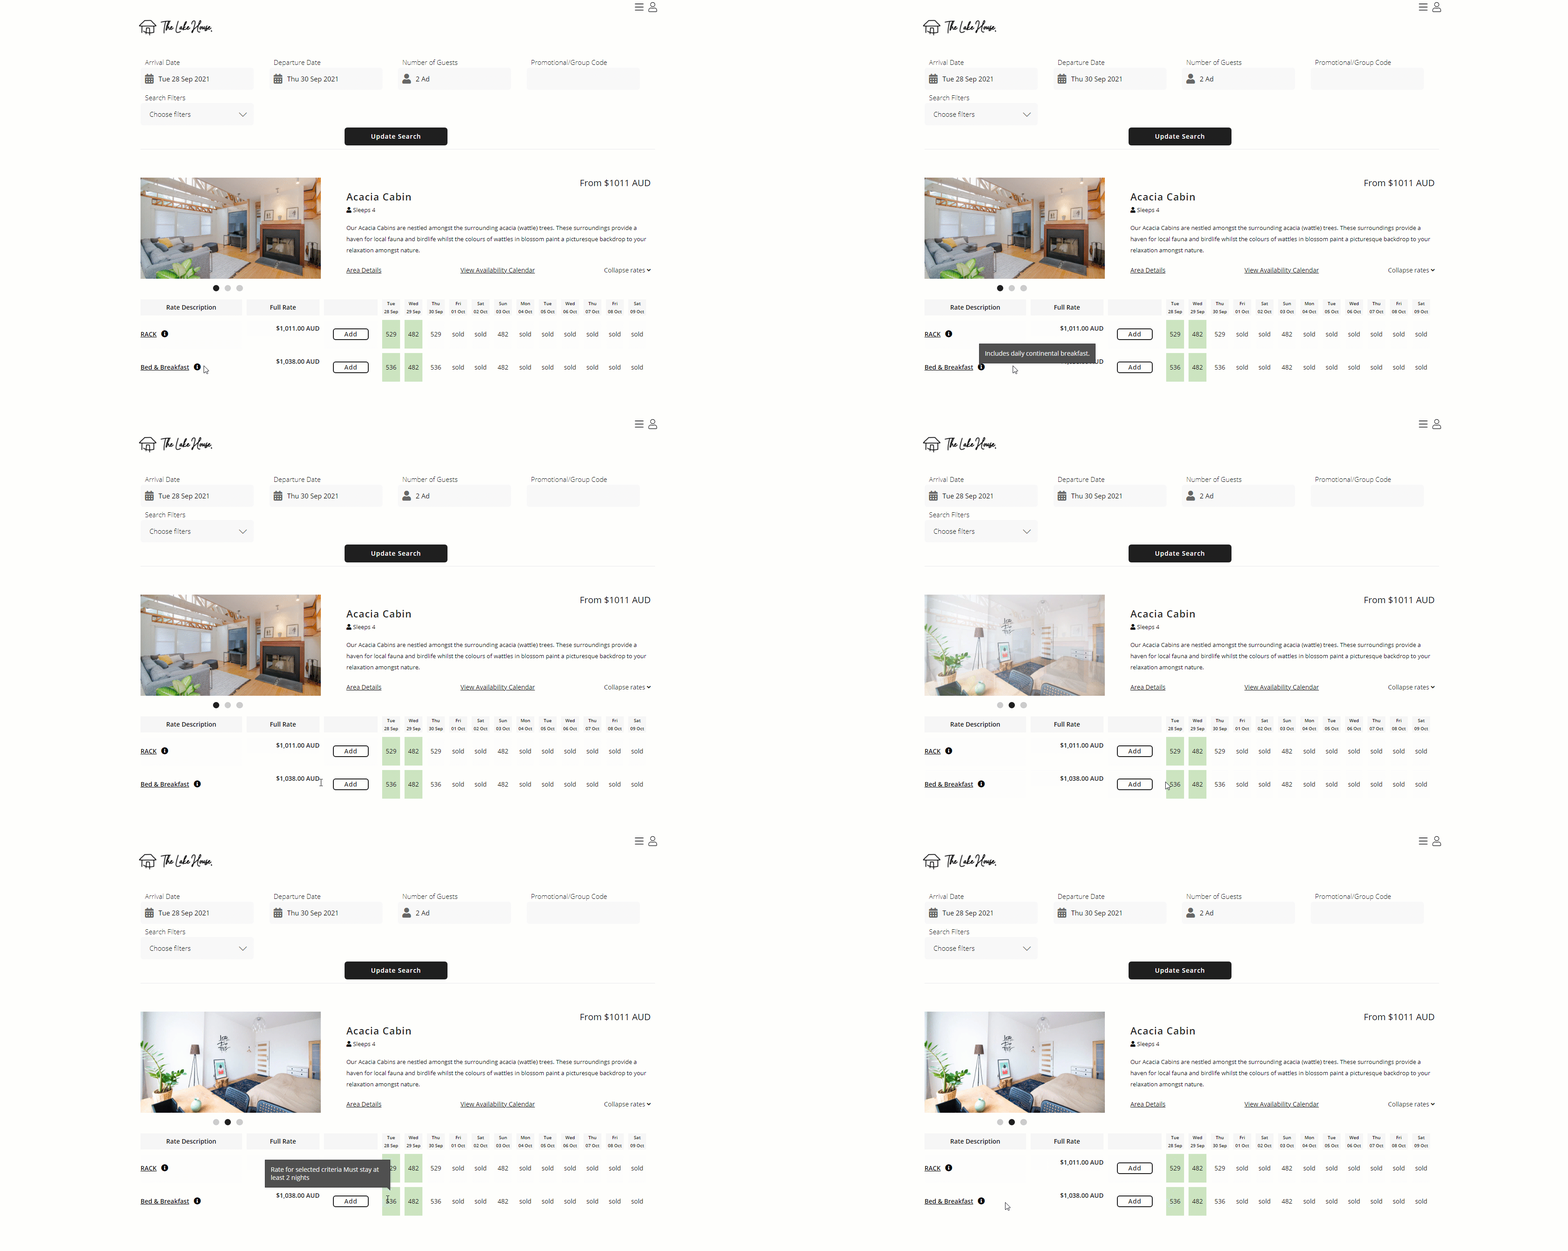
The 7 Day & 12 Day Rate Grids include additional options to customise what rate information is displayed when hovering over or selecting a Rate Type on the grid view and can include the Rate Type Long Description and/or the Rate Type Restriction Description.
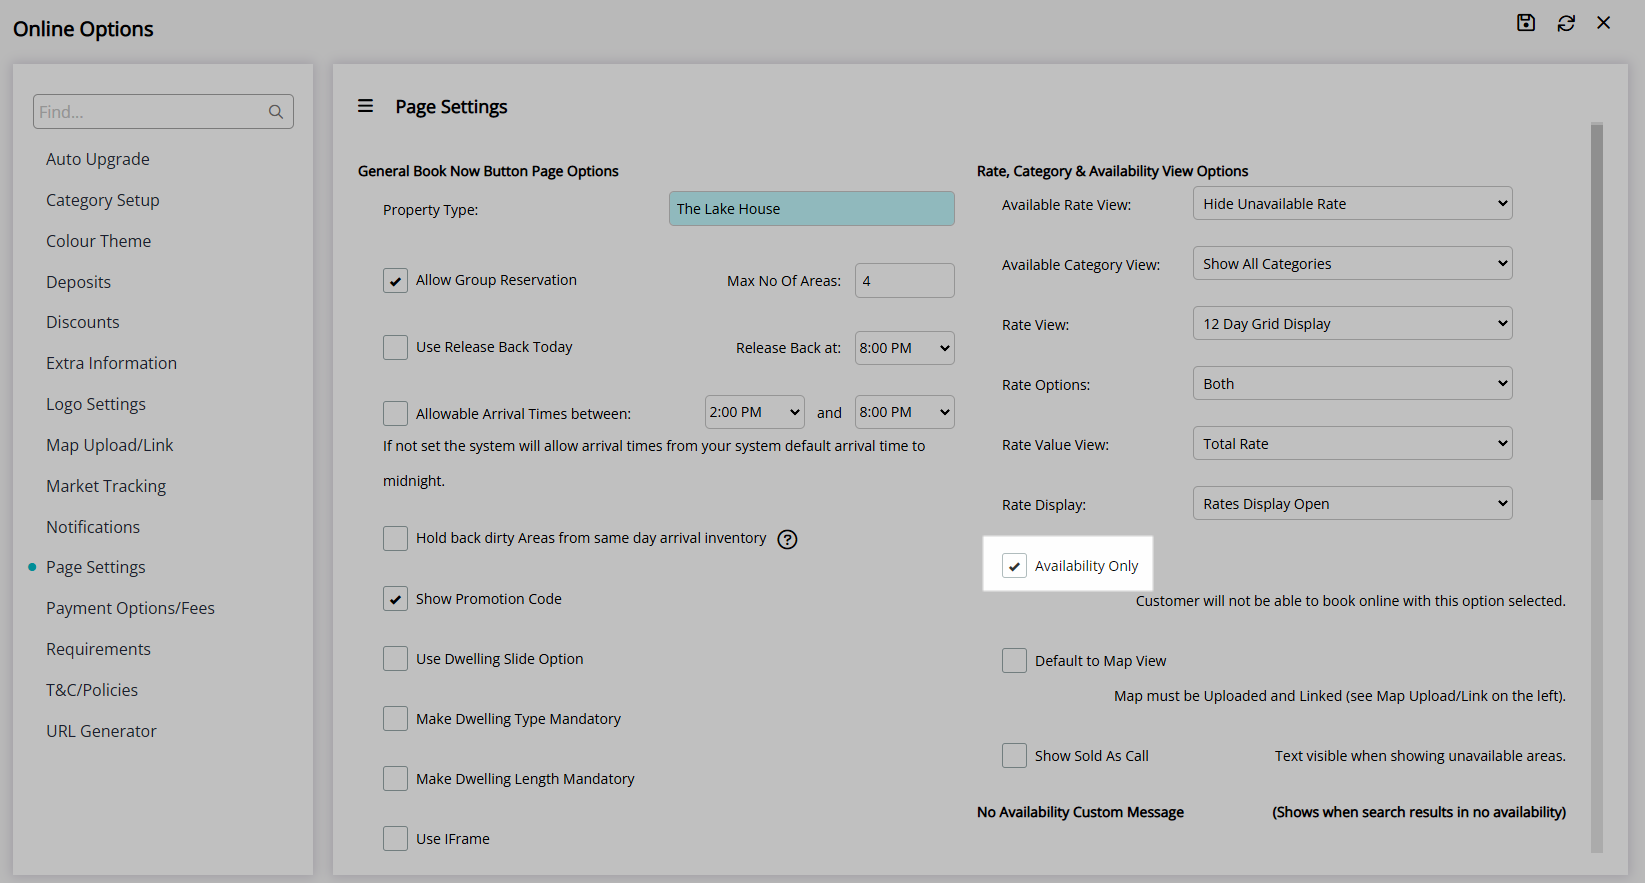
An alternative option is available to convert the RMS Internet Booking Engine into 'Availability Only' where Guests will only be able to search and view availability without completing an online booking process.
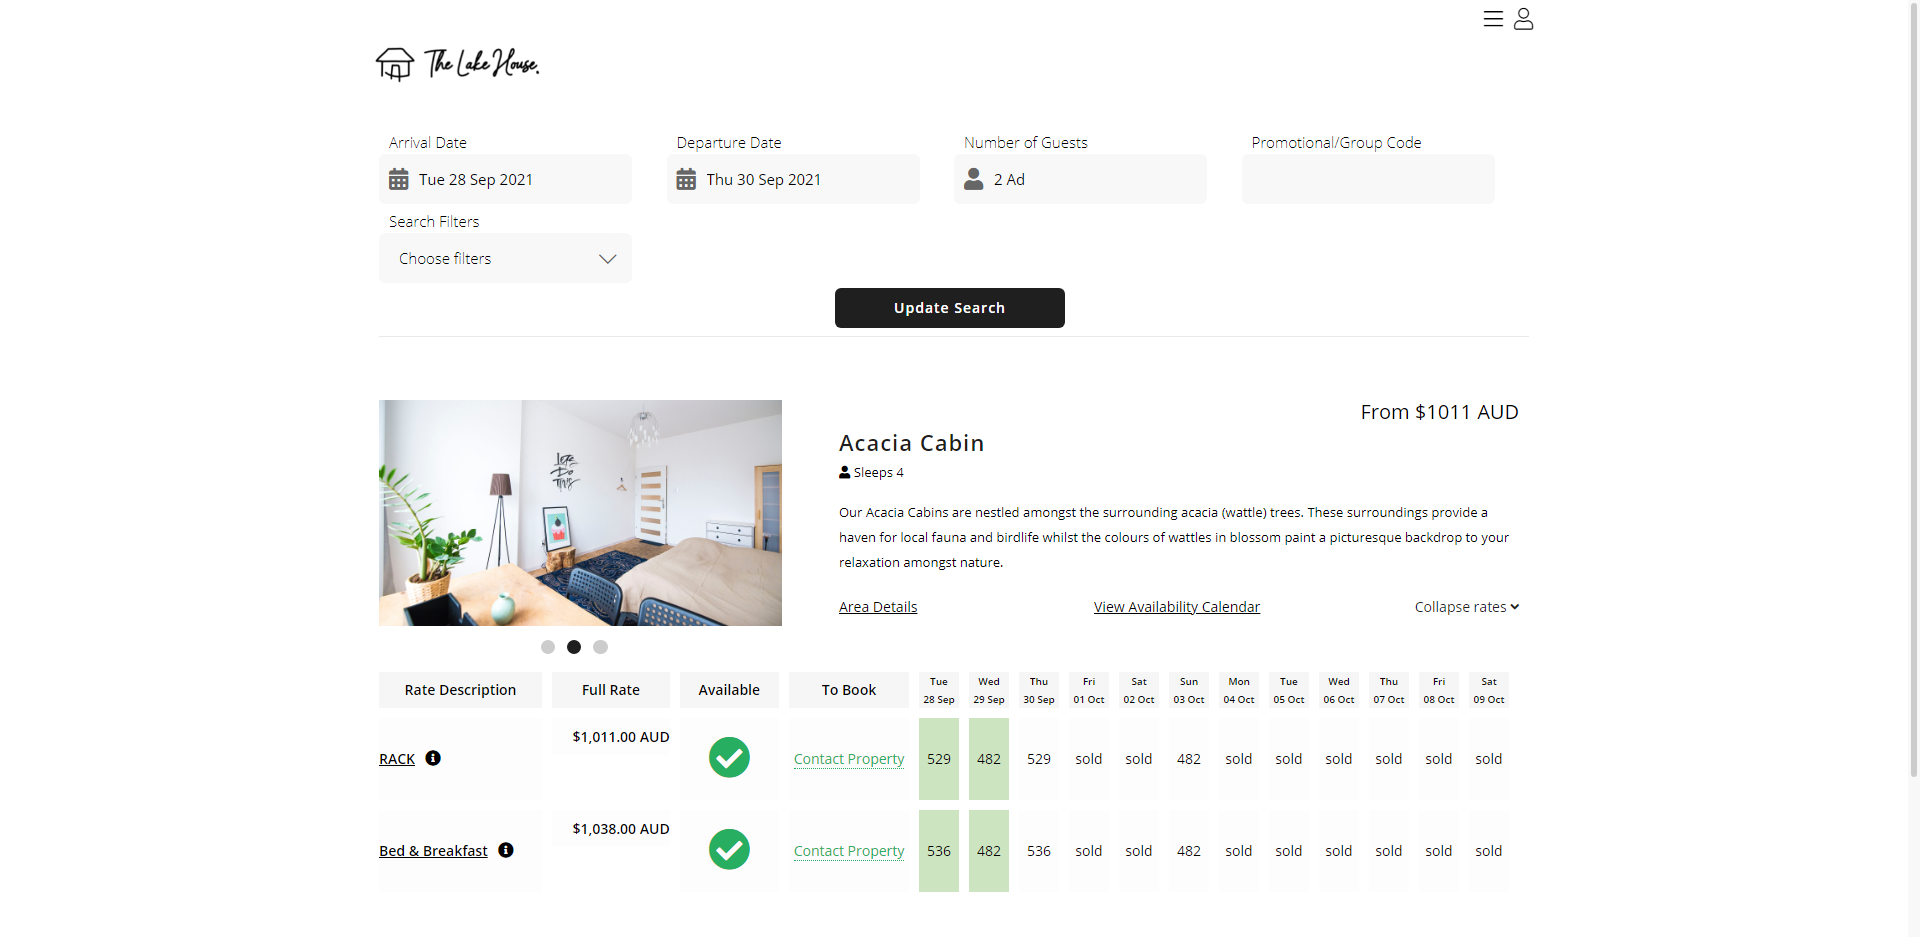
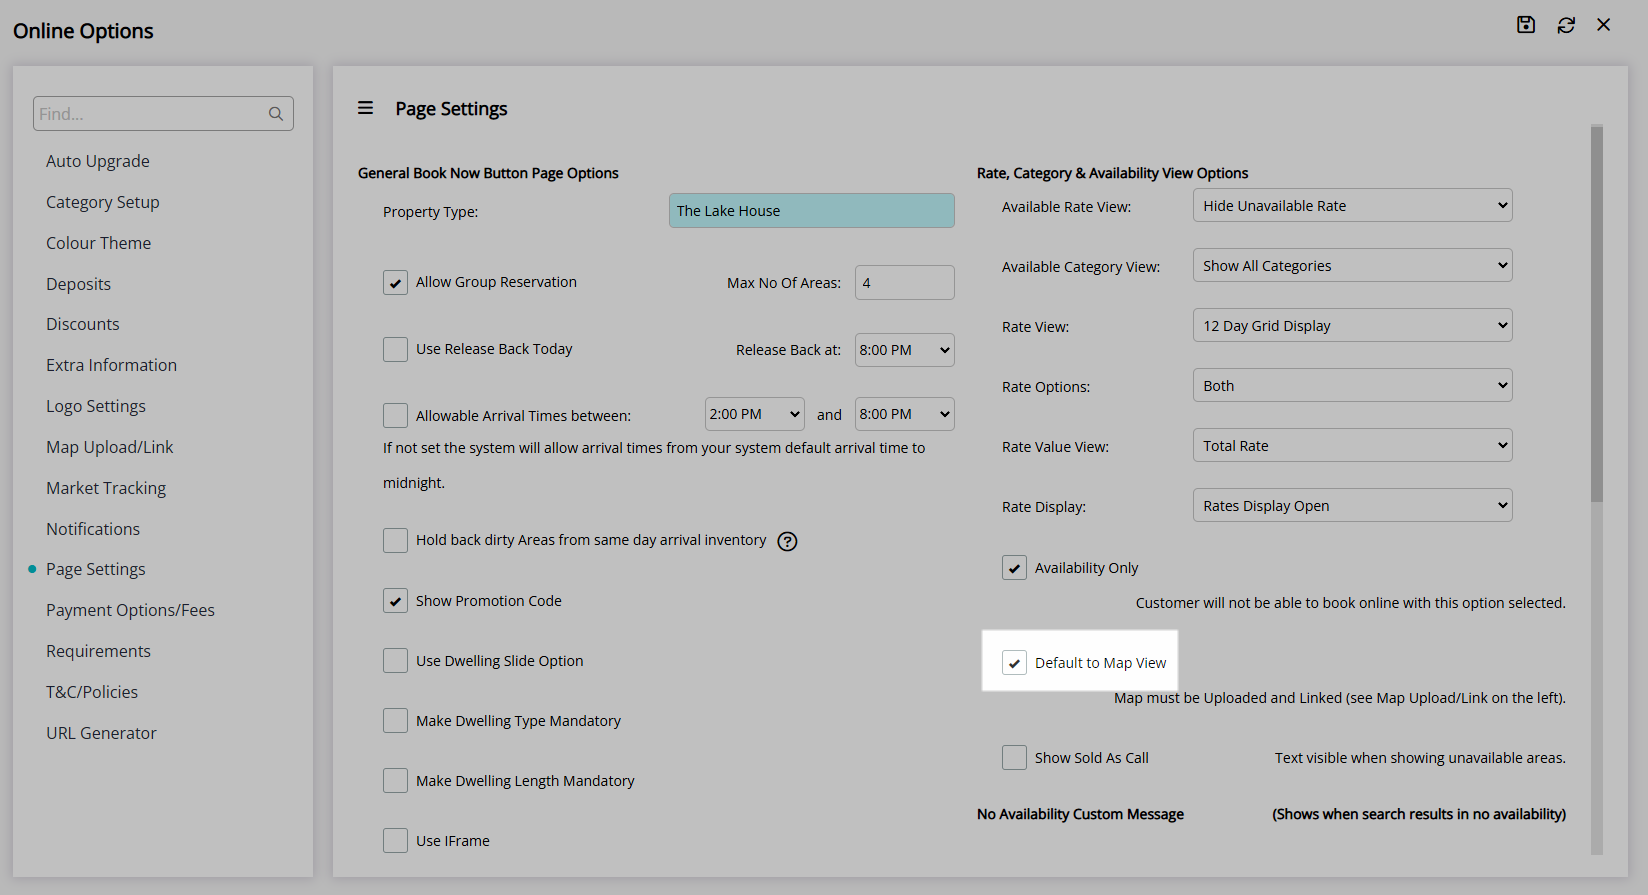
Properties using an Interactive Map can set their RMS Internet Booking Engine to default to the Map View for the property after an availability search is performed.
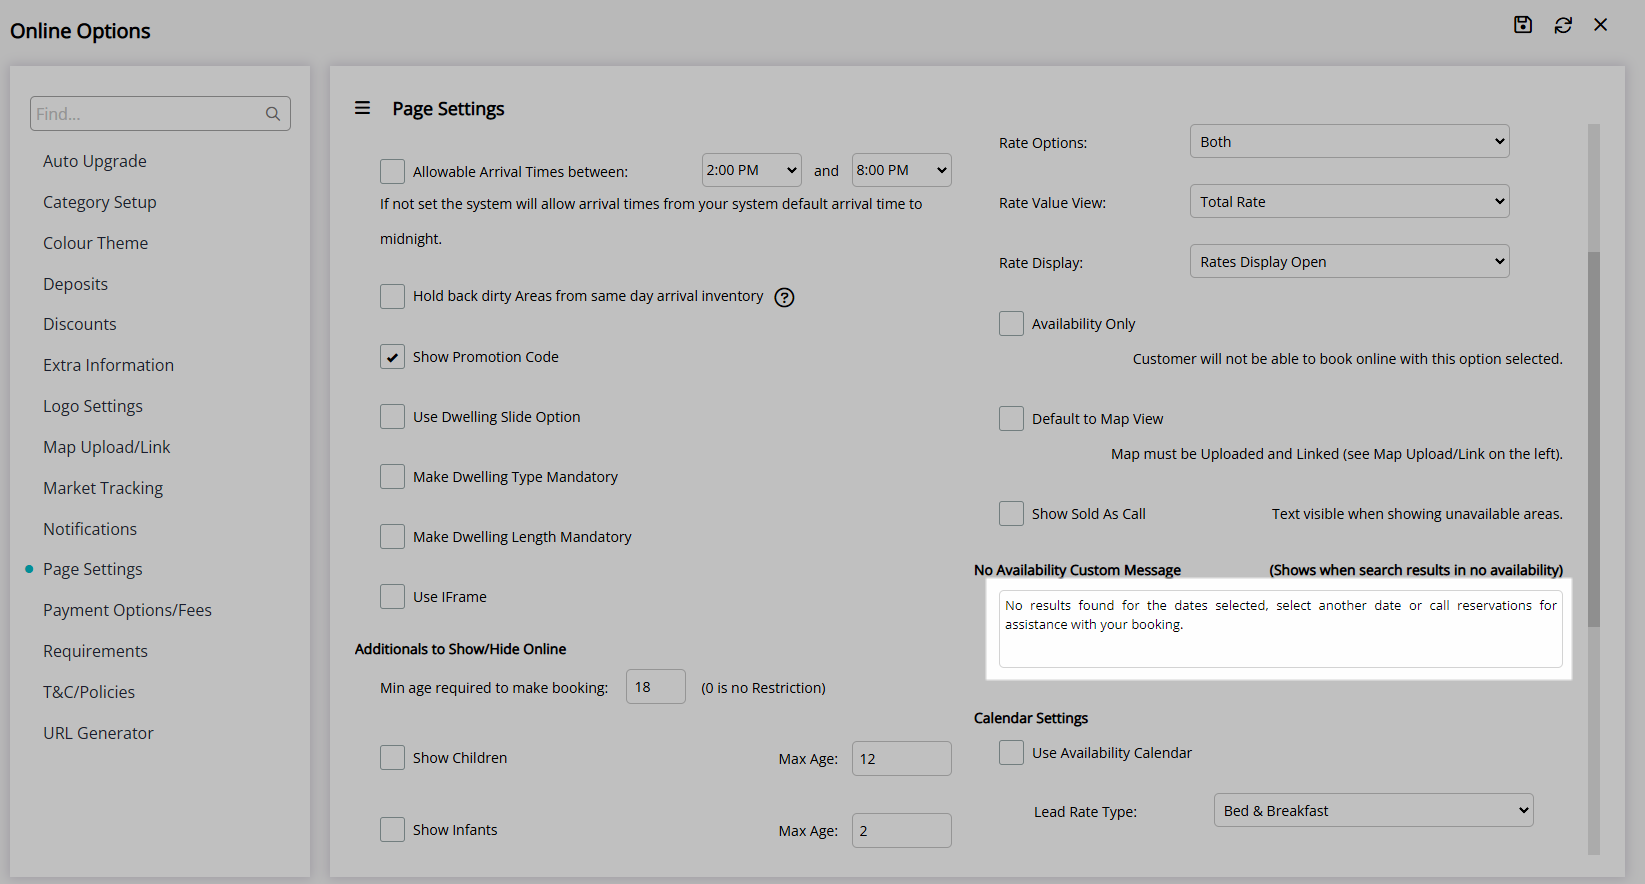
Using the options 'Hide Unavailable Rate' and 'Hide Unavailable Category' includes the ability to provide Guests with a No Availability Custom Message and an Availability Calendar giving an overview of date availability or restrictions for the dates surrounding their search dates.
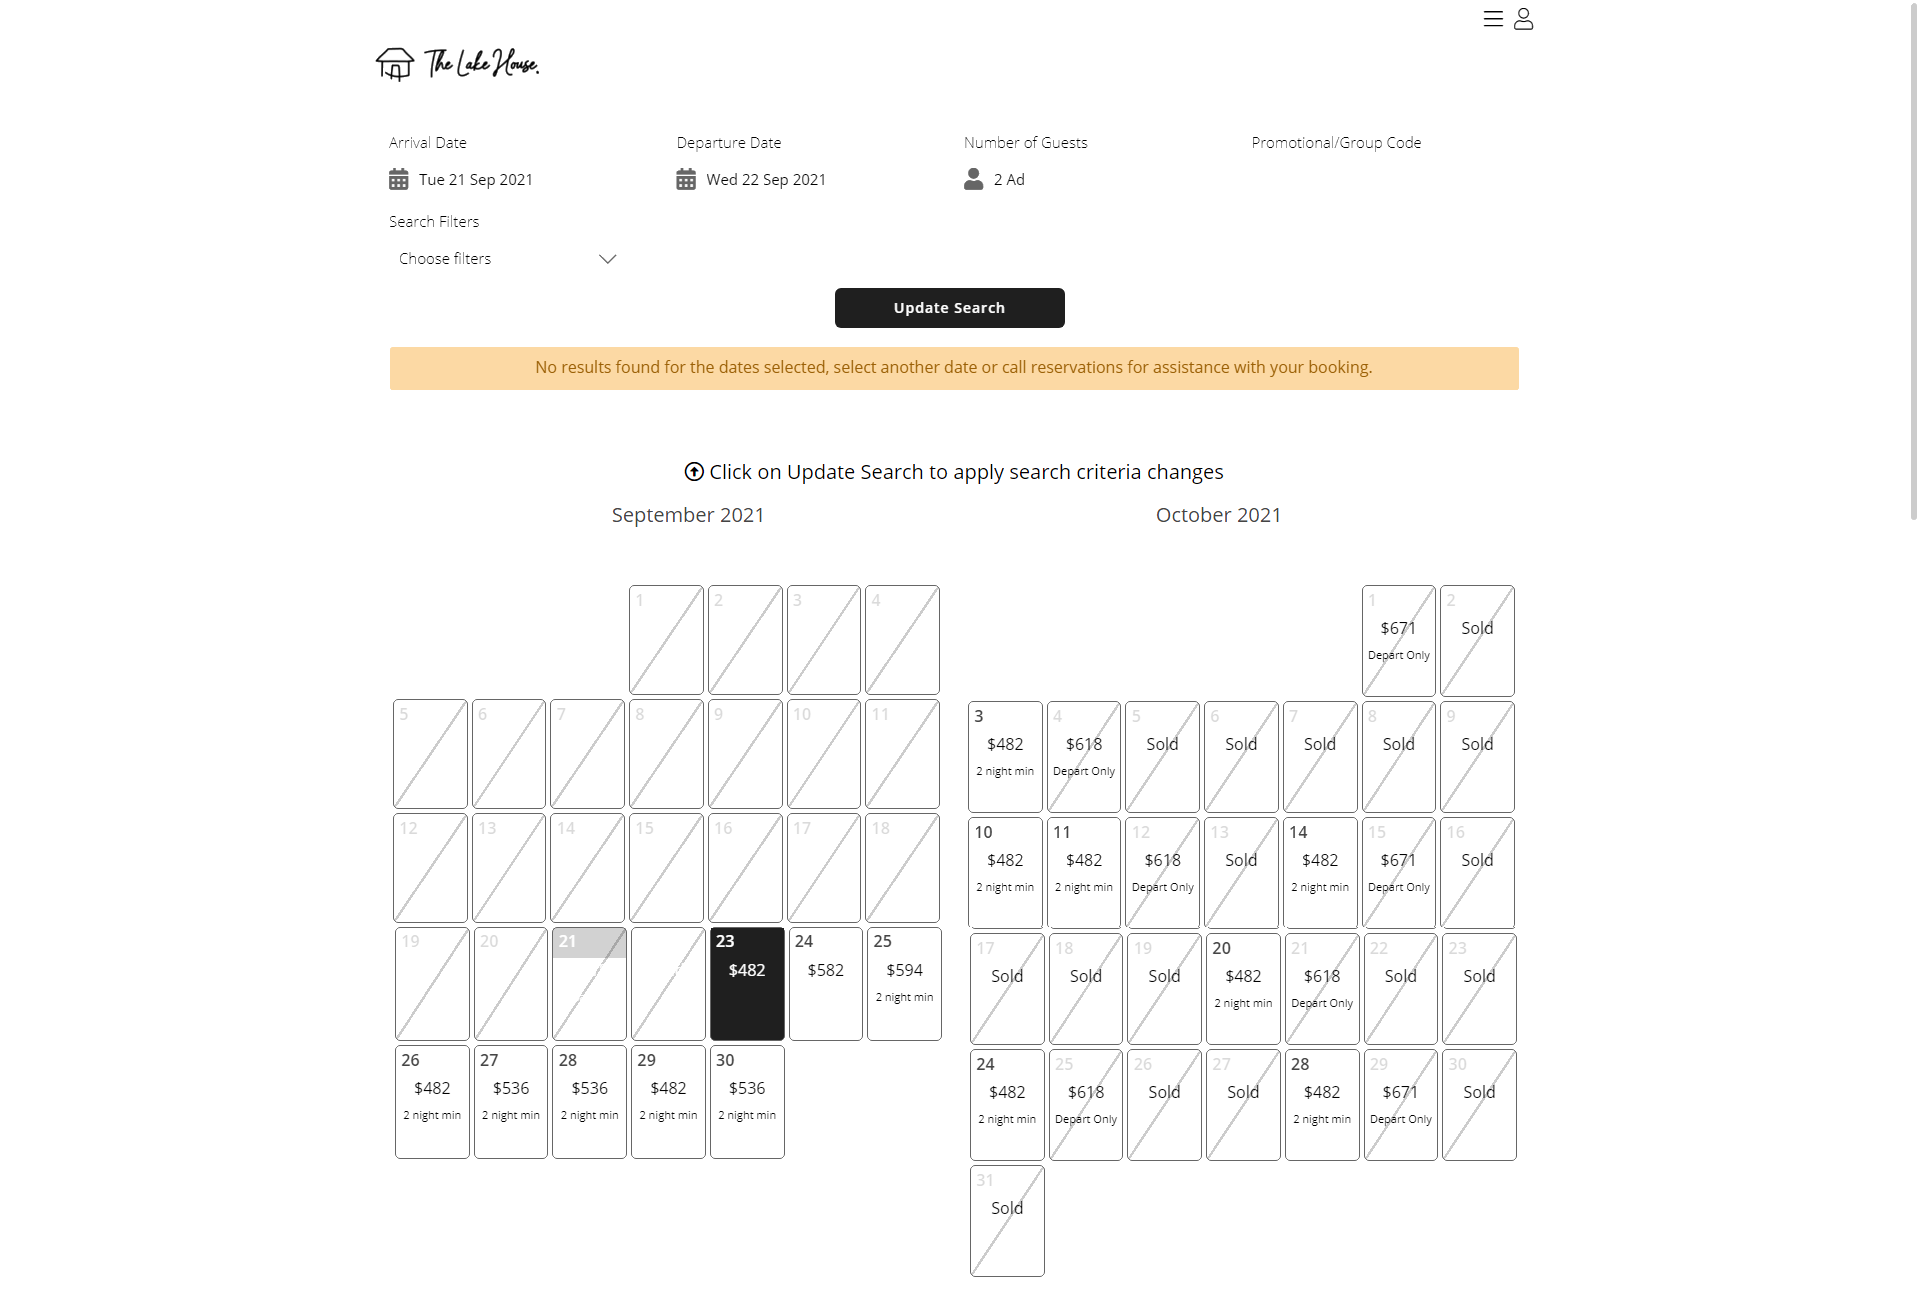

An Interactive Map must be setup to use the Map View option on the RMS Internet Booking Engine.
Category, Area, Reservation, Guest, and Rate are default System Labels that can be customised.

System Administrators will require Security Profile access to use this feature.
-
Setup
- Add Button
Setup
Have your System Administrator complete the following.
- Go to Setup > Online Bookings > Online Options in the Side Menu of RMS.
- Navigate to the 'Page Settings' tab.
- Select the Available Rate View option.
- Select the Available Category View option.
- Select the Rate View option.
- Grid Display: Select the Rate Options.
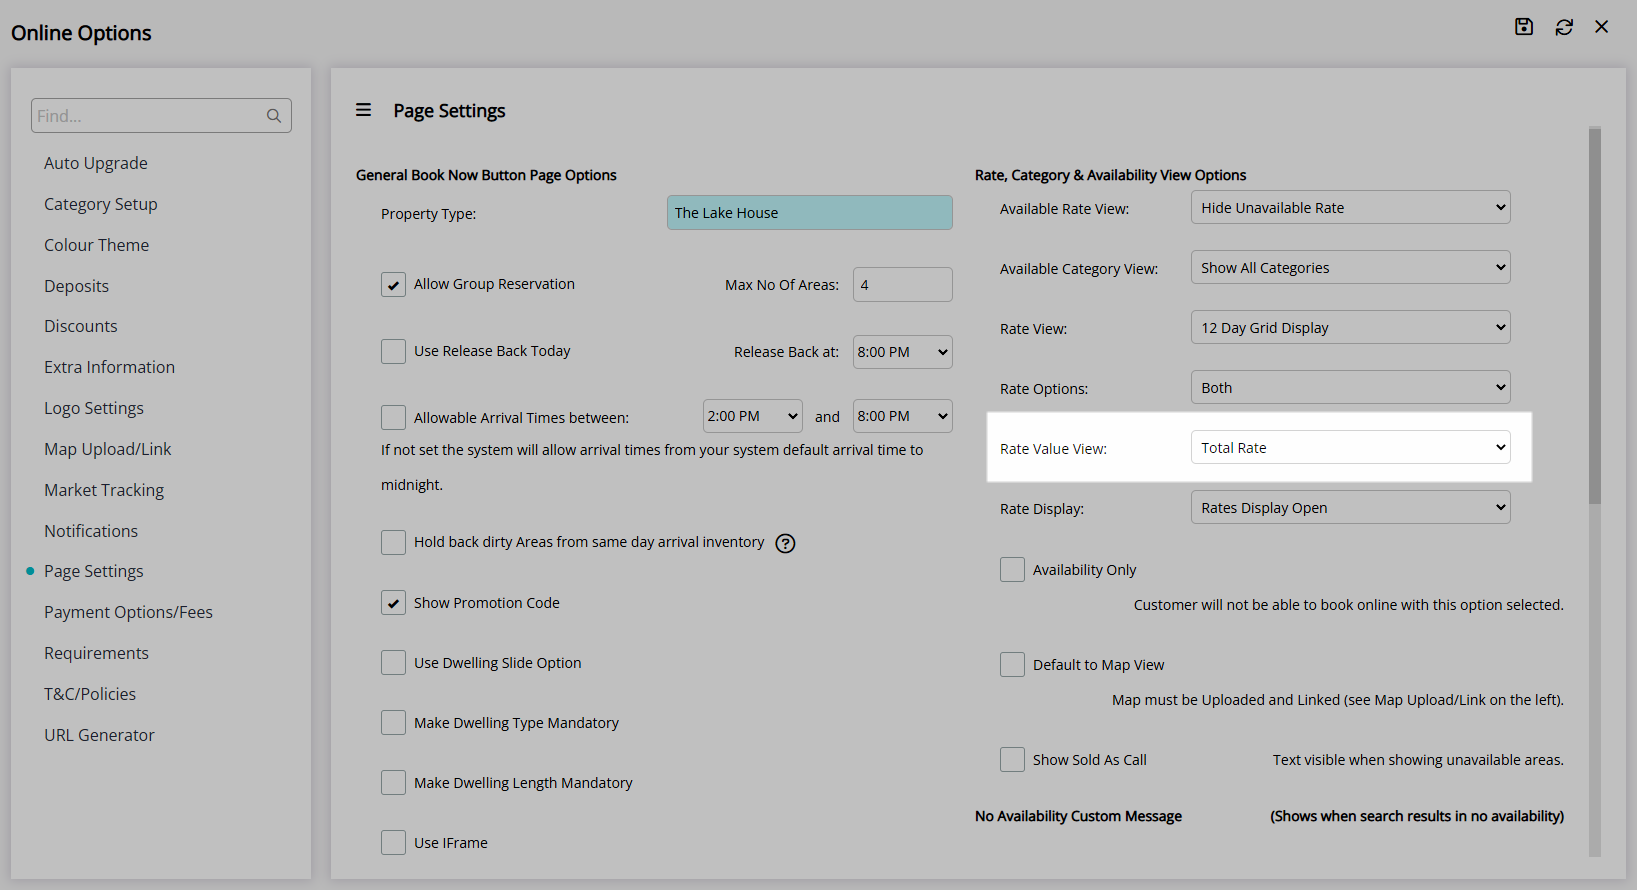
- Select the Rate Value View option.
- Select the Rate Display option.
- Optional: Select the checkbox 'Availability Only'.
- Optional: Select the checkbox 'Default to Map View'.
- Optional: Select the checkbox 'Show Sold as Call'.
- Enter a No Availability Custom Message.
-
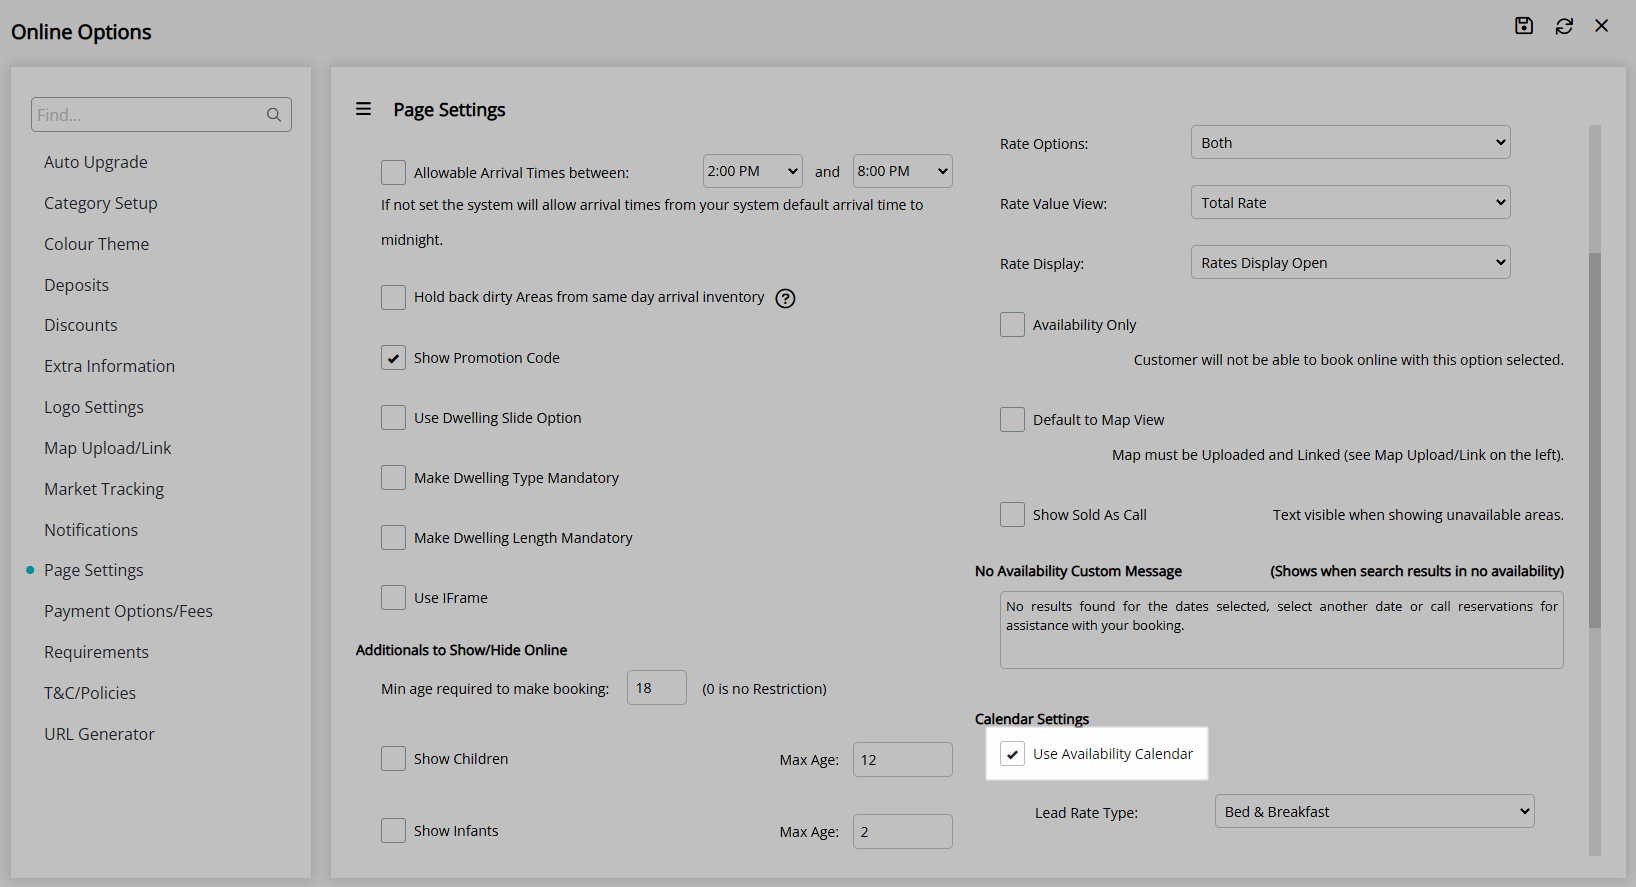
Optional: Select the checkbox 'Use Availability Calendar'.
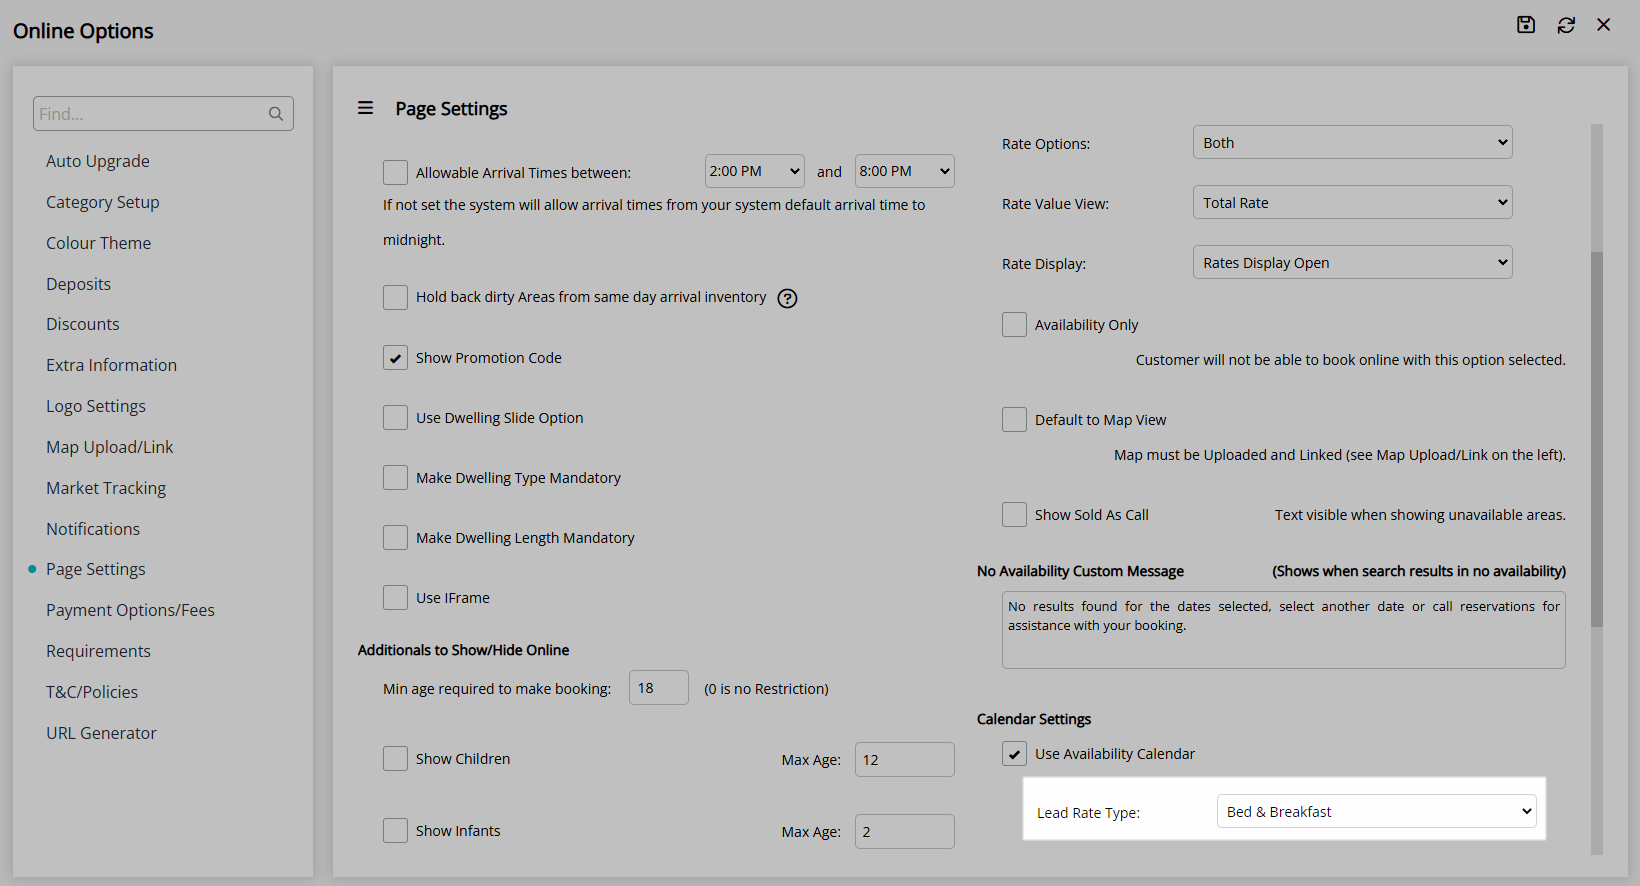
- Select a Lead Rate Type.
- Save.
- Exit.

An Interactive Map must be setup to use the Map View option on the RMS Internet Booking Engine.
Using the options 'Hide Unavailable Rate' and 'Hide Unavailable Category' includes the ability to provide Guests with a No Availability Custom Message and an Availability Calendar giving an overview of date availability or restrictions for the dates surrounding their search dates.
-
Guide
- Add Button
Guide
Go to Setup > Online Bookings > Online Options in the Side Menu of RMS.

Navigate to the 'Page Settings' tab.
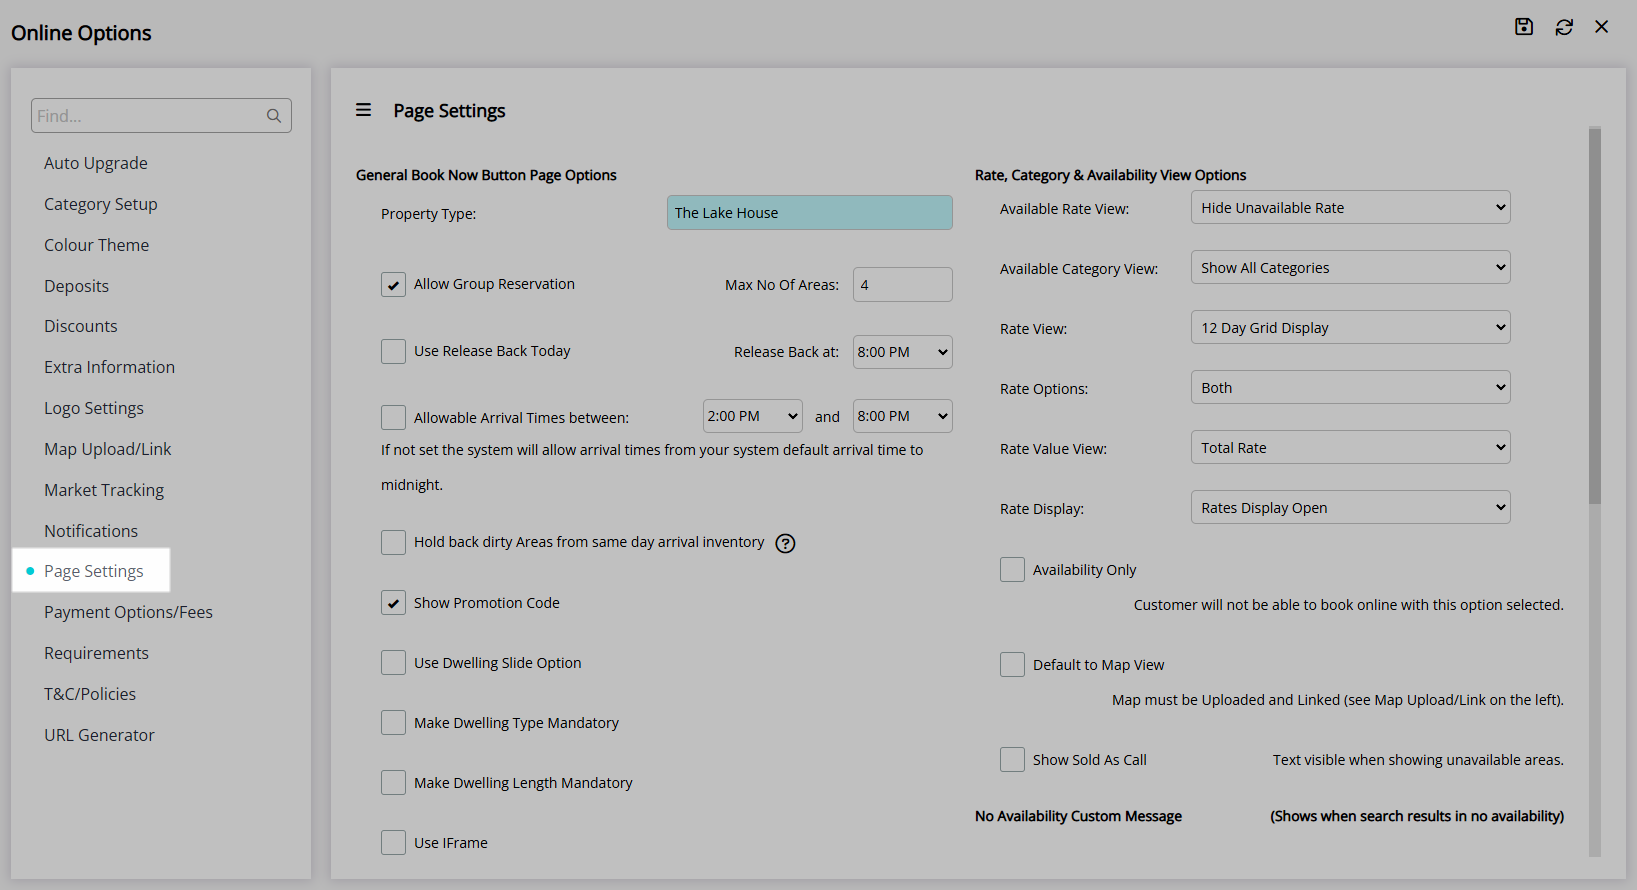
Select the Available Rate View option.
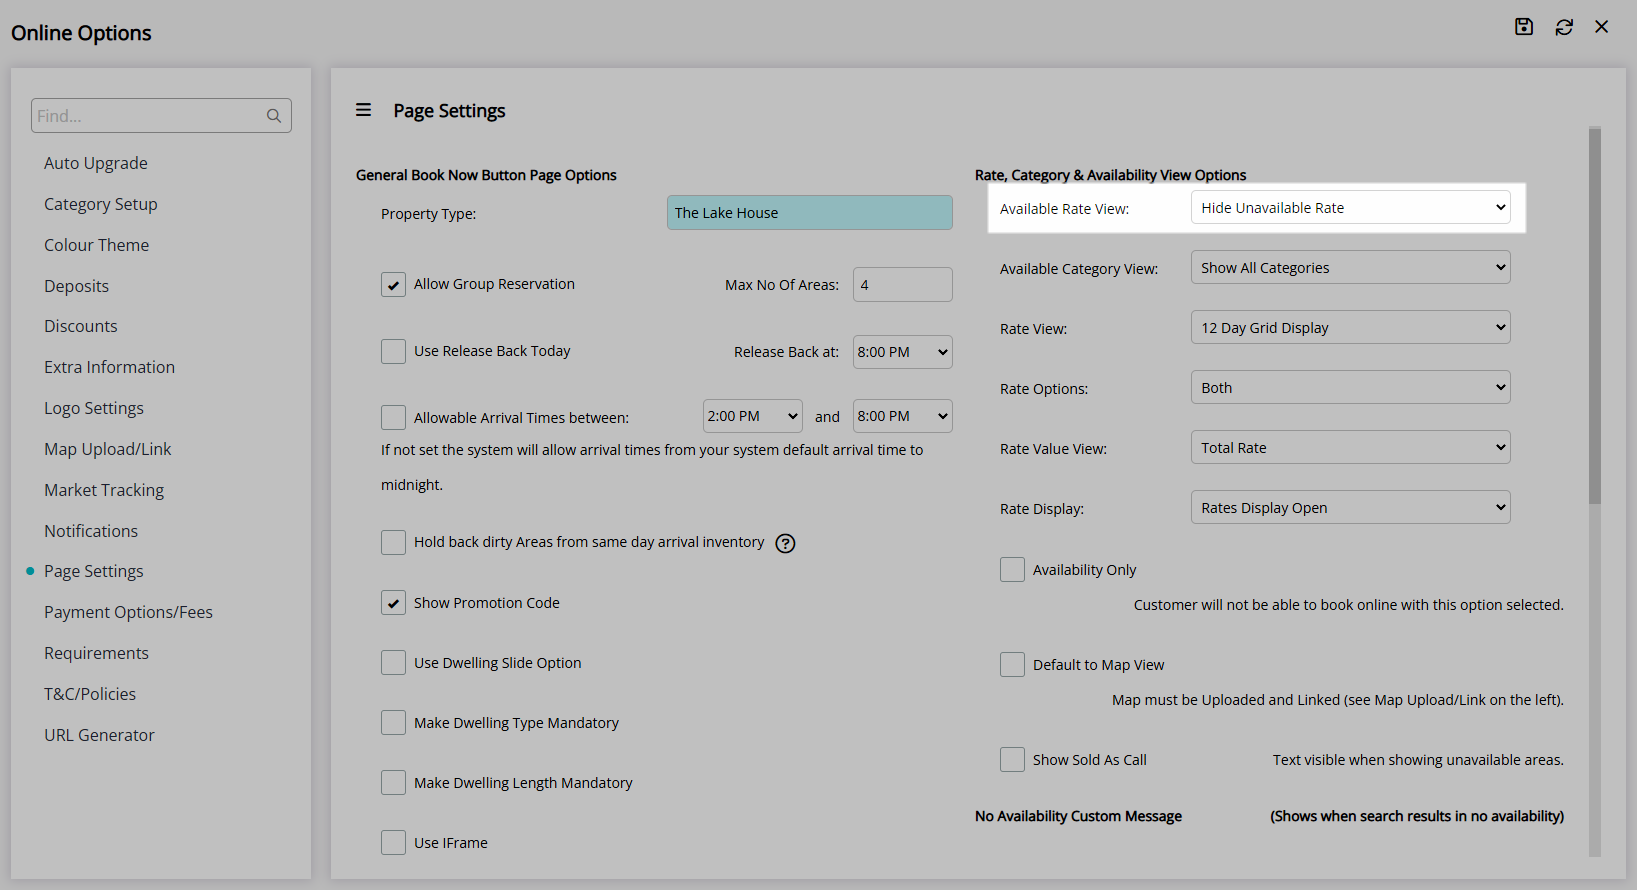
Select the Available Category View option.
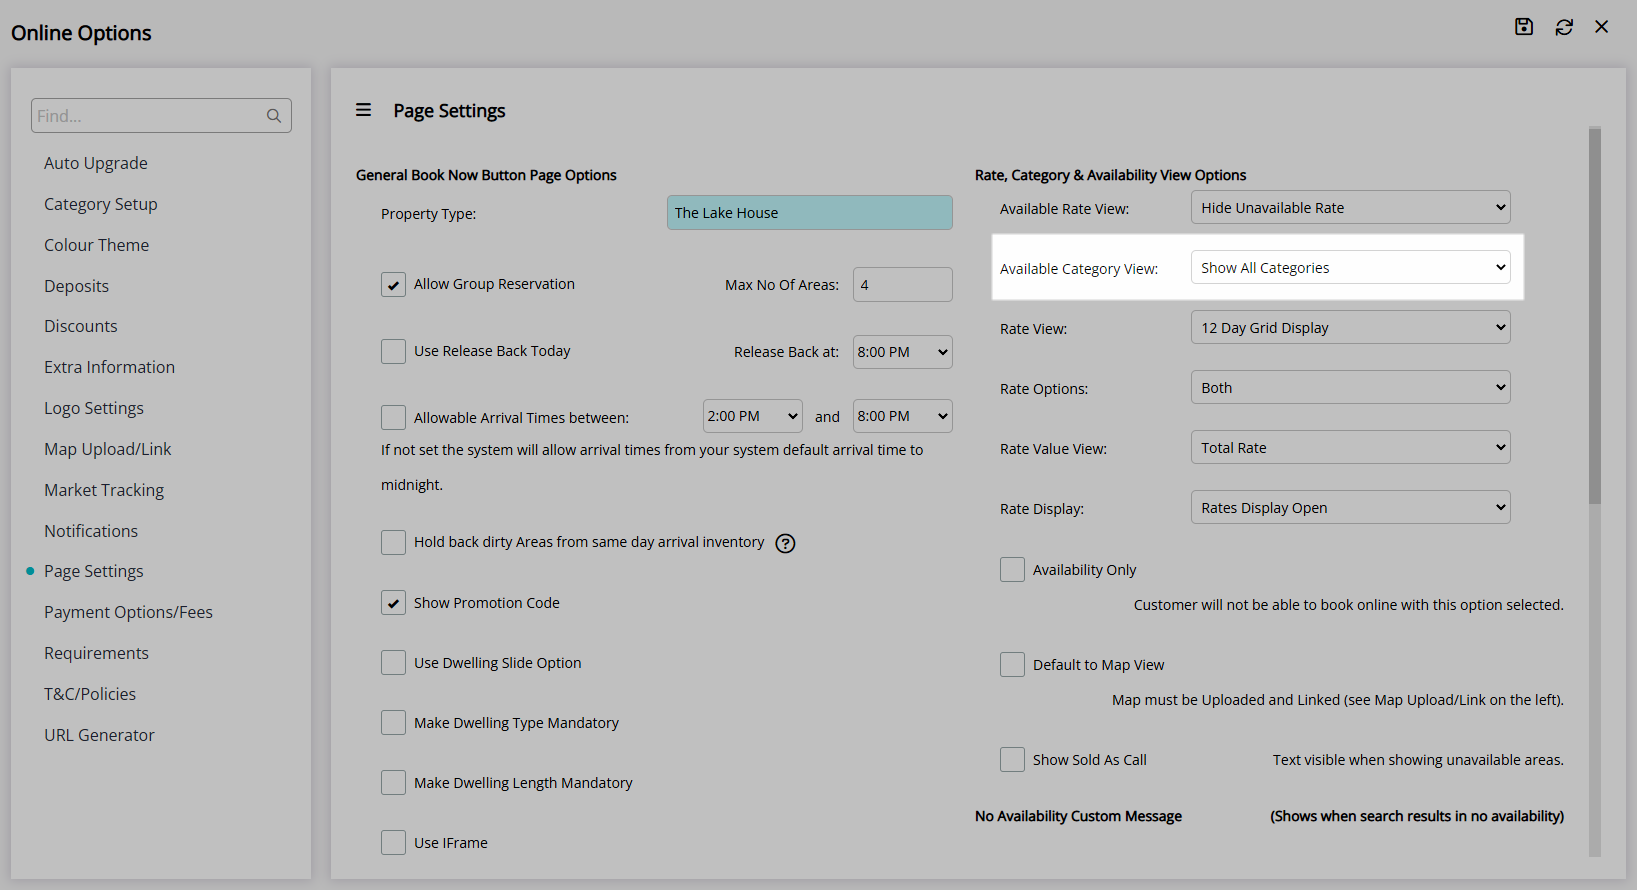
Select the Rate View option.

Grid Display: Select the Rate Options.
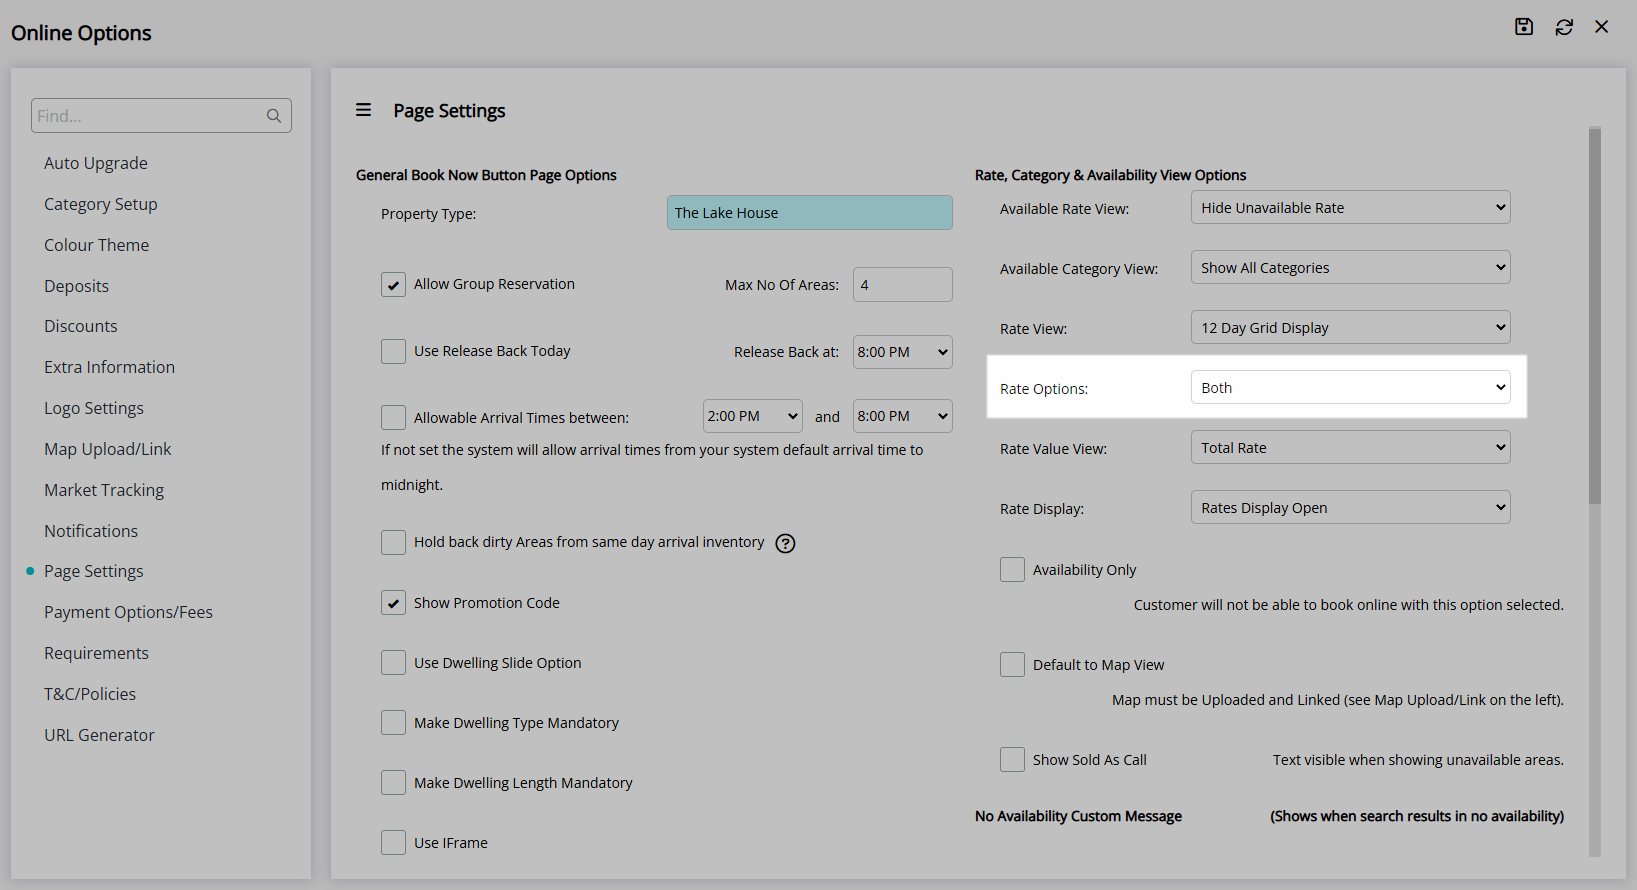
Select the Rate Value View option.
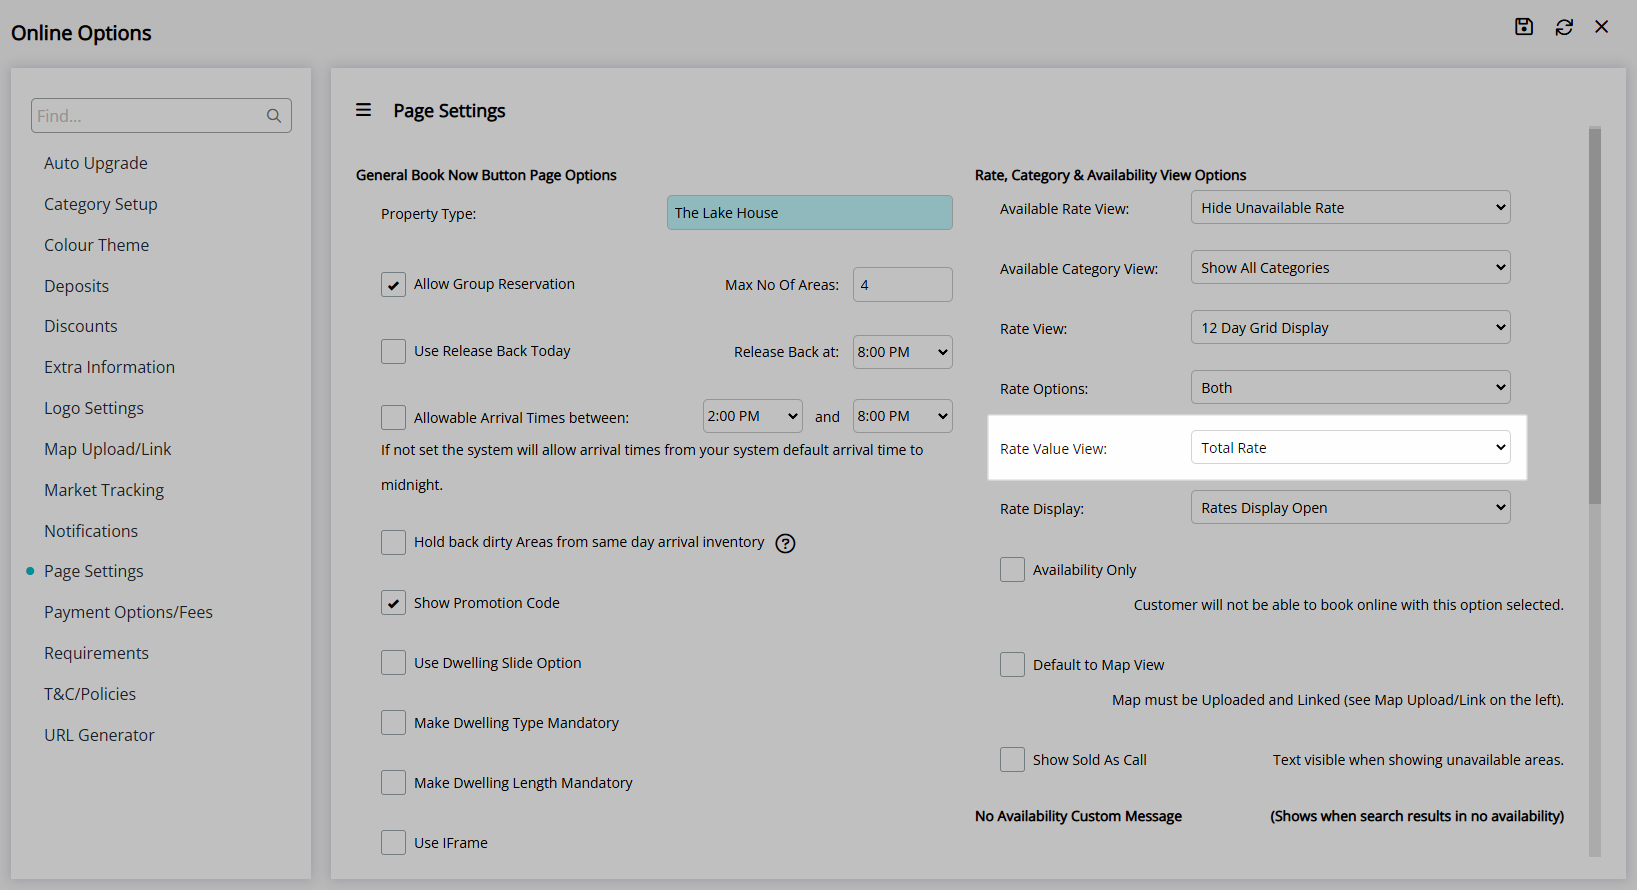
Select the Rate Display option.
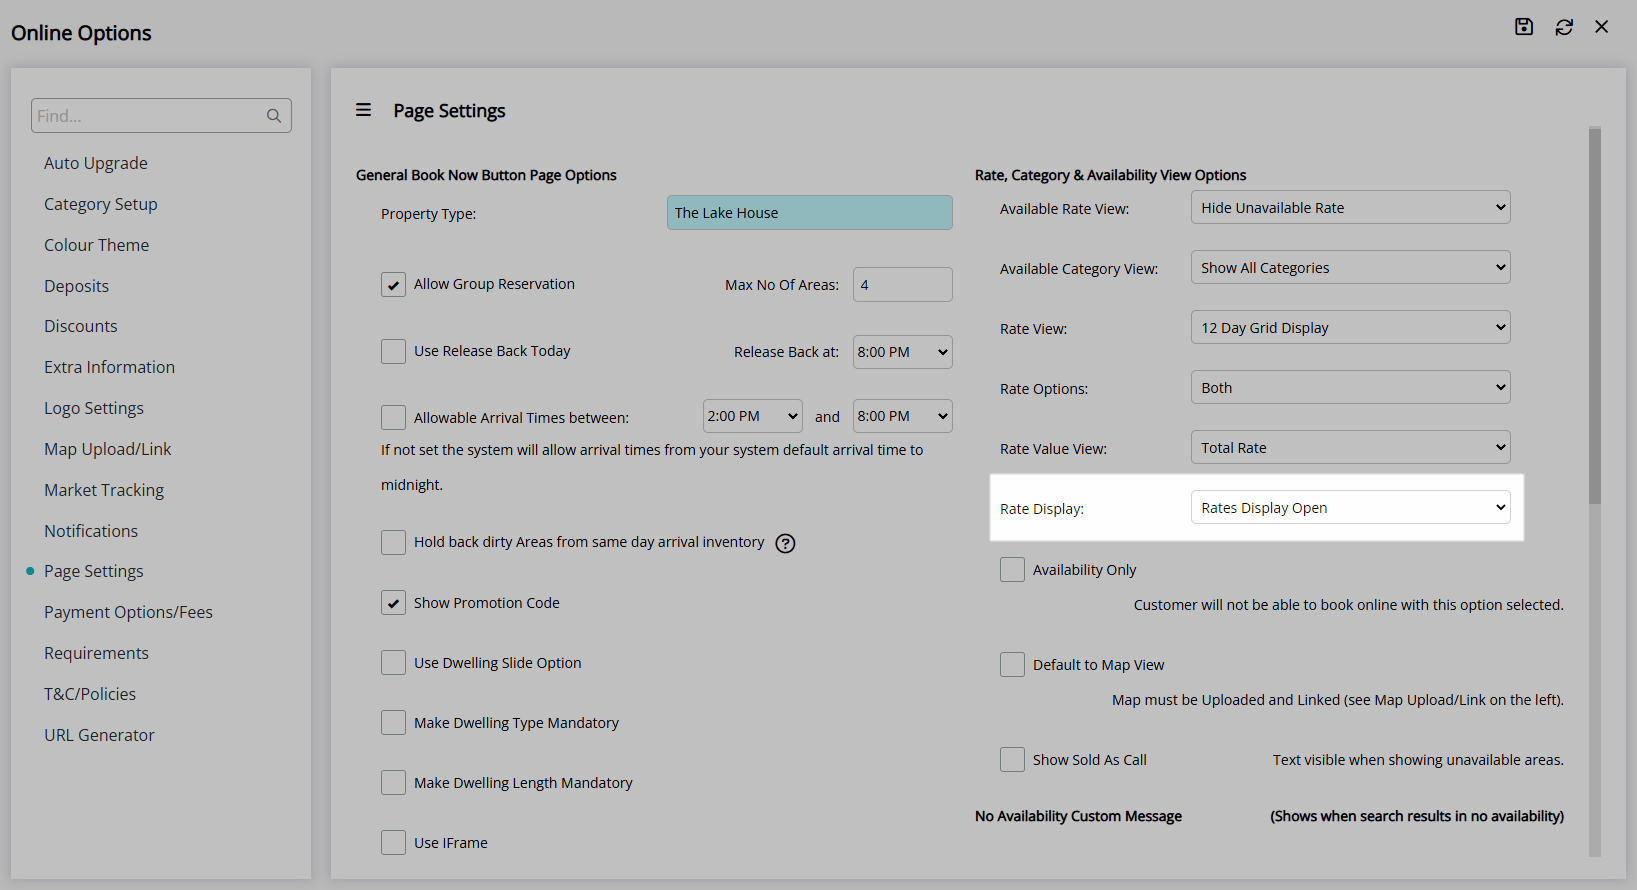
Optional: Select the checkbox 'Availability Only'.
Optional: Select the checkbox 'Default to Map View'.
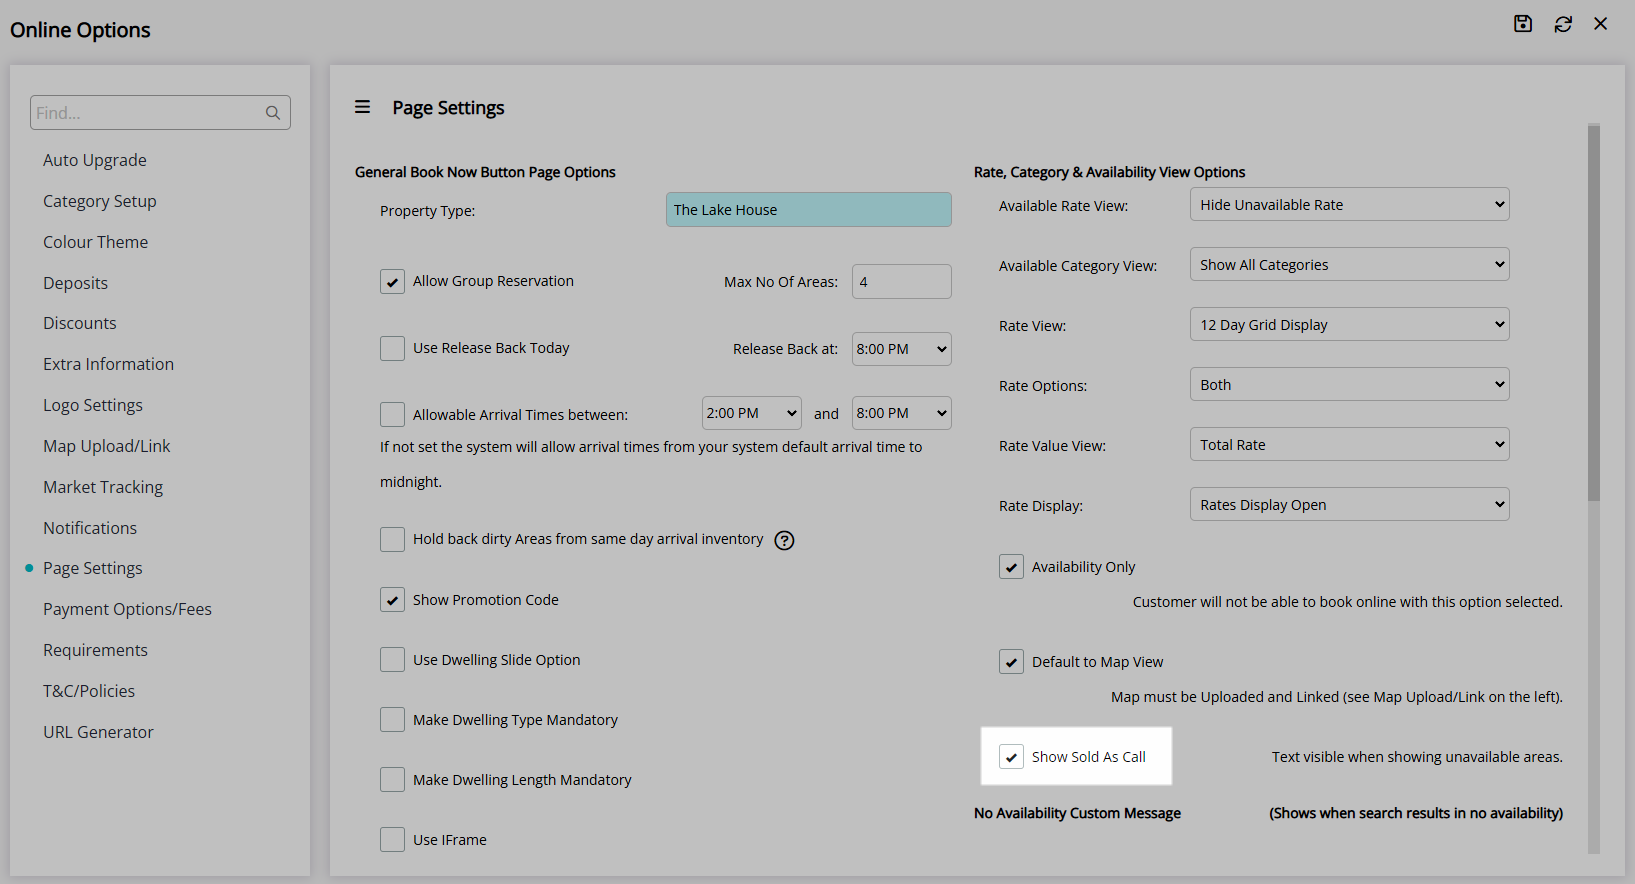
Optional: Select the checkbox 'Show Sold as Call'.
Enter a No Availability Custom Message.
Optional: Select the checkbox 'Use Availability Calendar'.
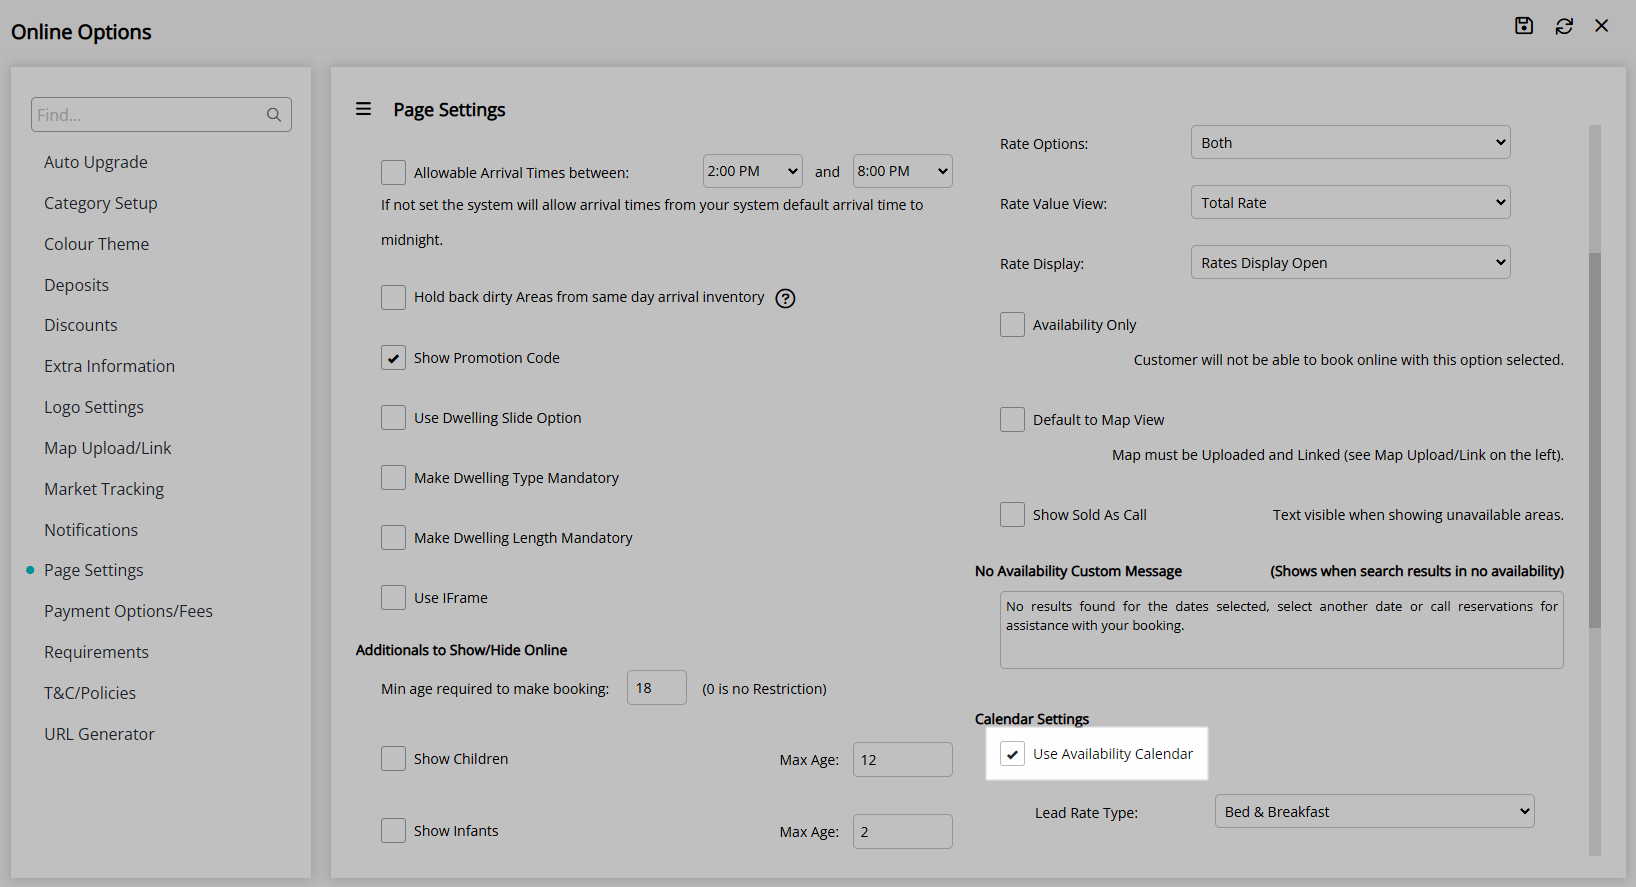
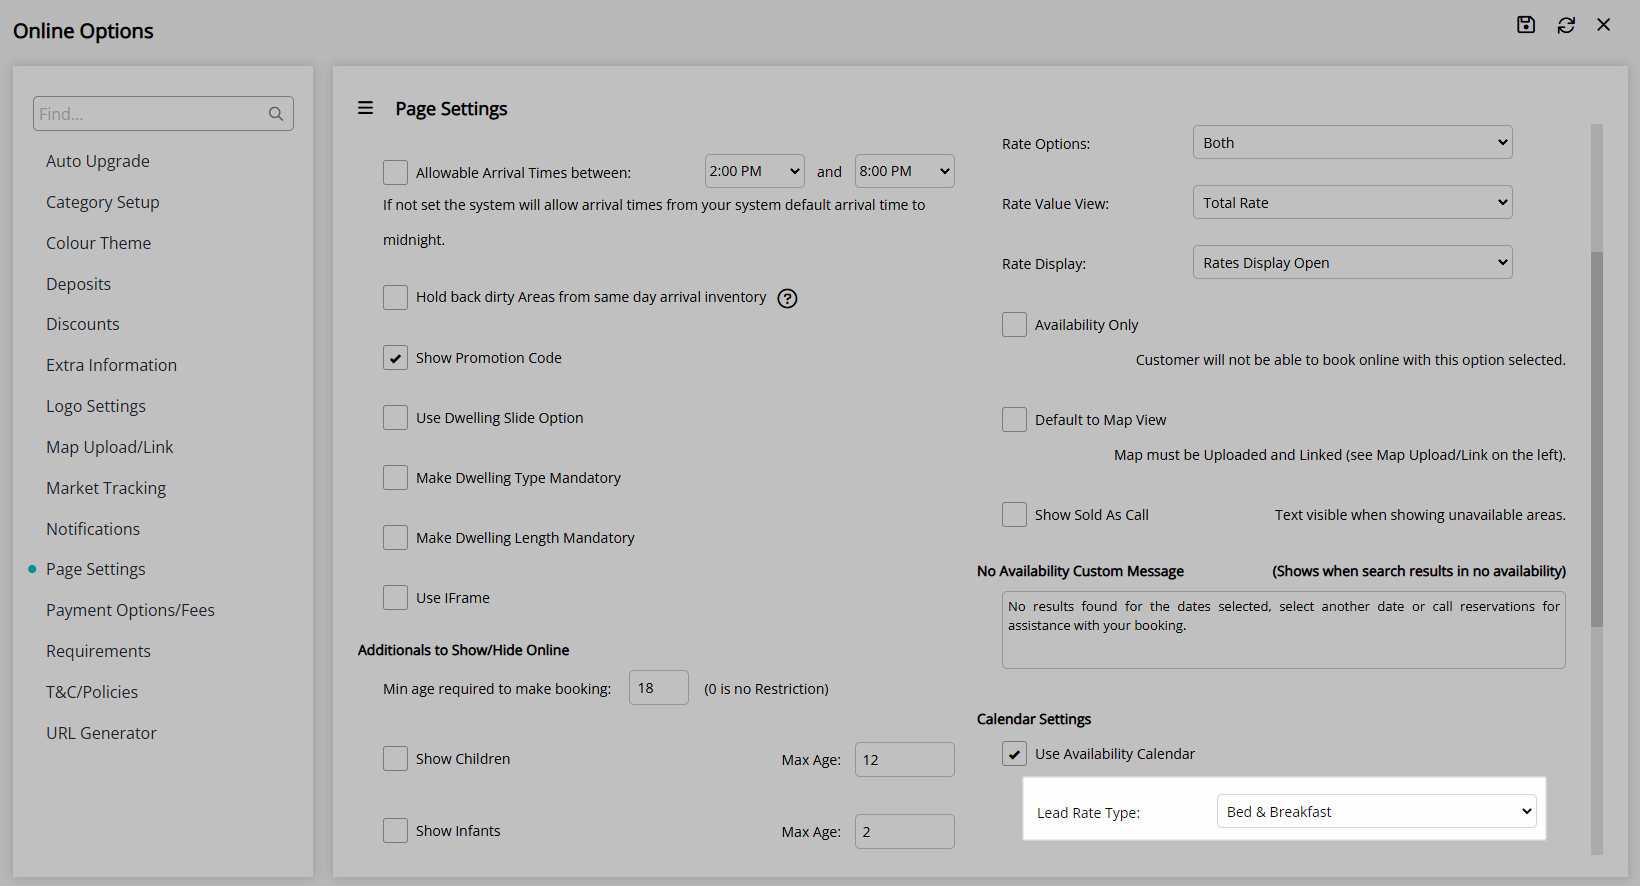
Select a Lead Rate Type.
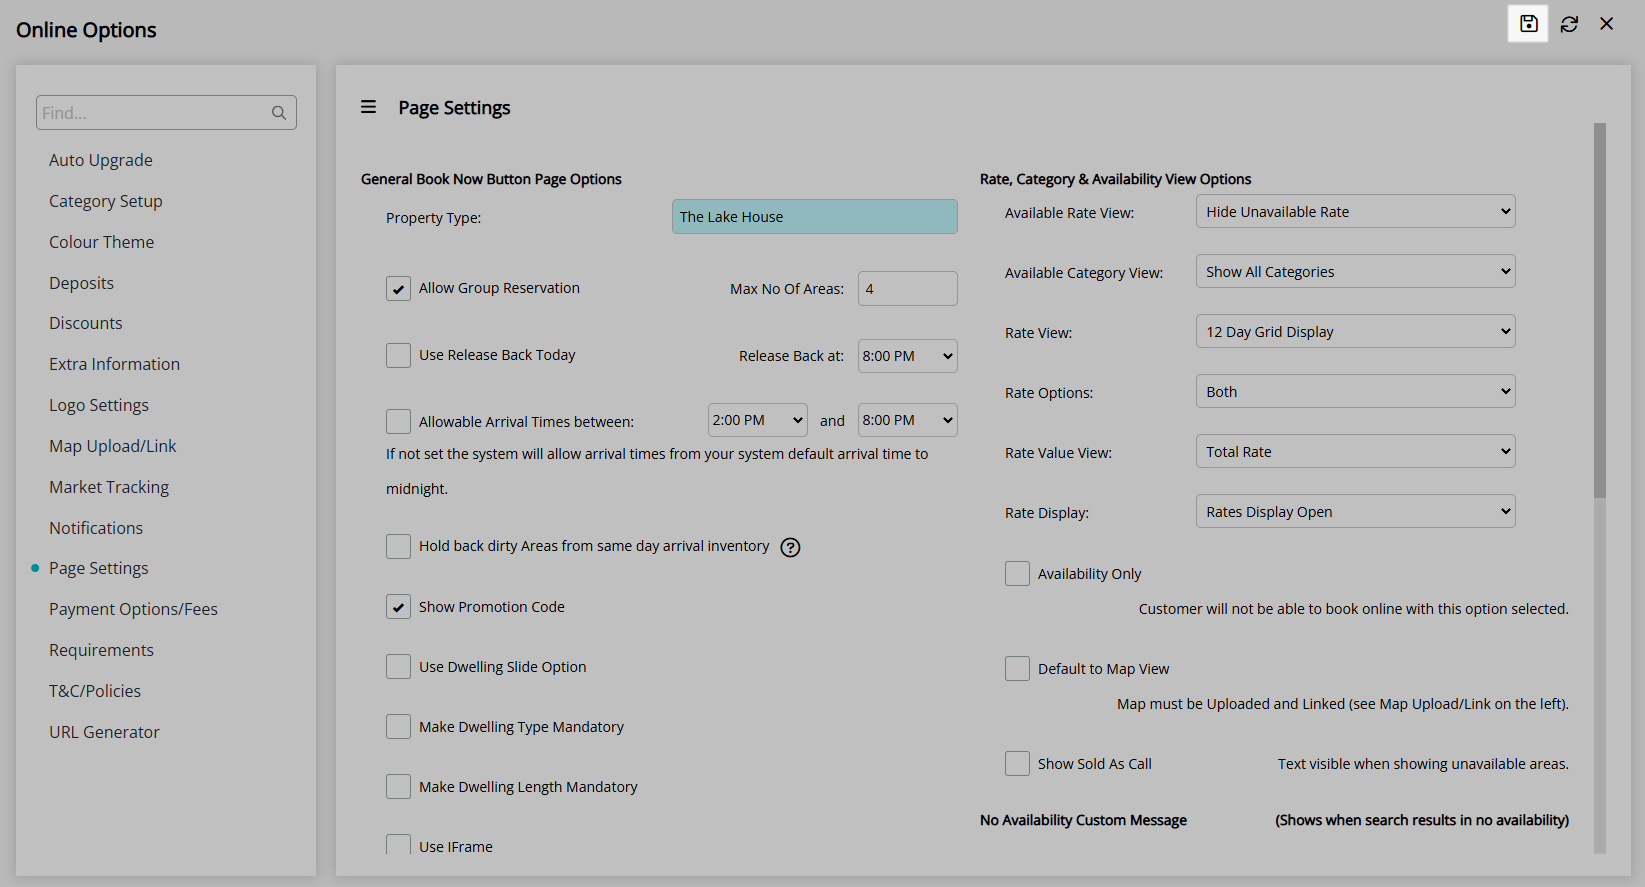
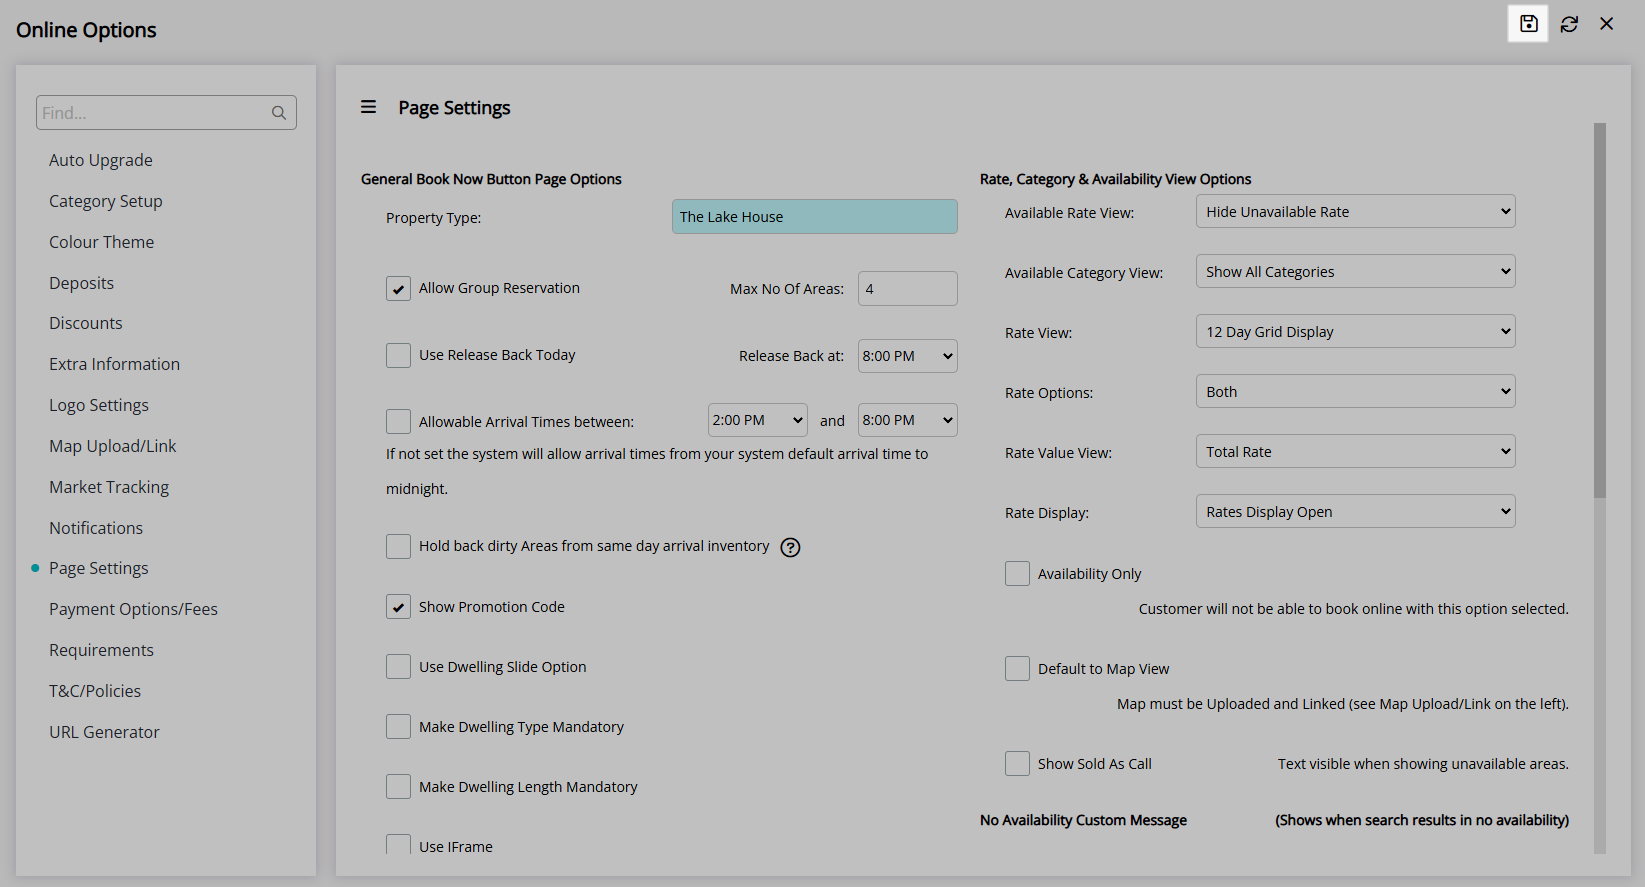
Select the  'Save' icon to store the changes made.
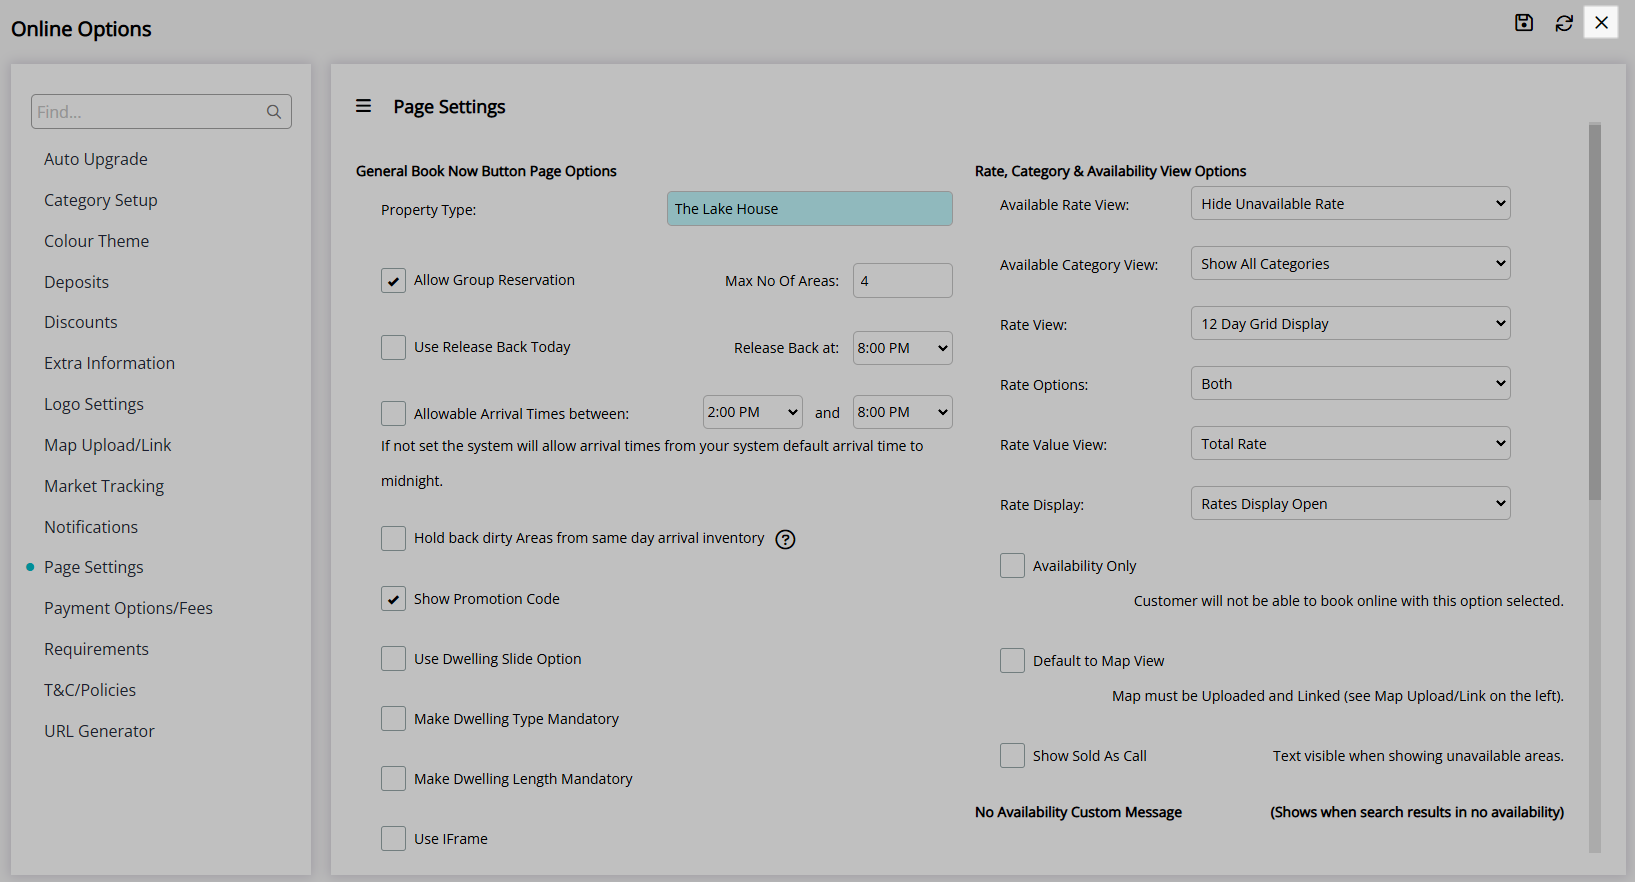
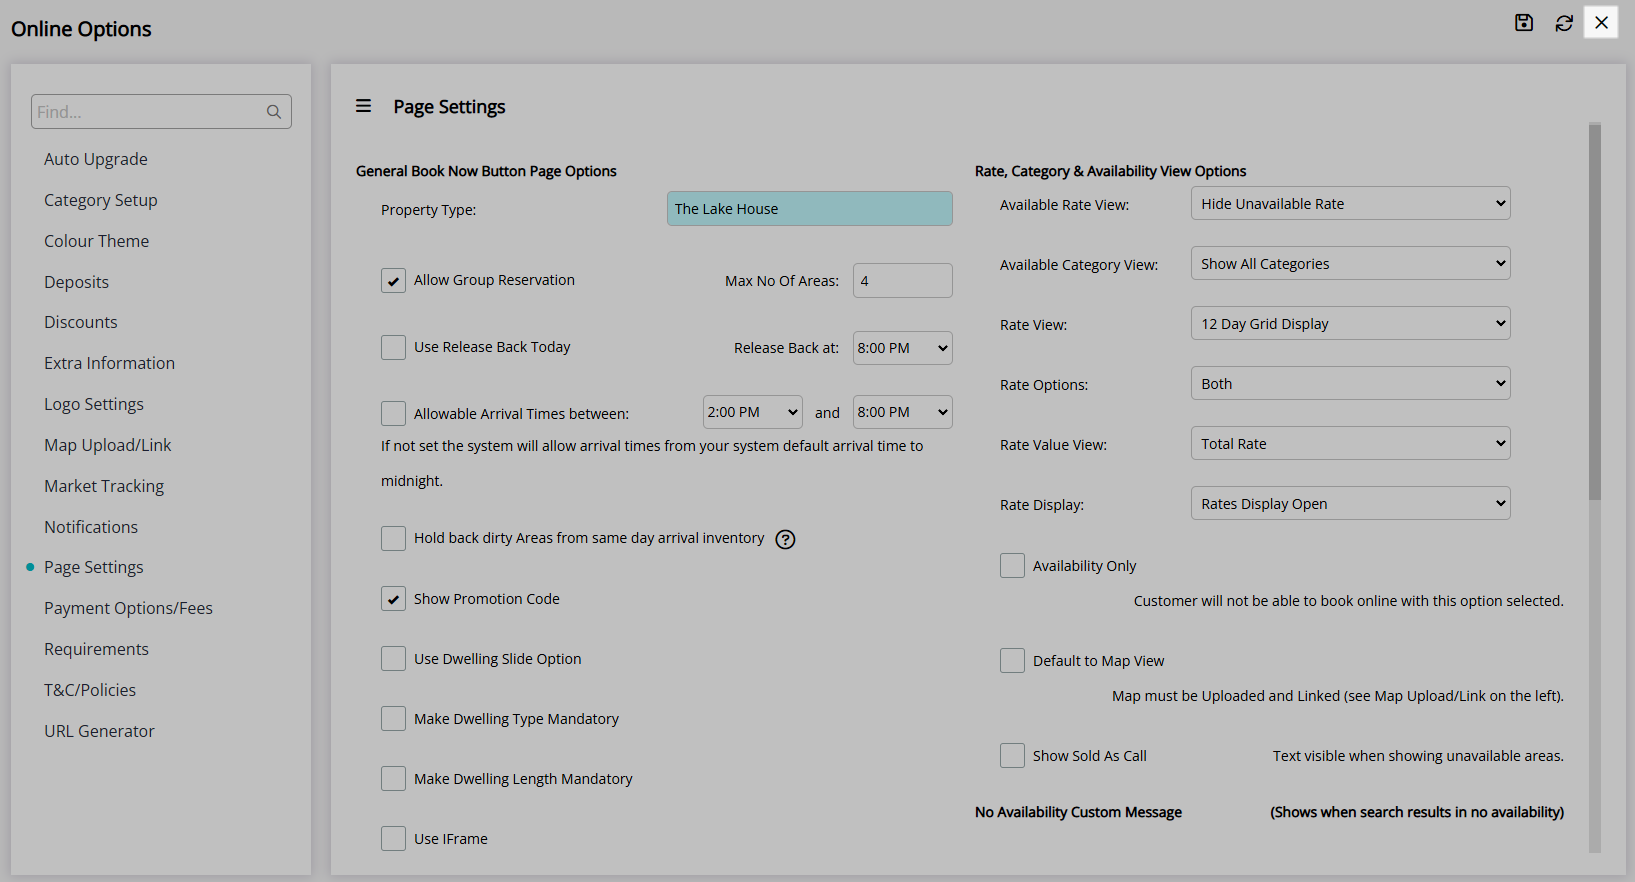
Select the  'Exit icon' to leave the setup.
The selected options will be used by the RMS Internet Booking Engine on the search results page.
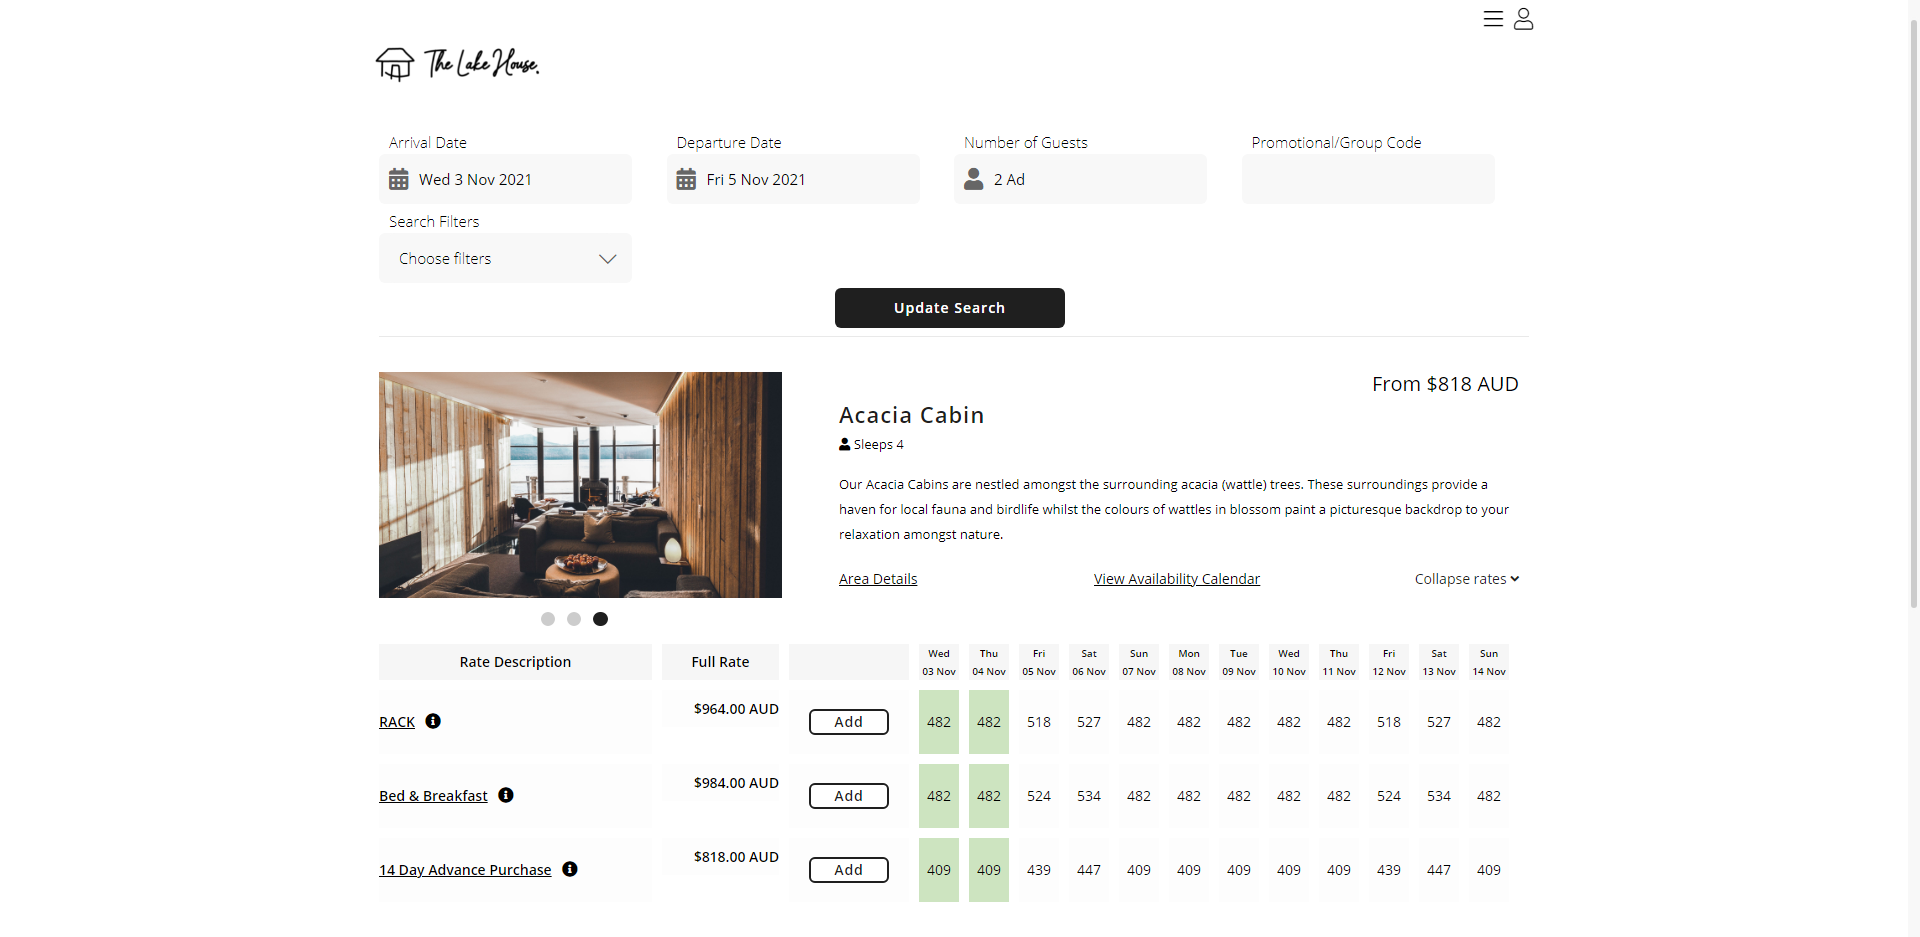
Setup
Have your System Administrator complete the following.
- Go to Setup > Online Bookings > Online Options in the Side Menu of RMS.
- Navigate to the 'Page Settings' tab.
- Select the Available Rate View option.
- Select the Available Category View option.
- Select the Rate View option.
- Grid Display: Select the Rate Options.
- Select the Rate Value View option.
- Select the Rate Display option.
- Optional: Select the checkbox 'Availability Only'.
- Optional: Select the checkbox 'Default to Map View'.
- Optional: Select the checkbox 'Show Sold as Call'.
- Enter a No Availability Custom Message.
-
Optional: Select the checkbox 'Use Availability Calendar'.
- Select a Lead Rate Type.
- Save.
- Exit.

An Interactive Map must be setup to use the Map View option on the RMS Internet Booking Engine.
Using the options 'Hide Unavailable Rate' and 'Hide Unavailable Category' includes the ability to provide guests with a No Availability Custom Message and an Availability Calendar giving an overview of date availability or restrictions for the dates surrounding their search dates.
-
Guide
- Add Button
Guide
Go to Setup > Online Bookings > Online Options in RMS.

Navigate to the 'Page Settings' tab.
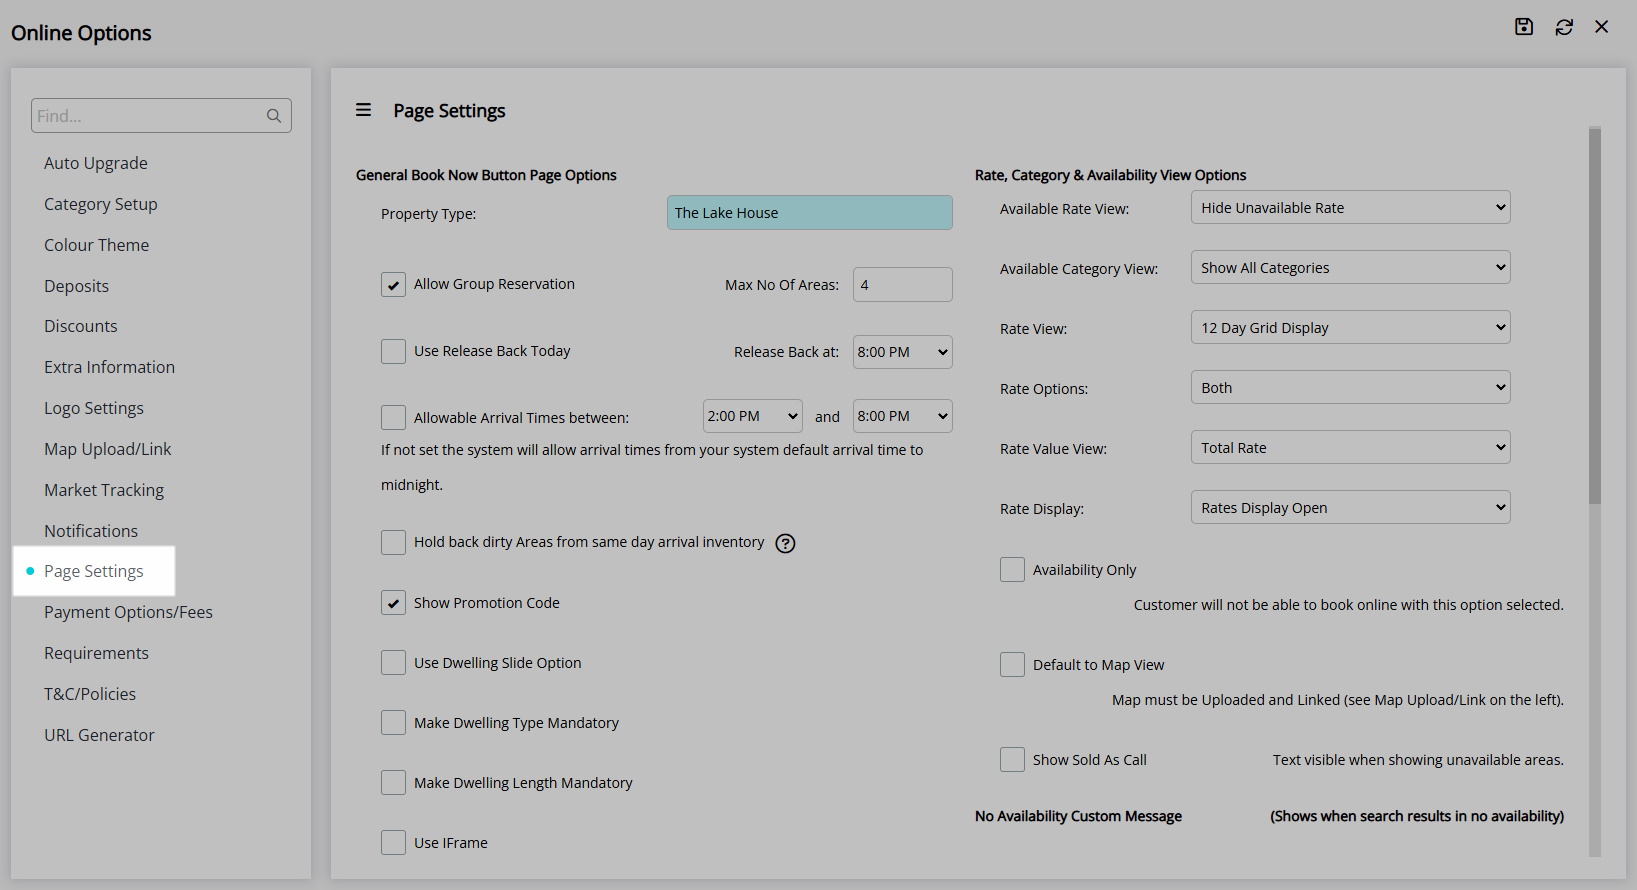
Select the Available Rate View option.
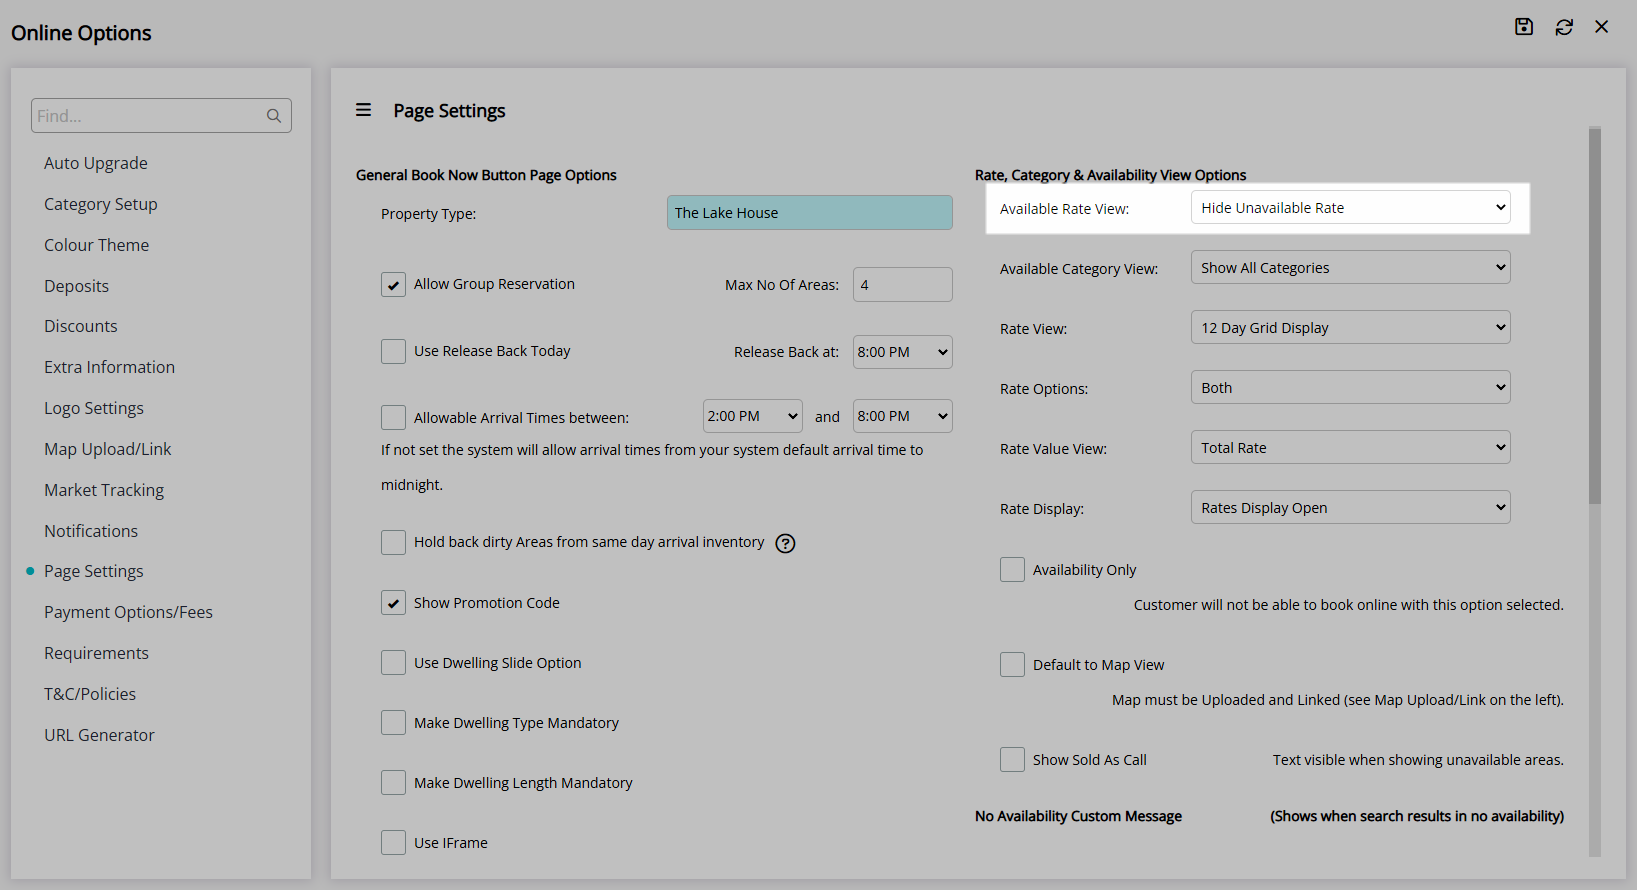
Select the Available Category View option.
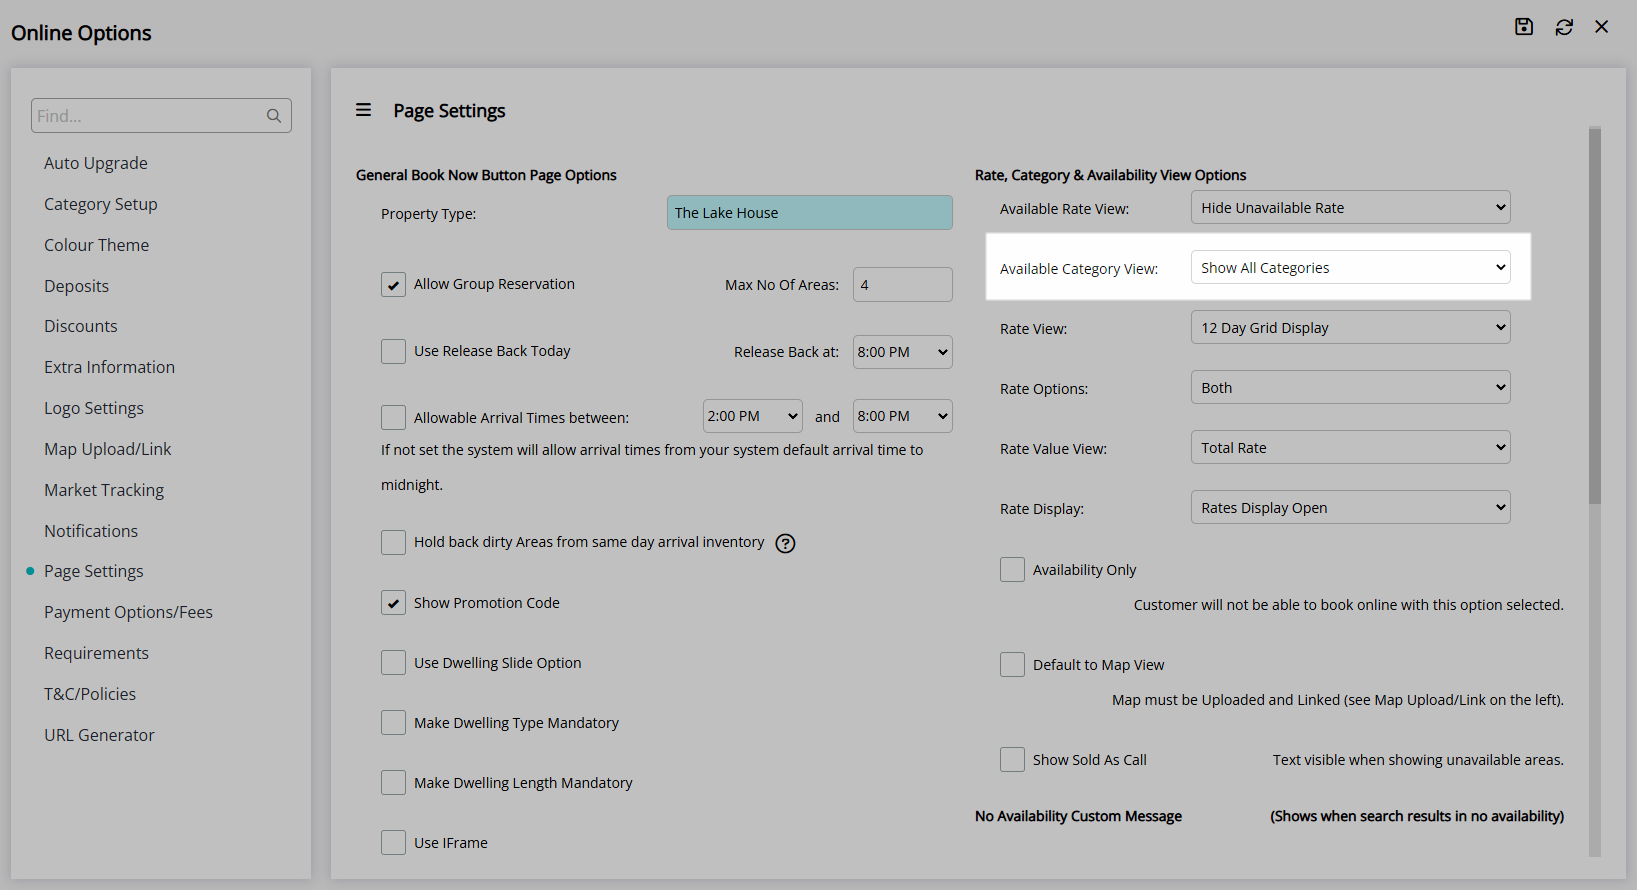
Select the Rate View option.
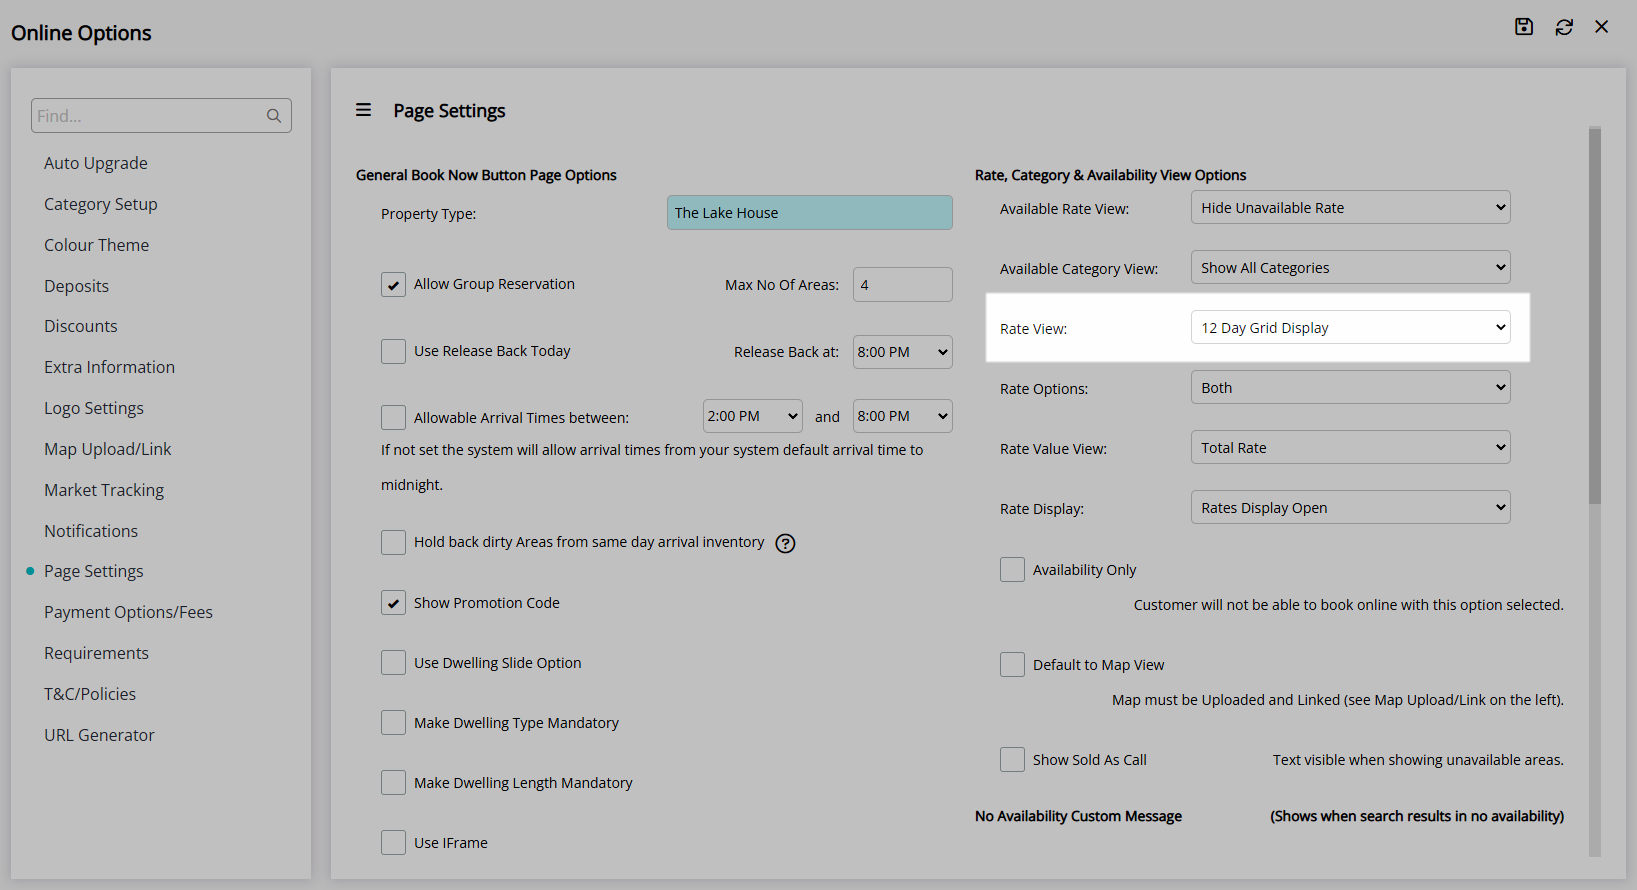
Grid Display: Select the Rate Options.
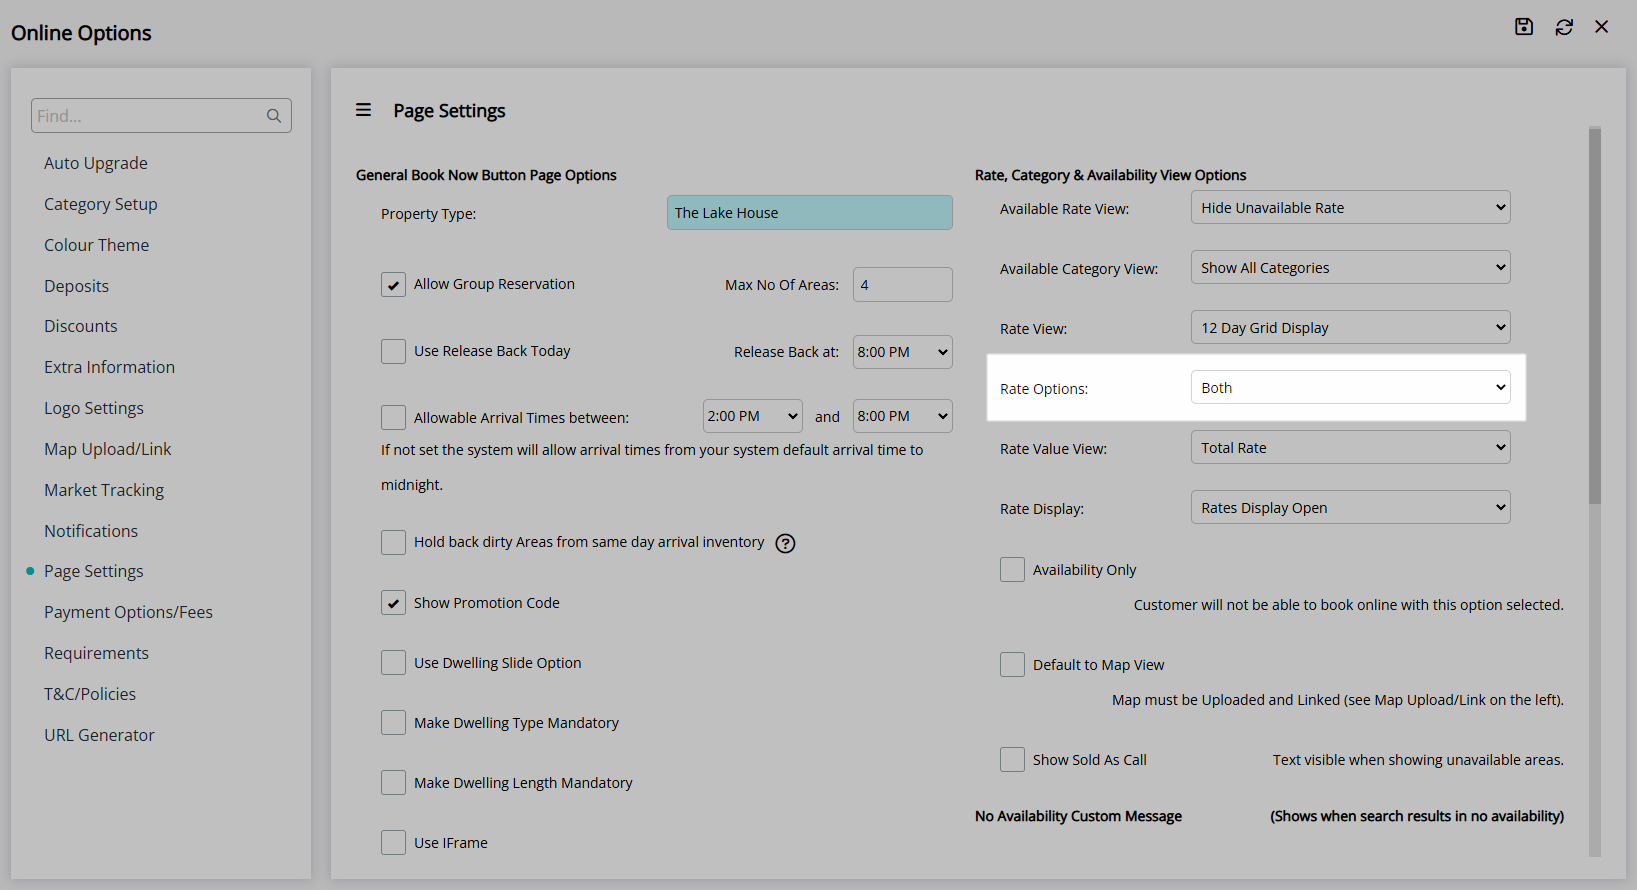
Select the Rate Value View option.
Select the Rate Display option.
Optional: Select the checkbox 'Availability Only'.
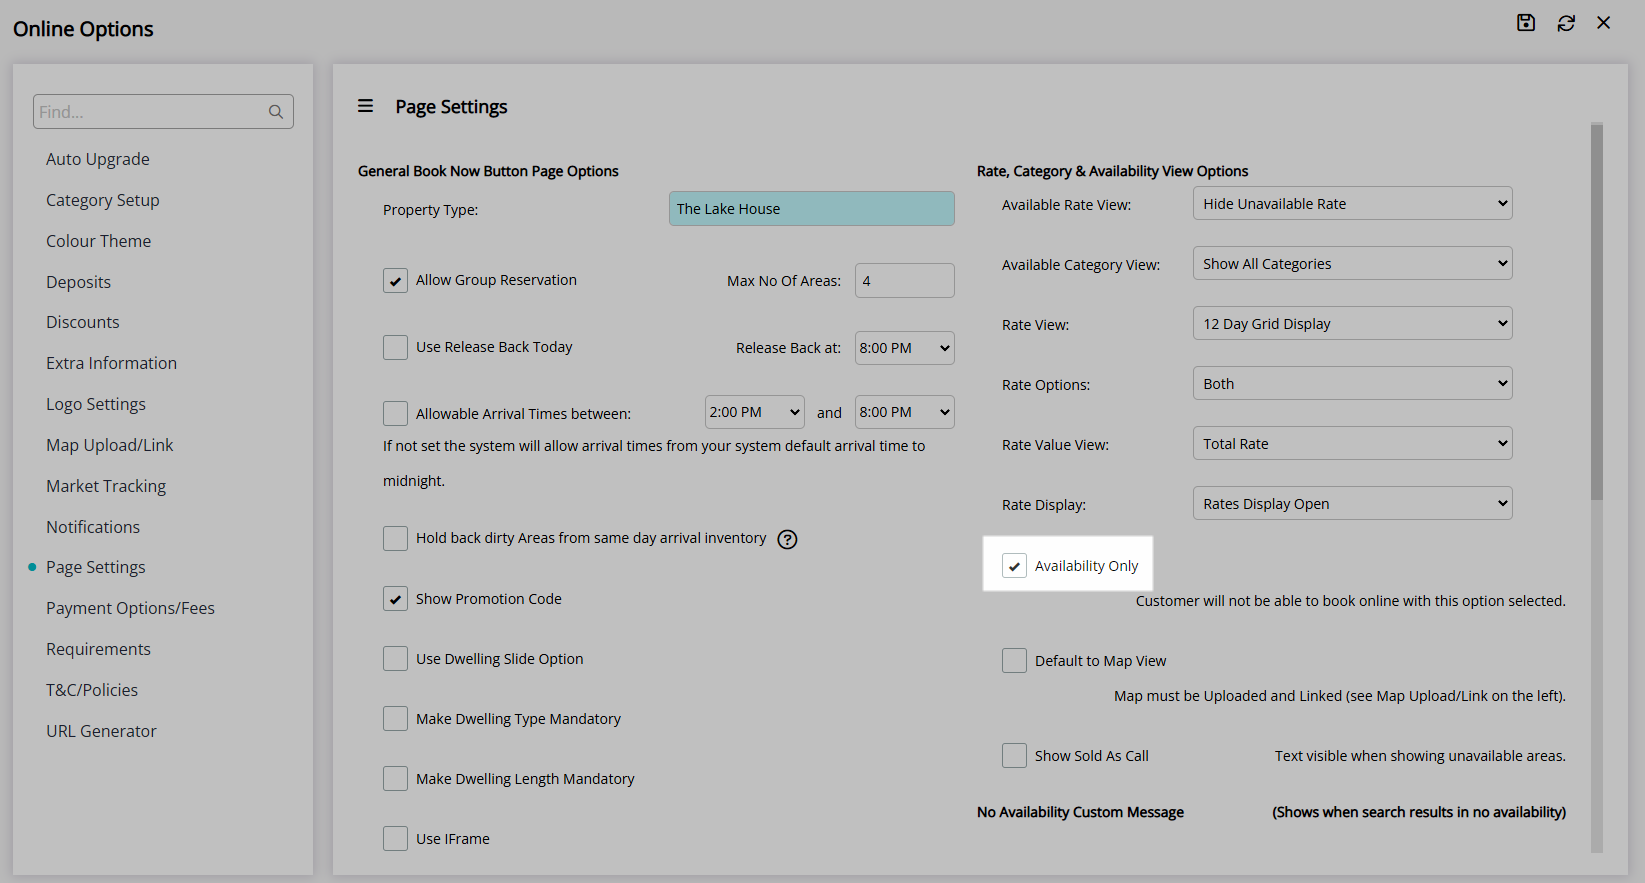
Optional: Select the checkbox 'Default to Map View'.
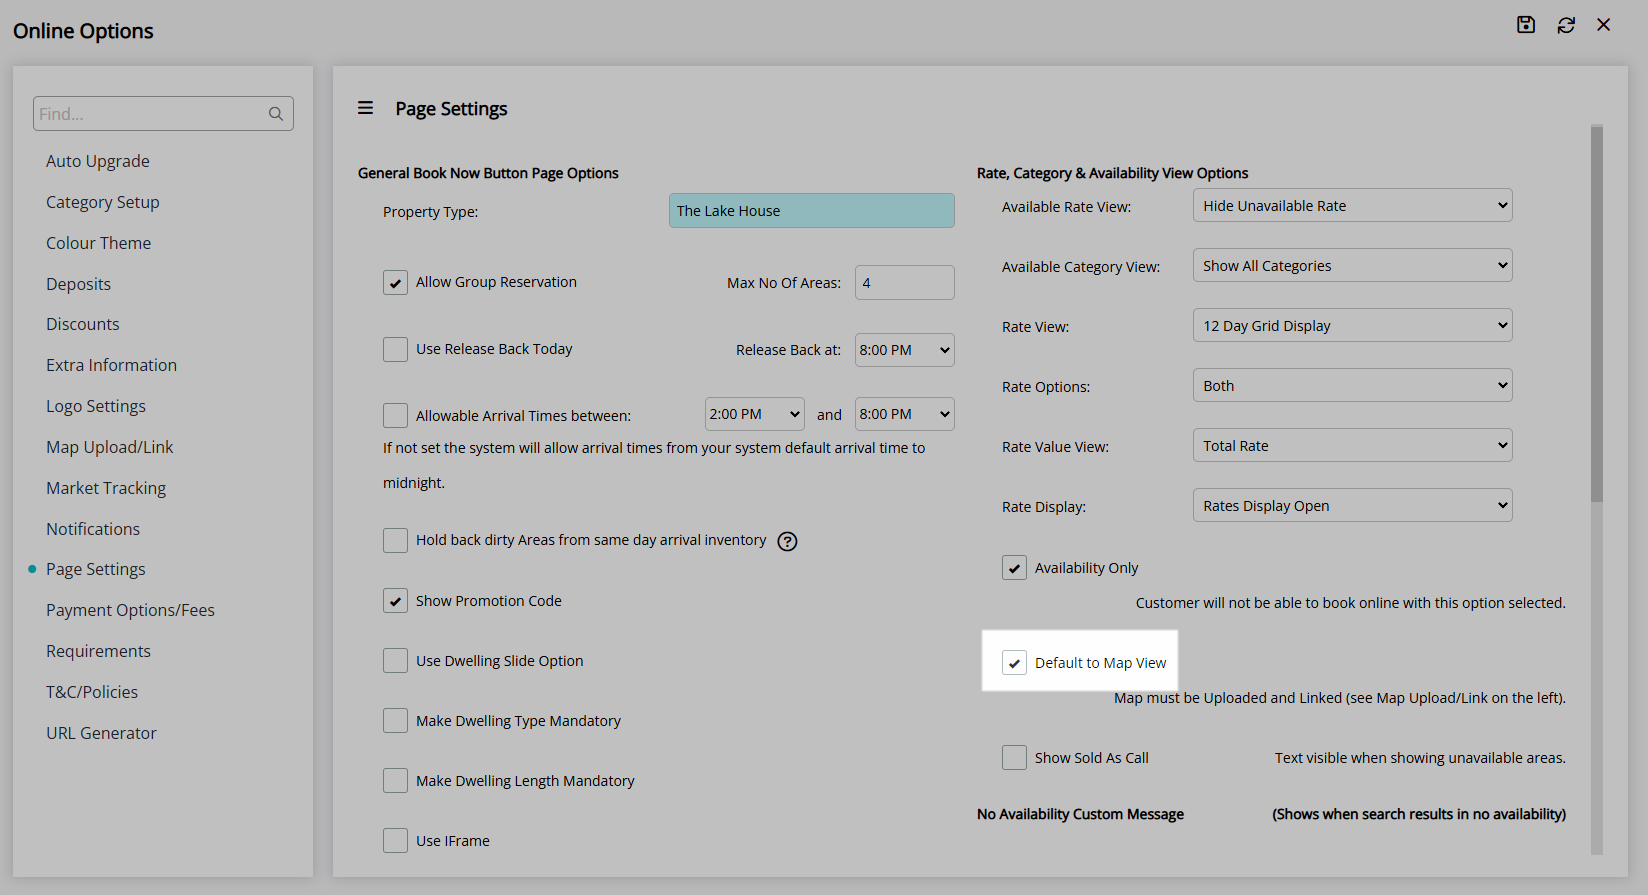
Optional: Select the checkbox 'Show Sold as Call'.
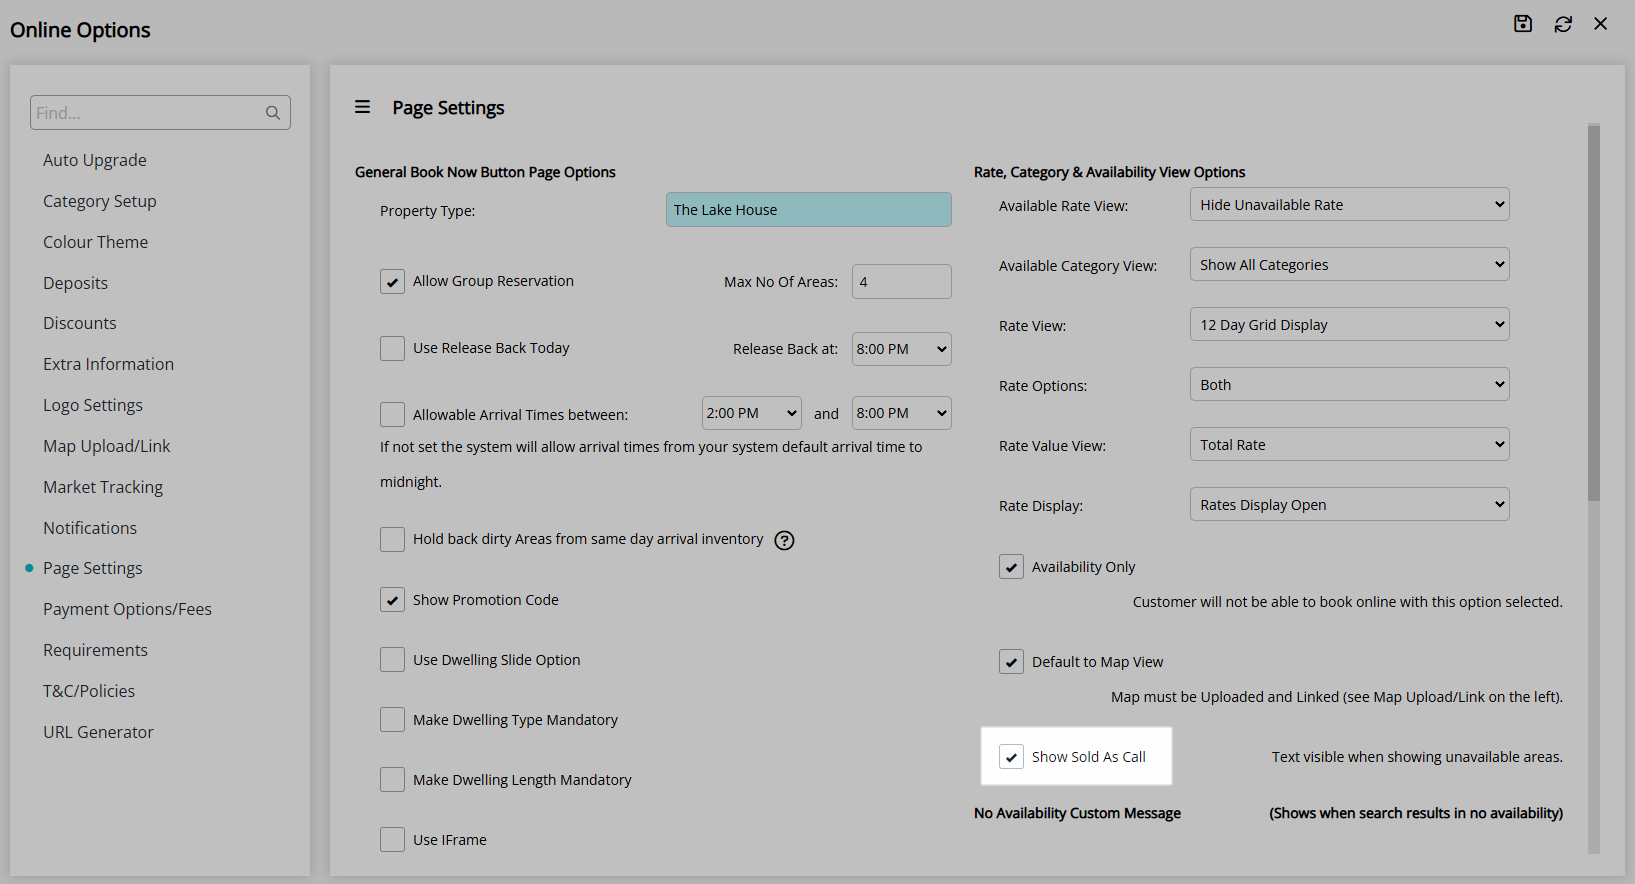
Enter a No Availability Custom Message.
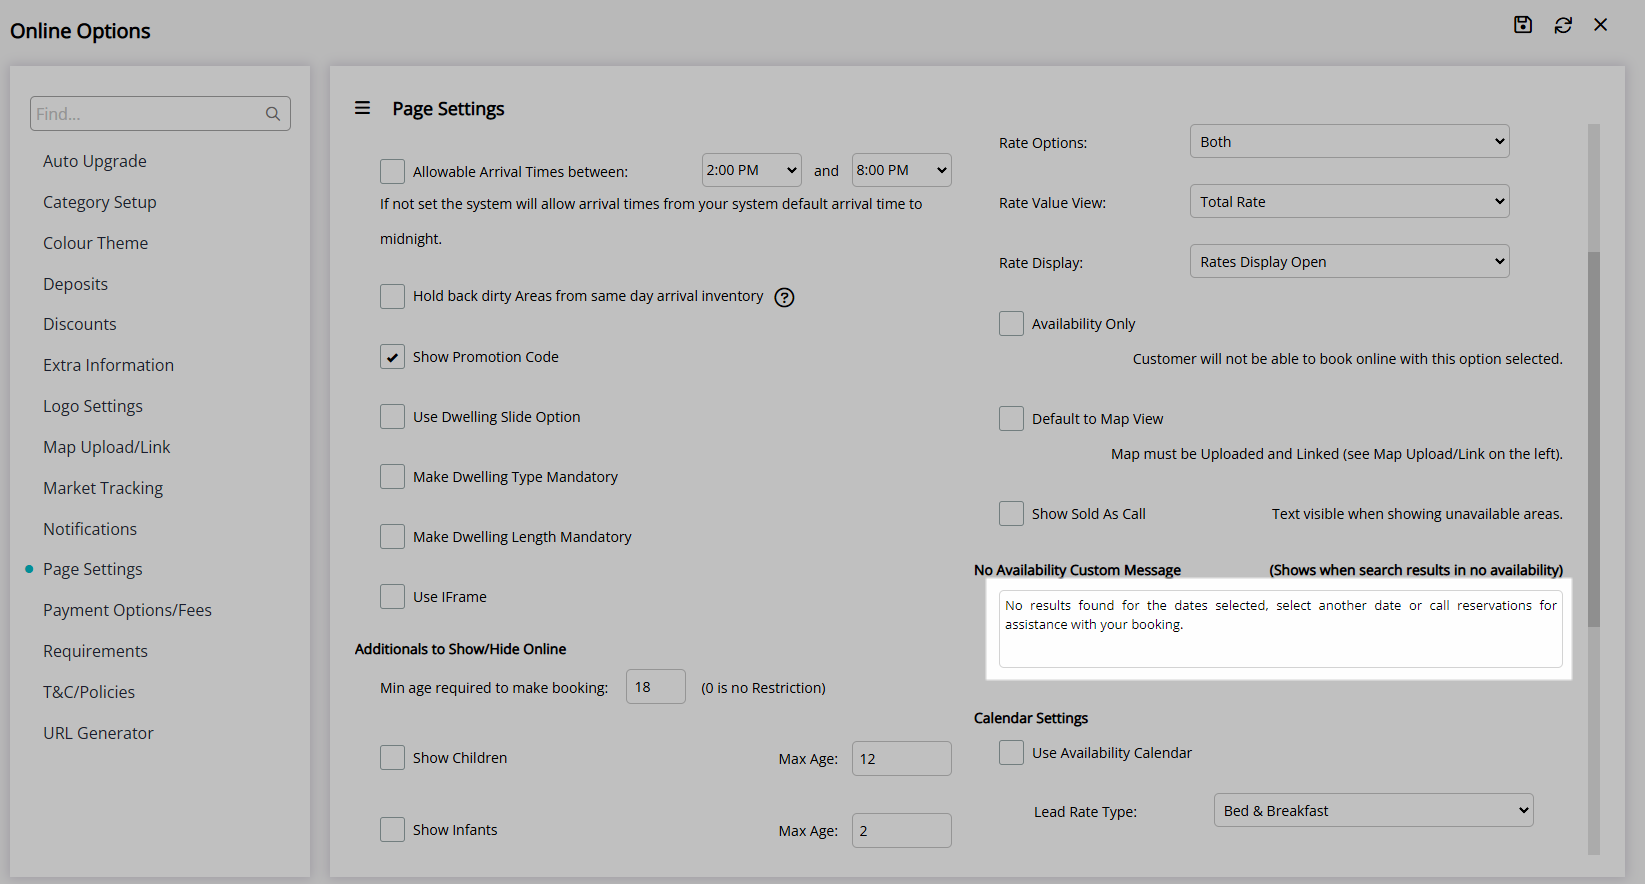
Optional: Select the checkbox 'Use Availability Calendar'.
Select a Lead Rate Type.
Select the  'Save' icon to store the changes made.
Select the  'Exit icon' to leave the setup.
The selected options will be used by the RMS Internet Booking Engine on the search results page.
