BridgePay (BridgeComm)
Setup BridgePay (BridgeComm) for eCommerce payments in RMS.
Steps Required
Have your System Administrator complete the following.
- Go to Setup > Property Options > Property Information in RMS.
- Select a Property and choose 'Edit'.
- Navigate to the 'Gateway' tab.
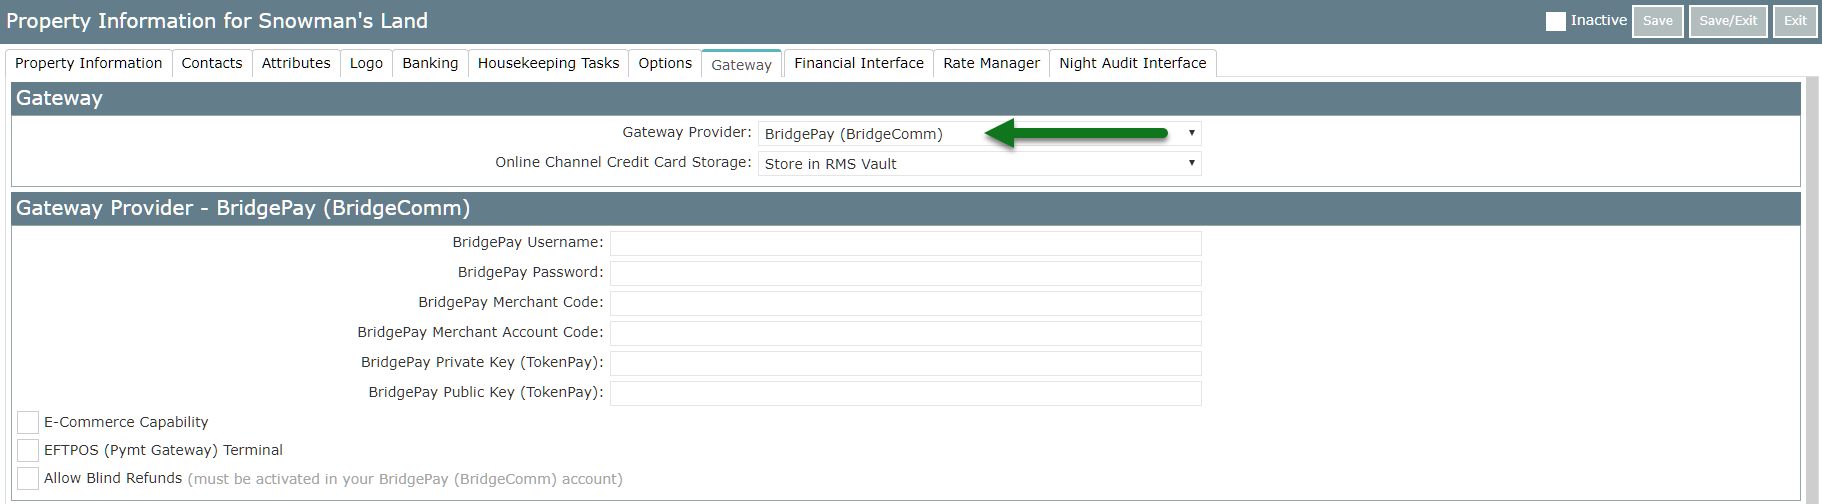
- Select 'BridgePay (BridgeComm)' as the Gateway Provider.
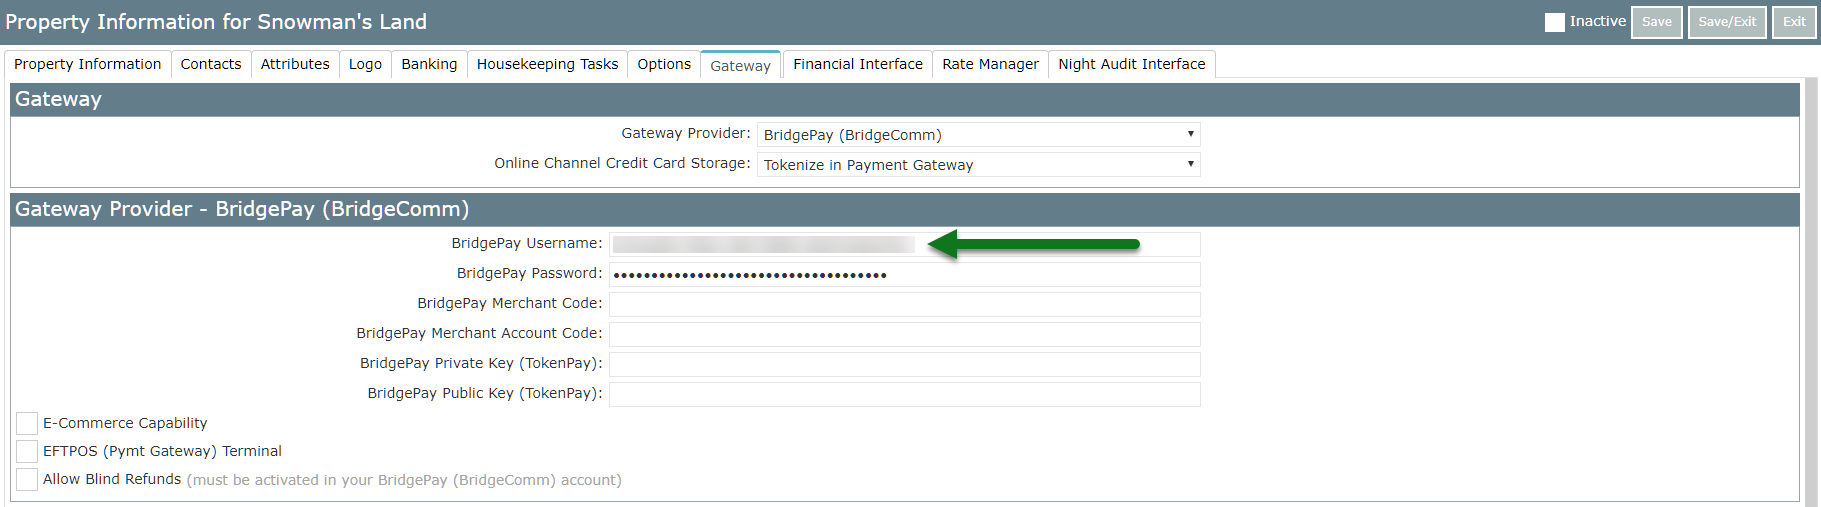
- Select 'Tokenise' as the Online Channel Credit Card Storage option.
- Enter the BridgePay (BridgeComm) Username & Password.
- Enter the BridgePay (BridgeComm) Merchant Code & Merchant Account Code.
- Enter the BridgePay (BridgeComm) Private Key.
- Enter the BridgePay (BridgeComm) Public Key.
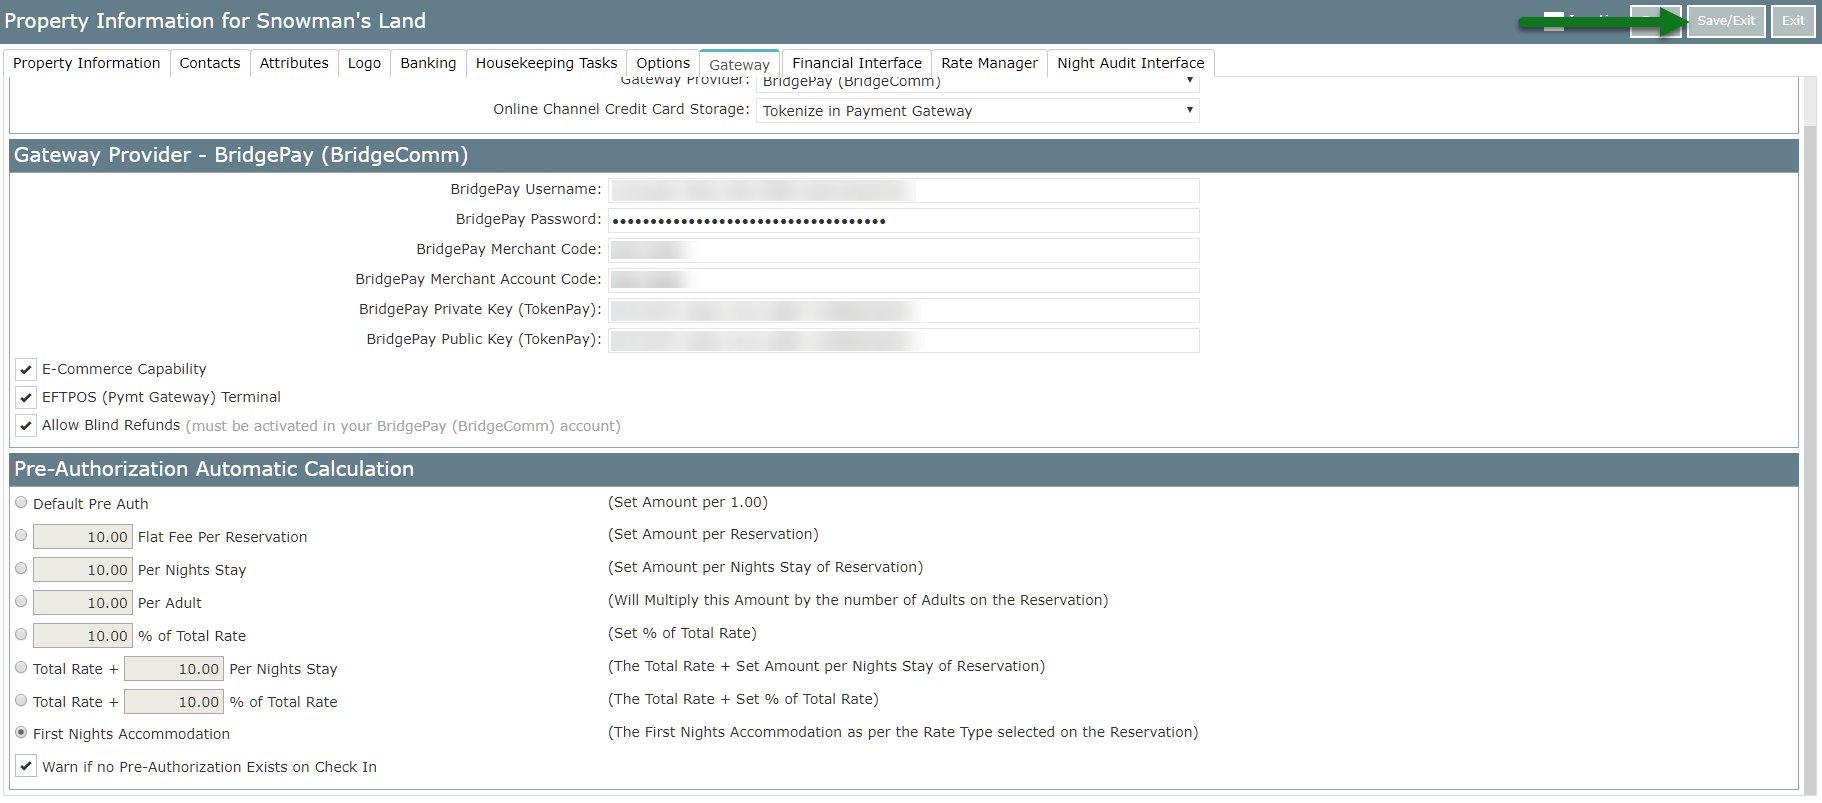
- Select the checkbox 'E-commerce Capability'.
- Select the checkbox 'EFTPOS Terminal'.
- Optional: Select the checkbox 'Allow Blind Refunds'.
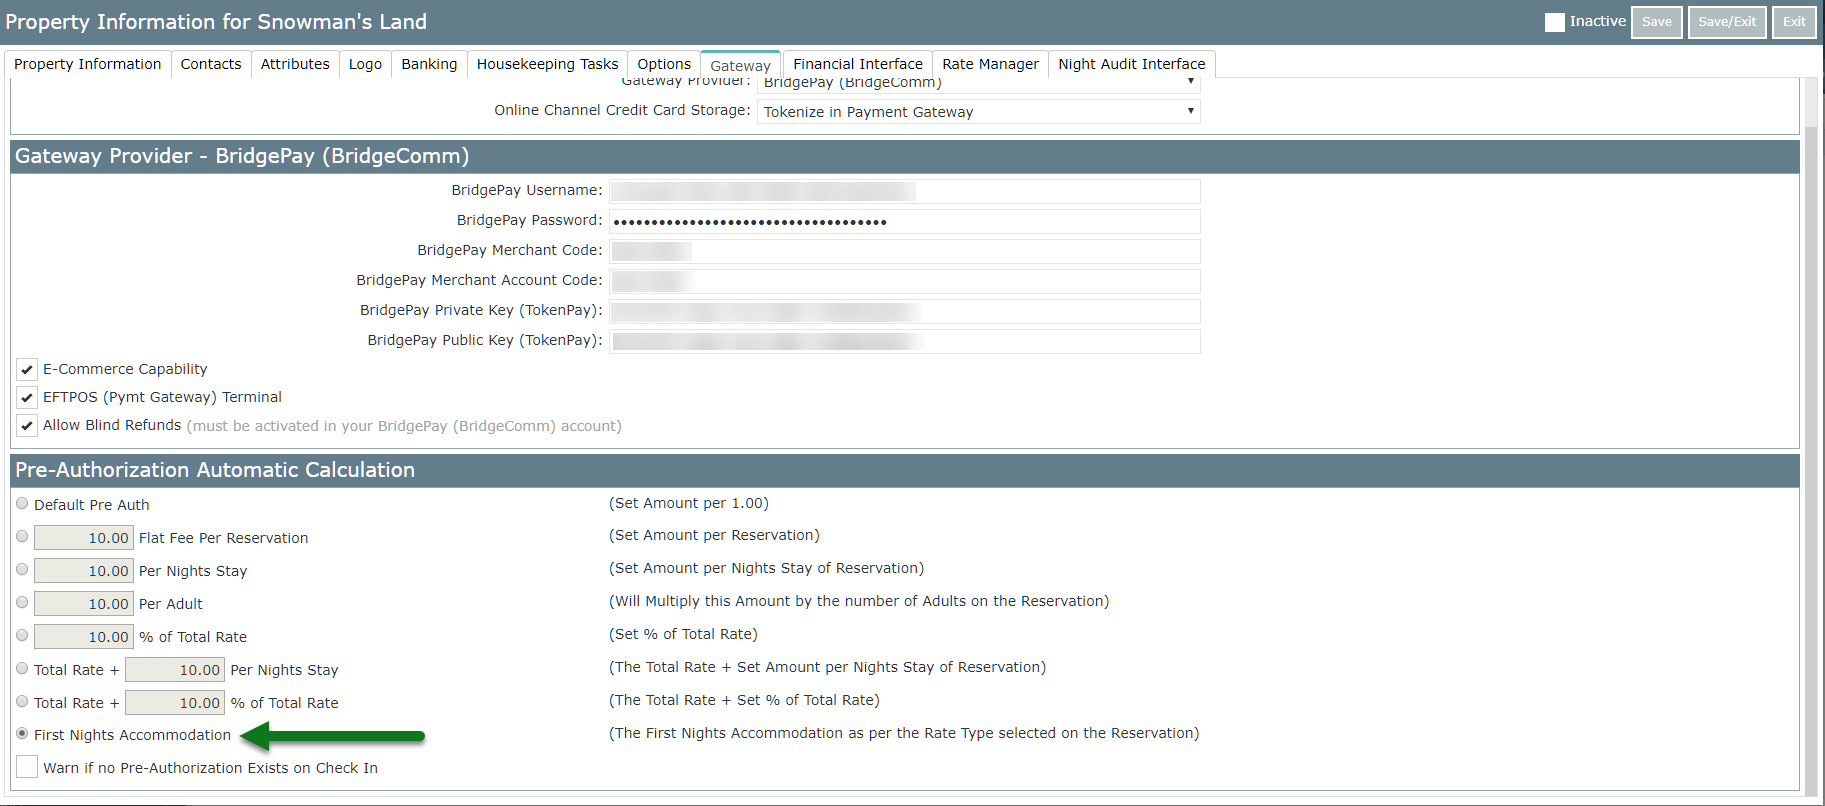
- Select the required Pre-Authorisation option.
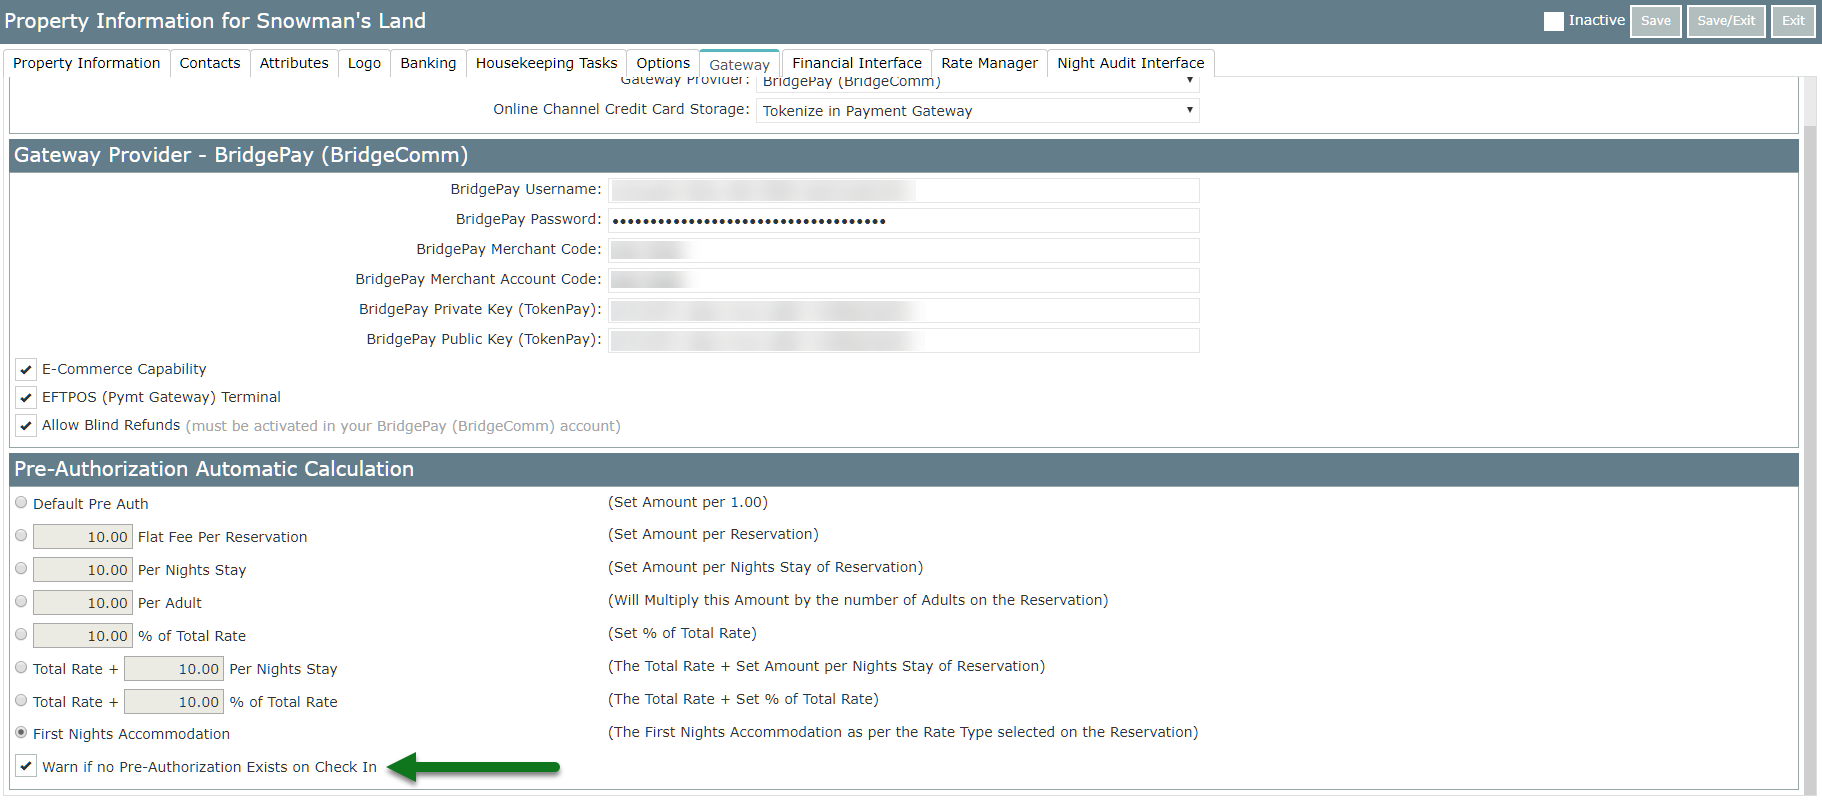
- Optional: Select the checkbox 'Warn if no Pre-Auth exists on Check-in'.
- Save/Exit.
Visual Guide
Go to Setup > Property Options > Property Information in RMS.
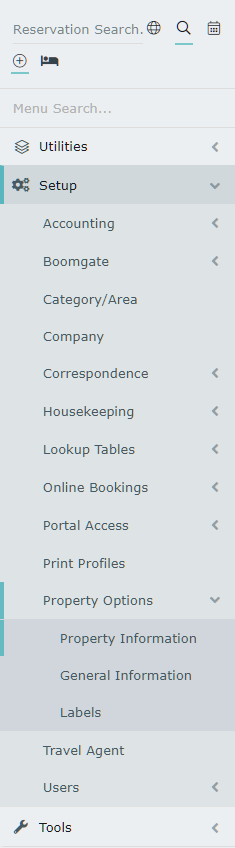
Select a Property and choose 'Edit'.

Navigate to the 'Gateway' tab.

Select 'BridgePay (BridgeComm)' as the Gateway Provider.
Select 'Tokenise' as the Online Channel Credit Card Storage option.

Enter the BridgePay (BridgeComm) Username & Password.
Enter the BridgePay (BridgeComm) Merchant Code & Merchant Account Code.
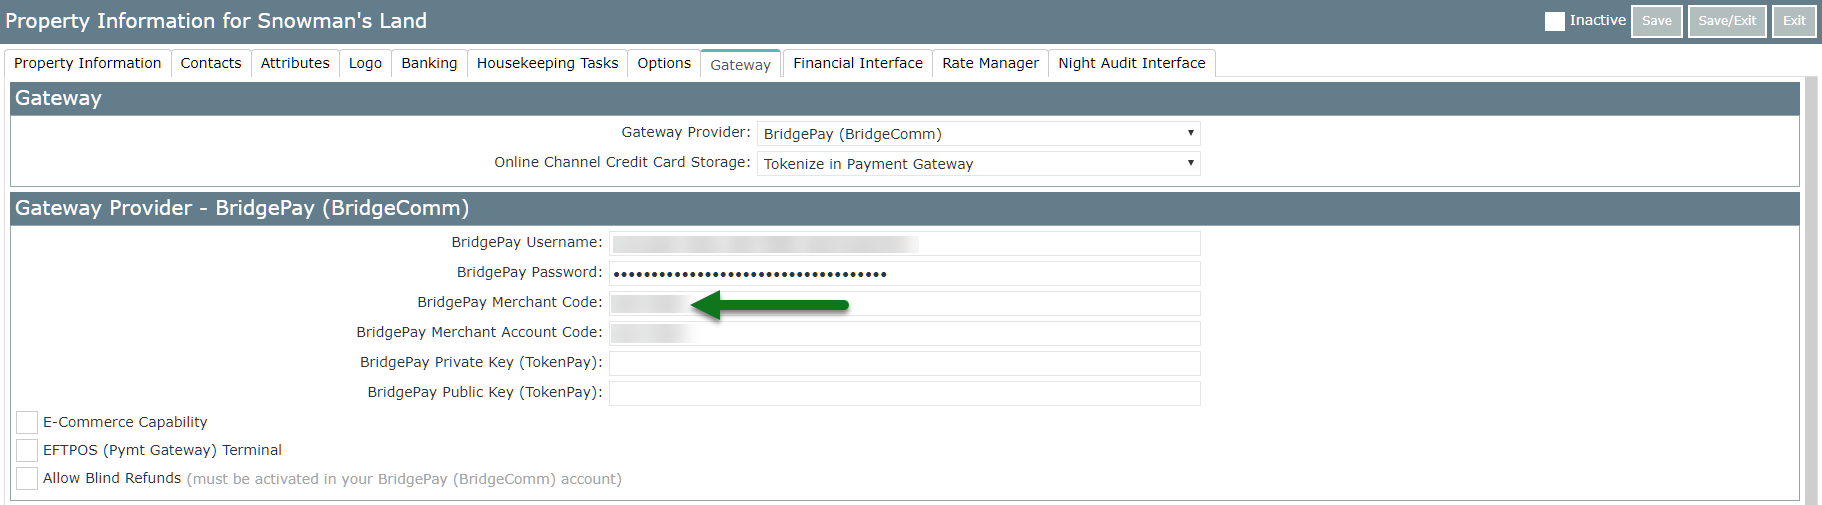
Enter the BridgePay (BridgeComm) Private Key.

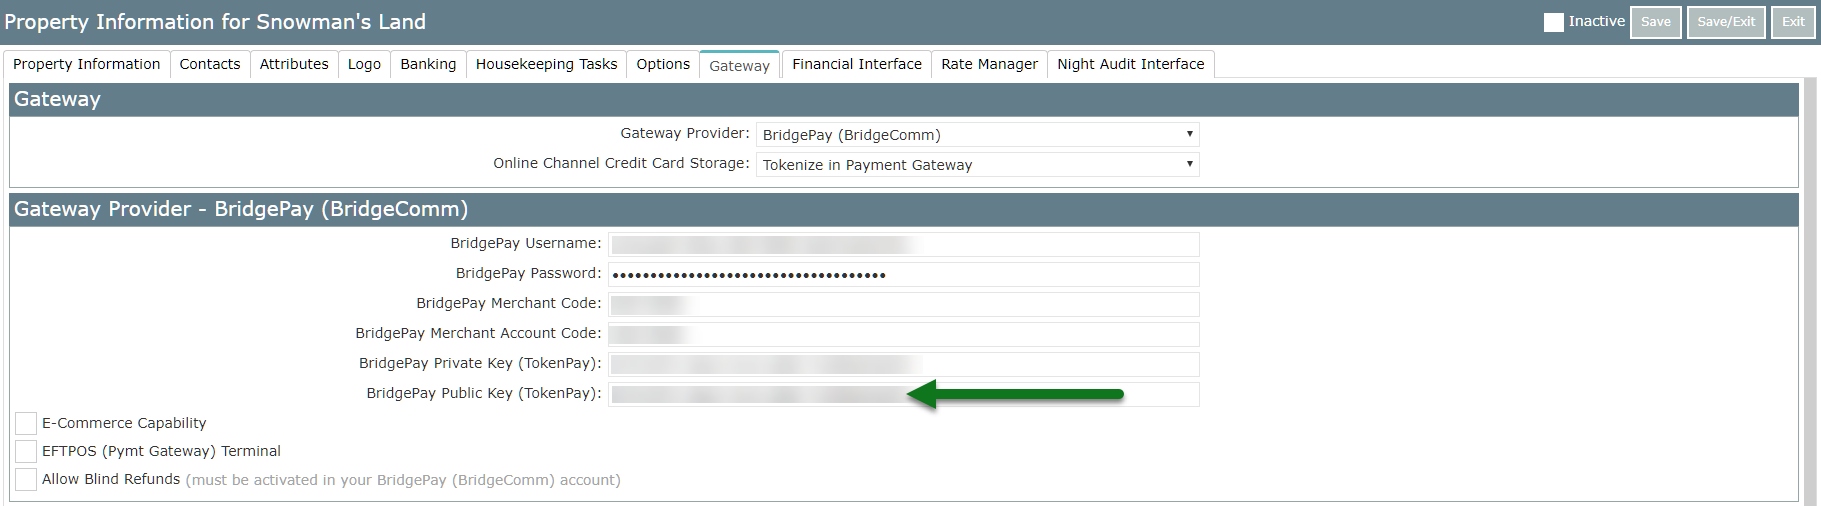
Enter the BridgePay (BridgeComm) Public Key.
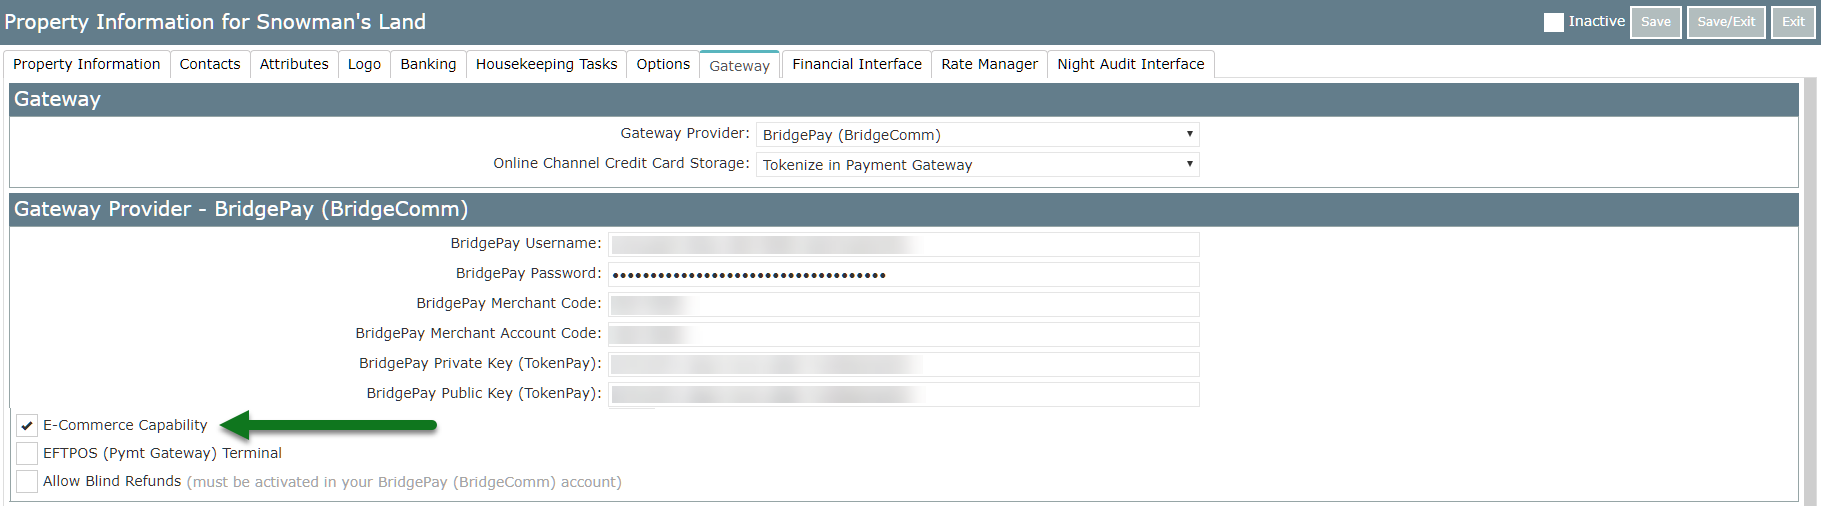
Select the checkbox 'E-commerce Capability'.
Select the checkbox 'EFTPOS Terminal'.
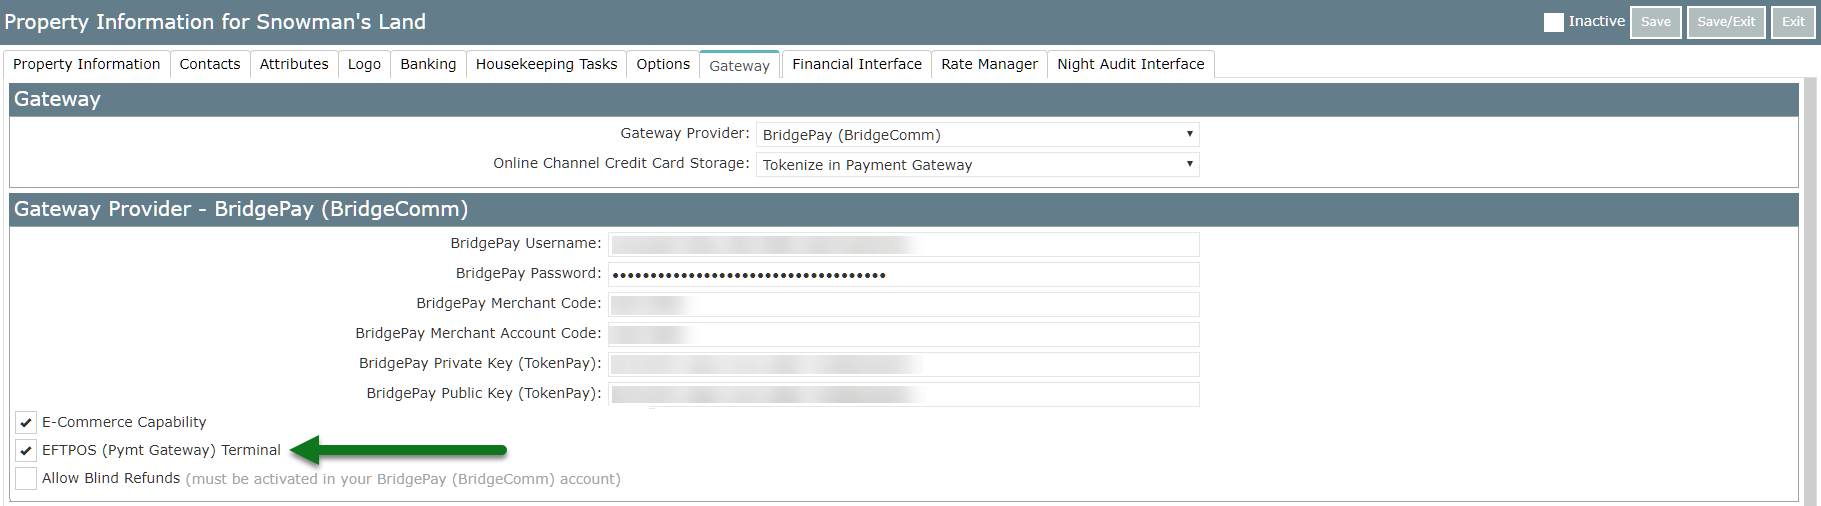
Optional: Select the checkbox 'Allow Blind Refunds'.

Select the required Pre-Authorisation option.
Optional: Select the checkbox 'Warn if no Pre-Auth exists on Check-in'.
Select 'Save/Exit' to store the changes made.