Display Due Date on Invoices
Setup Tax Invoices to display a Due Date in RMS.
-
Information
-
Use
- Add Button
Information
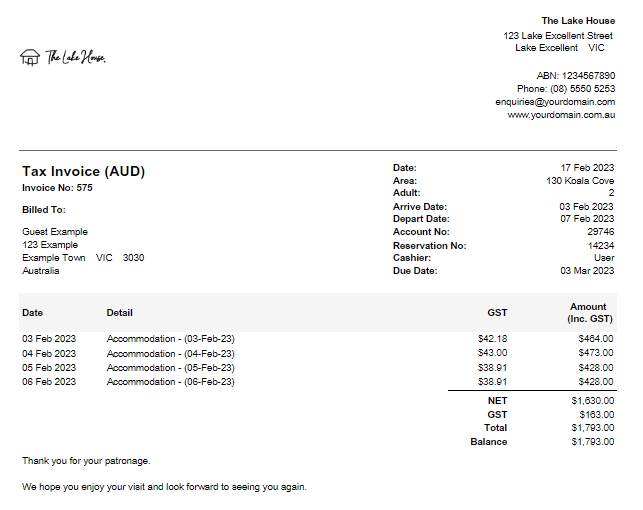
The Due Date is a field that can be included on Tax Invoices.
A Tax Invoice is an itemised invoice of taxable charges on an account with a unique Invoice Number.
The Due Date can be set for a number of days after Tax Invoice creation or Users can select a custom Due Date at time of Tax Invoice creation.

Account Types are a default System Label that can be customised.
For Properties with a Custom Tax Invoice log a Service Request with the RMS Customer Support team.

Users will require Security Profile access to use this feature.
-
Use
- Add Button
Use
Have your System Administrator complete the following.
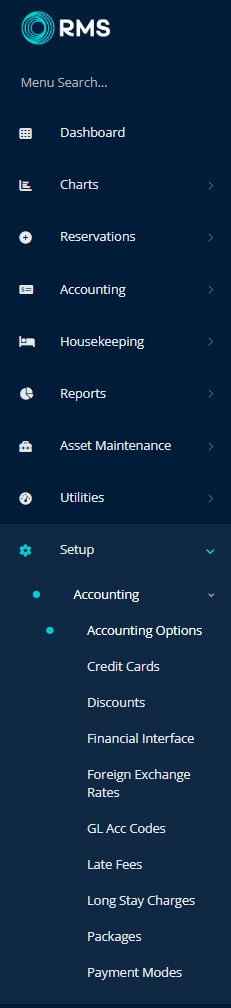
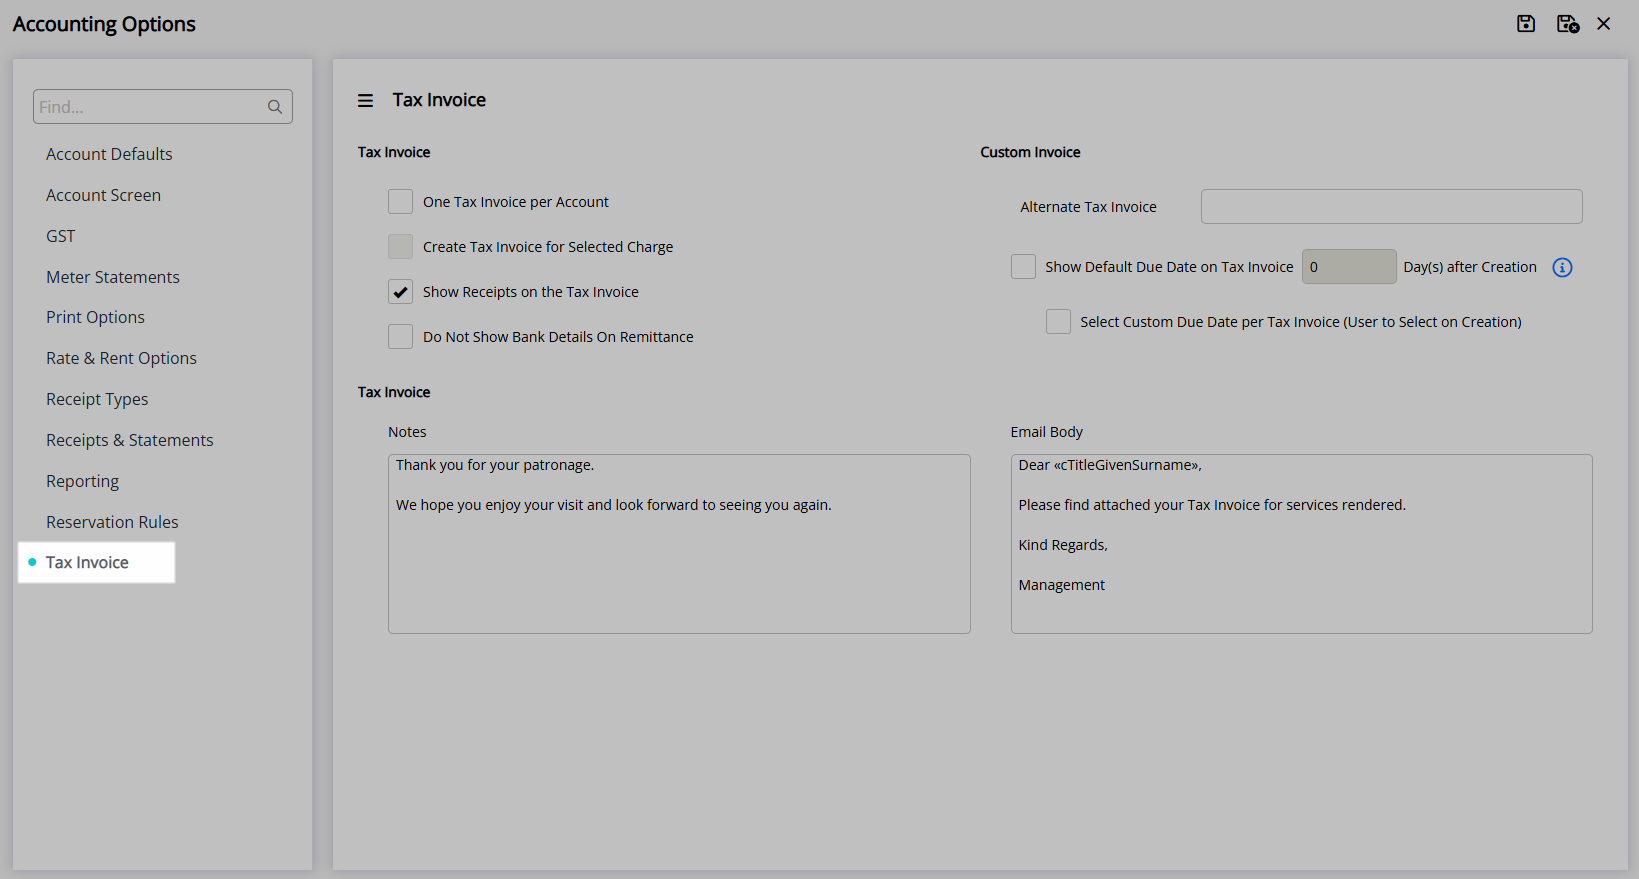
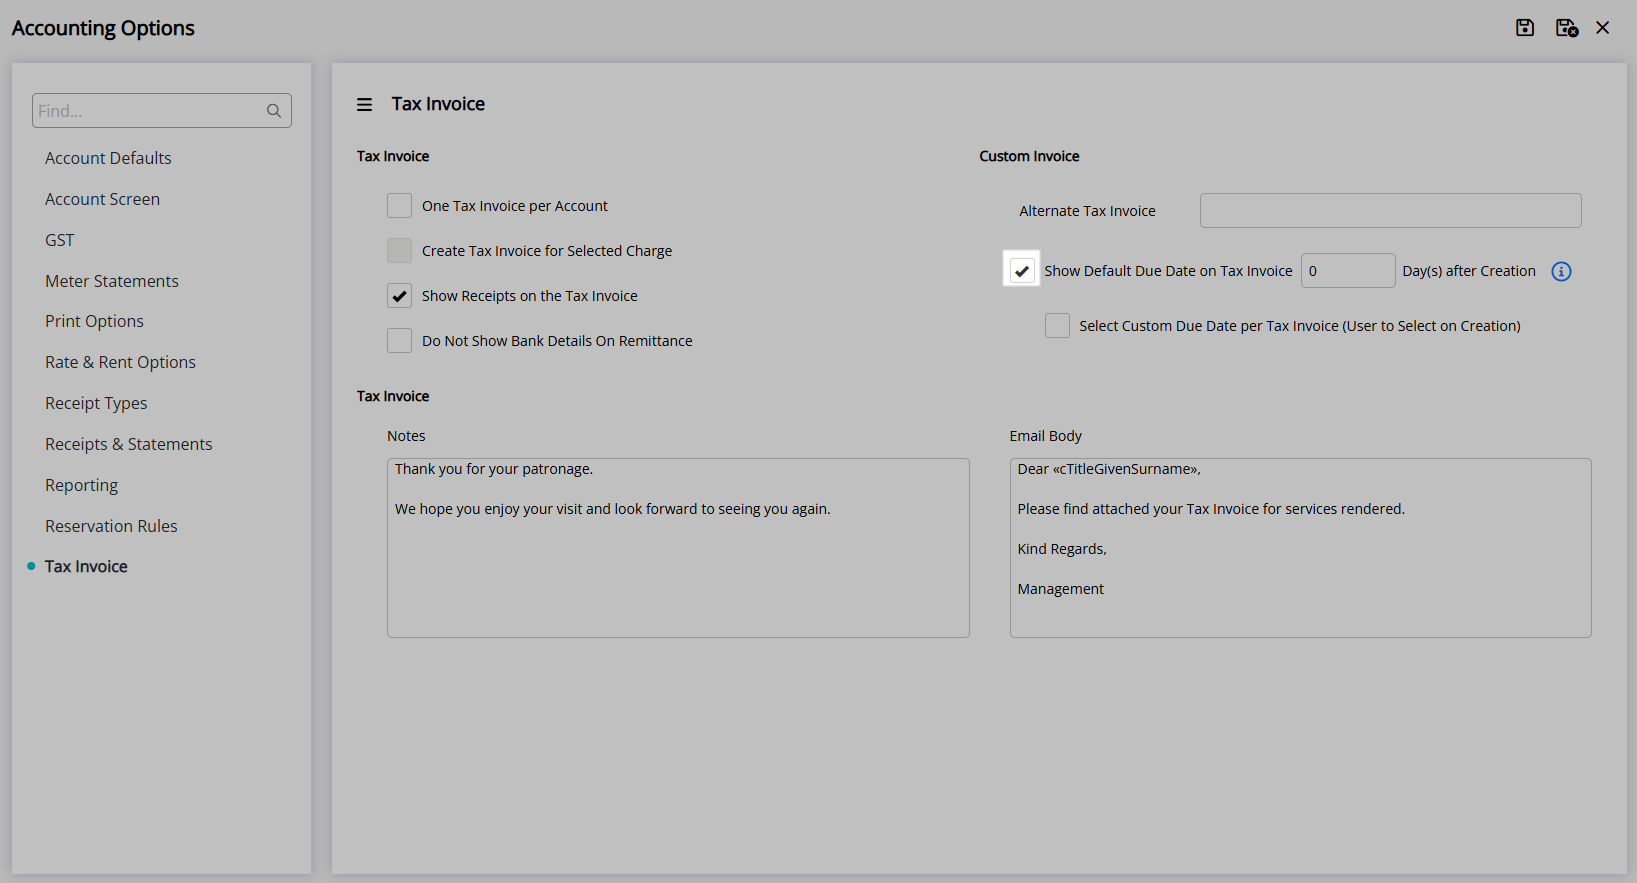
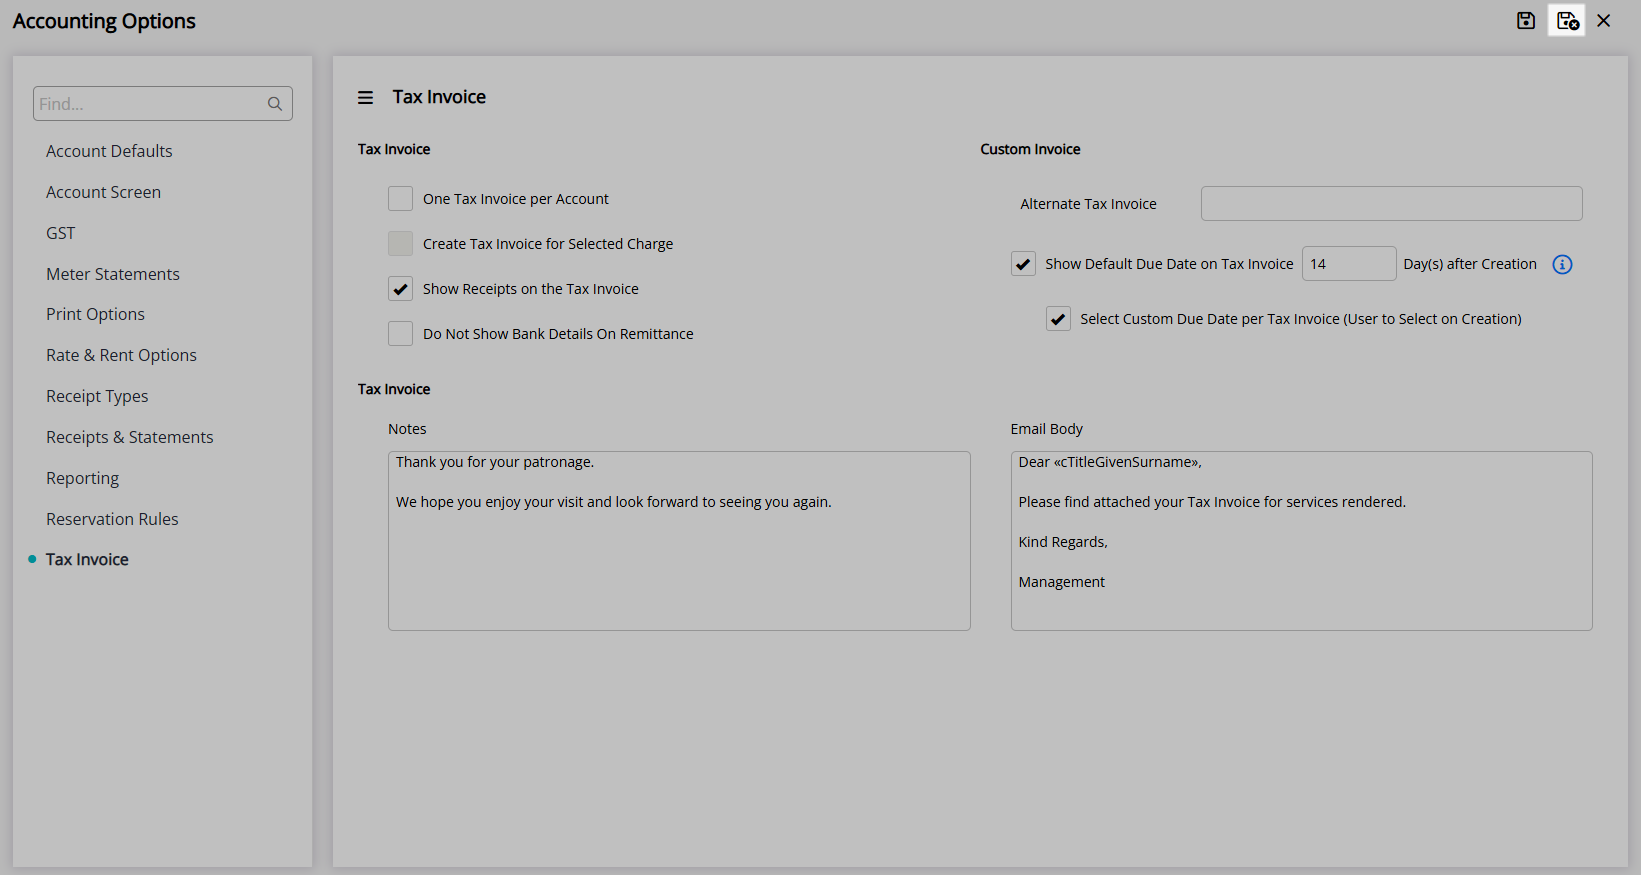
- Go to Setup > Accounting > Accounting Options in the Side Menu of RMS.
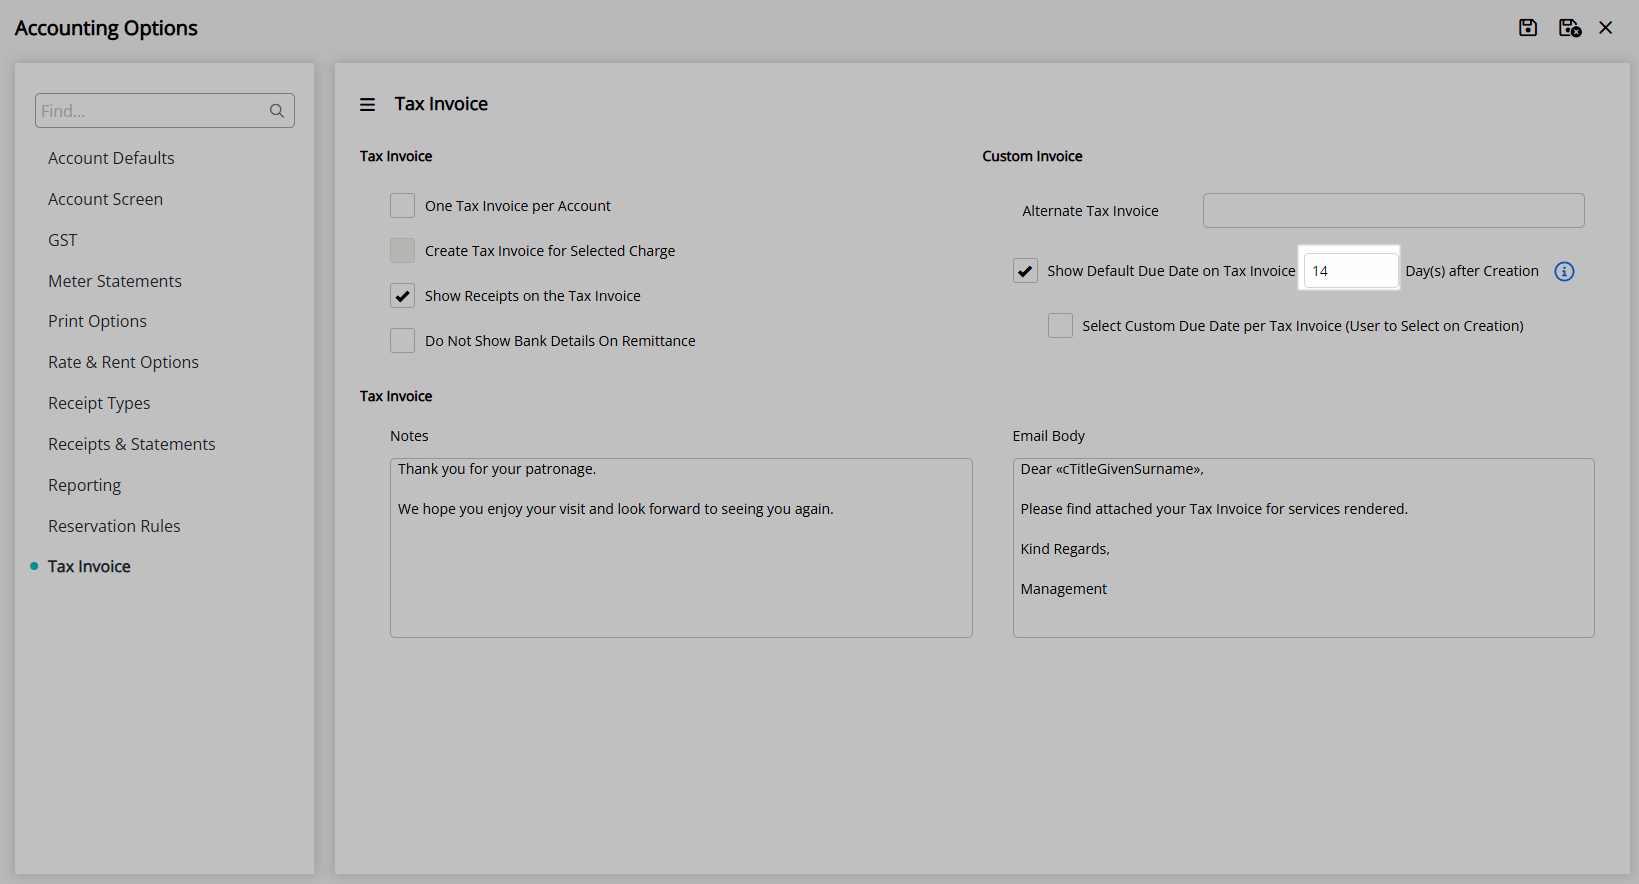
- Navigate to the ‘Tax Invoice' tab.
- Select the checkbox ‘Show Default Due Date on Tax Invoice’.
- Enter the number of Day(s) After Creation.
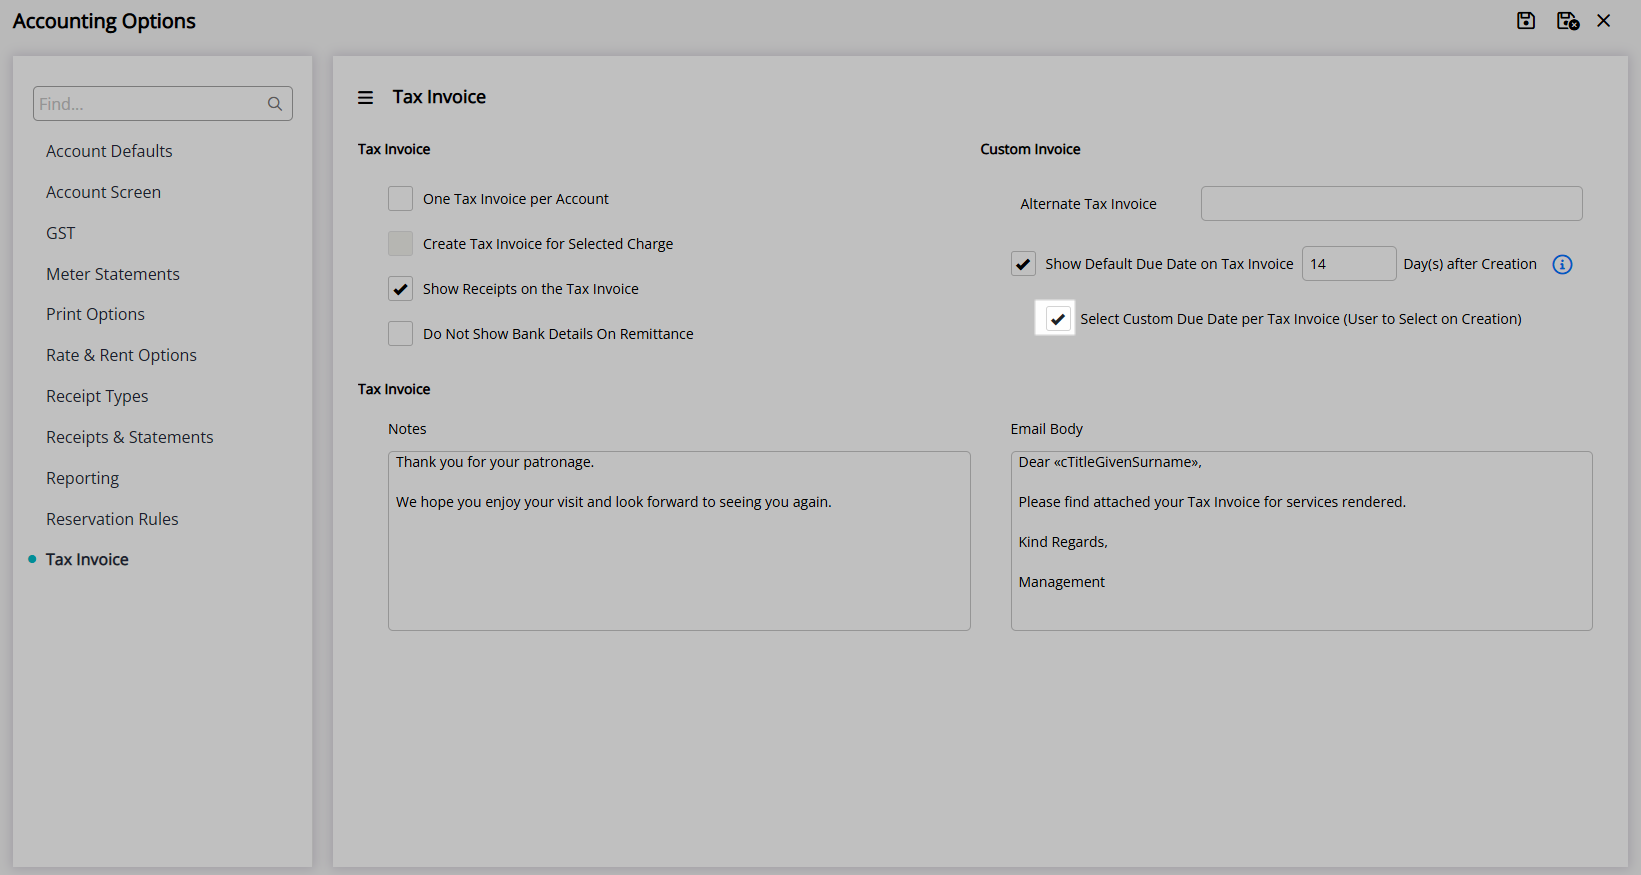
- Optional: Select the checkbox ‘Select Custom Due Date per Tax Invoice (User to Select on Creation)’.
- Save/Exit.
-
Guide
- Add Button
Guide
Go to Setup > Accounting > Accounting Options in the Side Menu of RMS.
Navigate to the ‘Tax Invoice' tab.

Select the checkbox ‘Show Default Due Date on Tax Invoice’.

Enter the number of Day(s) After Creation.
Optional: Select the checkbox ‘Select Custom Due Date per Tax Invoice (User to Select on Creation)’.
Select ‘Save/Exit’ to save the changes made and leave the setup.

The Due Date will now display on newly created Invoices.

Use
Have your System Administrator complete the following.
- Go to Setup > Accounting > Accounting Options in the Side Menu of RMS.
- Navigate to the ‘Tax Invoice' tab.
- Select the checkbox ‘Show Default Due Date on Tax Invoice’.
- Enter the number of Day(s) After Creation.
- Optional: Select the checkbox ‘Select Custom Due Date per Tax Invoice (User to Select on Creation)’.
- Save/Exit.
-
Guide
- Add Button
Guide
Go to Setup > Accounting > Accounting Options in the Side Menu of RMS.

Navigate to the ‘Tax Invoice' tab.
Select the checkbox ‘Show Default Due Date on Tax Invoice’.
Enter the number of Day(s) After Creation.

Optional: Select the checkbox ‘Select Custom Due Date per Tax Invoice (User to Select on Creation)’.

Select ‘Save/Exit’ to save the changes made and leave the setup.
The Due Date will now display on created Invoices.