Remove a Reservation from a Group
Remove a Sibling Reservation from a Master Reservation in RMS.
Sibling Reservations can be removed from a Master Reservation to become an individual Reservation.
-
Information
-
Use
- Add Button
Information
Sibling Reservations can be removed from a Master Reservation to become an individual Reservation.
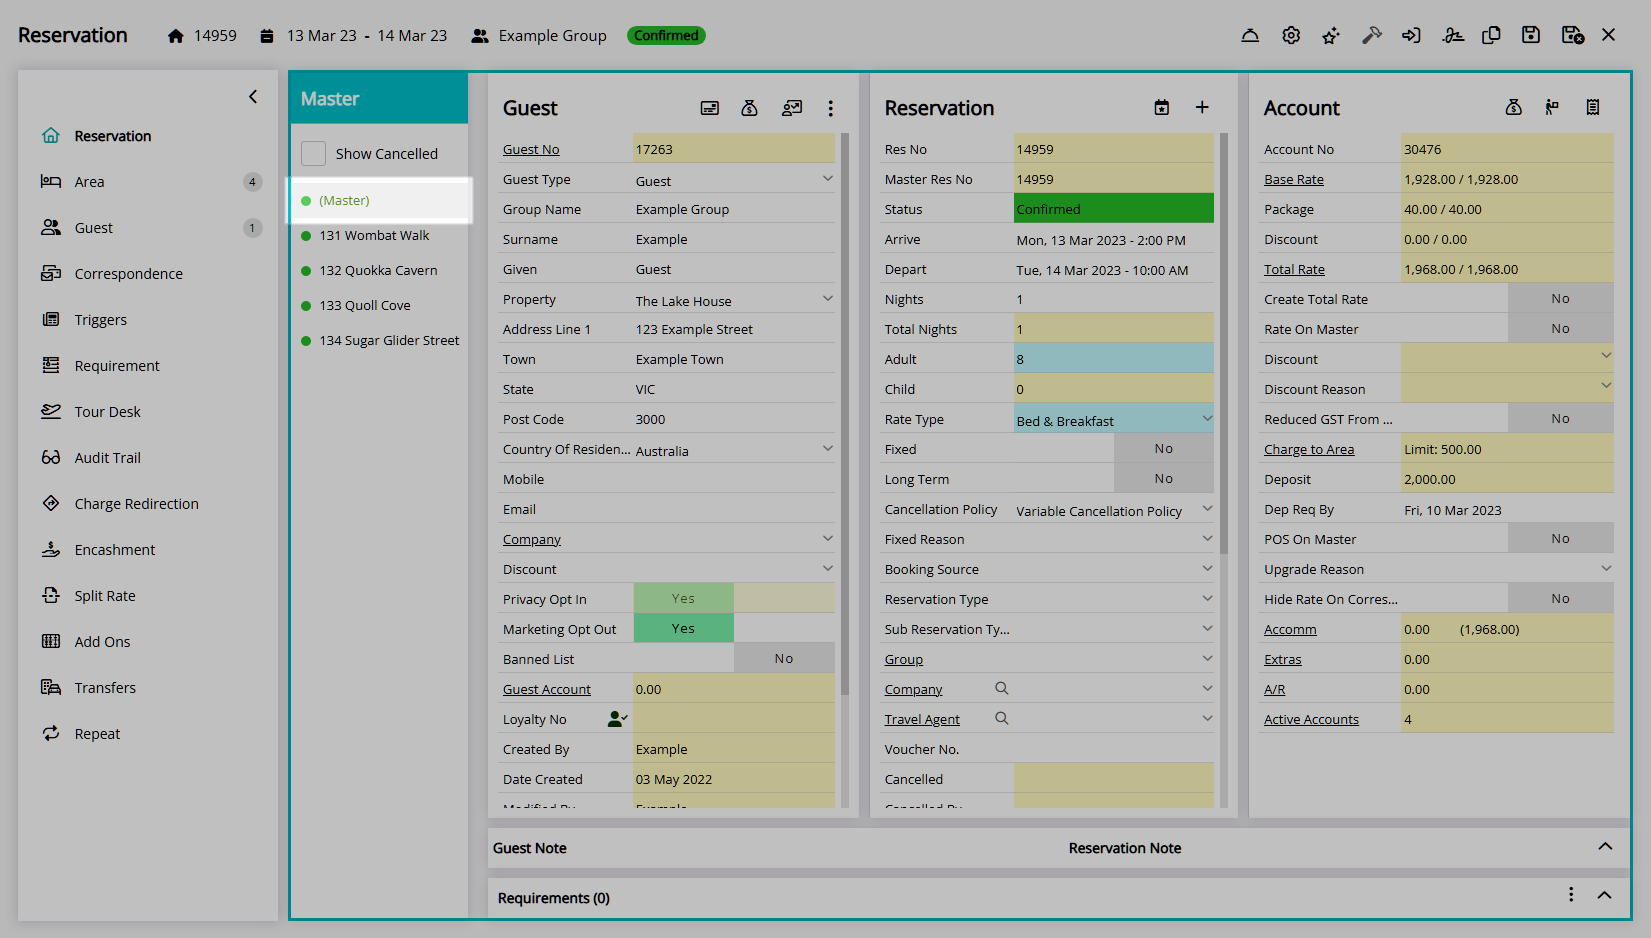
A Sibling Reservation is a reservation for an Area within a Master Reservation.
A Master Reservation is a collection of individual Reservations linked together.
Master Reservations can be used when multiple parties are travelling together or when one party requires more than one Area to accommodate them.
Removing a Sibling Reservation from a Master Reservation will make it become an individual reservation.

Category, Area and Reservation are default System Labels that can be customised.
Master Reservations were formerly referred to as Group Reservations in RMS.

Users will require Security Profile access to use this feature.
-
Use
- Add Button
Use
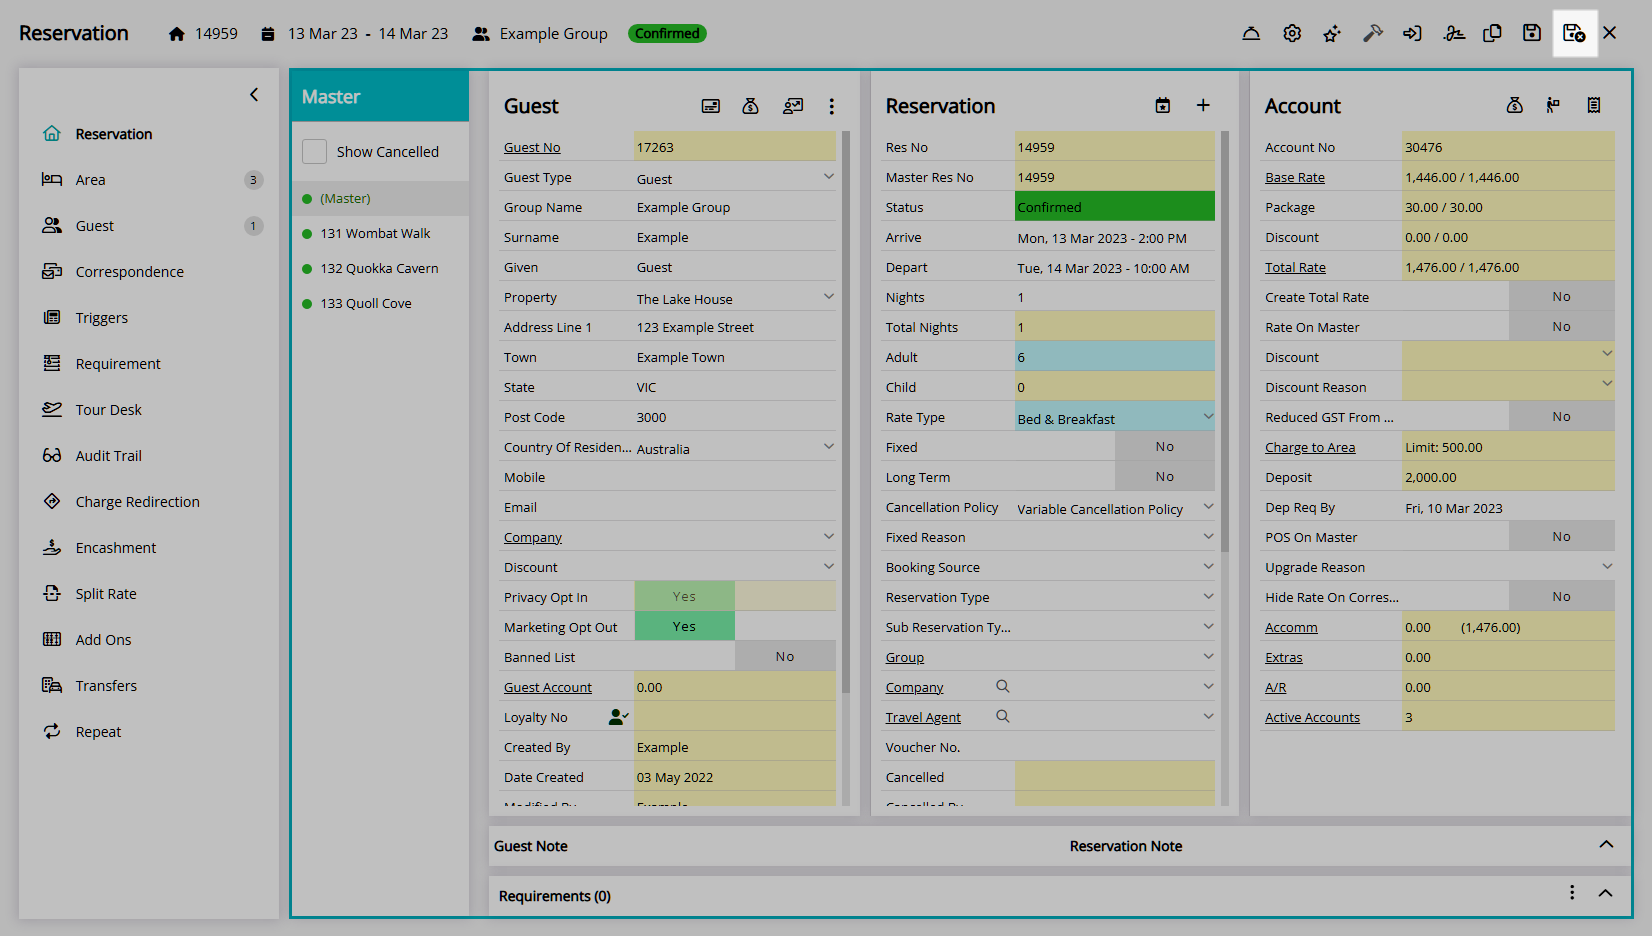
- Go to the Toolbar Menu Reservation Search in RMS.
- Enter the Group Name or Reservation Number and press 'Enter'.
- Select the Master Reservation.
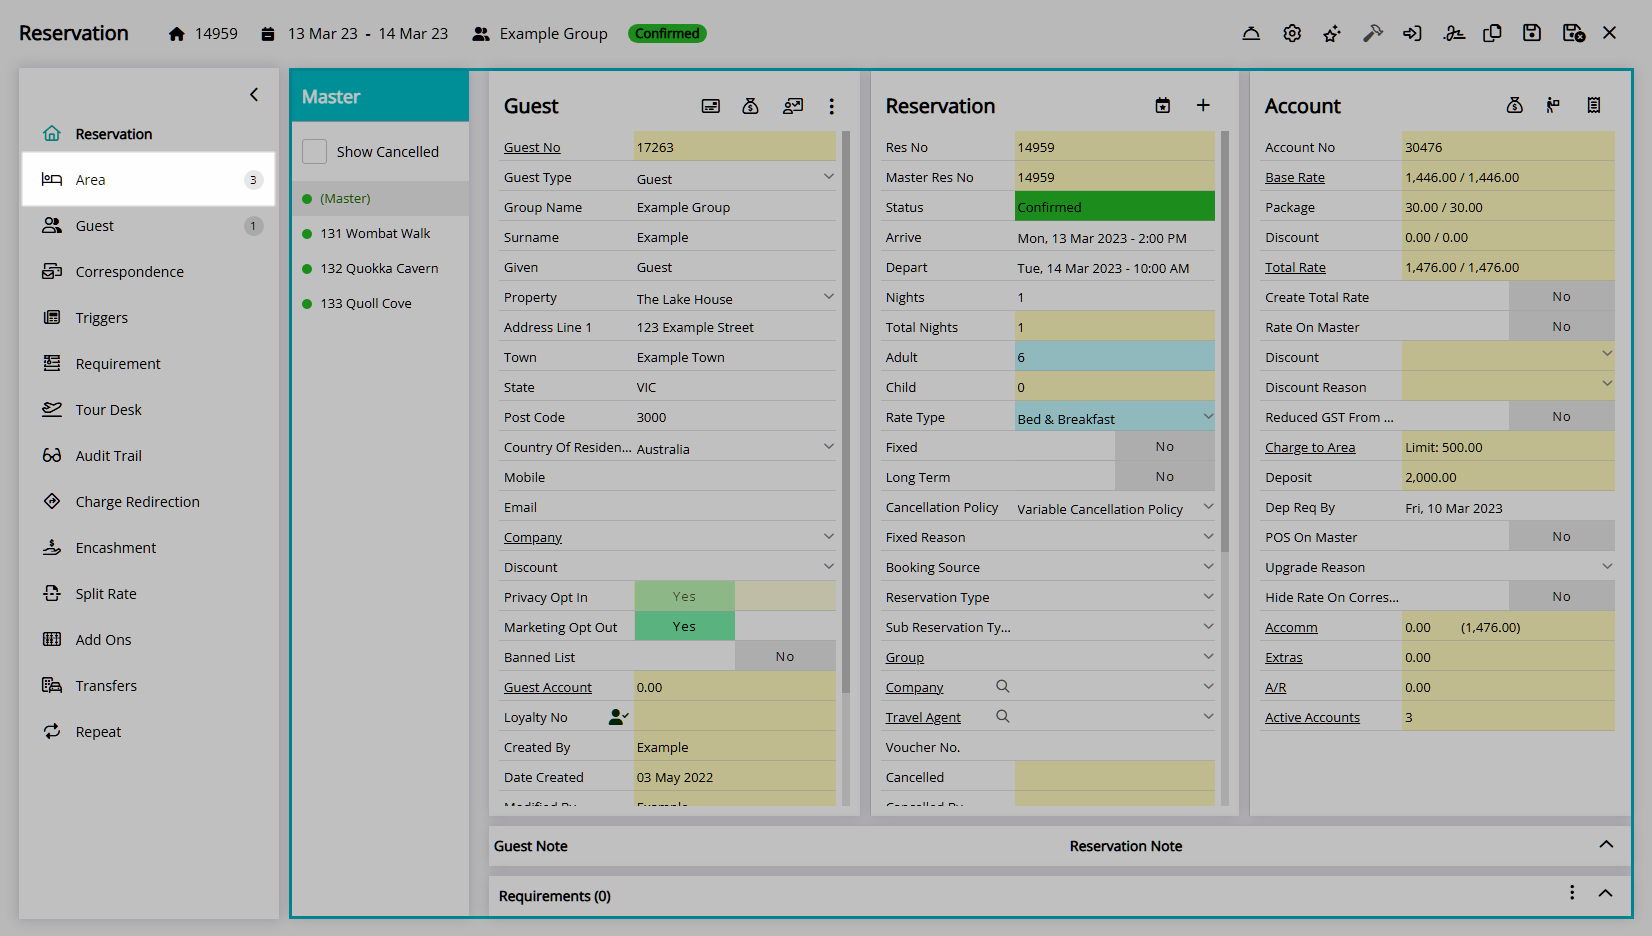
- Navigate to the 'Area' tab.
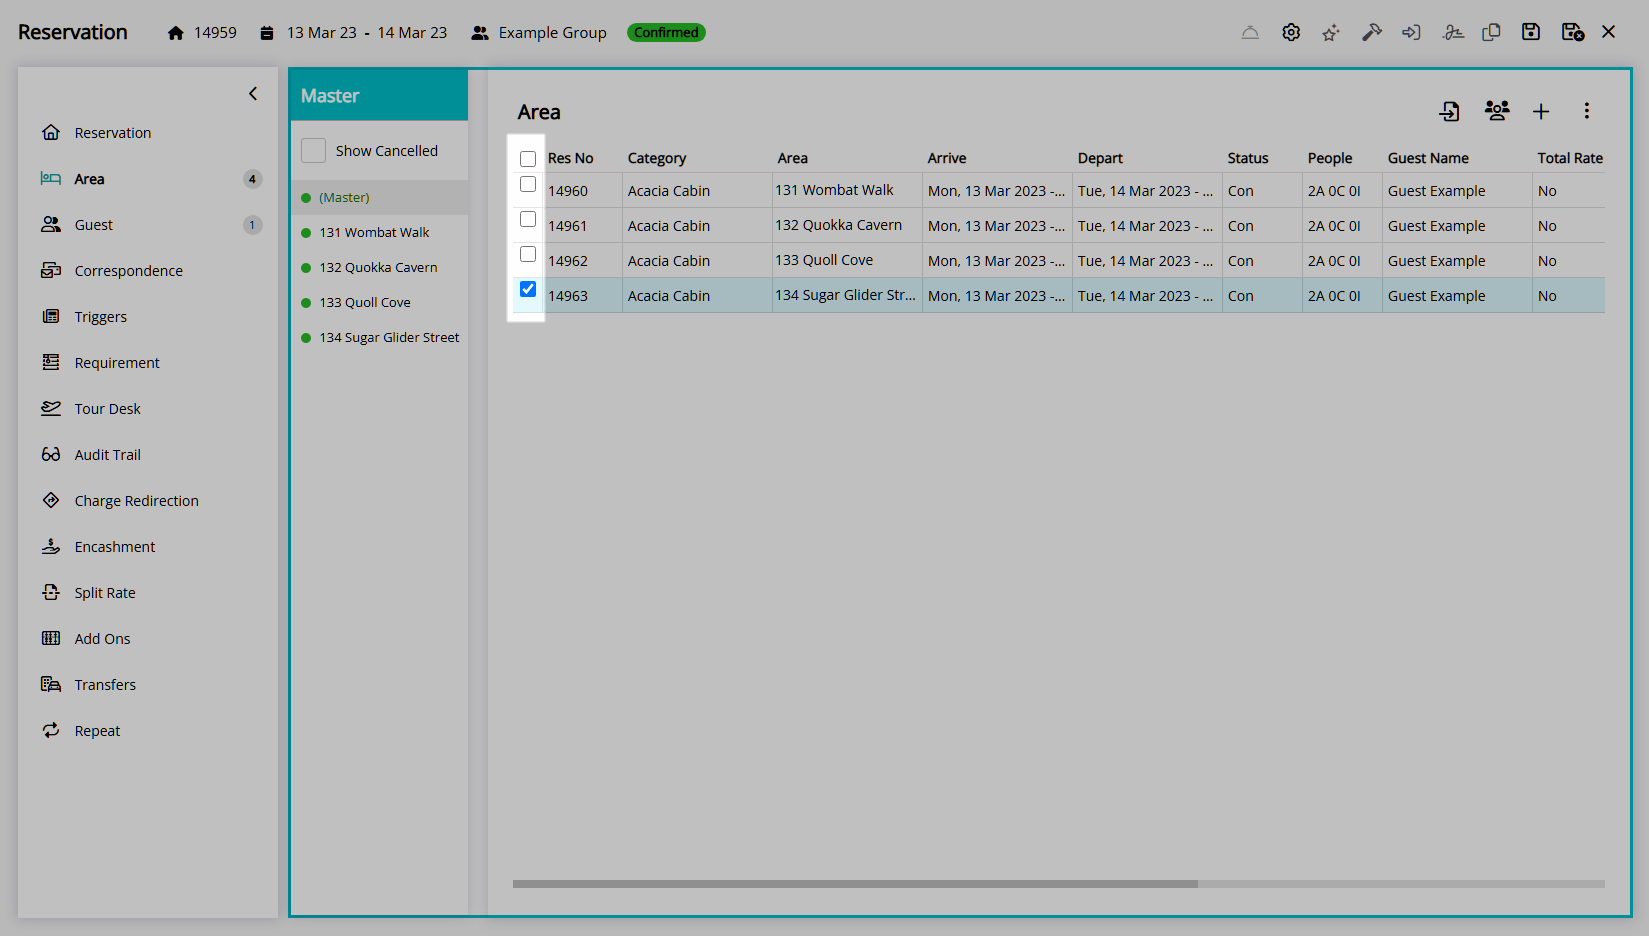
- Select the checkbox for an Area.
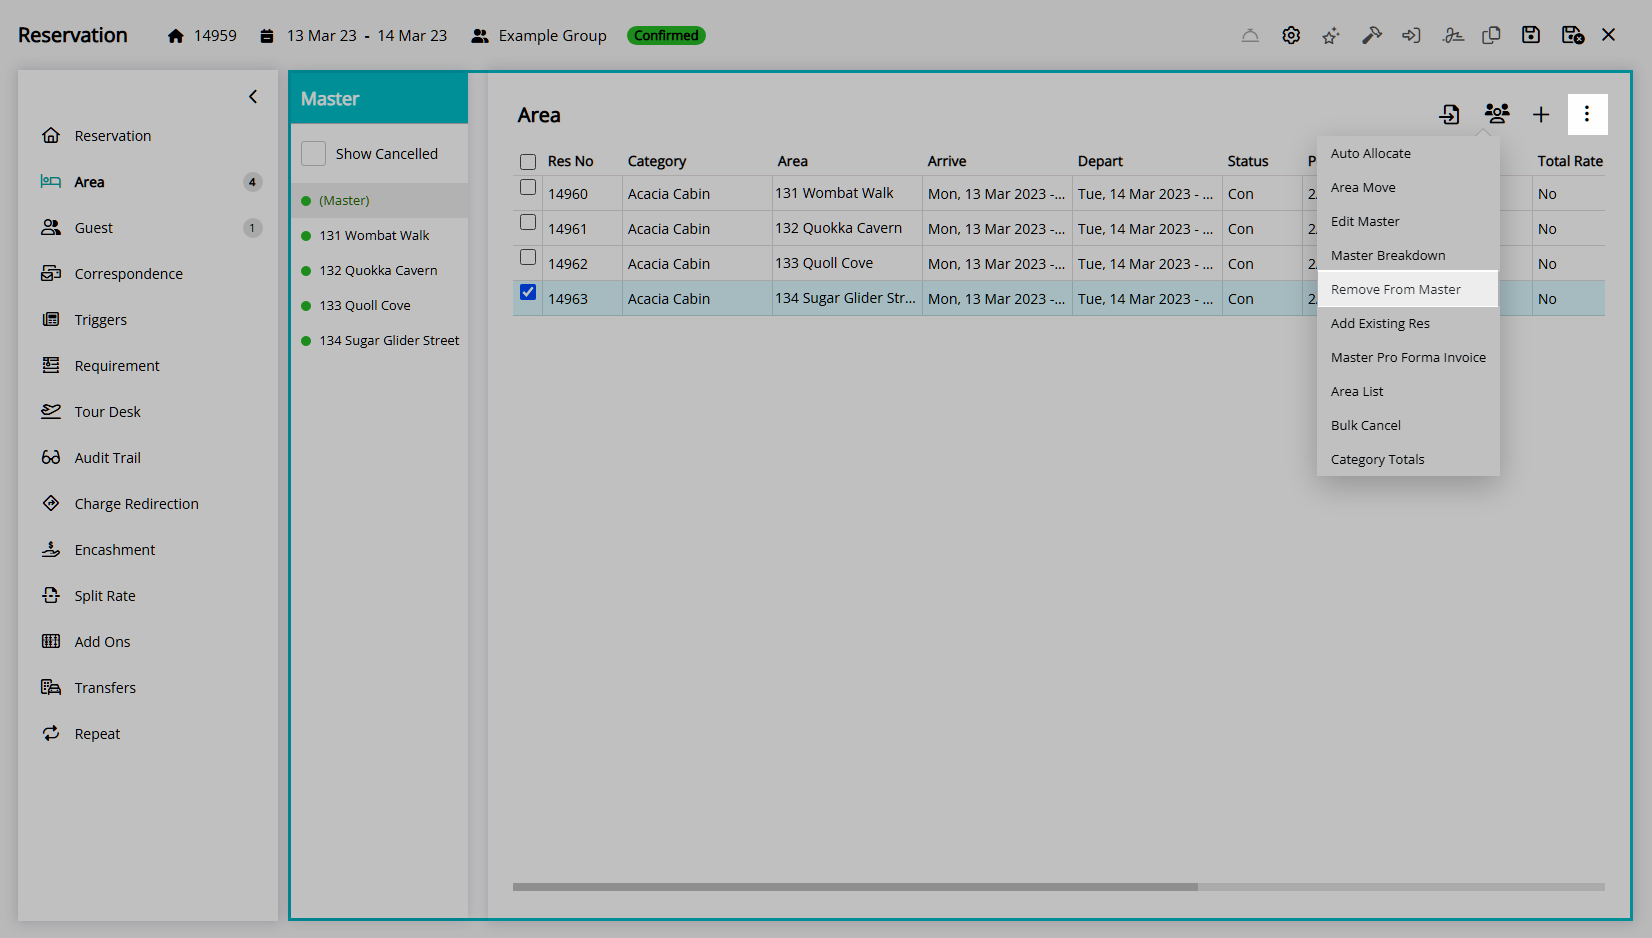
- Select the
 icon.
icon. - Select 'Remove from Master'.
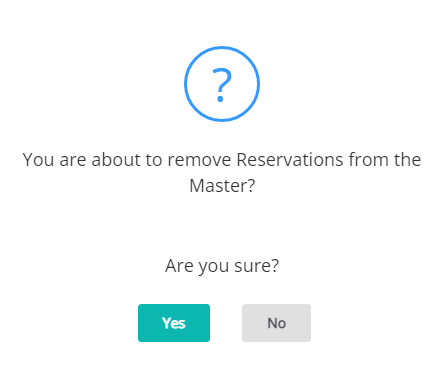
- Select 'Yes'.
- Save/Exit.

Master Reservations were formerly referred to as Group Reservations in RMS.
-
Guide
- Add Button
Guide
Go to the Toolbar Menu Reservation Search in RMS.
Enter the Group Name or Reservation Number and press 'Enter'.

Select the Master Reservation.
Navigate to the 'Area' tab.
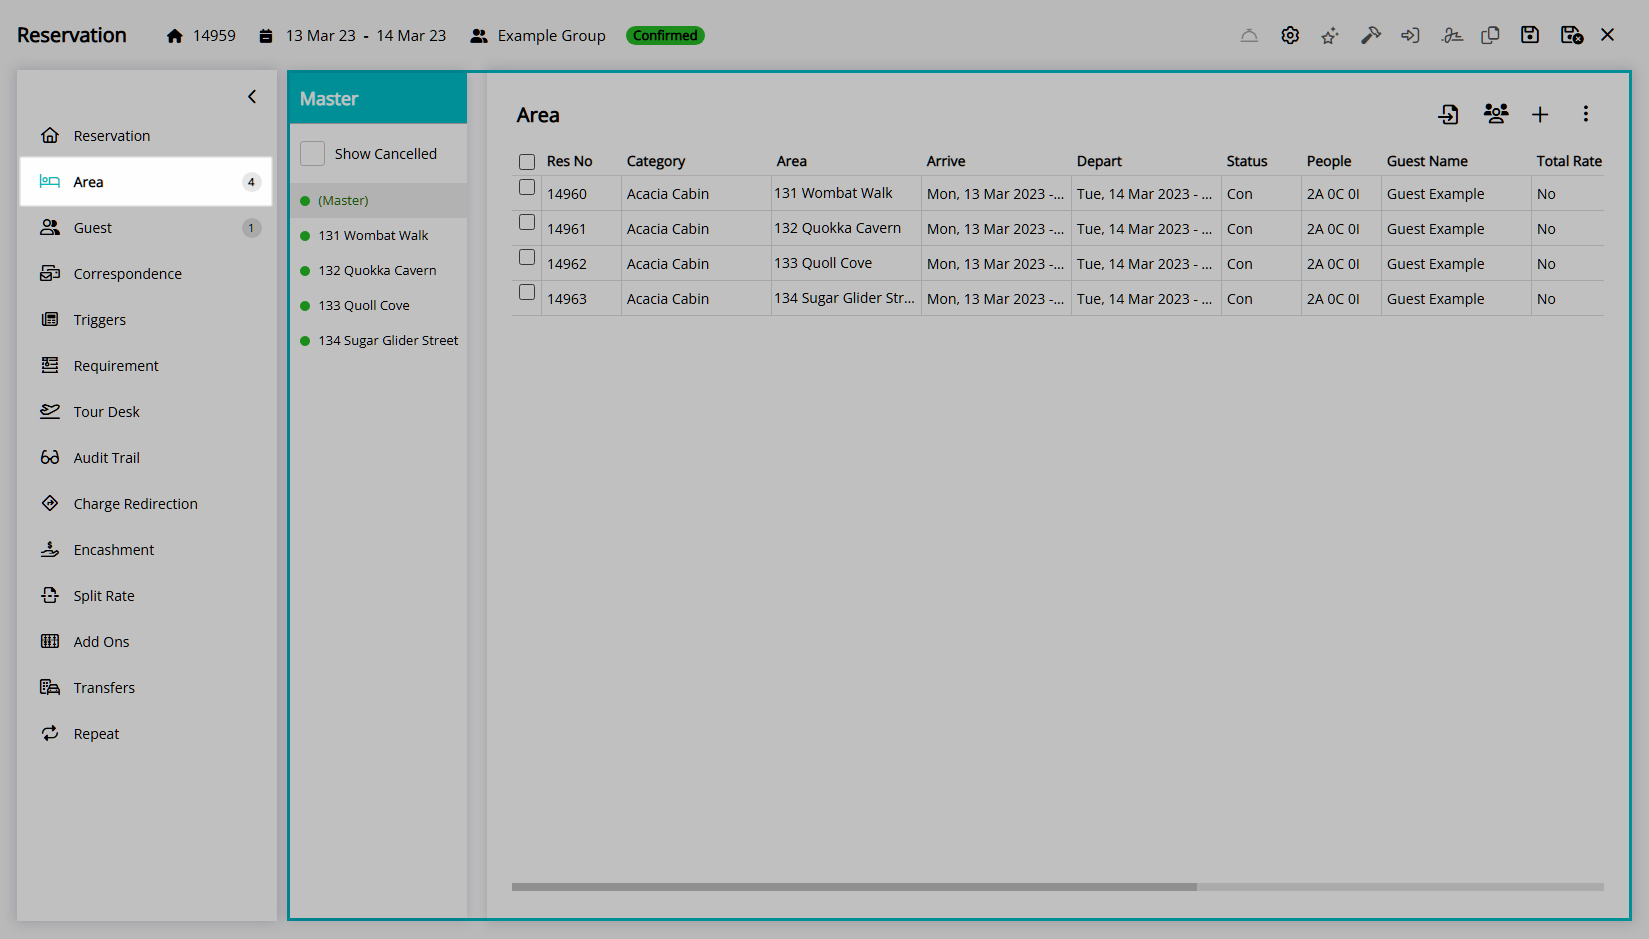
Select the checkbox for an Area.
Select the ![]() icon and choose 'Remove from Master'.
icon and choose 'Remove from Master'.
Select 'Yes' to confirm.
Select 'Save/Exit' to store the changes made and leave the reservation.
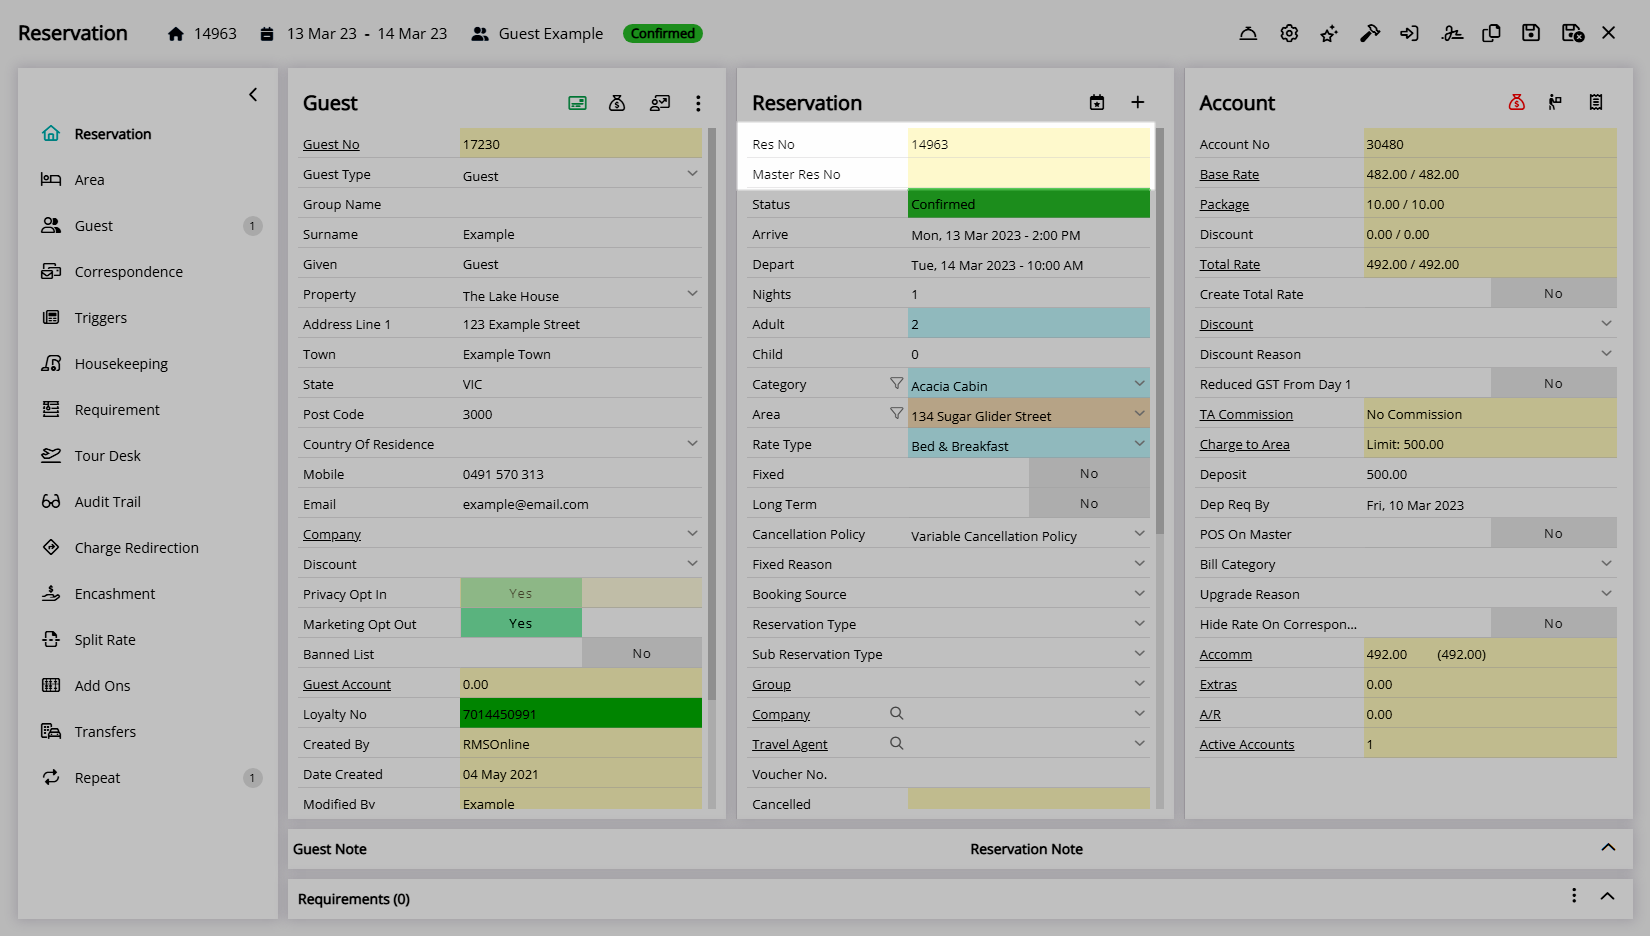
The removed Reservation will no longer be associated with the group and will be an individual Reservation.
Use
- Go to the Toolbar Menu Reservation Search in RMS.
- Enter the Group Name or Reservation Number and press 'Enter'.
- Select the Master Reservation.
- Navigate to the 'Area' tab.
- Select the checkbox for an Area.
- Select the icon.
- Select 'Remove from Master'.
- Select 'Yes'.
- Save/Exit.
Master Reservations were formerly referred to as Group Reservations in RMS.
-
Guide
- Add Button
Guide
Go to the Toolbar Menu Reservation Search in RMS.
Enter the Group Name or Reservation Number and press 'Enter'.
Select the Master Reservation.
Navigate to the 'Area' tab.
Select the checkbox for an Area.
Select the ![]() icon and choose 'Remove from Master'.
icon and choose 'Remove from Master'.
Select 'Yes' to confirm.
Select 'Save/Exit' to store the changes made and leave the reservation.
The removed Reservation will no longer be associated with the group and will be an individual Reservation.

