Guest Portal Triggered Correspondence
Automate sending documents or document requests to the Guest Portal in RMS.
Triggered Correspondence options for the Guest Portal enable automating sending Form Letters, Interactive Form Letters or Document Requests to the Guest Portal.
-
Information
-
Setup
- Add Button
Information
Triggered Correspondence options for the Guest Portal enable automating sending Form Letters, Interactive Form Letters or Document Requests to the Guest Portal.
Triggered Correspondence can be setup to send at a specific time of day for selected reservation criteria, at the time of an action being performed or a set period of time before or after an action occurs.
Monitored Triggers include a due date for an action to be completed by the recipient with the option for reminders and the ability to track progress on the 'Triggers' tab of a Reservation or the Monitored Triggers checklist.
Monitored Triggers are only available when the Trigger Type is set to 'X Periods before or after an action' and the Correspondence Type is 'Guest Portal'.
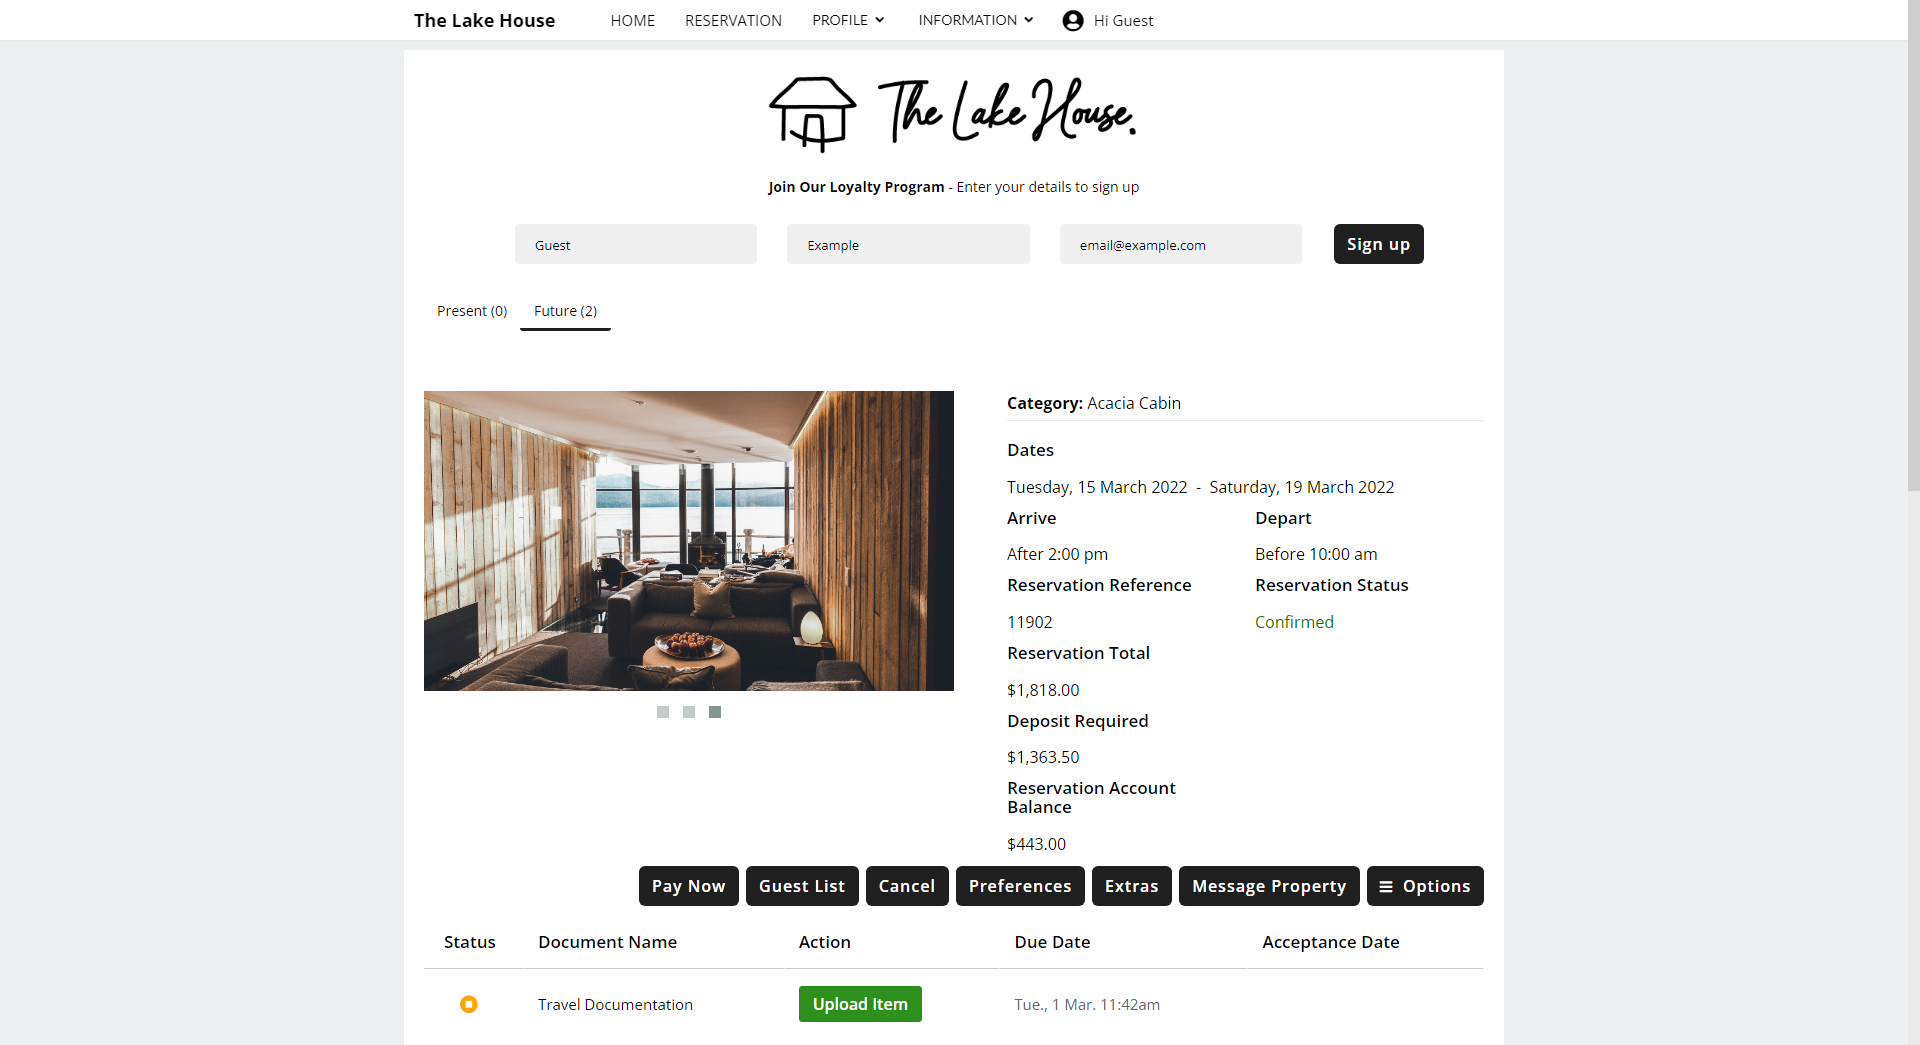
Guest Portal Triggered Correspondence and Monitored Triggers can be used to automate requests for travel documentation, passports, visas, vaccination certificates, financial statements or additional forms of identification as well as sending contracts to sign or digital forms for completion.
The below filters and exclusions can be added to Triggered Correspondence rules.
Option |
Description |
|---|---|
Reservation Filters | |
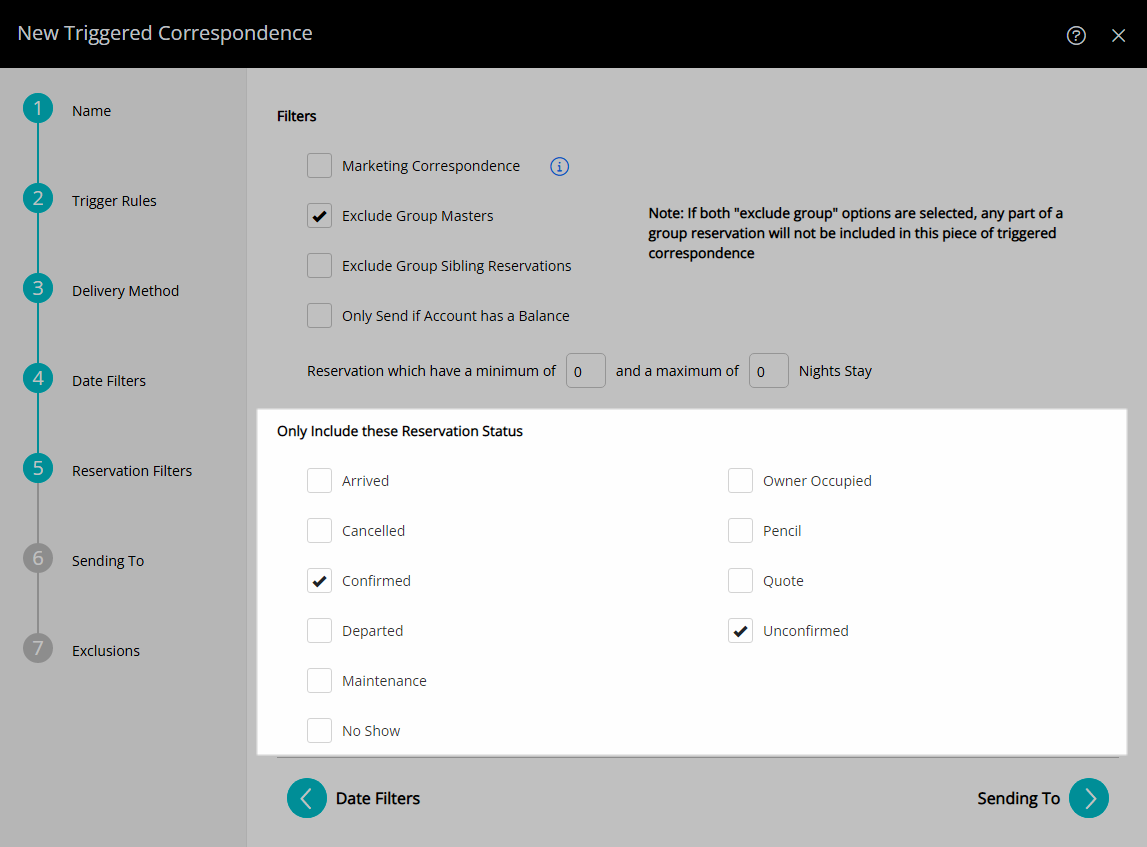
| Marketing Correspondence | Triggered Correspondence will check the 'Marketing Opt Out' field and if it is set to 'Yes' on the Guest Profile the correspondence will not be sent. |
| Exclude Group Masters * | Triggered Correspondence will not be sent to the Guest Profile on the Group Master of a Group Reservation. |
| Exclude Group Sibling Reservations * | Triggered Correspondence will not be sent to the Guest Profiles on the Sibling Reservations of a Group Reservation. |
| * Selecting 'Exclude Group Master' and 'Exclude Group Sibling Reservations' will prevent Triggered Correspondence from sending to any Guest Profile on a Group Reservation. | |
| Only Send if Account has a Balance | Triggered Correspondence will only be sent if the associated Account has active account with a debit or credit balance. |
| Length of Stay Restrictions | Triggered Correspondence will only be sent when the reservation's length of stay meets the entered criteria. |
Exclusions | |
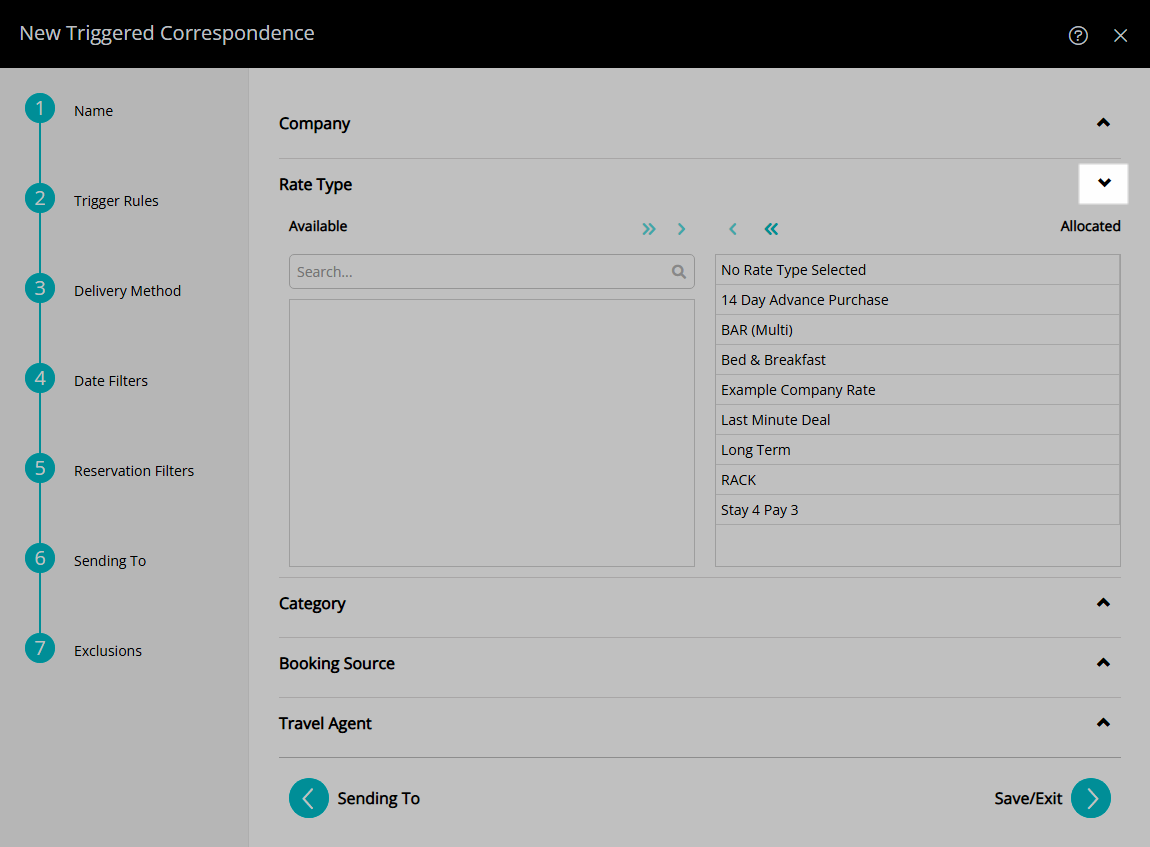
| Company | Triggered Correspondence will only be sent to the Company options in the 'Allocated' column. Use the option 'No Company Selected' to limit Triggered Correspondence to only send for reservations where there is no Company selected. |
| Rate Type | Triggered Correspondence will only be sent when the Rate Type on the Reservation is in the 'Allocated' column. Use the option 'No Rate Type Selected' to limit Triggered Correspondence to only send for reservations where there is no Rate Type selected. |
| Category | Triggered Correspondence will only be sent when the Category on the Reservation is in the 'Include Category' column. |
| Booking Source | Triggered Correspondence will only be sent when the Booking Source on the Reservation is in the 'Include Booking Source' column. Use the option 'No Booking Source Selected' to limit Triggered Correspondence to only send for reservations where there is no Booking Source selected. |
| Travel Agent | Triggered Correspondence will only be sent when the Travel Agent on the Reservation is in the 'Allocated' column. Use the option 'No Travel Agent Selected' to limit Triggered Correspondence to only send for reservations where there is no Travel Agent selected. |

Category, Area, Reservation, Guest, Booking Source and Rate are default System Labels that can be customised.

System Administrators will require Security Profile access to use this feature.
-
Setup
- Add Button
Setup
Have your System Administrator complete the following.
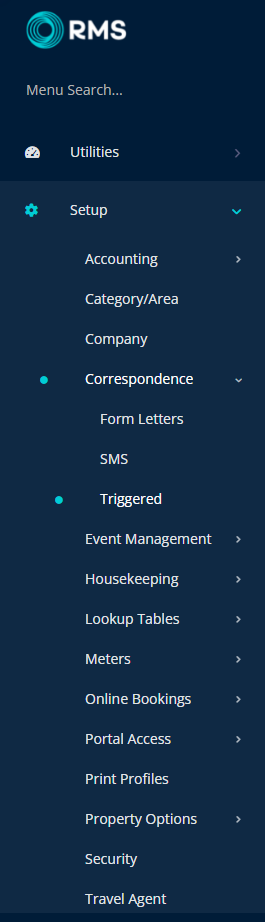
- Go to Setup > Correspondence > Triggered in RMS.
- Select the
 'Add' icon.
 - Enter a Name and select the
 'Next' icon.
 - Select the Trigger Type.
- Select & Enter the Trigger Rules then choose the
 'Next' icon.
 - Select the Correspondence Type as 'Guest Portal'.
- Select a Form Letter template.
-
Optional: Setup as Monitored Triggered Correspondence.
- Select the checkbox 'Monitored Trigger'.
- Select and enter the Due Date Criteria.
-
Optional: Setup Reminders.
- Select the checkbox 'Enable Reminders'.
- Select and enter the Reminder Criteria.
- Select 'SMS' or 'Email' and choose the Form Letter or SMS template.
- Select the
 'Next' icon.
 -
Optional: Add Date Filters.
- Select the
 'Add' icon.
 - Select the Date Made option.
- Select the Date Range.
- Select the Reservation Stay Dates option.
- Select the Date Range.
- Select the Reservation Arriving option.
- Optional: Select the checkbox for Days of the Week.
- Select
 'Save/Exit'.
- Select the
- Select the
 'Next' icon.
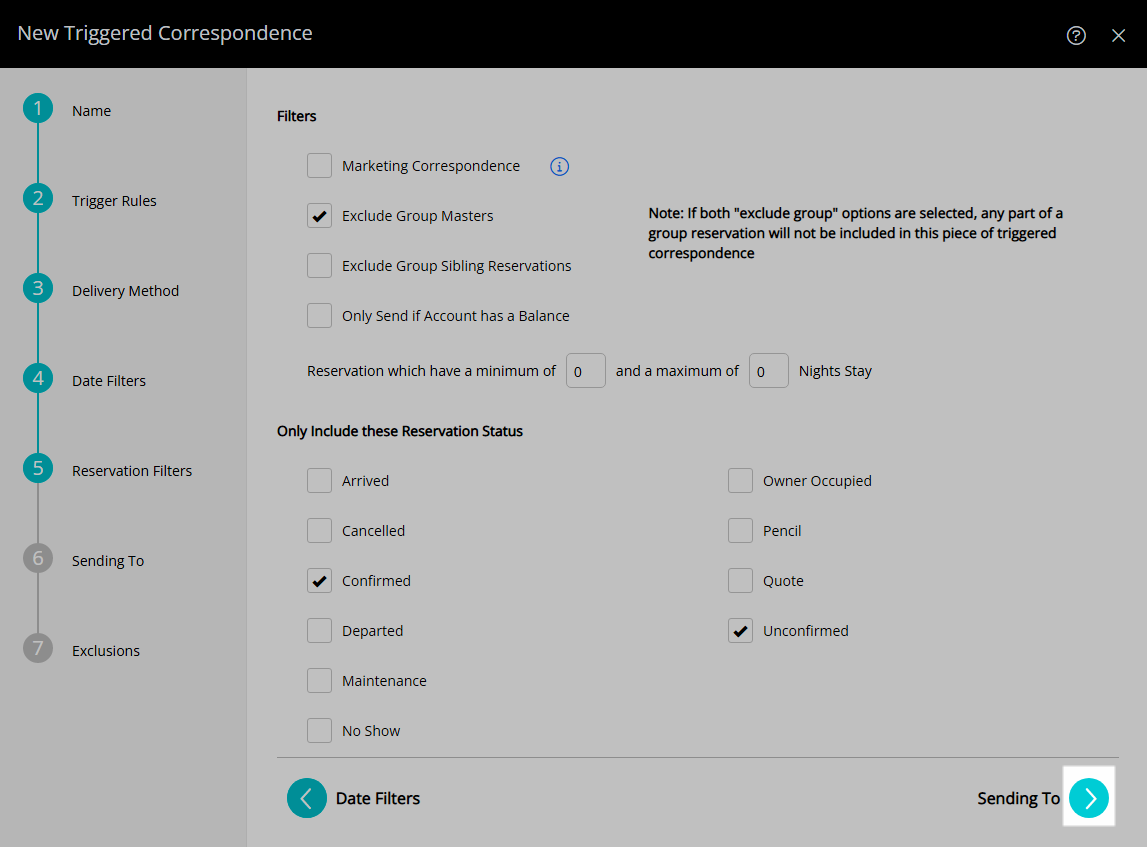
 - Select the checkbox for the Reservation Filters.
- Select the checkbox for the Reservation Statuses to include.
- Select the
 'Next' icon.
- Select the
- Select the
 'Next' icon.
 -
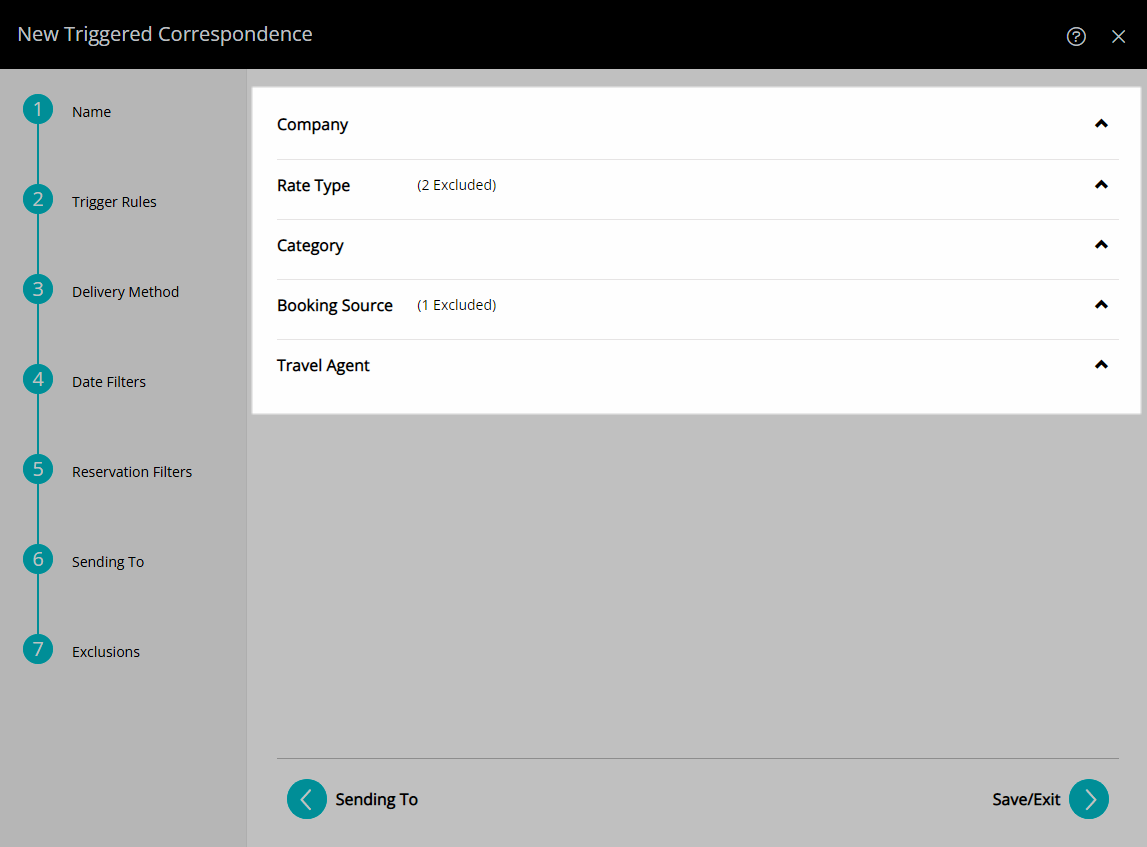
Optional: Select the Exclusions.
- Expand an Exclusion Type.
- Select the Exclusions and choose the
 button.
 - Repeat for all required Exclusions.
- Select the 'Save/Exit' icon.
- Select 'Yes' or 'No' if prompted with an option to update current and future reservations with the new Triggered Correspondence Rule.

Select the  'Back' icon to return to a previous step at any time.
Monitored Triggers are only available when the Trigger Type is set to 'X Periods before or after an action' and the Correspondence Type is 'Guest Portal'.
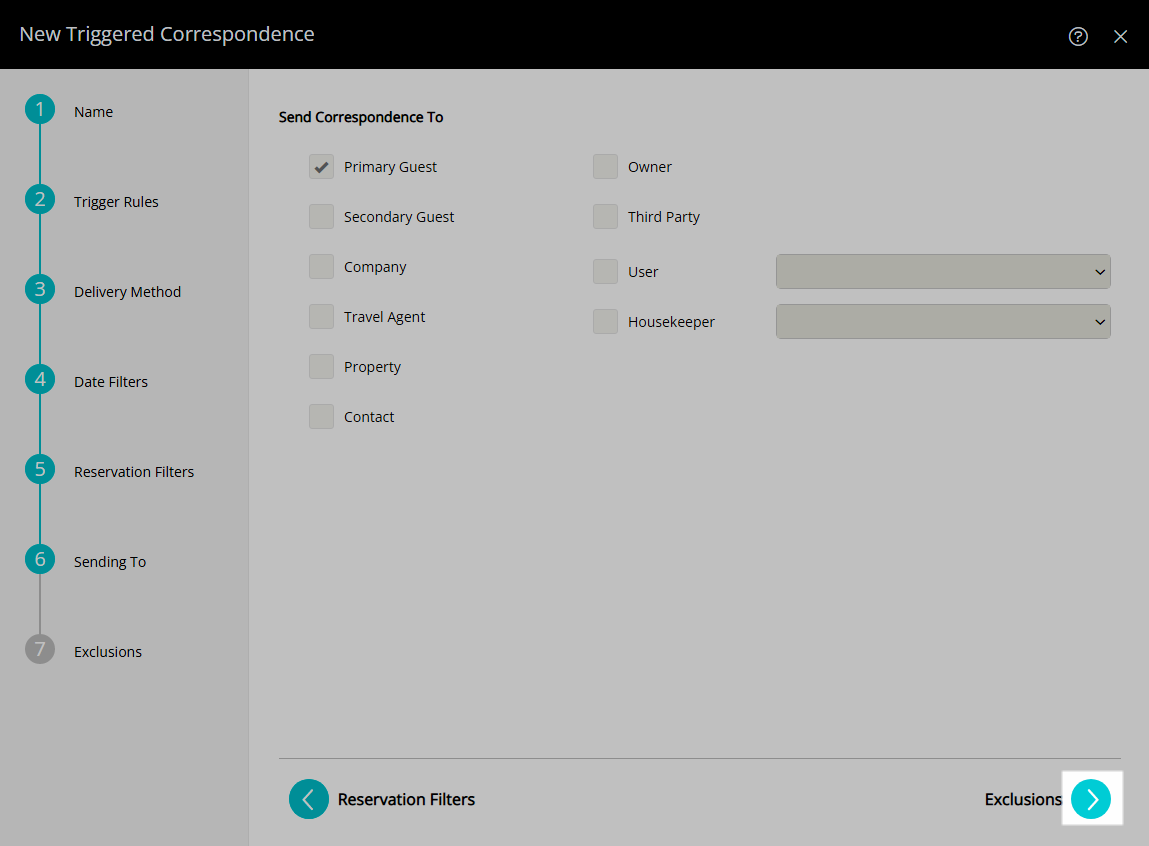
Recipients will default to the Primary Guest and cannot be altered for Guest Portal Triggered Correspondence.
Step 17 will only occur if the Trigger Type is set to 'X Periods before or after an action' or 'Specific Time of Day' and will update all current and future reservations to receive the new Triggered Correspondence if 'Yes' is selected.
-
Guide
- Add Button
Guide
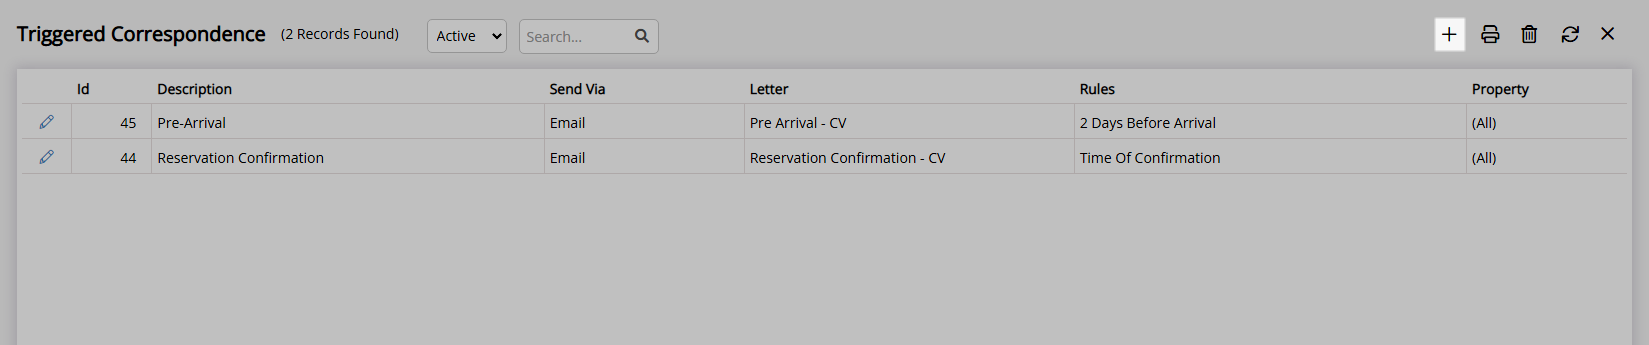
Go to Setup > Correspondence > Triggered in RMS.
Select the ![]() 'Add' icon.
'Add' icon.
Enter a Name and select the ![]() 'Next' icon.
'Next' icon.
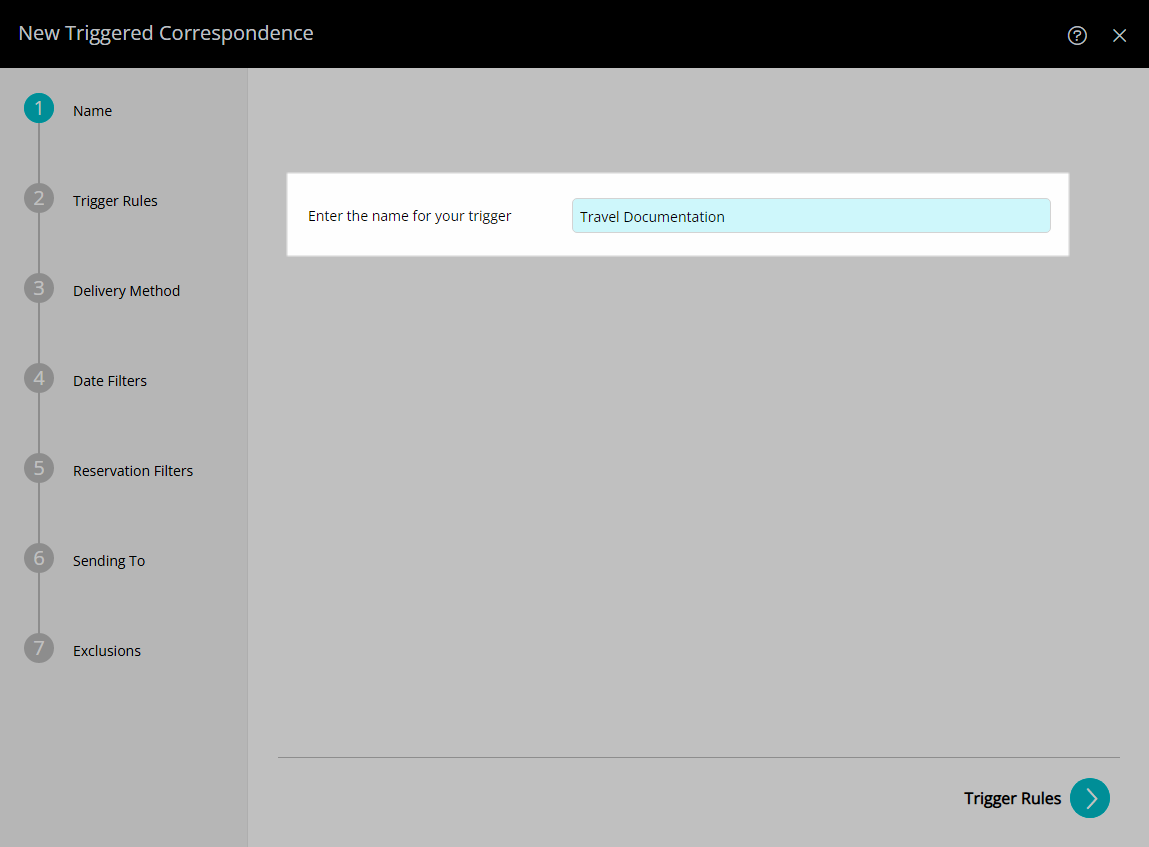
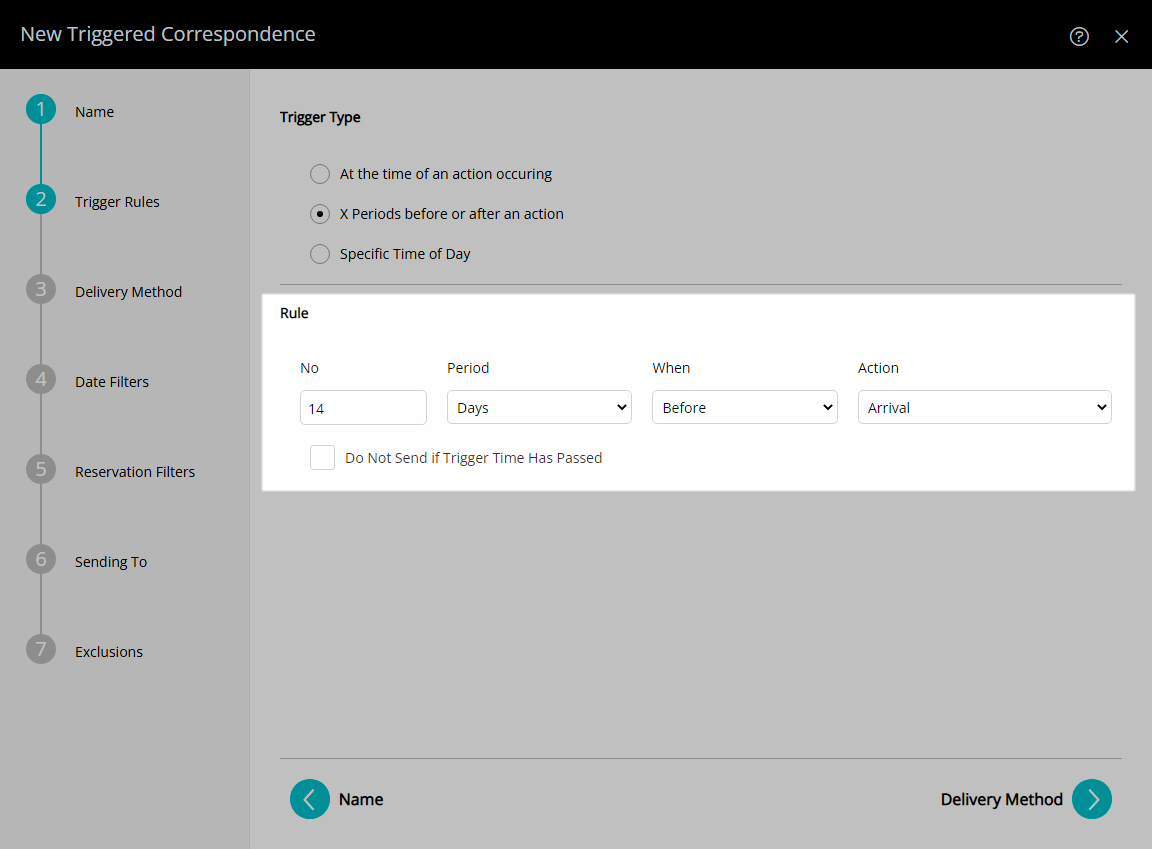
Select the Trigger Type.
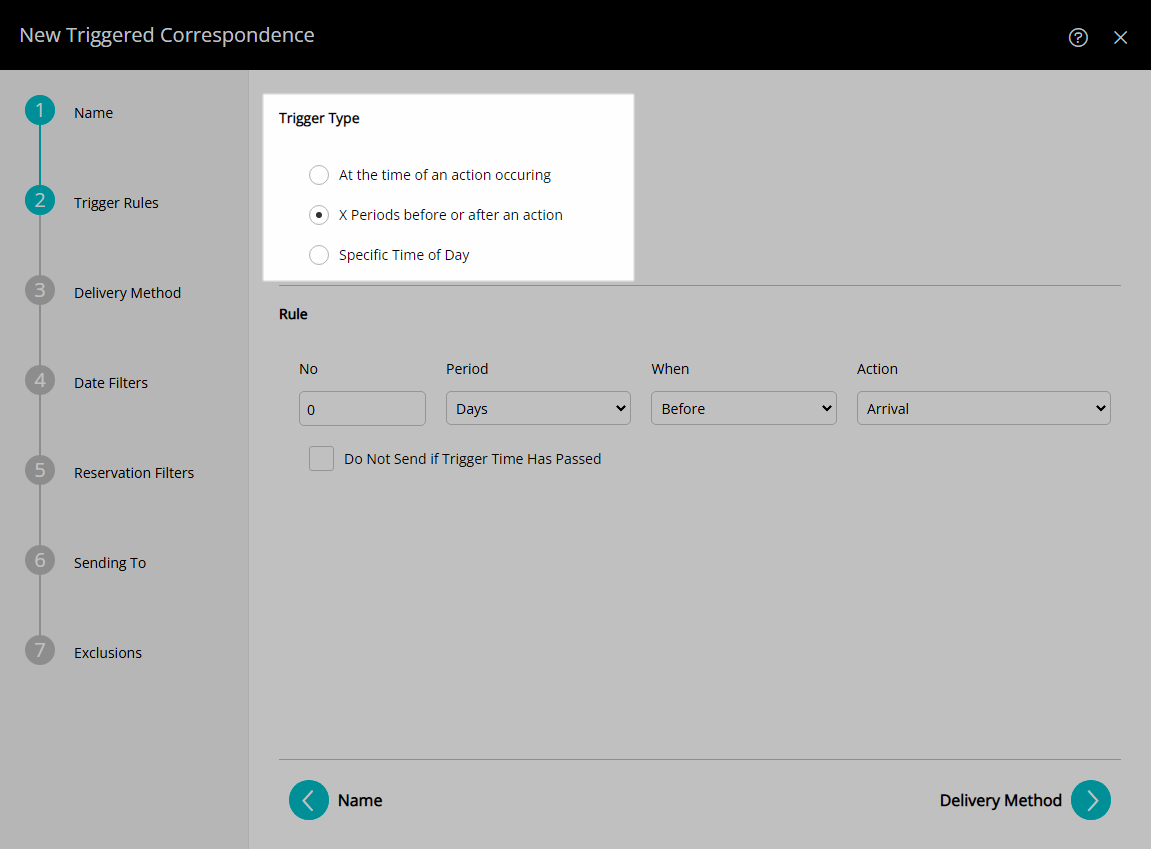
Select & Enter the Trigger Rules then choose the  'Next' icon.
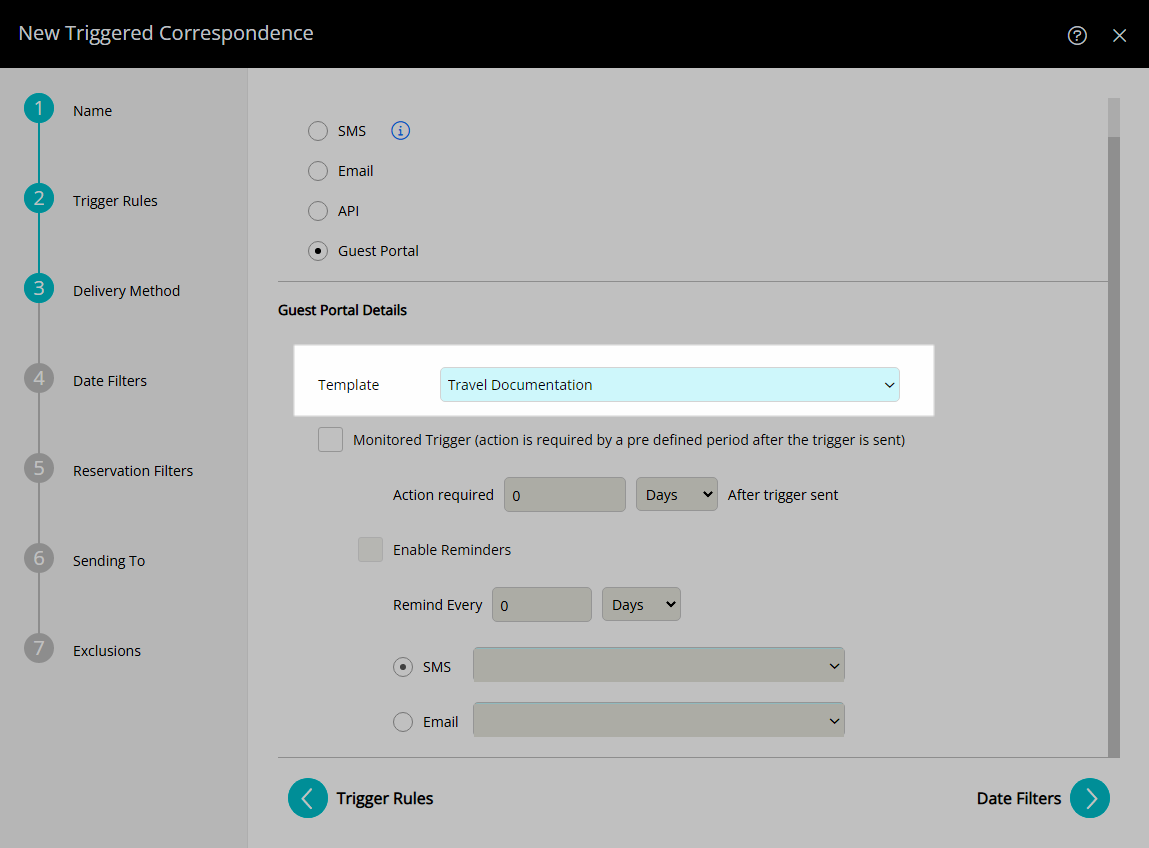
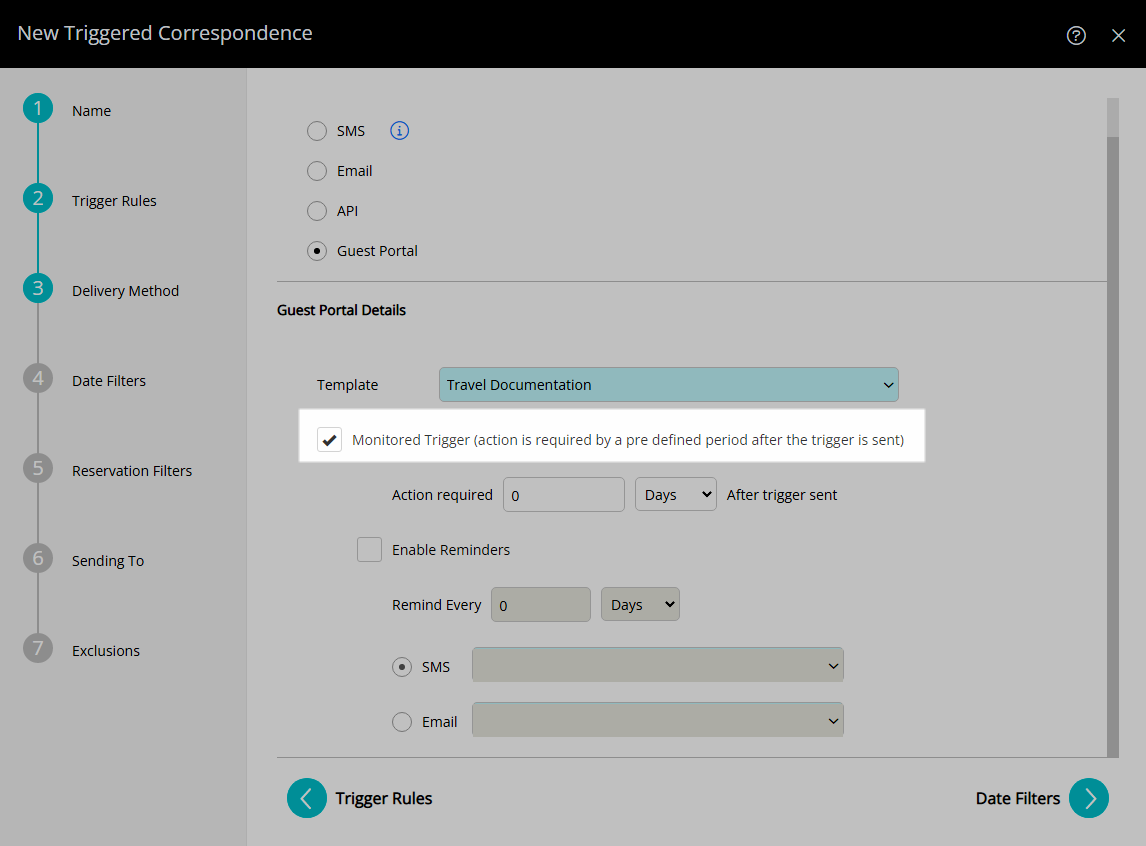
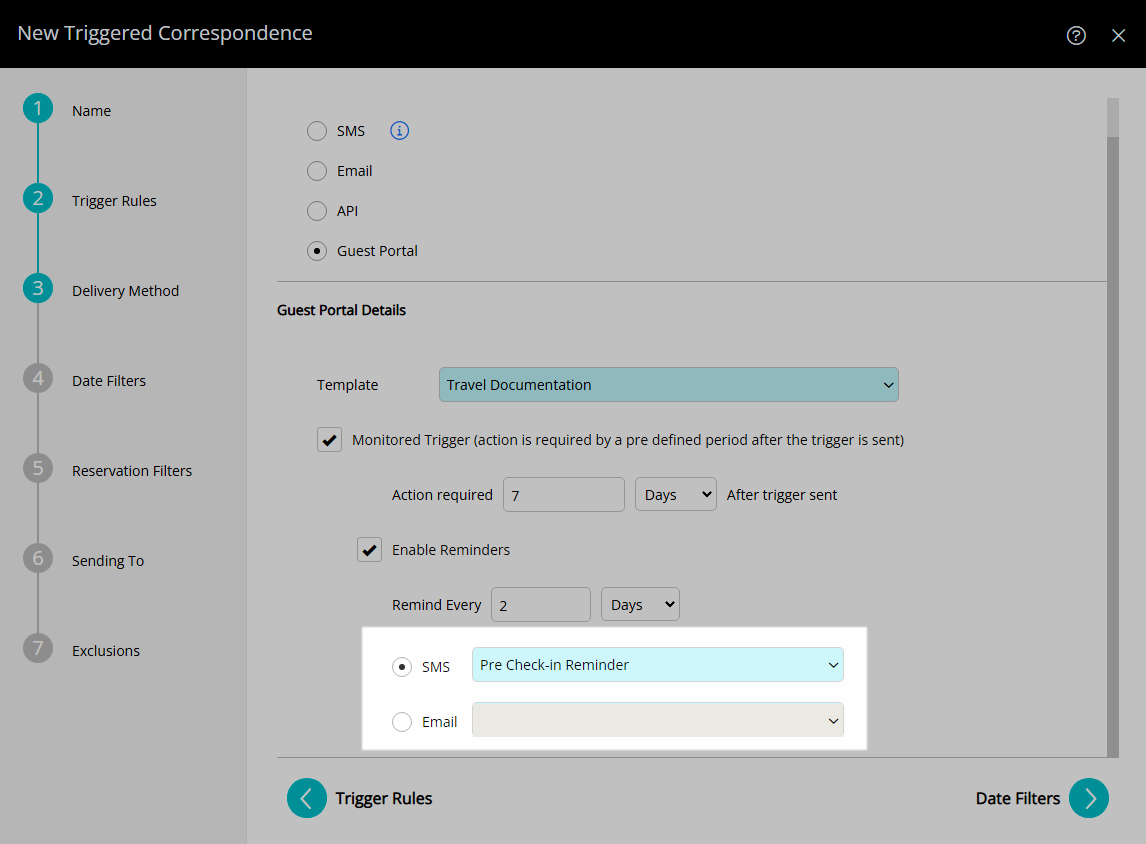
Select the Correspondence Type as 'Guest Portal'.
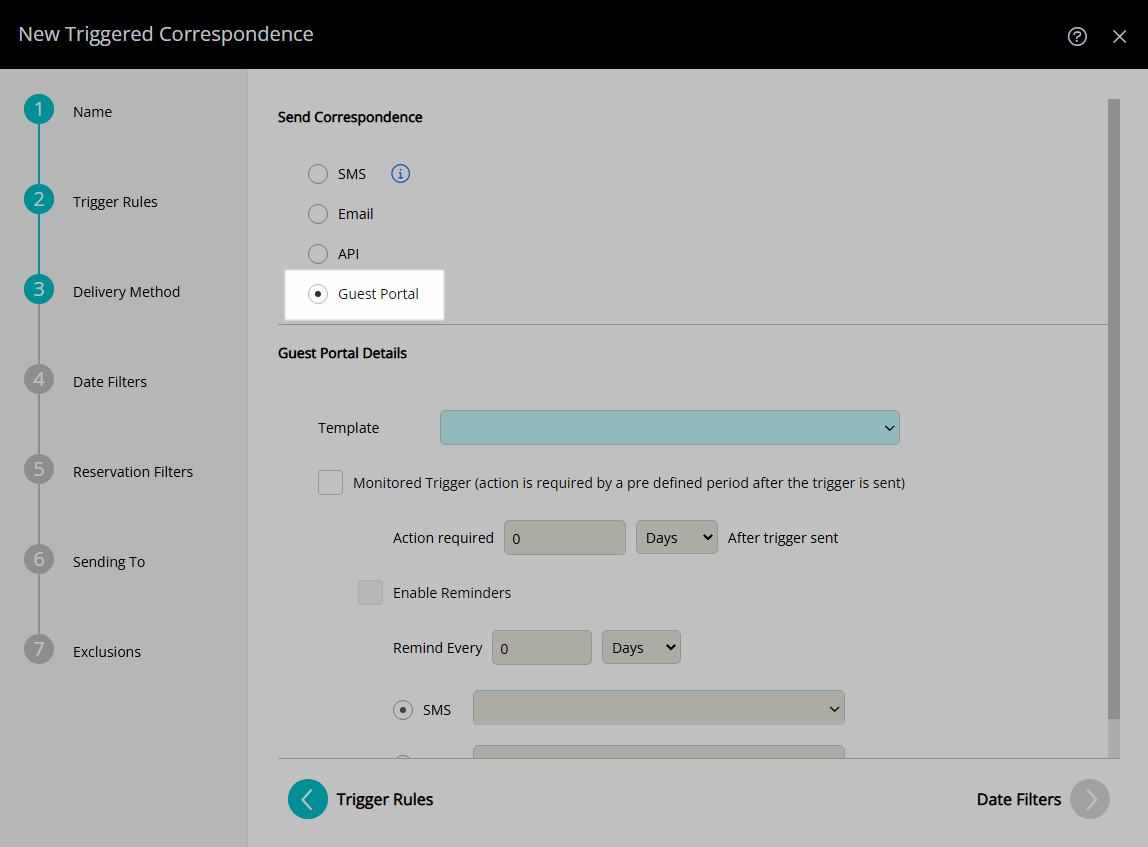
Select a Form Letter template.
Optional: Setup as Monitored Triggered Correspondence.
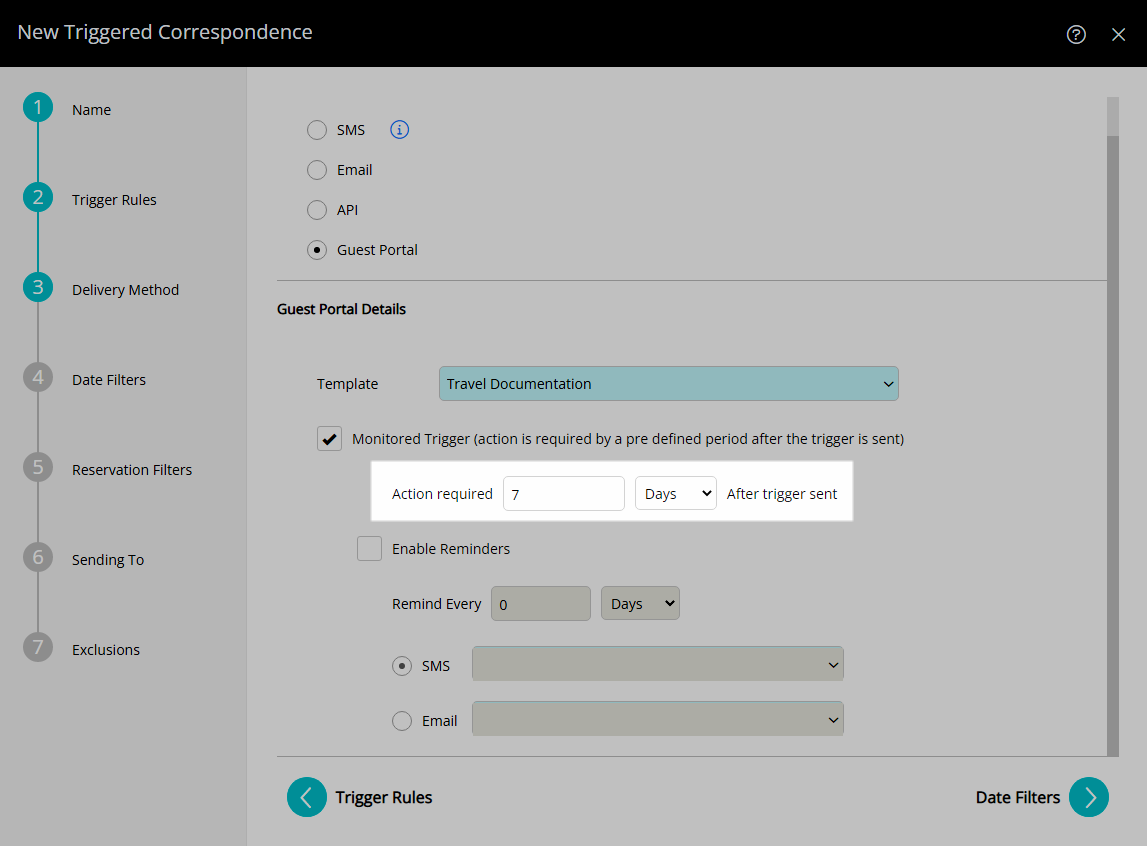
Select the checkbox 'Monitored Trigger'.
Select and enter the Due Date Criteria.
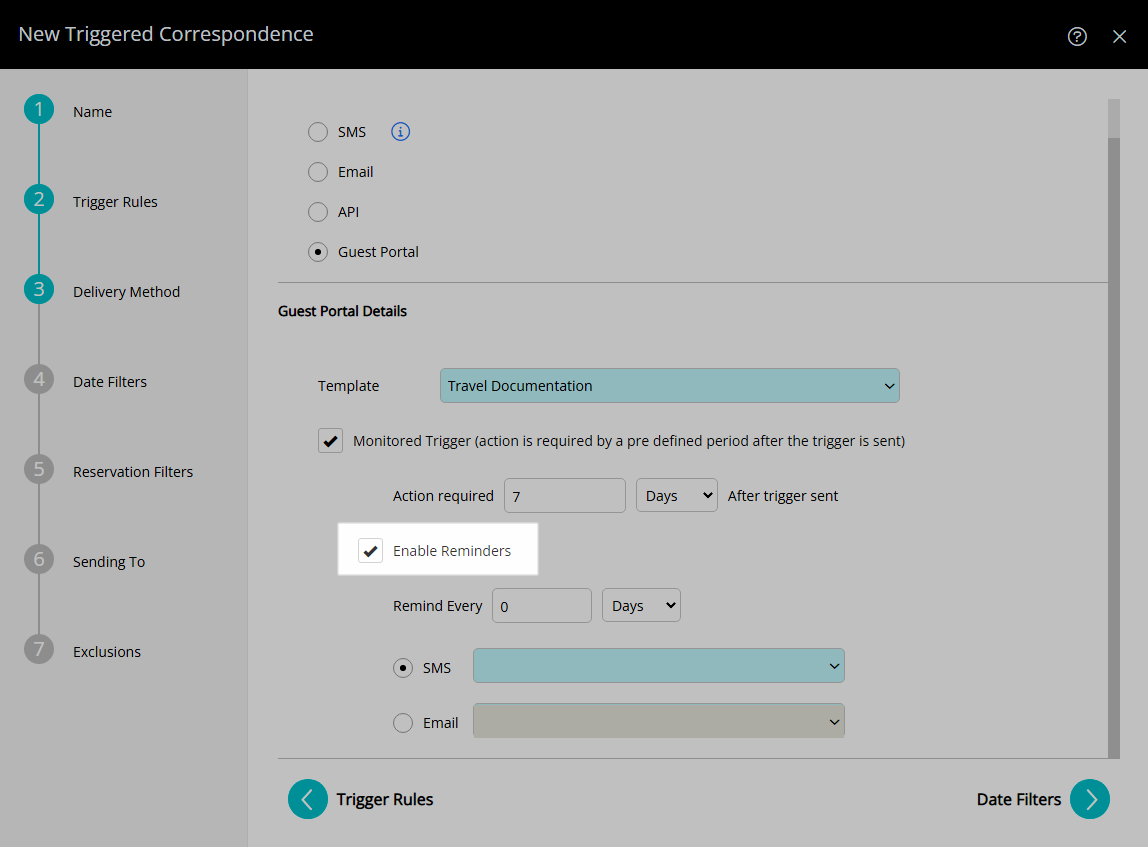
Optional: Setup Reminders.
Select the checkbox 'Enable Reminders'.
Select and enter the Reminder Criteria.
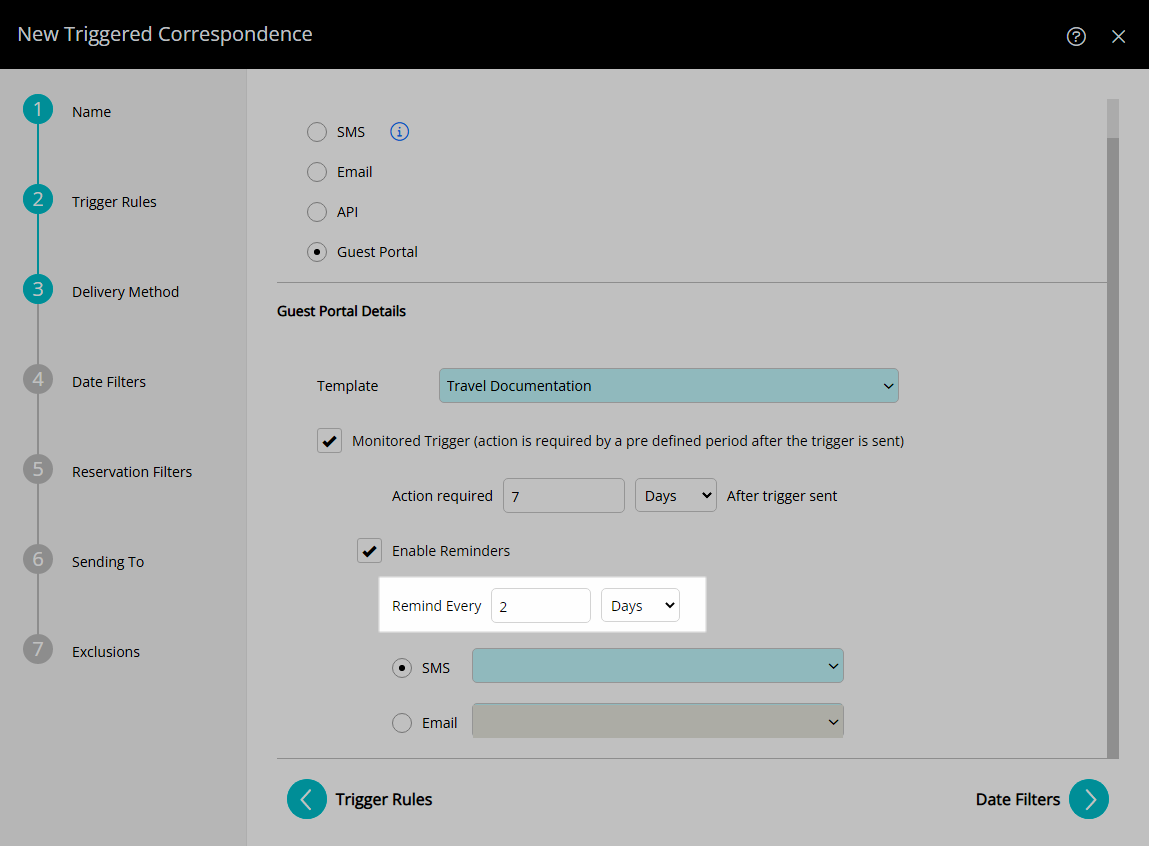
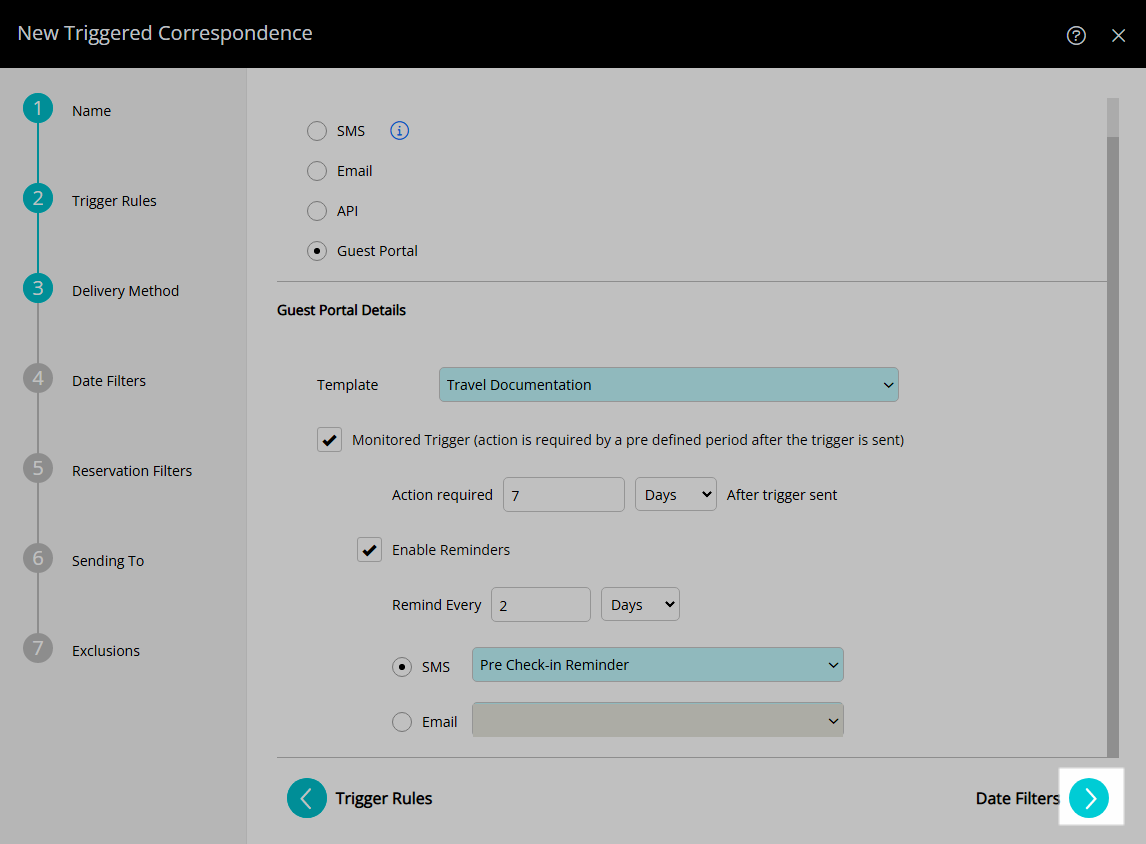
Select 'SMS' or 'Email' and choose the Form Letter or SMS template.
Select the  'Next' icon.
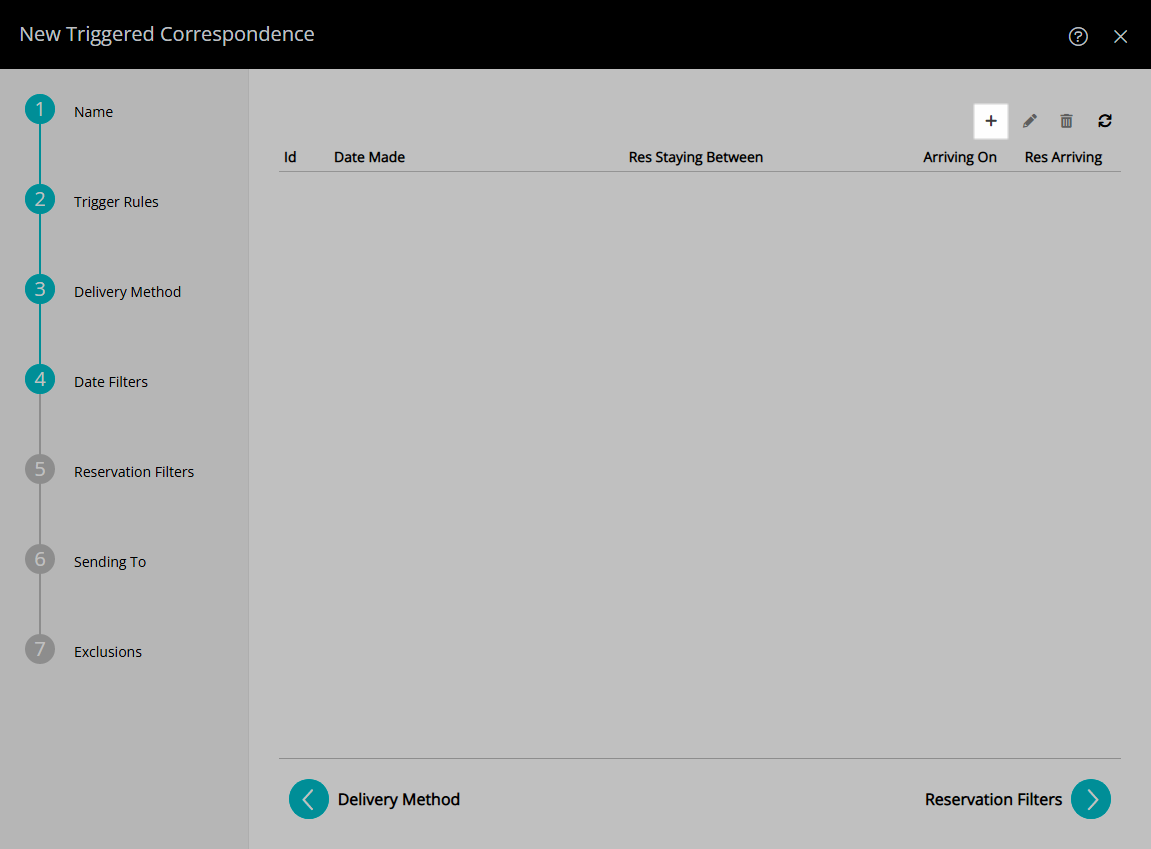
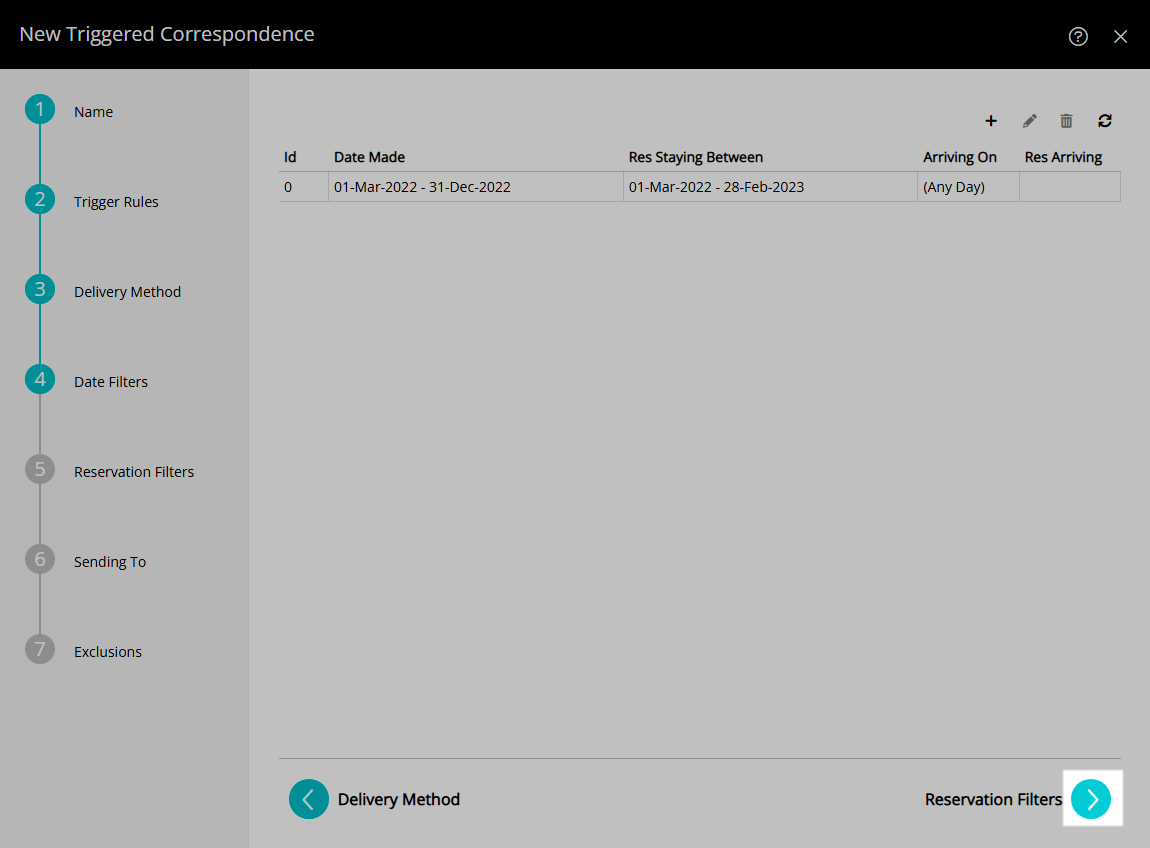
Optional: Add Date Filters.
Select the  'Add' icon.
Select the Date Made option and select the Date Range.
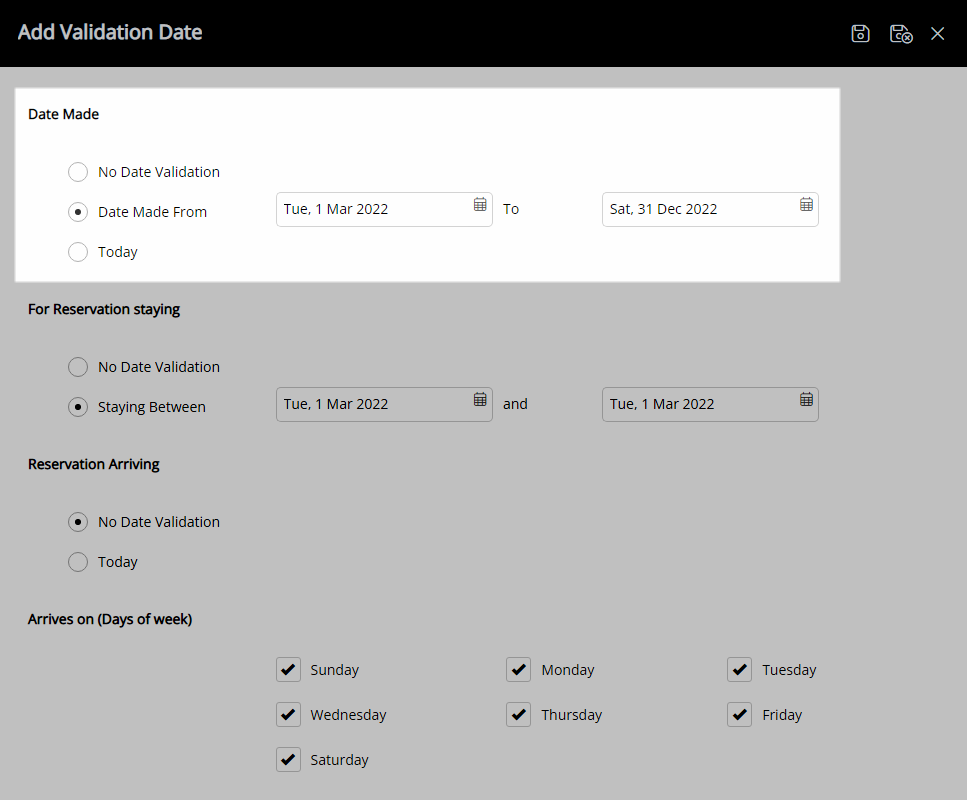
Select the Reservation Stay Dates option and select the Date Range.

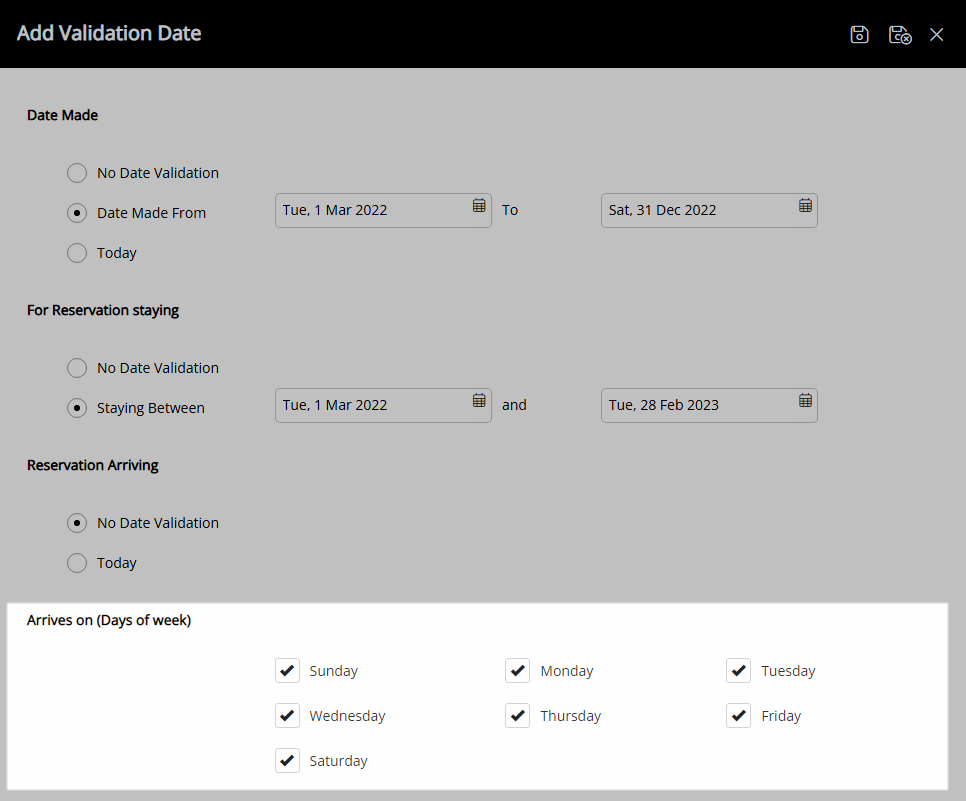
Select the Reservation Arriving option.
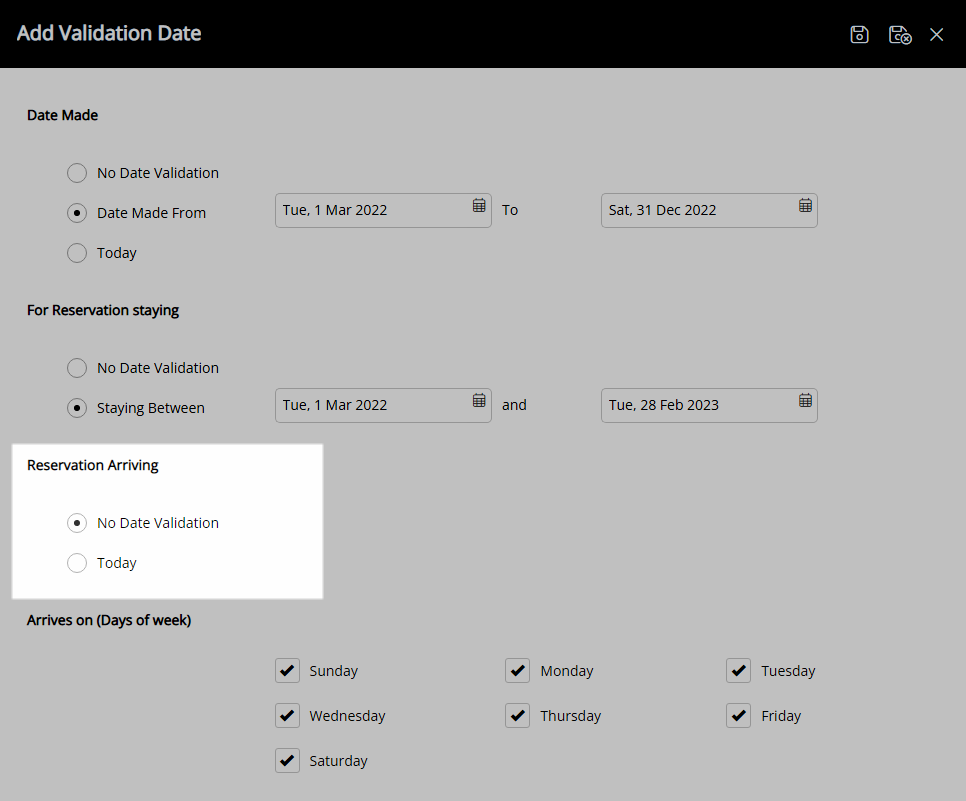
Optional: Select the checkbox for Days of the Week.
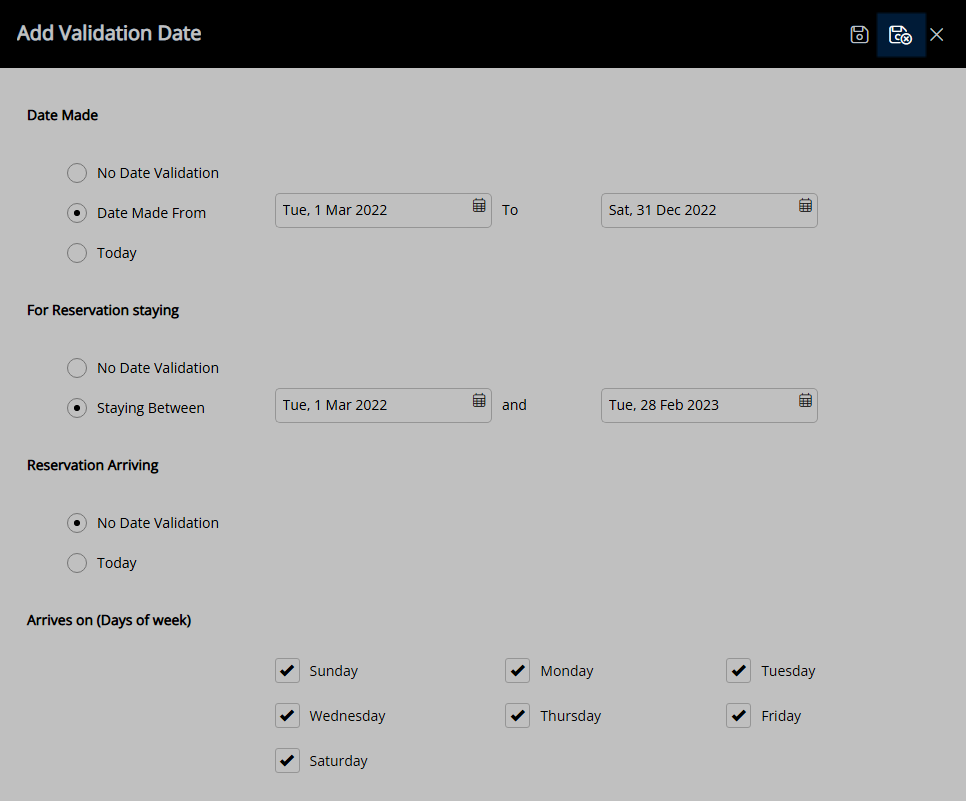
Select  'Save/Exit'.
Select the  'Next' icon.
Select the checkbox for the Reservation Filters.

Select the checkbox for the Reservation Statuses to include.
Select the  'Next' icon.
Select the  'Next' icon.
Optional: Select the Exclusions.
Expand an Exclusion Type.
Select the Exclusions and choose the  button.
Repeat for all required Exclusions.
Select the  'Save/Exit' icon.
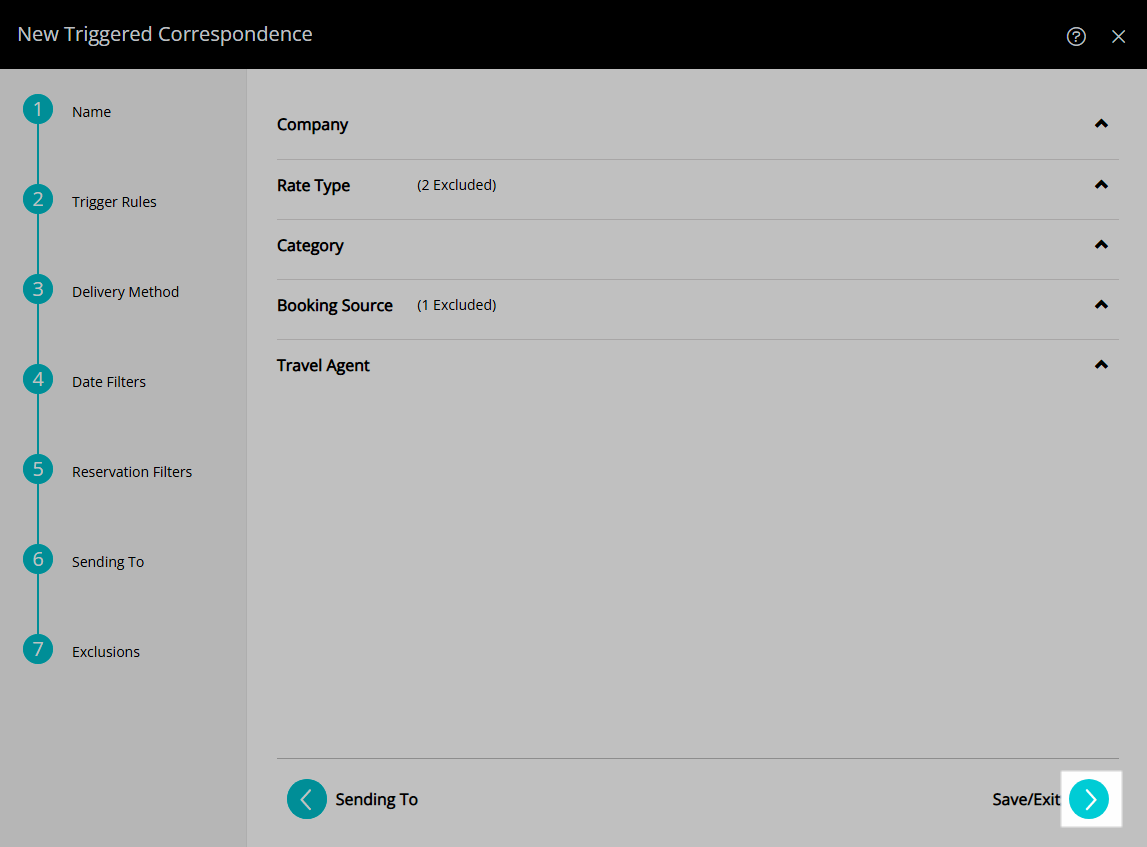
Select 'Yes' or 'No' if prompted with an option to update current and future reservations with the new Triggered Correspondence Rule.

The selected template will now send to Guests via the Guest Portal at the scheduled time.


Setup
Have your System Administrator complete the following.
- Go to Setup > Correspondence > Triggered in RMS.
- Select the
 'Add' icon.
 - Enter a Name and select the
 'Next' icon.
 - Select the Trigger Type.
- Select & Enter the Trigger Rules then choose the
 'Next' icon.
 - Select the Correspondence Type as 'Guest Portal'.
- Select a Form Letter template.
-
Optional: Setup as Monitored Triggered Correspondence.
- Select the checkbox 'Monitored Trigger'.
- Select and enter the Due Date Criteria.
-
Optional: Setup Reminders.
- Select the checkbox 'Enable Reminders'.
- Select and enter the Reminder Criteria.
- Select 'SMS' or 'Email' and choose the Form Letter or SMS template.
- Select the
 'Next' icon.
 -
Optional: Add Date Filters.
- Select the
 'Add' icon.
 - Select the Date Made option.
- Select the Date Range.
- Select the Reservation Stay Dates option.
- Select the Date Range.
- Select the Reservation Arriving option.
- Optional: Select the checkbox for Days of the Week.
- Select
 'Save/Exit'.
- Select the
- Select the
 'Next' icon.
 - Select the checkbox for the Reservation Filters.
- Select the checkbox for the Reservation Statuses to include.
- Select the
 'Next' icon.
- Select the
- Select the
 'Next' icon.
 -
Optional: Select the Exclusions.
- Expand an Exclusion Type.
- Select the Exclusions and choose the
 button.
 - Repeat for all required Exclusions.
- Select the
 'Save/Exit' icon.
 - Select 'Yes' or 'No' if prompted with an option to update current and future reservations with the new Triggered Correspondence Rule.

Select the ![]() 'Back' icon to return to a previous step at any time.
'Back' icon to return to a previous step at any time.
Monitored Triggers are only available when the Trigger Type is set to 'X Periods before or after an action' and the Correspondence Type is 'Guest Portal'.
Recipients will default to the Primary Guest and cannot be altered for Guest Portal Triggered Correspondence.
Step 17 will only occur if the Trigger Type is set to 'X Periods before or after an action' or 'Specific Time of Day' and will update all current and future reservations to receive the new Triggered Correspondence if 'Yes' is selected.
-
Guide
- Add Button
Guide
Go to Setup > Correspondence > Triggered in RMS.
Select the ![]() 'Add' icon.
'Add' icon.
Enter a Name and select the ![]() 'Next' icon.
'Next' icon.
Select the Trigger Type.
Select & Enter the Trigger Rules then choose the 'Next' icon.
Select the Correspondence Type as 'Guest Portal'.
Select a Form Letter template.
Optional: Setup as Monitored Triggered Correspondence.
Select the checkbox 'Monitored Trigger'.
Select and enter the Due Date Criteria.
Optional: Setup Reminders.
Select the checkbox 'Enable Reminders'.
Select and enter the Reminder Criteria.
Select 'SMS' or 'Email' and choose the Form Letter or SMS template.
Select the 'Next' icon.
Optional: Add Date Filters.
Select the 'Add' icon.
Select the Date Made option and select the Date Range.
Select the Reservation Stay Dates option and select the Date Range.
Select the Reservation Arriving option.
Optional: Select the checkbox for Days of the Week.
Select 'Save/Exit'.
Select the 'Next' icon.
Select the checkbox for the Reservation Filters.
Select the checkbox for the Reservation Statuses to include.
Select the 'Next' icon.
Select the 'Next' icon.
Optional: Select the Exclusions.
Expand an Exclusion Type.
Select the Exclusions and choose the button.
Repeat for all required Exclusions.
Select the 'Save/Exit' icon.
Select 'Yes' or 'No' if prompted with an option to update current and future reservations with the new Triggered Correspondence Rule.
The selected template will now send to Guests via the Guest Portal at the scheduled time.