Area
Setup a new Area for a Category in RMS.
An Area is the physical space available for a Reservation within a Category.
-
Information
-
Setup
- Add Button
Information
An Area is the physical space available for a Reservation within a Category.
A Category is a type of Area.
The Category Classification determines the type of Reservation available for an Area in that Category.
An Interconnecting Category includes Interconnecting Areas which are Areas selected from another Category that can be booked individually or in preset combinations as an Interconnecting Area.
A new Area can be added to a Category individually with the option to enter additional Area Details or using Quick Add to create multiple new Areas in a Category at the same time for faster setup.
An Area can be edited to add or remove Area Details any time after creation.
An existing Area can be moved to a new or different Category using Category Move.
Area Statistics are optional and will include any Reservation in that Area for statistics calculated on reports including the Night Audit Report, Occupancy Report and Marketing Report.
Excluding an Area from statistics will ignore any Reservation in that Area when calculating statistics on reports unless the option 'Ignore Statistics' is selected on the report.
A Category Map Link can be setup on an Area to use with the «aGoogleMapLink» 'Google Map Link' Merge Field in the Area Merge Table on a Form Letter or SMS to include directions or a location to the Area.
Attributes setup on an Area can be used to filter the Areas displayed on the Booking Chart, Interactive Map or RMS Internet Booking Engine to only show an Area that matches the selected criteria.
Additional Charge Labels can be excluded as available Guest Types from an Area to limit the types of Guest that can be accommodated.
The Area Long Description will be displayed in the Data Window on the Booking Chart and Quick Quote when hovering over the Area Description.
An Area can be setup with an alternate Guest Description that will be used on any Form Letter or SMS using the «aClientDescription» 'Area Guest Description' Merge Field in the Area Merge Table.
Maximum Occupants setup on an Area will override the Maximum Occupants Per Area setup on the Category.
If Maximum Occupants Per Category is used this will cap the total number of Guests for all Reservations in that Category even if the number of Guests in an individual Area is less than the entered Maximum Occupants Per Area.
Additional User Defined Fields are available for an Area in System Labels that will become available on the Area setup and can be used with the corresponding Merge Fields on a Form Letter or SMS to provide a Guest additional information including WiFi access or lockbox codes.
Utility Meters can be setup on an individual Area or for multiple Areas at the same time using Meter Activation.
Housekeeping Tasks setup on an Area will override any Housekeeping Tasks setup on the Category or Property following the Housekeeping Task Hierarchy.
Requirements can be setup on an Area to be automatically added to any Reservation in that Area.
Inventory Items can be setup on an Area to record and manage the inventory of furniture or appliances in an Area.
Additional Area Options include details used by specific Channel Connections or integrations and will be referred to during setup of that connection or integration.
Add Ons can be associated to an Area and will be added to the Reservation when that Area is selected.
If the associated Add On is not available for the Reservation Stay Dates it will not be included on the Reservation in that Area.
An Area Trace can be used to track and manage an inter or intra-departmental note for an Area.

Category, Area, Add On, Reservation, Guest and Rate are default System Labels that can be customised.

System Administrators will require Security Profile access to setup this feature.
-
Setup
- Add Button
Setup
Have your System Administrator complete the following.
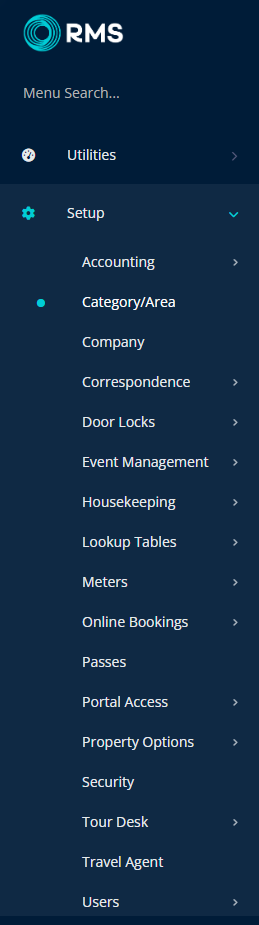
- Go to Setup > Category/Area in the Side Menu of RMS.
- Select the
 'Edit' icon on an existing Category.
 - Navigate to the 'Area' tab.
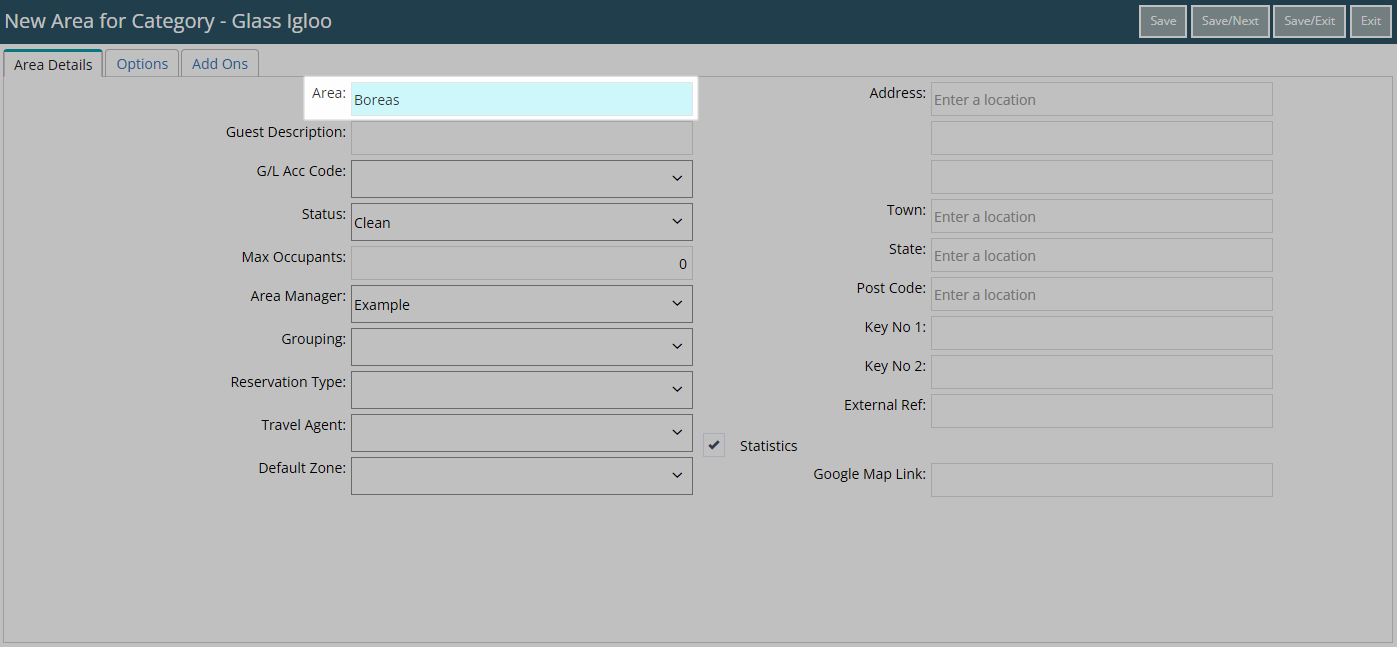
- Select 'Add'.
- Enter the Area Description.
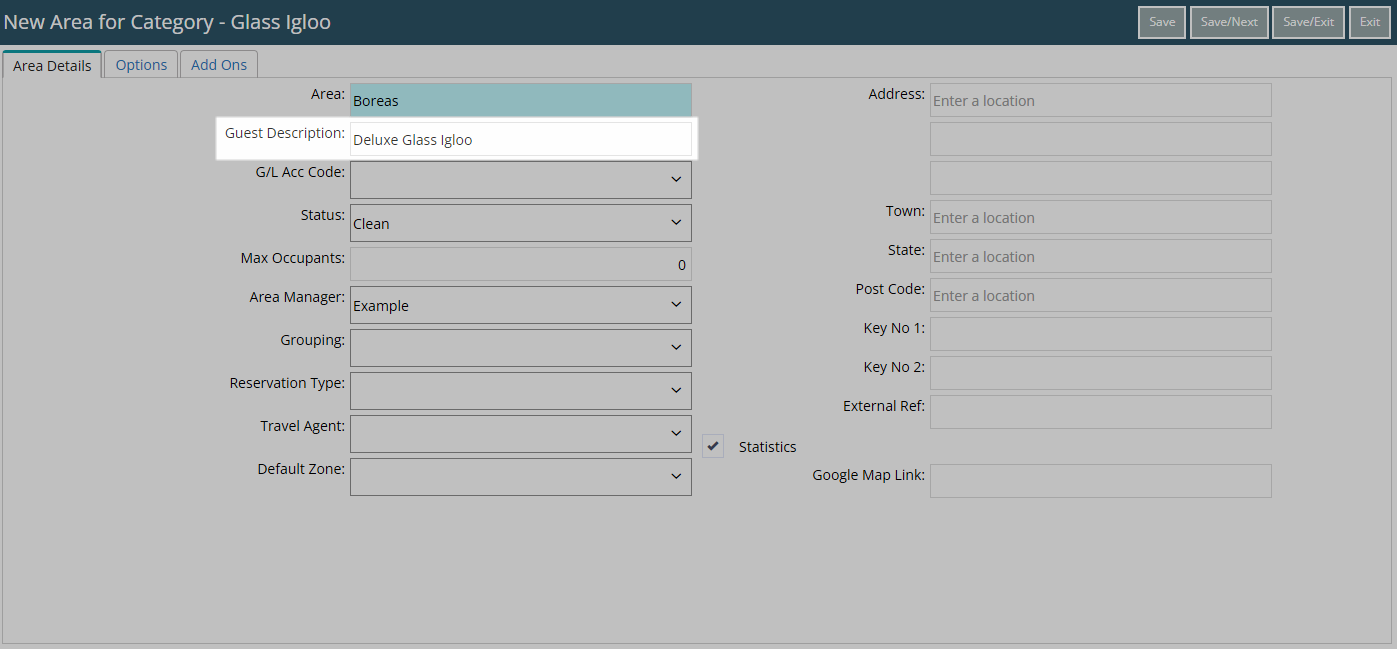
- Optional: Enter a Guest Description.
- Optional: Select a General Ledger Account Code.
- Optional: Enter Additional Area Details.
- Save/Exit.
- Log out of RMS.

The allocation of revenue on a Reservation Account is determined by the General Ledger Account Code Hierarchy.
-
Guide
- Add Button
Guide
Go to Setup > Category/Area in the Side Menu of RMS.
Select the ![]() 'Edit' icon on an existing Category.
'Edit' icon on an existing Category.
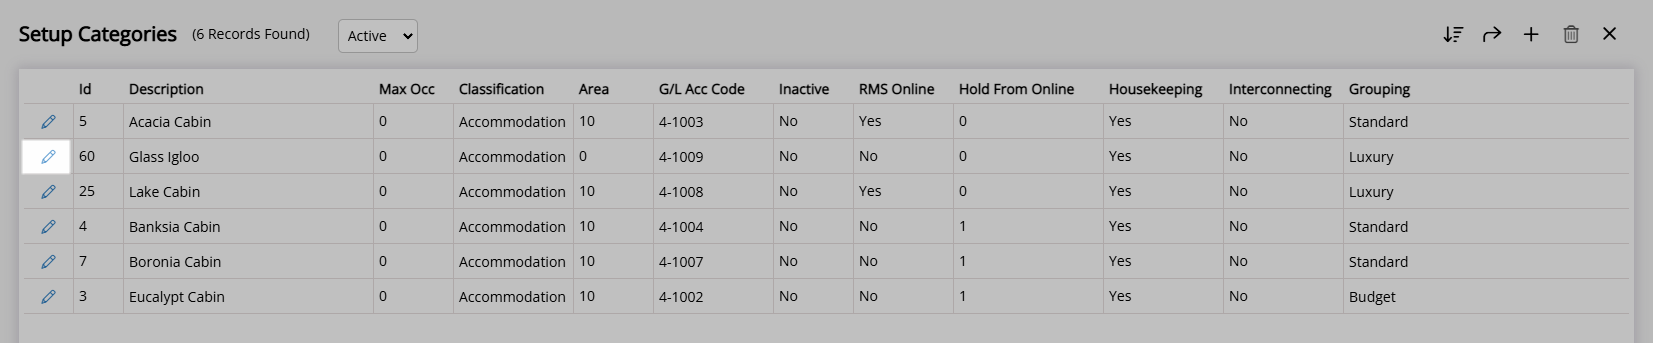
Navigate to the 'Area' tab.

Select 'Add'.

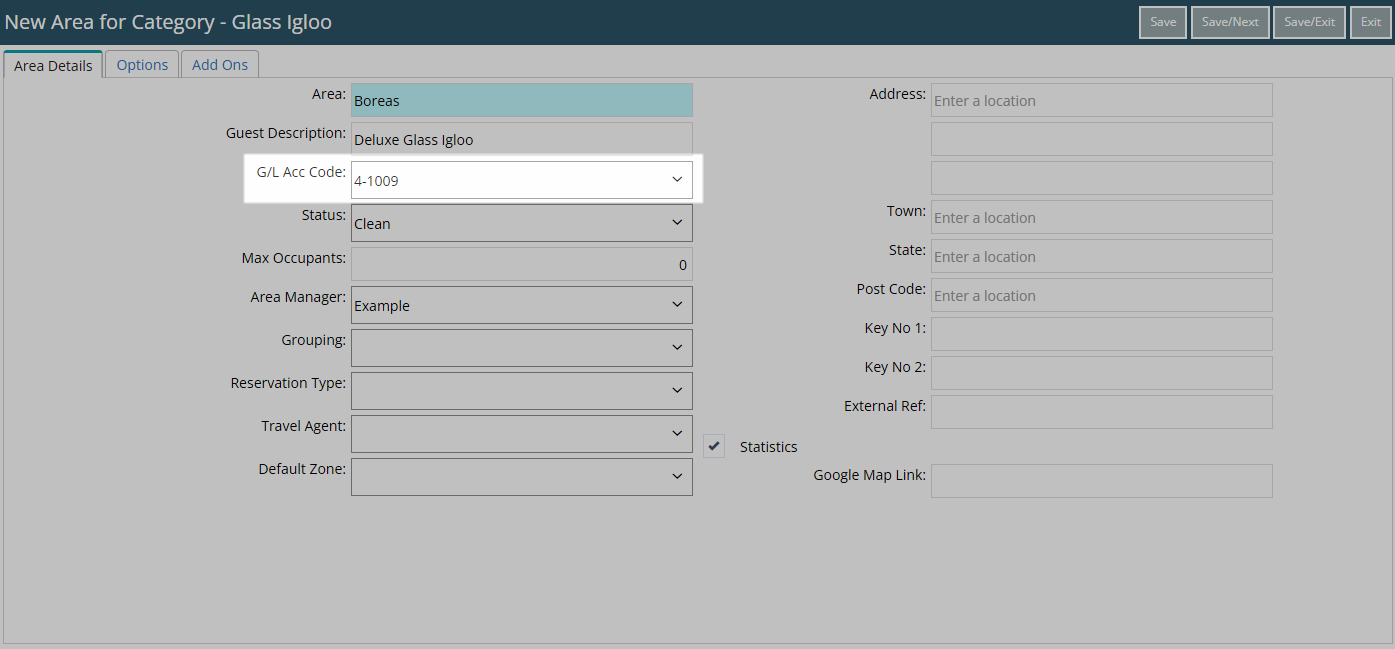
Enter the Area Description.
Optional: Enter a Guest Description.
Optional: Select a General Ledger Account Code.
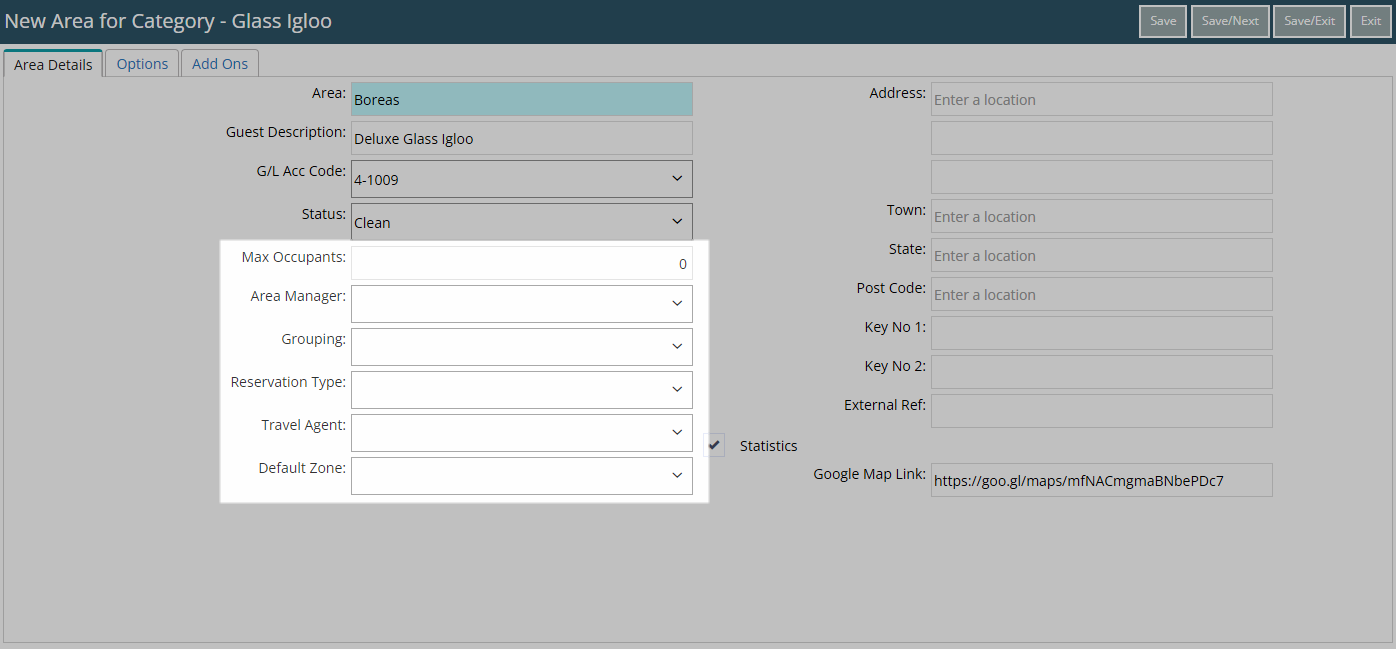
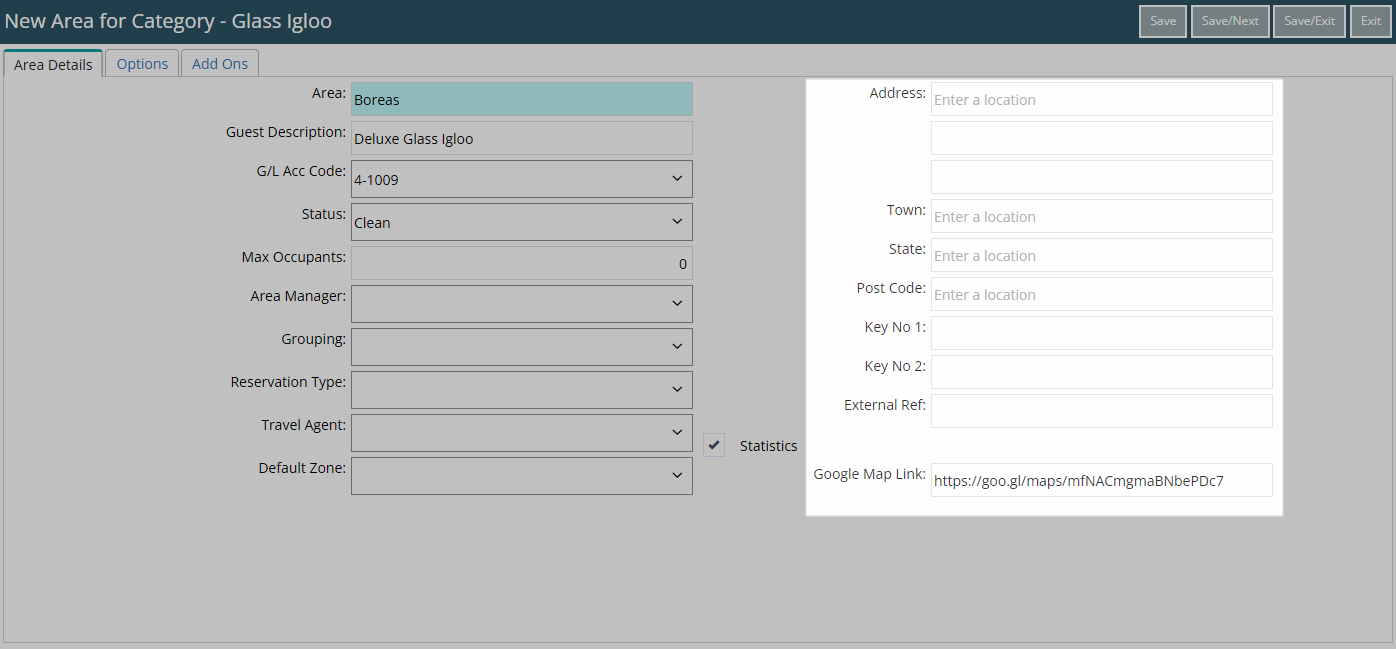
Optional: Enter Additional Area Details.
Select 'Save/Exit' to store the changes made and return to the Category.
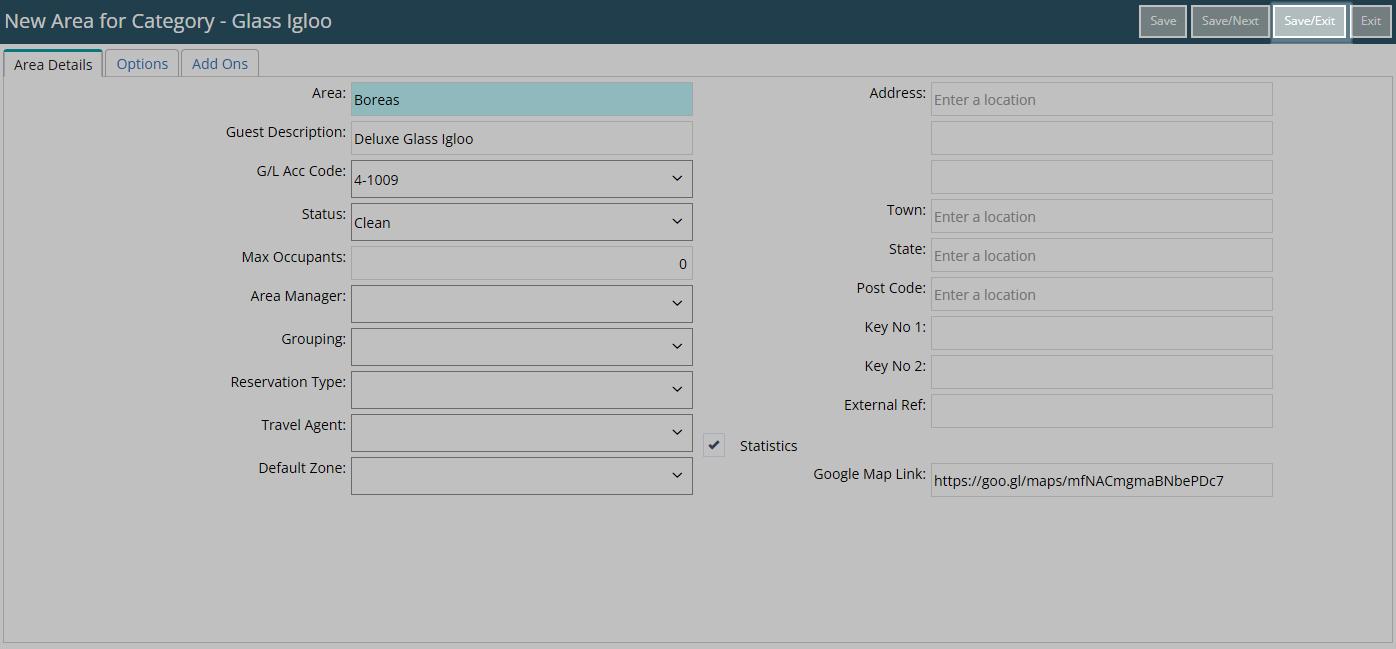
Select 'Save/Exit' to store the changes made and leave the Category.

Log out of RMS to allow the database to update with the changes made.

Setup
Have your System Administrator complete the following.
- Go to Setup > Category/Area in the Side Menu of RMS.
- Select the 'Edit' icon on an existing Category.
- Navigate to the 'Area' tab.
- Select 'Add'.
- Enter the Area Description.
- Optional: Enter a Guest Description.
- Optional: Select a General Ledger Account Code.
- Optional: Enter Additional Area Details.
- Save/Exit.
- Log out of RMS.
The allocation of revenue on a Reservation Account is determined by the General Ledger Account Code Hierarchy.
-
Guide
- Add Button
Guide
Go to Setup > Category/Area in the Side Menu of RMS.
Select the ![]() 'Edit' icon on an existing Category.
'Edit' icon on an existing Category.
Navigate to the 'Area' tab.
Select 'Add'.
Enter the Area Description.
Optional: Enter a Guest Description.
Optional: Select a General Ledger Account Code.
Optional: Enter Additional Area Details.
Select 'Save/Exit' to store the changes made and return to the Category.
Select 'Save/Exit' to store the changes made and leave the Category.
Log out of RMS to allow the database to update with the changes made.